


Supplementary Instructions
2
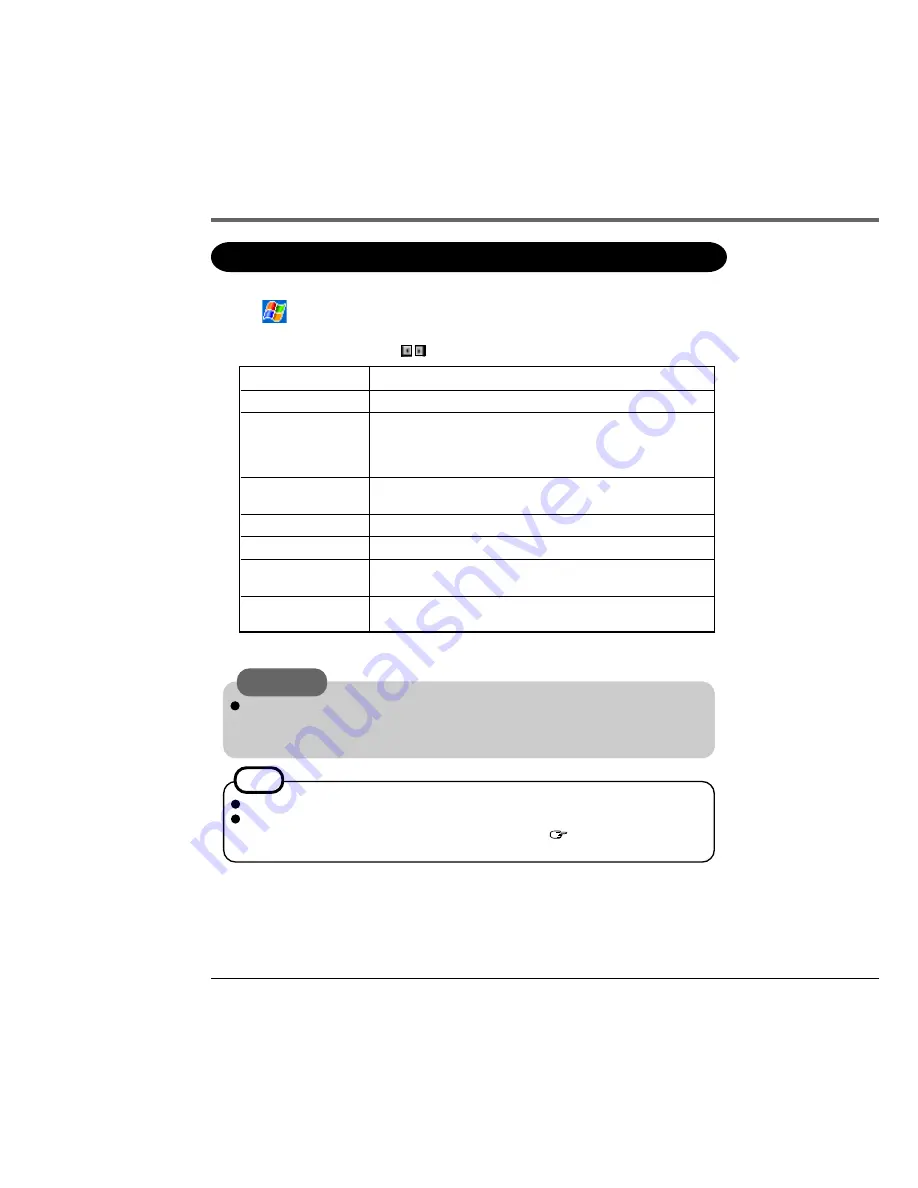
Setting for Barcode Scanner
(1)Start the Barcode scanner settings.
Tap
-[Settings]-[System] tab - [Barcode Scanner]
(2)If necessary, tap the tab and adjust the settings.
To display a hidden tab, tap the on the right edge of the tab.
[Code Type]
[Code Type Options]
[Buttons]
[Laser]
[Decode Format]
[BEEP]
[Keyboard Emulation]
[Version]
Select valid code type(s). Items showing check marks are valid items.
To add CheckDigit codes,
tap [Properties...].
To scan barcodes by pressing the trigger on either side of the computer,
set [Trigger] to [Enable]. When triggers are not used for scanning,
select one of the following: F1 button, F2 button, F3 button, or F4
button. The default setting is [No Entry].
In [The irradiation time of the laser], set the length of time before laser
irradiation stops in the event that the barcode scan is unsuccessful.
[Prefix/Suffix Data format] and [Code ID Data format] settings
Set whether to emit a “beep” sound when the barcode scan is successful.
Determines whether or not scanned barcode data is targeted for
key emulation.
View the Barcode Scanner information
To return settings for all items to their default settings, tap [Default].
(3)Tap [ok].
Close the [Barcode Scanner] settings screen when scanning a barcode.
When performing a full reset, CF-P1 restarts automatically to enable the driver for the
Barcode Scanner after completing the setup procedure (
“First-time Operation” in
the Handheld Computer Operating Instructions).
NOTE
It’s impossible to read a barcode during voice calls or data communications via a
GSM/GPRS modem. In these cases, scan a barcode after voice calls or data com-
munications are completed (GSM/GPRS model only).
CAUTION
Summary of Contents for Toughbook CF-P1 Series
Page 8: ......