background image

24

25

Advanced

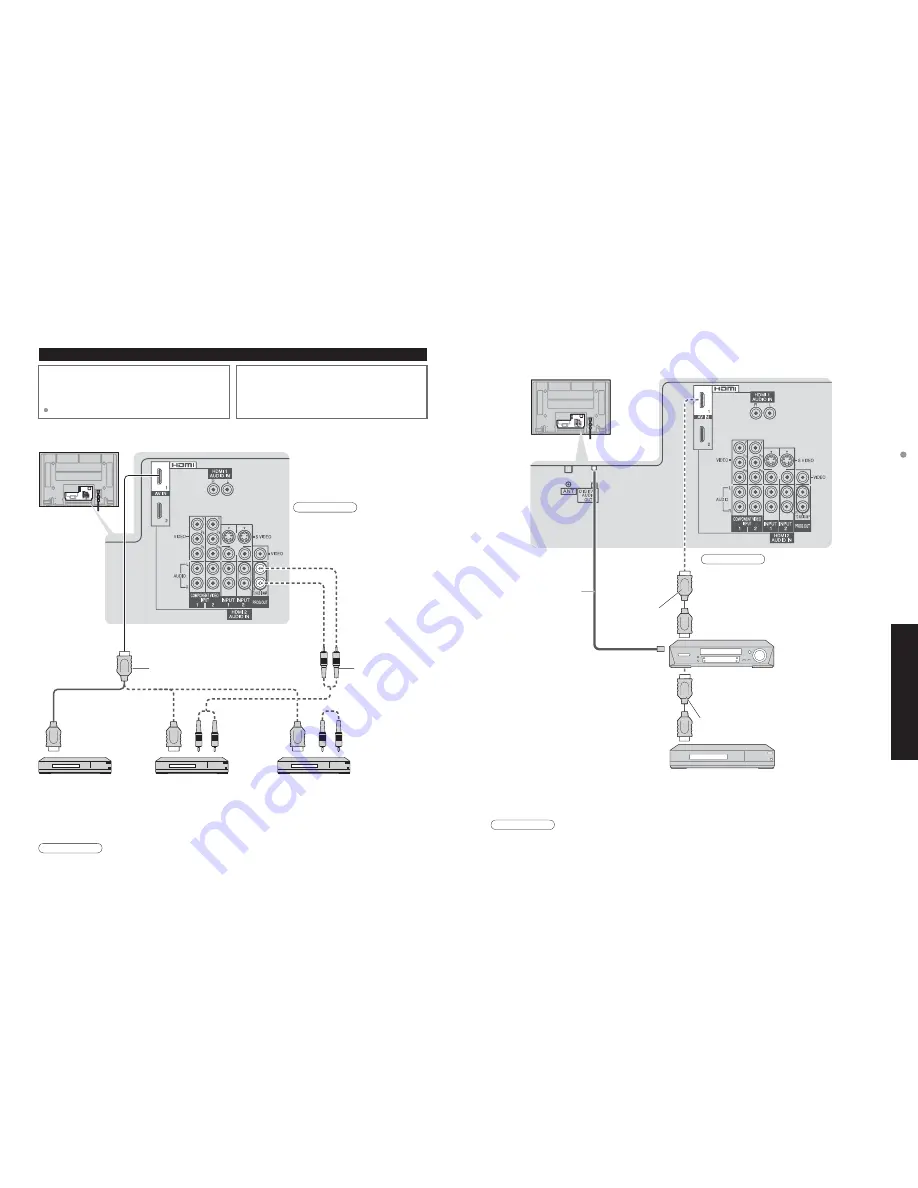
 Control with HDMI “HDA

VI Control

TM

Note

Individual HDMI equipment may require additional menu settings specific to each model. Please refer to their 
respective operating instruction manuals.

Control with HDMI “HDAVI Control

TM

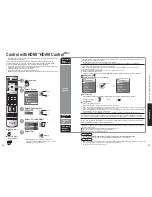
Ŷ

Setting of this unit after connection

After making connections as shown above, set “Ctrl with HDMI” (under “Other adjust”) to “On” using the Setup 
menu. (p. 22).

Audio
IN

Audio Cable

HDMI cable

HDMI
(AV OUT)

HDMI
(AV OUT)

HDMI
(AV OUT)

Audio
IN

DIGA
(Panasonic DVD Recorder)

Panasonic RAM theater

Panasonic Player theater

or

or

Ŷ

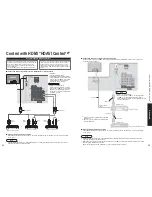
Connecting this unit to a DVD recorder, RAM theater or Player theater

Follow the connection diagrams below for HDMI control of 
a single AV piece of equipment such as a Panasonic DIGA-
DVD recorder, RAM Theater or Player Theater system.
Refer to page 22 for Setup Menu settings and additional 
control information.

 Optional HDMI and/or optical cables are not provided.

If connection (or setting) of equipment compatible with HDMI 
control is changed, switch the power of this unit Off then 
On again while the power of all equipment is On (to this 
unit to correctly recognize the connected equipment) and 
check that DIGA, RAM theater and Player theater playback 
operates.

Back of the unit

HDMI cable

Ŷ

Setting of this unit after connection

After making connections as shown above, set “Ctrl with HDMI” (under “Other adjust”) to “On” using the Setup 
menu. (p. 22).

Note

Optic fiber

Digital audio input 
(Optic)

HDMI (AV OUT)

HDMI (AV IN)

HDMI (AV OUT)

DIGA (Panasonic DVD Recorder)

HDMI cable

Panasonic AV amp

Ŷ

Connecting this unit to a DVD recorder and AV amp

When using an “Control with HDMI” audio-video amplifier and a compatible DIGA recorder, use a daisy chain 
connection as shown below.

One AV amp and one DIGA can be operated 
with this unit.

Be sure to connect the AV amp between this 
unit and the DIGA.

Individual HDMI equipment may require additional menu settings specific to each model. Please refer to their 
respective operating instruction manuals.

When audio from other equipment connected to this unit via HDMI is output using “DIGITAL AUDIO OUT” of this 
unit, the system switches to 2CH audio.

  (When connecting to an AV amp via HDMI, you can enjoy higher sound quality.) 

Recommended HDMI Connections

For DIGA :

Connect with HDMI cable

For RAM theater and Player theater :
Connect with HDMI cable and audio cable.

  Connect the TV’s PROG. OUT audio 

(L&R) to listen to the TV program 
through the theater system.

Note

HDMI 1 is recommended.

  When connecting to HDMI 2, set the 

input mode to HDMI 2 (p. 19) initially 
before connecting to HDMI 2. After 
connection, confirm the HDMI control 
functions (p. 22-23).

Note

HDMI 1 is recommended.

  When connecting to HDMI 2, set the input mode 

to HDMI 2 (p. 19) initially before connecting to 
HDMI 2. After connection, confirm the HDMI control 
functions (p. 22-23).

Summary of Contents for TH-42PX60X

Page 1: ... de utilizar su televisor y guárdelas para consultarlas en el futuro Las imágenes mostradas en este manual tienen solamente fines ilustrativos TQB2AA0663 3 For assistance please call 1 888 VIEW PTV 843 9788 or contact us at www panasonic com contactinfo U S A For assistance please call 787 750 4300 or visit us at www panasonic com Puerto Rico For assistance please call 1 800 561 5505 or visit us a...

Page 2: ... Connections 34 Remote Control Operation Code List 36 Ratings List for Channel Lock 39 Technical Information 40 Maintenance 43 FAQ 44 Specifications 46 Limited Warranty for U S A 48 Customer Services Directory for U S A 49 Limited Warranty for Canada 50 Contents Enjoy your TV Basic Features Advanced Features FAQs etc Safety Precautions 4 Warning Caution Notes 5 Be Sure to Read Accessories Options ...

Page 3: ...an to carry out set up ŶAC Power Supply Cord The Plasma TV is designed to operate on 120 V AC 50 60 Hz TH 37PX60U TH 42PX60U TH 50PX60U TH 58PX60U or on 110 127 V AC 50 60 Hz TH 42PX60X TH 50PX60X Securely insert the power cord plug as far as it will go If the plug is not fully inserted heat may be generated which could cause fire If the plug is damaged or the wall socket plate is loose they shoul...

Page 4: ...becomes warped or physically damaged If you use the pedestal while it is physically damaged personal injury may result Contact your nearest Panasonic Dealer immediately During setting up make sure that all screws are securely tightened If sufficient care is not taken to ensure screws are properly tightened during assembly the pedestal will not be strong enough to support the plasma television and ...

Page 5: ...lasma television to a solid area of the wall or a pillar Securing method The plasma TV must be fastened to both the base and the wall Front Rear side Accessories for pedestal security For 37 42 50 Plasma television 1 Band 2 2 Screw 2 3 Wood screw 2 4 Clamp 2 Nominal diameter 4 mm x 12 Accessories for pedestal security For 58 Plasma television 1 Band 4 2 Screw 4 3 Wood screw 4 4 Hook 2 Nominal diam...

Page 6: ...Cable clampers ŶCable Binding Instructions Connection ŶWatching TV Back of the unit Cable BOX S Video signals have priority or VHF UHF aerial DVD Recorder VCR Fastener To unfasten AC cord Connect after all the other connections Note All cables and external equipment shown in this book are not supplied with the TV For additional assistance visit us at www panasonic com www panasonic ca The S Video ...

Page 7: ...revious screen First time setup is displayed only when the TV is turned on for the first time after the AC cord is inserted into a wall outlet Available only when Auto power on p 20 is set to Off next select Press to go to previous screen Or select icon then press OK for same results About broadcasting systems Analog traditional TV system Digital new system that allows you to view more channels fe...

Page 8: ... JUST 4 3 or ZOOM Change the aspect p 40 ŶFAVORITE Channel numbers registered in Favorite are displayed on the favorite tune screen Select the desired broadcast station with the cursor or using number keys see below Switches the unit OFF in a preset amount of time from 0 to 90 minutes in 30 minute intervals Display or remove the channel banner ŶSelect Audio Mode for TV Viewing Digital mode Press S...

Page 9: ...to TV ŶPress to exit ŶPress to return to the previous screen Note This SD modes selection are able to operate from MENU screen Total number of images Note Depending on the JPEG type Info contents may not be displayed correctly ŶTo adjust picture Adjust SD Card In select set Start slide show select ok Picture menu p 20 Remove the card Press in lightly on SD Card then release Label surface Push unti...

Page 10: ...mpact Insert the card in the correct direction otherwise card may be damaged Electrical interference static electricity or erroneous operation may damage the data or card Back up the recorded data at regular intervals in case of deteriorated or damaged data or erratic operation of the unit Panasonic is not liable for any deterioration or damage of recorded data No file The card has no data or this...

Page 11: ... 5 The TV can automatically turn On Off at the designated date and time p 32 60 Sleep Lock Locks the channels and programs p 26 Memory Card Displays SD card data p 16 Setup CH scan Selects the channel with Program up down button Fav All Fav Only channels registered as FAVORITE p 15 28 CH scan All Language Selects the screen menu language p 13 Language Clock Adjusts the clock p 13 Clock Program cha...

Page 12: ...I must be set to On Limited to newer Panasonic Home Theater RAM theater and DIGA DVD models with Control with HDMI Display menu Select Home theater or TV speakers ŶHome theater Adjustment for Panasonic Amplifier Panasonic Player theater Panasonic RAM theater When selecting Home theater the sound of TV speakers is mute When Home theater is selected the home theater volume control can be raised or l...

Page 13: ...ections as shown above set Ctrl with HDMI under Other adjust to On using the Setup menu p 22 Note Optic fiber Digital audio input Optic HDMI AV OUT HDMI AV IN HDMI AV OUT DIGA Panasonic DVD Recorder HDMI cable Panasonic AV amp ŶConnecting this unit to a DVD recorder and AV amp When using an Control with HDMI audio video amplifier and a compatible DIGA recorder use a daisy chain connection as shown...

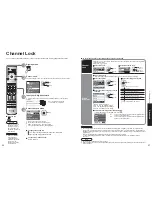
Page 14: ...Bulletins Such as EAS messages weather warnings and others Locally originated programming News Political Public Service Announcements Religious Sports Weather Select up to 7 1 7 channels to be blocked out These channels will be blocked out regardless of the program rating Select CH in on p 26 Select Channel ŶTo select the channel or the rating of the program to be locked next select Channel Lock S...

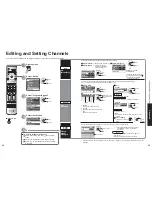
Page 15: ...orite Add Caption Preset Caption detail Rename maximum 7 characters available Select the number Favorite Favorite Add Press OK button to select Yes add or No delete Select Apply Press to move cursor to Apply Signal intensity select channel ok Editing and Setting Channels Select Setup 2 Display menu 1 3 4 ŶPress to exit The current channel settings can be changed according to your needs and recepti...

Page 16: ...d must provide Closed Captioning CC for the television to display it p 40 ŶSelect the item and set Size Text size Font Text font Style Text style Raised Depressed etc Foreground Color of text Fore opacity Opacity of text Background Color of text box Back opacity Opacity of text box Outline Outline color of text Identify the setting options on the screen DBS PVR GAME AUX BLANK If SKIP is selected f...

Page 17: ... settings p 13 0 30 60 90 minutes ŶTo set Timer 1 5 On Off Timer Select the item and set Operating Peripheral Equipment You can operate other manufacturers components using this TV s remote control 4 1 2 Press both buttons simultaneously for more than 3 seconds Release the buttons when the equipment selection buttons start flashing 3 5 Caution Registration will fail if the wrong code is input or i...

Page 18: ... DVD Player Set Top Box Caution For Antenna connection via VCR please refer to the Operating Instructions of a VCR Cable TV Cable Box HDMI cable HDMI DVI conversion cable Audio cable or ŶRecommended HDMI Connections p 24 25 For receiving digital broadcasting of cable TV connect Cable TV directly to ANT terminal or AC Cord Connect after all the other connections are complete Back of the unit Digita...

Page 19: ...r 1972 Daewoo 0045 1278 Dell 1972 Denon 0042 DirecTV 0739 Durabrand 0039 Dynatech 0000 Electrohome 0037 0043 Electrophonic 0037 Emerex 0032 Emerson 0000 0037 0043 1278 1479 Fuji 0033 0035 Funai 0000 Garrard 0000 Gateway 1972 GE 0035 0060 0807 1035 1060 GoldStar 0037 1237 Gradiente 0000 Harley Davidson 0000 Hewlett Packard 1972 Hitachi 0000 0042 0089 Howard Computers 1972 HP 1972 Hughes Network Sys...

Page 20: ... violent scenes or one or more sufficiently violent scenes to affect them Adult supervision strongly suggested 16 ans Programming may not be suitable for children under the age of 16 Contains frequent scenes of violence or intense violence 18 ans Programming restricted to adults Contains constant violence or scenes of extreme violence ABS 1972 Alienware 1972 CyberPower 1972 Dell 1972 DirecTV 0739 ...

Page 21: ... latest information on the following website http panasonic co jp pavc global cs This site is in English only Photo Still images recorded with digital still cameras compatible with JPEG files of DCF and EXIF standards Data format Baseline JPEG 160X120 2 560X1 920 pixels Sub sampling 4 4 4 4 4 2 or 4 2 0 Max number of files 9 999 Image resolution 8 x 8 to 5 120 x 3 840 DCF Design rule for camera fi...

Page 22: ...nd then wring the cloth to remove excess liquid Use this cloth to wipe the surface of the display panel then wipe it evenly with a dry cloth of the same type until the surface is dry Do not scratch or hit the surface of the panel with fingernails or other hard objects Furthermore avoid contact with volatile substances such as insect sprays solvents and thinner otherwise the quality of the surface ...

Page 23: ...settings p 14 Check HDMI1 in or HDMI2 in settings p 20 Set SAP setting to Stereo or Mono Check the HDMI device connected to the unit Set the audio setting of the HDMI device to Linear PCM If digital sound connection has a problem select analog sound connection The sound is from built in cooling fan not a sign of faulty operation Problem Actions Press any key to return moves on the screen Screen On...

Page 24: ...Plasma Display panel Drive method AC type Aspect Ratio 16 9 Contrast Ratio max 10000 1 Visible screen size W H Diagonal No of pixels 127 cm 148 cm 43 6 24 5 50 0 1 106 mm 622 mm 1 269 mm 50 7 28 5 58 1 1 287 mm 723 mm 1 476 mm 1 049 088 1 366 W 768 H 4 098 768 dots 1 049 088 1 366 W 768 H 4 098 768 dots Sound Speaker 4 8 2 4 120 mm 60 mm 2pcs 8 ȍ Audio Output 20 W 10 W 10 W 10 THD Channel Capabili...

Page 25: ...RE ARE NO EXPRESS WARRANTIES EXCEPT AS LISTED UNDER LIMITED WARRANTY COVERAGE THE WARRANTOR IS NOT LIABLE FOR INCIDENTAL OR CONSEQUENTIAL DAMAGES RESULTING FROM THE USE OF THIS PRODUCT OR ARISING OUT OF ANY BREACH OF THIS LIMITED WARRANTY As examples this excludes damages for lost time cost of having someone remove or re install an installed unit if applicable or travel to and from the servicer Th...

Page 26: ... PANASONIC CANADA INC BE LIABLE FOR ANY SPECIAL INDIRECT OR CONSEQUENTIAL DAMAGES In certain instances some jurisdictions do not allow the exclusion or limitation of incidental or consequential damages or the exclusion of implied warranties so the above limitations and exclusions may not be applicable In home service requires clear complete and easy access to the product by the Authorized Servicen...

Page 27: ...onic Way Secaucus New Jersey 07094 U S A Panasonic Puerto Rico Inc PSC Ave 65 de Infanteria Km 9 5 San Gabriel Industrial Park Carolina Puerto Rico 00985 Panasonic Canada Inc 5770 Ambler Drive Mississauga Ontario L4W 2T3 CANADA Panasonic De México S A De C V Moras No 313 Col Tlacoquemecatl Del Valle Del Benito Juárez MÉXICO D F C P 03200 Anotación del cliente El modelo y el número de serie de este...

Reviews: