


12
1
2
3
4
5
6
7
8
9
0
TEXT
TEXT
F.P.
F.P.
INDEX
INDEX HOLD
HOLD
MULTI PIP
MENU
TEXT
F.P.
INDEX HOLD
R
G
Y
B
<< 01 02 03 04 05 06 07 >>
TELETEXT
INFORMATION
17:51 28 Feb
TEXT
MENU
R
MENU
G
R
G
Y
B
1
2
3
4
5
6
7
8
9
0
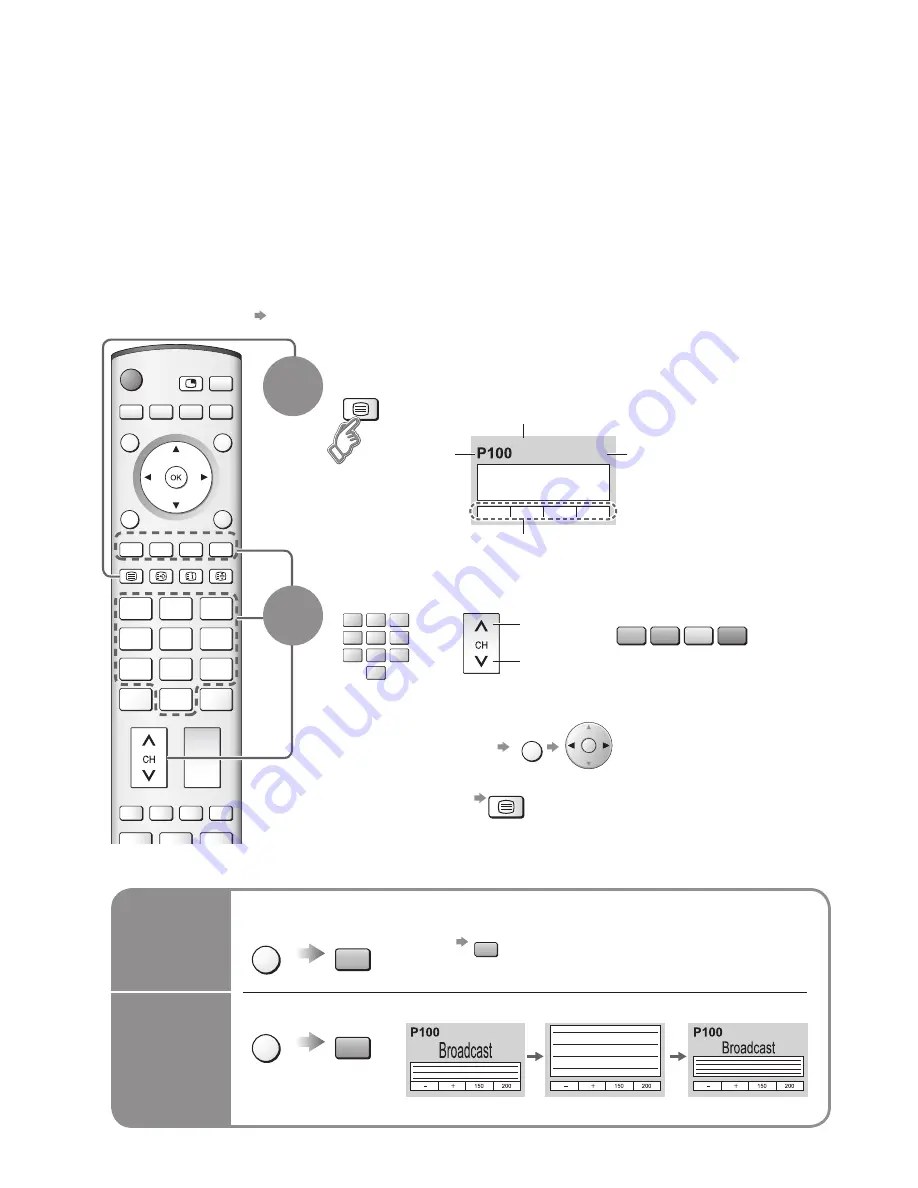
Viewing Teletext
Switch to Teletext
1
Select the page
or
You can enjoy teletext broadcasting, including news, weather forecasts and subtitles, if this service is
provided by the broadcasters.
or
■
To return to TV
TEXT
■
To adjust contrast
MENU
(Corresponds to the colour bar)
•
Displays Index (content varies depending on the broadcasters)
Time / date
Current
page
number
Sub page number
Colour bar
What is TOP mode?
In TOP mode, four differently coloured subjects are situated at the bottom of the screen. To access more
information about one of these subjects, press the appropriately coloured button. This facility enables fast access to
information on the subjects shown.
What is List mode?
In List mode, four differently coloured page numbers are situated at the bottom of the screen. Each of these
numbers can be altered and stored in the TV’s memory. ("Store frequently viewed pages", p. 13)
■
To change mode
"Teletext" in Setup menu (p. 16)
FULL /
TOP /
BOTTOM
Reveal
hidden
data
•
Re-hide
R
Reveal hidden words e.g. quiz page answers
■
Using teletext conveniently
(TOP)
(BOTTOM)
Normal (FULL)
(Expand the BOTTOM half)
2
As the blue bar is displayed
up
down


