background image

16

Insert the USB Flash Memory.

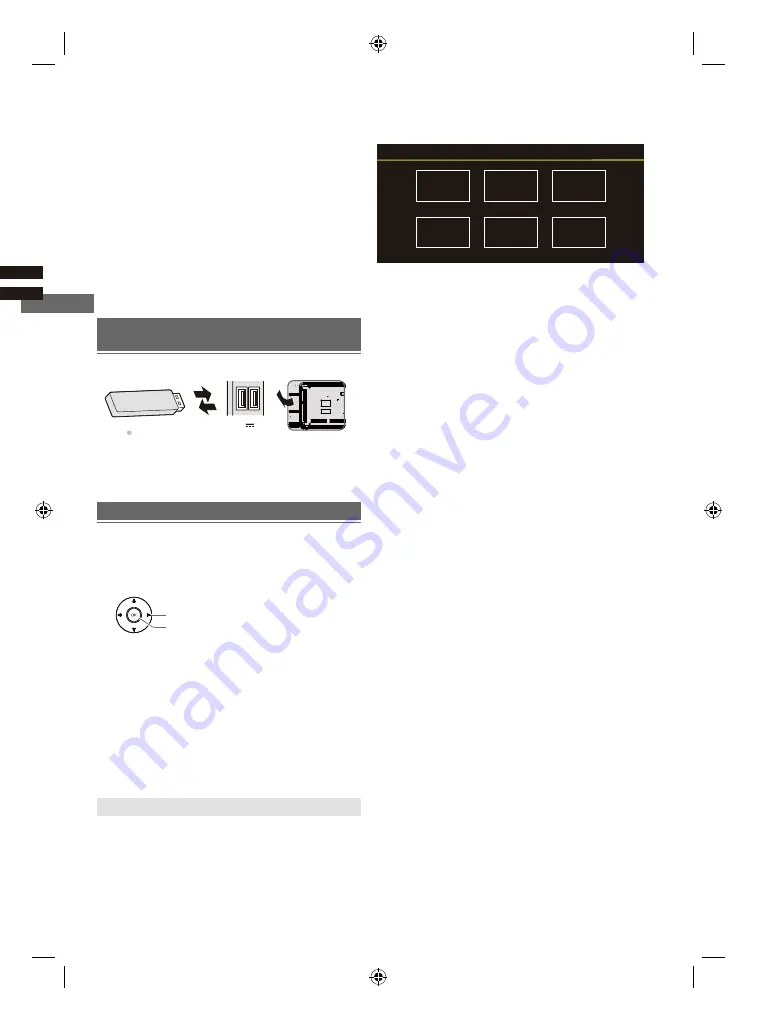
Select the mode.

[PHOTO]:

Displays the thumbnail of all photos in the 

USB Flash Memory.

[DOCUMENT]:

Displays the thumbnail of all documents 

in the USB Flash Memory. 

[MUSIC]:

Displays the thumbnail of music folders in 

the USB Flash Memory.

[DISK]:

Displays the thumbnail of all documents in 

the USB Flash Memory.

[VIDEO]:

Displays the thumbnail of video titles in the 

USB Flash Memory.

[Contents Display]

Follow the operation guide to perform 

available operations.

When the cursor stays on the icon,it displays the 

information of the highlighted content.

r

e

y

a

l

P


a

i

d

e

M


g

n

i

s

U


Media Player allows you to enjoy photo, music or video 

recorded on a USB Flash Memory.

The picture may not appear correctly on this TV 

depending on the digital cameras used.

Display may take some time when there are many files 

and folders in the USB Flash Memory.

Partly degraded files might be displayed at a reduced 

resolution.

The folder and file names may be different depending 

on the digital camera used.

Starting Media Player

Inserting / Removing the USB Flash 

Memory

TV


Insert or remove 

straight and 

completely.

Video

Document

Photo

Music

Disk

1. Select 

Disk

 icon, then press OK button to choose folder.

2. Press Up, Down, Left or Right direction button to select your

desired  file and press OK to Play.

3. Press Return key of remote to Stop playing.

Disk:

1. Select 

Document

2. Press Up, Down, Left or Right direction button to select your

desired  file and press OK to Play.

3. Use OK key to see more option: ZOOM+, ZOOM-.
4. Press Return key of remote to Stop playing.

Document:

 icon.

Access

Select

Photo:

1. Select Picture icon, then press OK button to view the

picture.

2. Press Up, Down, Left or Right direction button to select 

your desired  picture file and press  OK to show.

3. While showing picture, press OK to display the play console. 

For Previous and Next use remote left and Right key. 

4. Use OK key to see more option: Left rotation, Right rotation,

ZOOM+, ZOOM-, Manual play/Auto play, Information, Play 

mode, Play interval,BGM:on or off.

Video:

1. Select Video icon, then press OK button to view movie file.

2. Press Up, Down, Left or Right direction button to select 

your desired file and press OK to Play.

3. While playing a Video, press OK Menu of remote to display  

the play console. For the Play console, Press Ok key of remote 

to Play and Pause the video file.Left key of remote to Fast

backward.Right key of remote to Fast forward.

4. Use OPTION key to see more option: Photo scale, Looping

mode, Subtitle, Subtitle code, Audio track, information and 

video list. 
5. Press Return key of remote to Stop playing and Press

Return to Exit.

1. Select Music icon, then press OK button to listen to Music.

2. Press Up, Down, Left or Right direction button to select your 

desired  file and press  OK to Play.

3. The Play console includes Previous, Play/Pause,Fast

backward/Fast forward,Next and Repeat.

Press OPTION key to see PlayList. 

4. Press Return key of remote to Stop playing.

Music:

500mA

MAX

5V

Using Media Player 

Summary of Contents for TH-32MS600H

Page 1: ...Operating Instructions 72 40MS60 E30Z1 English image TH 32MS600H TH 32MS600H TH 40MS600H ...

Page 2: ...amages caused by use of this product Panasonic accepts no responsibility for the loss etc of data caused by disasters External devices separately prepared by the customer are not covered by the warranty Care for the data stored in such devices is the responsibility of the customer Panasonic accepts no responsibility for abuse of this data Safety Precautions Setting Up the TV Connecting the TV Init...

Page 3: ... the edge of the base To prevent the spread of fire keep candles or other open flames away from this product at all times Dangerous part Small object Warning This product contains possibly dangerous parts such as plastic bags that can be breathed in or swallowed by young children accidentally Keep these parts out of reach of young children Pedestal Warning Do not disassemble or modify the pedestal...

Page 4: ...particular wireless network for transmission Do not subject the built in wireless LAN to high temperatures direct sunlight or moisture Data transmitted and received over radio waves may be intercepted and monitored The built in wireless LAN uses 2 4 GHz and 5 GHz frequency bands To avoid malfunctions or slow response caused by radio wave interference when using the built in wireless LAN keep the T...

Page 5: ... TV on a foam mat or thick soft cloth on a table 2 Remove the assembly screws from the TV Be sure to remove the pedestal in the following way when using the wall hanging bracket or repacking the TV Removing the pedestal from the TV Pull out the base from the TV 3 Assembly screws ST4 x 20 x 4 inch model 40 Base Assembly screws ST4 x 15 x 4 inch model 32 Base Note the correct polarity or push down t...

Page 6: ...he TV View from the side Holes for wall hanging bracket installation Model a b 40 inch 200 mm 100 mm 32 inch 100 mm 100 mm Model Type 40 inch M6 10 mm 12 mm 32 inch M4 8 mm 9 mm Depth of screw Minimum Maximum Screw for fixing the TV onto the wall hanging bracket not supplied Connecting the TV Please ensure the TV is disconnected from the mains socket power point before attaching or disconnecting a...

Page 7: ...ARC Audio return channel capability the sound Enjoy the sound of external devices in multichannel sound e g Dolby digital 5 1CH connect the device to the loudspeaker For connections see the device and the instructions for the loudspeaker RF cable Aerial Equipment MiNi AV Cable TV AV IN Using AV terminals ...

Page 8: ...you turn on the TV for the first time there will show a wizard to guide you to finish the following initial settings Step 1 Select the menu language as you need Note English United States is recommended Step 2 Only for some countries Select whether or n to use and Android device to setup the TV Google Initial Setup llustrations within this publication are provided for reference only Initial Setup ...

Page 9: ...p You can also go back to former step and make any changes by using button Step 1 Step 2 Step 3 Step 4 Step 5 Initial Setting Setup is now complete and your TV is ready for viewing Note If tuning has failed check the connection of the RF cable then follow the on screen instructions 5 Environment Home Country Region HONGKONG Home Shop 1 2 3 4 Next Environment Please choose your Environment Home Sho...

Page 10: ...open the settings menu MENU To enter the picture mode PICTURE To enter the sleep timer OFF TIMER To enter source selection interface INPUT Goes to the AUDIO LINK homepage Goes to the prime video homepage To select the apps Goes to the Google Play homepage To exit the program EXIT Exit the menu and return to the previous menu Mic Available only when the network connection is normal Displays the opt...

Page 11: ...to enter the home page Step 2 Press to choose and then press OK to enter Step 3 Press to select Remotes Accessories and then to chooe the Bluetooth remote name to enter next steps Step 4 Press unpair and then choose OK button 2 Aim remote control reception and unpair by following below When remote control does not respond 1 Press and hold the button as shown below for 3 seconds to reset remote con...

Page 12: ...h the button key functions When the virtual button is present press the button long enough for more than 1 second can perform the following functions 2 Power LED 3 Remote control signal receiver Red Standby Green On Power off Input source Long press display input source option release when the cursor jumps to the source to be switched Volume increase Volume reduction Previous channel Next channel ...

Page 13: ...s and illustrations in this User Manual are provided for reference only and may differ from actual product appearance And for some models certain options are not available You can select all the features from homepage Press to display homepage Press to select icons from the screen list Press OK to enter each option Using Homepage Apps To exit the APP press or Customize channels Add and remove chan...

Page 14: ...he operation guide to select the mode 16 9 4 3 Auto Original Output 1 1 on the screen according to the number of pixels entered Backlight To select the level of 0 100 Sound Menu Picture Picture Sound System Picture Sound System Channel Channel Picture Mode Normal 100 High 16 9 Backlight ECO Setting Aspect Ratio Advanced Settings Sound Mode To select the mode of Standard Speech Music Stadium and Us...

Page 15: ... or Decoding Page Language 1 Audio Description Include Off and On 2 Audio Description Mixing Level Press OK and then use to set Audio Description Mixing Level 3 Audio Type You can set the audio type 4 Primary Preferred Language Press OK and then use to select Primary Preferred Language TV Placement To select Desktop or Wallmount Environment To select Home or Shop Shop Mode To select None or E Stic...

Page 16: ... Down Left or Right direction button to select your desired file and press OK to Play 3 Use OK key to see more option ZOOM ZOOM 4 Press Return key of remote to Stop playing Document icon Access Select Photo 1 Select Picture icon then press OK button to view the picture 2 Press Up Down Left or Right direction button to select your desired picture file and press OK to show 3 While showing picture pr...

Page 17: ...ures Input audio signal 2ch Linear PCM sampling frequencies 48 kHz 44 1 kHz 32 kHz Input video signal Input signal that can be displayed p 17 Match the output setting of the digital equipment Signal name HDMI 525 480 60i 60p 625 576 50i 50p 750 720 60p 50p 1 125 1 080 60i 50i 1 125 1 080 60p 50p 24p For playing back in Media Player Format FAT32 Compliance Maximum USB capacity supported is 1TB Note...

Page 18: ...rt We recommend that you use an exteral hard drive with its own power adapter Certain digital cameras and audio devices may not be compatible with the TV The TV supports the FAT file systems After sorting files in the Folder view mode the TV can display up to 1 000 files per folder lf the USB device contains more than 8 000 files and folders however some files and folders might not be accessible C...

Page 19: ...ote control directly at the remote control signal receiver of the TV within about 7 m and 30 degree angle Situate the TV away from sunshine or block sources of bright light from shining on the remote control signal receiver of the TV Parts of the TV become hot Even if the temperature of parts of the front top and rear panels has risen these temperature rises do not cause any problems in terms of p...

Page 20: ...wer Standby power TH 32MS600H 32 inch model TH 40MS600H 40 inch model 32 inch model 50 W 0 5W 40 inch model 70 W 0 5W Dimensions W H D 728 9 478 4 178 5 mm With Pedestal 728 9 433 8 81 9 mm TV only 903 6 x 565 x 214 5 mm With Pedestal 903 6 x 520 x 85 3 mm TV only 32 inch model 40 inch model Display panel Panel LCD panel LED backlight Visible screen size diagonal Display resolution 32 inch model 8...

Page 21: ...mperature Humidity Note TH 32MS600H and TH 40MS600H comply with China Terrestrial Television National Standard Built in wireless LAN Standard compliance and Frequency range IEEE 802 11 a b g n ac 2 4 2 5GHz and 5 15 5 825GHz Security Support for WPA WPA2 Bluetooth V5 0 Built in Bluetooth 2 4 2 485GHz 0 C 45 C ...

Page 22: ...distributed in the hope that it will be useful but WITHOUT ANY WARRANTY without even the implied warranty of MERCHANTABILITY or FITNESS FOR A PARTICULAR PURPOSE Please refer to the detailed terms and conditions thereof system settings Oss License At least three 3 years from delivery of this product Panasonic will give to any third party who contacts us at the contact information provided below for...

Page 23: ...sonic Entertainment Communication Co Ltd Panasonic Entertainment Communication Co Ltd 2022 Information on Disposal in other Countries outside the European Union Customer s Record Model Number Serial Number ...

Reviews: