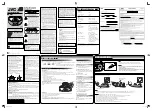
The laser diode in the traverse deck (optical pickup) may break
down due to potential difference caused by static electricity of
clothes or human body.
1. The traverse deck (optical pickup) is an extremely high-
precision construction and must not be subjected to impact,
excessive vibration, or other types of rough handling.
2. To protect the laser diode against electrostatic breakdown,
be sure that the short land A and B of the flexible board
(FFC board) should be short-circuit by solder before pulling
out the FFC. Then inserting a short pin or similar object
intothetip of the flexible board.
(Refer to
Fig. 1
)
3. Handle the flexible circuit boards with care; excessive force
could cause them to be broken.
4. Do not turn the pre-set variable resistor (for adjustment of
the laser power); it has been adjusted at the factory.
(as shown in
Fig. 1
)
The new traverse deck short-circuits by the short pin, the foil
(C) and short lands to protect the laser diode against
electrostatic breakdown. Be sure to replace to new one
following procedures.
1. Remove the short pin from the FFC, and then connect it to
1. Human body grounding
Use the anti-static wrist strap to discharge the static
electricity from your body. (as shown in
Fig. 2
)
2. Work table grounding
Put a conductive material (sheet) or steel sheet on the area
where the optical pickup is placed, and fround the sheet.
(as shown in
Fig. 3
)
Caution
The static electricity of your clothes will not be grounded
through the wrist strap.
So, take care not to let your clothes touch the traverse deck
(optical pickup).
So, be careful of electrostatic breakdown during repair of the
traverse deck (optical pickup).
Fig. 1
the connector.
2. Cut the foil (C). (Refer to
Fig. 1
) (Take care not to make
contact with cutting point each other.)
3. Unsolder the short lands. (Refer to
Fig. 1
)
Fig. 2
3 Handling Precautions for Traverse Deck
3.1. Handling the traverse deck (optical pickup)
3.2. Caution when replacing traverse deck
3.3. Grounding for electrostatic breakdown prevention
4
SL-SX450EB / SL-SX450EE / SL-SX450EG / SL-SX450GC / SL-SX450GN
Summary of Contents for SL-SX450EB
Page 5: ...Fig 3 5 SL SX450EB SL SX450EE SL SX450EG SL SX450GC SL SX450GN ...
Page 11: ...11 SL SX450EB SL SX450EE SL SX450EG SL SX450GC SL SX450GN ...
Page 20: ...SL SX450EB SL SX450EE SL SX450EG SL SX450GC SL SX450GN 20 ...
Page 22: ...SL SX450EB SL SX450EE SL SX450EG SL SX450GC SL SX450GN 22 ...
Page 30: ...15 Cabinet Parts Location 30 SL SX450EB SL SX450EE SL SX450EG SL SX450GC SL SX450GN ...
Page 31: ...16 Traverse Parts Location 31 SL SX450EB SL SX450EE SL SX450EG SL SX450GC SL SX450GN ...
Page 32: ...17 Packaging 17 1 SL SX450EB 32 SL SX450EB SL SX450EE SL SX450EG SL SX450GC SL SX450GN ...
Page 33: ...17 2 SL SX450EE EG GN 33 SL SX450EB SL SX450EE SL SX450EG SL SX450GC SL SX450GN ...
Page 34: ...17 3 SL SX450GC 34 SL SX450EB SL SX450EE SL SX450EG SL SX450GC SL SX450GN ...
Page 35: ... 35 SL SX450EB SL SX450EE SL SX450EG SL SX450GC SL SX450GN K0502 YH HM ...


