


7
VQT4U54
ENGLISH
∫
Using the WPS Push Button
Configuration (PBC)
1
Press and hold
[– WPS]
on the unit.
{.
“WPS” flashes on the display.
(The Wi-Fi status indicator blinks blue.)
≥
Complete step 2 within 2 mins.
2
After “WPS” is indicated, press the WPS button on
the wireless network router.
3
The unit’s settings are completed when
“
SUCCESS
” is displayed and the Wi-Fi status
indicator
stops blinking
and
lights in blue
.
4
Press [OK] on the remote control to exit the
setting.
≥
To use the WPS PIN code, refer to the notes on page 8.
You can make the wireless network settings with the
app, “Panasonic Stereo System Network Setup” (for
free).
If you’re using an Android device, download the app at
the Google Play Store. If you’re using an iPod touch/
iPhone/iPad, download it at the App Store.
Preparation
≥
Connect your smartphone to your home wireless
network.
≥
Check the password for your home wireless network.
1
Press
[SETUP]
on the remote control repeatedly
to select “
NET SETUP
” and then press
[OK]
.
{.
“SETTING” is indicated on the display.
(The Wi-Fi status indicator blinks purple.)
2
Start “
Panasonic Stereo System Network
Setup
” on your smartphone and follow the
indications.
∫
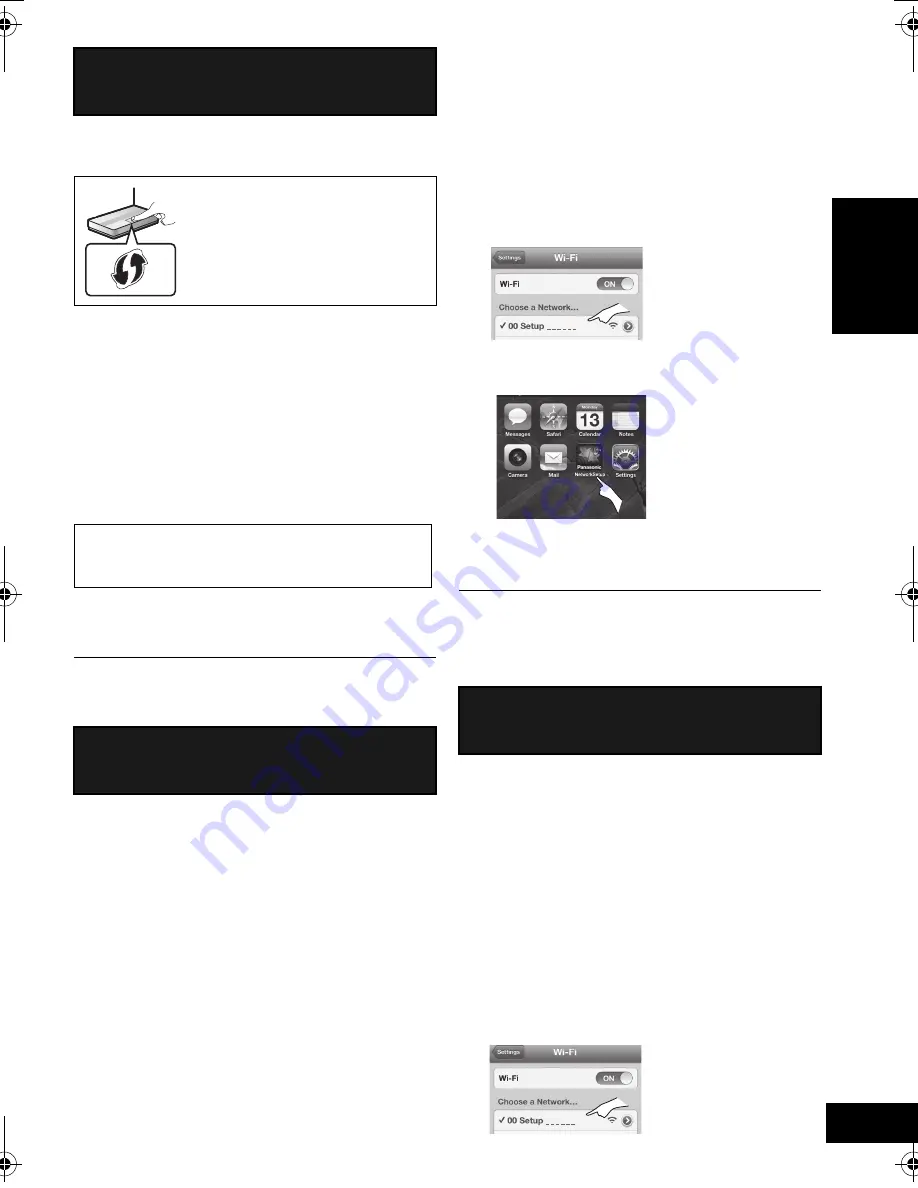
Note for the iOS version
After step 2
1
Enter the password for the home wireless network
to which the iOS device is connected.
2
When a message instructing you to connect the
iOS device to this unit is displayed, press the
home button to close the app.
3
On the Wi-Fi network selection screen in
“Settings”, select “00 Setup _ _ _ _ _ _”.
≥
“ _ ” stands for a digit that is unique to each set.
4
When a message indicating the completion of the
connection to this unit is displayed, restart the app.
5
When a message indicating the completion of the
Wi-Fi setup of this unit is displayed, close the app,
and then check the operation of AirPlay, etc.
≥
“Panasonic Stereo System Network Setup” for Mac OS is
also available at the App Store.
With this method, you will access this unit’s wireless
network settings from the Internet browser of your
compatible device.
≥
The following explanations are based on an iPhone.
1
Press
[SETUP]
on the remote control repeatedly
to select “
NET SETUP
” and then press
[OK]
.
{.
“SETTING” is indicated on the display.
(The Wi-Fi status indicator blinks purple.)
2
After “SETTING” is indicated, connect your
compatible device to this unit’s wireless network
named “
00 Setup _ _ _ _ _ _
”.
≥
“ _ ” stands for a digit that is unique to each set.
≥
Make sure that DHCP is enabled for the network setting
on your compatible device.
Method 1
If your wireless network router supports WPS
(Wi-Fi Protected Setup
TM
).
The WPS identifier mark
WPS Push Button Configuration
(PBC) compatible wireless network
router may have this mark.
“FAIL” may be displayed if the connection was not
made within the set time limit. Try the setting again.
If “FAIL” is still displayed, try other methods.
Method 2
Setting the network connection with the smartphone
app
Method 3
Setting the network connection from an Internet
browser.
SC-NE3_EG~VQT4U54.book 7 ページ 2013年1月16日 水曜日 午前9時3分
Summary of Contents for SC-NE3
Page 58: ...58 VQT4U54 ...
Page 59: ...59 VQT4U54 ...


