background image

7

RQT7619

INT

R

O

If you are using a cable TV box, set the following:

Cable TV box connection channel (Ch2/Ch3/Ch4/L3)
–If you are connecting the cable TV box to this unit’s IN3 (L3) 

terminal, select “L3”.

–If you are connecting the cable TV box to this unit’s RF terminal, 

select “Ch2”, “Ch3” or “Ch4”, according to the cable TV box 
setting.

Cable TV box brand
(Move down with [

4

] for more brands. Select “Not Listed” if you 

cannot find your cable TV box on the list.)

IR signal code
Make sure your cable TV box is set to the channel that appears 
on screen and press [ENTER]. A test is performed.

–If the cable TV box has changed to channel 09, select “Yes” and 

press [ENTER].

–If the cable TV box is still set to the same channel, select “No” 

and press [ENTER]. Repeat this step until the cable TV box 
changes to channel 09.

The set contents are displayed together

–If the information is correct, select “Yes, end setup” and press 

[ENTER].

–If the information is not correct, select “No, repeat setup 

process” and press [ENTER] to start the setting again.

Once you confirm the input content, the following screen appears.

5

Press [ENTER].

A television reception screen or a blue background screen is 
displayed.

If you do not want to use TV Guide On Screen

TM

 system 

page 41, Auto channel/clock settings

6

Press [

Í

POWER].

Leave the unit turned off until the unit downloads the television 
program list. This may take up to a maximum of 24 hours.

When the unit is connected to a cable TV box.

The cable TV box must be turned on in order to download the 
television program list.

Note that the television program list may not be downloaded 
correctly if you change the channel of the cable TV box while the 
unit is turned off.

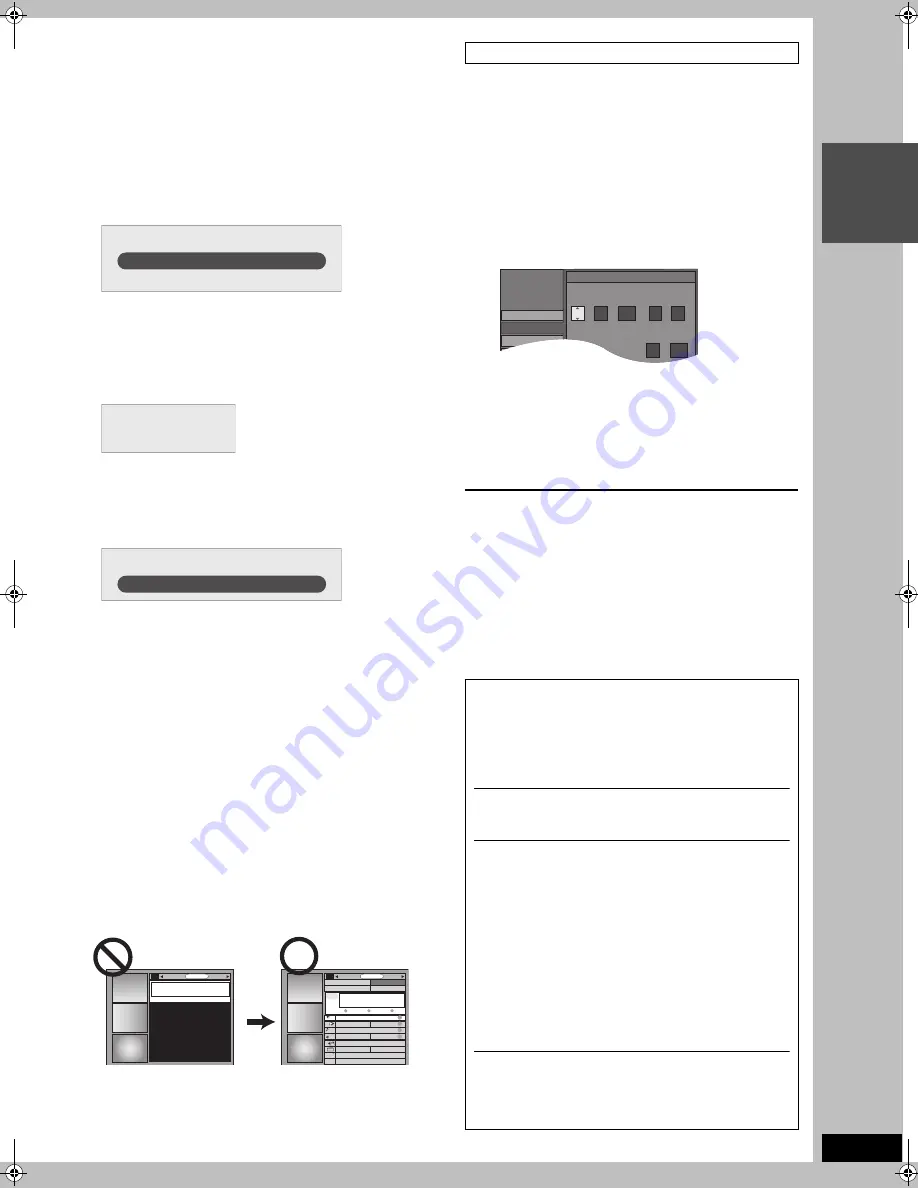
If you find “There is no data for this screen” on the television when 
you turn the unit on, the unit has not yet downloaded the program 
list.

This unit may download more than one channel line-up. Follow the 
on-screen guidance and select one of the channel line-ups 
(

page 19).

Set the clock manually.
Please note that the program list is not displayed until the unit 
downloads it. Timer program recording is only possible manually.

1

Press [FUNCTIONS].

2

Press [

3

,

4

] to select “SETUP” and 

press [ENTER].

3

Press [

3

,

4

] to select “Set Up” and press [

1

].

4

Press [

3

,

4

] to select “Manual Clock 

Setting” and press [ENTER].

5

Press [

2

,

1

] to select the item you 

want to change and press [

3

,

4

] to 

change the setting.

6

Press [ENTER].

The clock starts.

To exit the screen

Press [RETURN] several times.

DST (Daylight Saving Time): ON or OFF
If you select “ON”, the clock is advanced one hour starting at 2 a.m. on the 
first Sunday in April and ending at 2 a.m. on the last Sunday in October.

TIME ZONE shows the time difference from Greenwich meantime (GMT).

EST (Eastern Standard Time)

l

 GMT 

j

5

CST (Central Standard Time)

l

 GMT 

j

6

MST (Mountain Standard Time)

l

 GMT 

j

7

PST (Pacific Standard Time)

l

 GMT 

j

8

AST (Alaska Standard Time)

l

 GMT 

j

9

HST (Hawaii Standard Time)

l

 GMT 

j

10

Is your cable box now tuned to channel 09?

Yes

No

Zip code  - 11111 (USA)
Cable - 

Yes

Cable box - No

What would you like to do now?

Watch TV

SORT

SCHEDULE

LISTINGS

There is no data
for this screen.

TODAY

Last

Channel

SORT

SCHEDULE

FAVORITES

RECORD

INFO.

87

NWGB

R

R

W

R

W

R

BOX

pTV

TV

NWBG

ducation

ANiMe

Network

PBS

LISTINGS

8:30PM

8:00PM

To use immediately (Manual Clock Setting)

In the United States, TV GUIDE and other related marks are 
registered marks of Gemstar-TV Guide International, Inc. and/
or one of its affiliates. In Canada, TV GUIDE is a registered 
mark of Transcontinental Inc., and is used under license by 
Gemstar-TV Guide International, Inc. TV Guide On Screen, 
G-LINK, VCR Plus

r

 and PlusCode are registered marks of 

Gemstar-TV Guide International and/or one of its affiliates.

The TV Guide On Screen and VCR Plus

r

 systems are 

manufactured under license from Gemstar-TV Guide 
International, Inc. and/or one of its affiliates.

GEMSTAR-TV GUIDE INTERNATIONAL, INC. AND/
OR ITS RELATED AFFILIATES ARE NOT IN ANY WAY 
LIABLE FOR THE ACCURACY OF THE PROGRAM 
SCHEDULE INFORMATION PROVIDED BY THE TV 
GUIDE ON SCREEN SYSTEM. IN NO EVENT SHALL 
GEMSTAR- TV GUIDE INTERNATIONAL, INC. AND/
OR ITS RELATED AFFILIATES BE LIABLE FOR ANY 
AMOUNTS REPRESENTING LOSS OF PROFITS, 
LOSS OF BUSINESS, OR INDIRECT, SPECIAL, OR 
CONSEQUENTIAL DAMAGES IN CONNECTION 
WITH THE PROVISION OR USE OF ANY 
INFORMATION, EQUIPMENT, OR SERVICES 
RELATING TO THE TV GUIDE ON SCREEN SYSTEM.

The TV Guide On Screen and VCR Plus

r

 systems are 

protected by one or more issued United States patents such as 
6,331,877; 6,239,794; 6,154,203; 5,940,073; 4,908,713; 
4,751,578; 4,706,121; 6,466,734; 6,430,359; 6,091,882; 
6,049,652; 5,335,079; 5,307,173.

SETUP

Disc

Video

Set Up

Manual Clock Setting

/

:

/

SAT

PM

MONTH

DAY

YEAR

HOUR

MINUTE

1

1

12

00

2000

DST

TIME ZONE

OFF

EST

Channel

7619en.book  7 ページ  2004年5月6日 木曜日 午前9時33分

Summary of Contents for SC-HT1500

Page 1: ...and safety please read these instructions carefully Before connecting operating or adjusting this product please read these instructions completely Please keep this manual for future reference Region...

Page 2: ...ystem cable K1HA25HA0003 1 AM loop antenna N1DAAAA00002 1 FM indoor antenna RSA0007 L 1 IR Blaster K2ZZ04C00001 3 Speaker cables 1a4 m 13 foot cable REE1203A J 2a10 m 33 foot cables REE1203C J 1 Sheet...

Page 3: ...n 9 HDD and discs you can use for recording and play 9 Play only discs 12 cm 8 cm 9 Discs that cannot be played 9 Disc handling 10 HDD Hard disk drive handling care 10 Maintenance 11 RECORDING Recordi...

Page 4: ...sk of electric shock to persons CAUTION CAUTION TO REDUCE THE RISK OF ELECTRIC SHOCK DO NOT REMOVE SCREWS NO USER SERVICEABLE PARTS INSIDE REFER SERVICING TO QUALIFIED SERVICE PERSONNEL The exclamatio...

Page 5: ...ram list page 15 Erase items page 22 Start recording page 12 Center focus SHIFT page 38 Select audio page 13 22 Seat position SHIFT page 38 Create chapters Green button for television program list pag...

Page 6: ...ellite service the program guide in this unit will not receive program listings or channel information Without this information program based recordings cannot be made However recordings can still be...

Page 7: ...s ENTER 5 Press 2 1 to select the item you want to change and press 3 4 to change the setting 6 Press ENTER The clock starts To exit the screen Press RETURN several times DST Daylight Saving Time ON o...

Page 8: ...seconds 7 Press ENTER When the following indicator appears on the unit s display Change the code on the remote control to match the main unit s step 6 To exit the screen Press RETURN several times To...

Page 9: ...age 13 Recording modes and approximate recording times You can perform chasing playback or Time Slip page 13 You can record digital broadcasts that allow One time only recording You can transfer dub a...

Page 10: ...ing a play list will not increase the amount of time When HDD SLP SLEEP appears in the display The HDD has automatically gone into SLEEP mode in order to extend the life of the HDD Press HDD to activa...

Page 11: ...actually be loud and harmful to your hearing Guard against this by setting your equipment at a safe level BEFORE your hearing adapts To establish a safe level Start your volume control at a low setti...

Page 12: ...to complete recording management information after recording finishes To pause recording Press Press again to restart recording Title is not split into separate titles To specify a time to stop record...

Page 13: ...title and press ENTER Time Slip indicator on the main unit lights To exit the Direct Navigator screen Press DIRECT NAVIGATOR 1 Press TIME SLIP Time Slip indicator on the main unit lights You will hear...

Page 14: ...e L2 input terminals If the audio output of the other equipment is monaural connect to L MONO The S VIDEO terminal achieves a more vivid picture than the VIDEO terminal 1 While stopped Press HDD DVD I...

Page 15: ...n To check change or delete the program page 18 To utilize TV Guide On ScreenTM system see also page 19 Notes on timer recording page 17 To cancel recording when recording has already begun Press then...

Page 16: ...gs CH VOLUME SKIP STOP PAUSE PLAY x1 3 SLOW SEARCH CANCEL 1 2 3 4 5 6 7 8 9 0 HOME THEATER TV Info MULTI REAR DUBBING S POSITION CHAPTER C FOCUS AUDIO CH SELECT RETURN ERASE REC MODE TIME SLIP L1 OPT...

Page 17: ...D REMOVE FREQUENCY INFO 87 NWBG SP HDD R R R W R W R 11 00 11 55 Notes on timer recording F lights on the unit s display to indicate that the unit is in timer recording standby F flashes when the unit...

Page 18: ...D DISPLAY POWER POWER PRO LOGIC SHIFT SHIFT HDD DVD INPUT PAGE VCR Plus FM MODE SUB MENU STATUS EQ SFC PROG CHECK PROG CHECK TV GUIDE TV GUIDE CH VOLUME SKIP STOP PAUSE PLAY x1 3 SLOW SEARCH CANCEL 1...

Page 19: ...pears at the end of the list Customizing the channel line up 1 Press 3 several times to select LISTINGS 2 Press 2 1 to select SETUP and press 4 3 Press 3 4 to select Change channel display and press E...

Page 20: ...MENU VCD Press RETURN CH VOLUME SKIP STOP PAUSE PLAY x1 3 SLOW SEARCH CANCEL 1 2 3 4 5 6 7 8 9 0 HOME THEATER TV Info MULTI REAR DUBBING S POSITION CHAPTER C FOCUS AUDIO CH SELECT RETURN ERASE REC MO...

Page 21: ...e paused press 6 or 5 On the main unit press and hold D or E The speed increases up to 5 steps Press 1 PLAY to restart play Forward direction only VCD The unit will pause if slow motion play is contin...

Page 22: ...e headphones not included Headphone plug type 3 5 mm 1 8z stereo 2 Adjust headphone volume with VOLUME DOWN UP Audio is automatically switched to stereo 2 channel Note Avoid listening for prolonged pe...

Page 23: ...Numbered buttons 001 Both Ends Freezing 002 Lady Starfish 003 Life on Jupiter 004 Metal Glue 005 Paint It Yellow 006 Pyjamamama 007 Shrimps from Mars 008 Starperson 009 Velvet Cuppermine 010 Ziggy Sta...

Page 24: ...G SW LEVEL TV VIDEO AUX FM AM DVD HDD DISPLAY POWER POWER PRO LOGIC SHIFT SHIFT HDD DVD INPUT PAGE FM MODE SUB MENU STATUS EQ SFC PROG CHECK PROG CHECK TV GUIDE TV GUIDE 4 VCR Plus DISPLAY 3 4 2 1 ENT...

Page 25: ...off Progressive page 45 Select ON to enable progressive output Select OFF if the picture is stretched horizontally When progressive output is on closed captions cannot be displayed Transfer When Prog...

Page 26: ...CANCEL 1 2 3 4 5 6 7 8 9 0 HOME THEATER TV Info MULTI REAR DUBBING S POSITION CHAPTER C FOCUS AUDIO CH SELECT RETURN ERASE REC MODE TIME SLIP L1 OPT TOP MENU ENTER DIRECTNAVIGATOR FUNCTIONS MIX 2CH RE...

Page 27: ...o select Exit and press ENTER 3Press 2 1 to select Divide and press ENTER To confirm the division point Press 3 4 to select Preview and press ENTER The unit plays 10 seconds before and after the divis...

Page 28: ...1 3 SLOW SEARCH CANCEL 1 2 3 4 5 6 7 8 9 0 HOME THEATER TV Info MULTI REAR DUBBING S POSITION CHAPTER C FOCUS AUDIO CH SELECT RETURN ERASE REC MODE TIME SLIP L1 OPT TOP MENU ENTER DIRECTNAVIGATOR FUNC...

Page 29: ...ct Play Previous 01 01 Next SUB MENU 01 Create 10 27 Mon 0 30 HDD Copy Enter Name Change Thumbnail Create Properties Edit Chapter View Erase Refer to Play list operations PLAY LIST Chapter View Select...

Page 30: ...ECT RETURN ERASE REC MODE TIME SLIP L1 OPT TOP MENU ENTER DIRECTNAVIGATOR FUNCTIONS MIX 2CH REC TEST CM SKIP REPEAT MUTING SW LEVEL TV VIDEO AUX FM AM DVD HDD DISPLAY POWER POWER PRO LOGIC SHIFT SHIFT...

Page 31: ...same transferring dubbing list You can transfer dub your favorite titles and play lists to an archive disc Transferring dubbing a play list will create a title When you want to re edit finalized cont...

Page 32: ...ted with can be registered Repeat steps 2 4 as necessary To erase add or move items from the list page 33 To show other pages Multiple editing page 33 6 Press 3 4 to select SET and press ENTER The tra...

Page 33: ...lists that can be transferred dubbed in high speed mode to DVD R page 40 Title with One time only recording restriction Titles erased from the HDD by recording restrictions after transferring dubbing...

Page 34: ...ng Edit Set up Play back DISC SPACE LEFT 52 00 SP PLAY LIST HDD TV GUIDE EPG DVD Disc setting HDD RAM DVD R Preparation Press HDD or DVD to select the drive Release protection RAM cartridge page 9 dis...

Page 35: ...nu or Title 1 and press ENTER Top Menu The top menu appears first Title 1 The disc content is played without displaying the top menu page 45 Finalize DVD R You can play DVD R on compatible DVD players...

Page 36: ...the display Press the numbered buttons to select a channel and press ENTER Alternatively press CH W or CH X then press ENTER The station occupying a channel is erased if another station is preset in t...

Page 37: ...ess EQ SFC several times to select SFC AV MOVIE or SFC MUSIC SFC AV MOVIE 2 1 DRAMA ACTION SPORTS MONO GAME MUSICAL For monaural sound SFC MUSIC 2 1 LIVE POP ROCK VOCAL PARTY DANCE JAZZ Sound is in st...

Page 38: ...tton SUB W 1 SUB W 2 SUB W 3 SUB W 4 factory preset This doesn t work when SFC is lit on the display Adjust the level of the speakers so they are the same apparent level as the front speakers where yo...

Page 39: ...s Underlined items are the factory presets Channel TV GUIDE Setting Set the TV Guide On ScreenTM system Antenna System 2 Select to suit the type of antenna you are using TV CATV Auto Channel Setting 1...

Page 40: ...eamless Play Select the play mode for play list chapter segments On The chapters in play lists are played seamlessly This does not work when there are several audio types included on the play list and...

Page 41: ...tatus messages automatically Automatic Off On screen Language Choose the language for these menus and on screen messages English Espa ol Fran ais Only English is displayed in the TV Guide On ScreenTM...

Page 42: ...d down the screen 6 Press 3 4 to select the channel corresponding to the caption and press 2 Channels are only displayed if they contain a station and if captions have not been added manually To delet...

Page 43: ...s HDD or DVD to select HDD or DVD as the source Television broadcasts Press W X CH to select the channel 2 Start recording and play Refer to the manual of the other unit for details To playback audio...

Page 44: ...onnector Y C k2 Component video output 480P 480i Audio system Recording system Dolby Digital XP SP LP EP Linear PCM XP only Number of channels Recording 2 channels Playback 5 1 channels FL FR Center S...

Page 45: ...cording in XP mode MP3 MPEG Audio Layer 3 An audio compression method that compresses audio to approximately one tenth of its size without any considerable loss of audio quality You can play MP3 you h...

Page 46: ...it was purchased HDD SLP In order to extend HDD life the HDD is in SLEEP mode Press HDD to activate 10 NO READ The disc is dirty or badly scratched The unit cannot record play or edit You have used a...

Page 47: ...the on screen menus The effect is less perceivable with some types of video The images from this unit do not appear on the television Picture is distorted Make sure that the television is connected t...

Page 48: ...rcibly switched to standby Alternatively disconnect the AC power supply cord wait one minute then reconnect it 12 20 HDD activation is slow The HDD is in SLEEP mode HDD SLP appears in the unit s displ...

Page 49: ...recording title that was recorded to DVD RAM using a different Panasonic DVD Recorder to this unit s HDD but play is not possible due to copyright protection When recording to DVD RAM using EP 8H mod...

Page 50: ...levision progressive output compatible All Panasonic televisions that have 480P input terminals are compatible Consult the manufacturer if you have another brand of television Can I play DVD Video DVD...

Page 51: ...S PRODUCT OR ARISING OUT OF ANY BREACH OF THIS WARRANTY As examples this excludes damages for lost time travel to and from the servicer loss of media or images data or other memory content The items l...

Page 52: ...frequency step 36 Optional FM antenna connection 36 Ratings level 39 Recording Flexible Recording 14 mode 13 Relief 17 timer 15 18 Re initialize settings 39 Relief Recording 17 Remote control code 8...

Reviews: