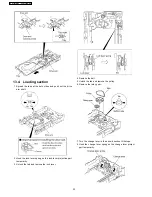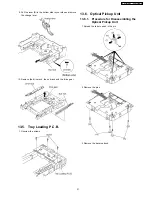
13.4. Loading section
1. Spread the tabs at the both sides and push out the drive
arm shaft.
2. Hook the lock lever spring on the lock lever projection part
temporarily.
3. Unlock the tab and remove the lock lever.
4. Remove the belt.
5. Unlock the tab and remove the pulley.
6. Remove the relay gear.
7. Turn the change lever in the arrow direction till it stops.
8. Hook the change lever spring on the change lever project
part temporarily.
30
SA-HT885WGC / SA-HT885WGS
Summary of Contents for SA-HT885WGC
Page 11: ...11 SA HT885WGC SA HT885WGS ...
Page 19: ...10 Caution for AC Cord 19 SA HT885WGC SA HT885WGS ...
Page 23: ...12 2 Main Components and P C B Locations 23 SA HT885WGC SA HT885WGS ...
Page 39: ...39 SA HT885WGC SA HT885WGS ...
Page 52: ...SA HT885WGC SA HT885WGS 52 ...
Page 58: ...SA HT885WGC SA HT885WGS 58 ...
Page 68: ...SA HT885WGC SA HT885WGS 68 ...
Page 72: ...SA HT885WGC SA HT885WGS 72 ...
Page 74: ...SA HT885WGC SA HT885WGS 74 ...
Page 79: ...79 SA HT885WGC SA HT885WGS ...

