


13
Pla
ybac
k
Playback
Preparations
≥
Confirm that the VCR is on.
≥
Confirm that the TV is on and the VCR viewing channel is
selected.
≥
Insert a recorded video cassette.
For Normal Playback:
Press the Play button
I
.
For Cue Playback:
During playback, tap the Fast Forward button
H
.
≥
To return to normal playback, press the
Play button
I
.
≥
If you press and hold down the Fast
Forward button
H
, cue playback
continues for as long as you keep the
button pressed.
For Review Playback:
During playback, tap the Rewind button
8
.
≥
To return to normal playback, press the
Play button
I
.
≥
If you press and hold down the Rewind
button
8
, review playback continues for
as long as you keep the button pressed.
For Still Playback:
During playback, press the Pause/Slow button
7
.
≥
To return to normal playback, press the
Play button
I
or the Pause/Slow button
7
.
For Slow Playback:
During playback, keep the Pause/Slow button
7
pressed
for 2 seconds or more.
≥
To return to normal playback, press the
Play button
I
.
Fast-forwarding or Rewinding the Tape:
To fast-forward the tape:
Press the Fast Forward button
H
in the stop mode.
To rewind the tape:
Press the Rewind button
8
in the stop mode.
≥
To stop fast-forwarding or rewinding, press the Stop button
9
.
≥
To briefly view the picture during fast-forwarding or
rewinding, press and hold down the corresponding button.
To Stop Playback
Press the Stop button
9
.
Notes:
≥
Cue, review or slow playback will be automatically
cancelled after 10 minutes, and still playback after
5 minutes.
≥
During playback function other than normal playback,
horizontal noise bars may appear in the picture, the colour
of the picture may be unstable, or the picture may be
otherwise distorted.
However, these are not malfunctions.
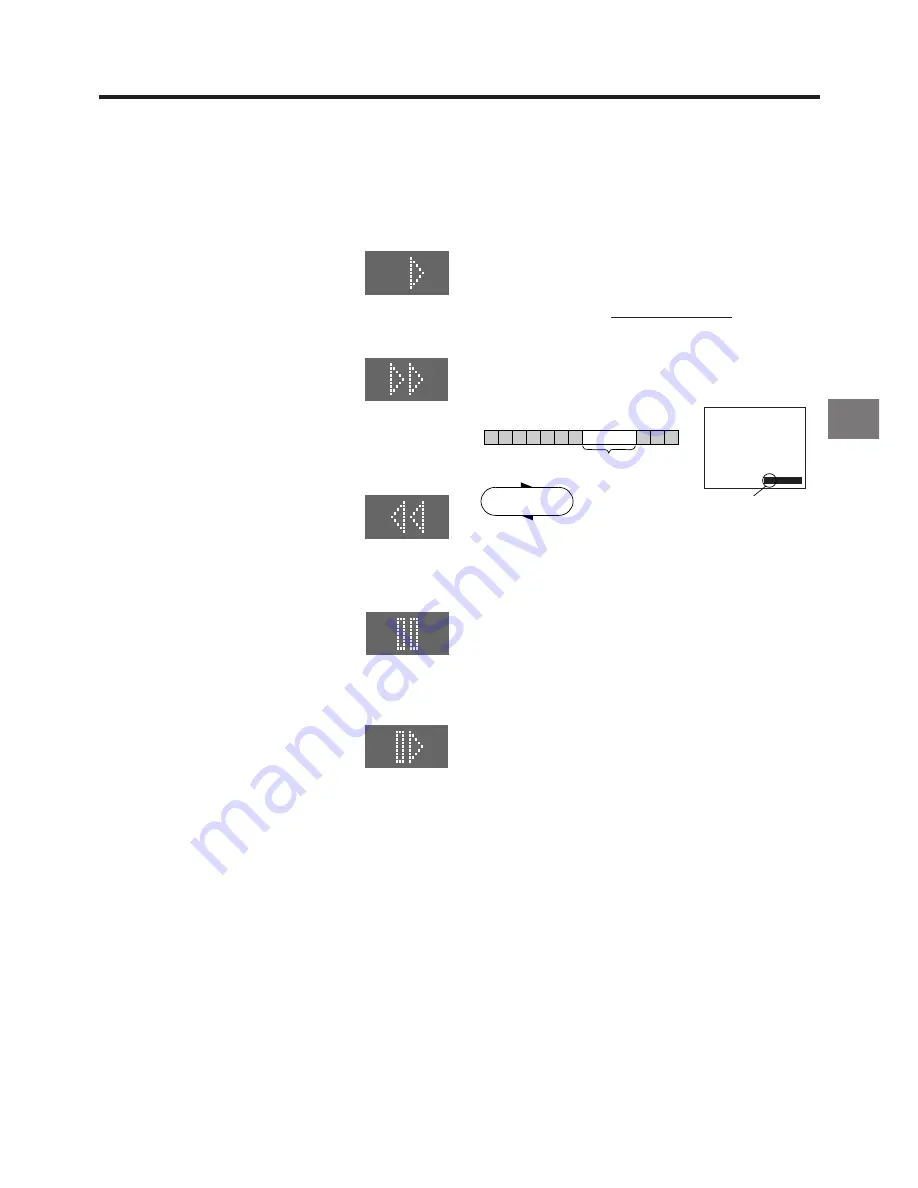
To Play Back a Recorded Part Repeatedly
Press the Play button
I
on the remote control for more than
5 seconds.
The “R” indication appears on the On Screen Display.
≥
If “OSD” is set to “OFF” (See page 29), the “R” indication
will not appear in repeat playback mode.
To Cancel the Repeat Playback Mode:
Press the Stop button
9
.
To rewind the tape a little to view the same
scene again (Replay Function)
If you want to view the same scene again, for example
because you could not catch clearly what a person said,
simply press the REPLAY button
4
, to rewind the tape a little
from its present position and play it back again.
The direction in which the tape is rewound depends on what
playback mode the VCR is in when you press the REPLAY
button
4
.
≥
If you press the REPLAY button
4
when the VCR is in the
stop, rewind, fast-forward, slow playback, or standby (Off)
mode, the Replay function does not work.
During Normal Playback, Cue Playback and Still
Playback:
When you press the REPLAY button
4
, the VCR switches
over to the review playback mode for a few seconds and then
resumes normal playback.
During Review Playback:
When you press the REPLAY button
4
, the VCR briefly
switches over to Cue playback and then plays back at normal
speed in forward direction from the point where the REPLAY
button
4
was pressed.
VCR display
0:00:29
R
Indication of the Repeat
Playback mode
Beginning
of Tape
End of
Recorded Part
Repeat Playback
Control Signal
Interruption
(at least 5 sec.)
PLAY
REWIND


