Panasonic NV-GS1 User Manual Download Page 9

45

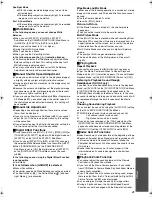
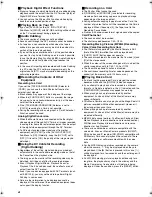
Spotlight Mode

With this mode, recorded images may turn out to be 

extremely dark.

If the recording subject is extremely bright, its recorded 

image may turn out to be whitish.

Surf & Snow Mode

If the recording subject is extremely bright, its recorded 

image may turn out to be whitish.

ª

White Balance

In the following cases, you cannot change White 
Balance:

When you set [EFFECT1] of [DIGITAL EFFECT] 
Sub-Menu on the [CAMERA FUNCTIONS] Main-Menu to 
[GAINUP] or [EFFECT2] to [SEPIA] or to [B/W].

When you set the Zoom to 10

k

 or higher

During Digital Still Picture Mode

When you display a Menu

When you use the Colour Night View

In the following cases, the [

1

] Indication flashes:

The flashing indicates that the previously adjusted White 
Balance setting is still kept. This setting will be kept until 
White Balance is adjusted again.

You may not be able to achieve correct White Balance 
Adjustment manually under weak illumination.

ª

Manual Shutter Speed Adjustment

You may see vertical lines of light in the playback image of 
a brightly shining subject or highly reflective subject.

During normal playback, movement in the images may not 
look smooth.

Because the colour and brightness of the playback image 
may become unstable, avoid recording under fluorescent 
light, mercury light or sodium light.

If you are using either Gain-up Mode 

(

l

24)

 or Programme 

AE Mode 

(

l

21)

, you cannot adjust the shutter speed. If 

the shutter speed was adjusted manually, this setting will 
be cancelled.

ª

Manual Iris Adjustment

Depending on zoom magnification, there are iris values 
that will not be displayed.

If you are using Programme AE Mode

 (

l

21)

, you cannot 

adjust the iris. If the iris is adjusted manually, this setting 
will be cancelled.

If you attempt to adjust the Shutter Speed after setting the 
Iris, the value set for the Iris will be cancelled.

ª

Digital Effect Functions

It is not possible to use [MULTI], [P-IN-P], [WIPE], [MIX] or 
[TRACER] of [EFFECT1] together with the digital modes of 
[EFFECT2] on the [DIGITAL EFFECT] Sub-Menu.

If you have set [EFFECT2] to [B/W] or [SEPIA], changing 
the selected White Balance Mode is not possible.

 (

l

21)

When [PROGRESSIVE] on the [CAMERA SETUP] 
Sub-Menu is set to [ON], the digital modes of [EFFECT1] 
on the [DIGITAL EFFECT] Sub-Menu cannot be used. 

(

l

44)

In the following cases, using the Digital Effect Function 
is not possible.

Card Mode

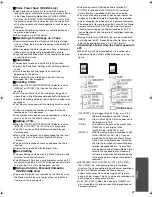
It is as follows when [GAINUP] is selected.

Manual Focus Mode

The shutter speed and White Balance cannot be operated.

The Sports Mode [

5

], the Portrait Mode [

7

] and Low 

Light Mode [

4

] are cancelled.

Wipe Mode and Mix Mode

If either one of the following operations is carried out, stored 
images will be erased, and Wipe and Mix Functions cannot 
be used.

Use the Camera Search Function

Press the [STILL] Button

Picture-in-Picture

If the Movie Camera is turned off, the smaller picture 
disappears. 

Titles cannot be inserted into the smaller picture.

Multi-Picture Mode

If the [MULTI] Button is pressed while self-recording Mirror 
Mode 

(

l

17) 

is used, the still picture is displayed from the 

upper right corner of the screen, but, in reality, the picture 
is recorded from the upper left corner as usual.

Multi-Picture Mode cannot be used in digital still picture 
mode.

The quality of Multi images deteriorates slightly.

The top and bottom of the Multi pictures will be cut off 
slightly.

ª

Playing Back

Repeat Playback

If you continue to press the [

1

] Button for 5 seconds or 

longer, the Movie Camera switches to Repeat Playback 
Mode, and the [R

!

] Indication appears. (To cancel Repeat 

Playback Mode, set the [OFF/ON/MODE] Switch to [OFF].)

Listening to Playback Sound through 
Headphones (NV-GS5 only)

If you want to use the headphones to listen to the playback 
sound, set [AV JACK] on the [AV IN/OUT SETUP] Sub-Menu 
to [OUT/PHONES] and connect the headphones to the 
[PHONES] Socket 

(

l

6) 

on the Movie Camera. In this case, 

no sound (including a warning sound and shutter sound) will 
be reproduced through the built-in speaker of the Movie 
Camera.

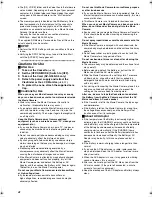
Choosing Sound during Playback 

You can select the sound by using the [AUDIO OUT] setting 
on the [PLAYBACK FUNCTIONS] Sub-Menu.
STEREO:Stereo Sound (main sound and sub sound)
L:

Left channel sound (main sound)

R:

Right channel sound (sub sound)

If you dub a tape recorded at the [12bit] selected as the 
[AUDIO REC] on the [RECORDING SETUP] Sub-Menu,  
playback sound becomes stereo sound regardless of the 
[AUDIO OUT] setting if [12bit AUDIO] is set to [MIX].

ª

Index Search Functions

Index Search may not be possible at the beginning of tape.

Because Photoshot Index Signals are not recorded on still 
pictures recorded in Continuous Photoshot Mode, the 
Photoshot Index Search Function cannot be used for these 
still pictures.

Scene Index Search may not function properly if the 
interval between 2 scene index signals is shorter than 
1 minute.

ª

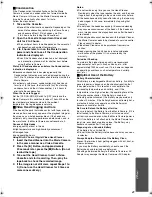
Playback Zoom Function

You cannot adjust the sound volume with the Remote 
Controller in Playback Zoom Mode.

If you turn off the Movie Camera power or if you switch 
from VCR Mode to Camera Mode, Playback Zoom Mode is 
automatically cancelled.

Even if Playback Zoom Functions are being used, images 
that are output from the DV Terminal 

(

l

6)

 or Digital Still 

Picture Terminal 

(

l

32)

 are not enlarged.

As you enlarge an image, the quality of image suffers.

During a Playback Zoom, the Variable Speed Search 
Function cannot be changed with the Remote Controller.

B.book  45 ページ  2002年1月28日 月曜日 午後3時48分

Summary of Contents for NV-GS1

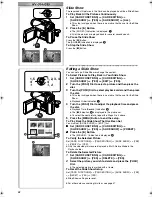
Page 1: ...de please carry out the following procedures To Copy 1 Picture 1 Slide the TAPE CARD CARD MODE Selector to CARD MODE until the PICTURE Indication appears NV GS5 only 2 Display a desired picture 3 Set the TAPE CARD CARD MODE Selector to TAPE 4 Press the PHOTO SHOT Button During the copying the indication 1 appears It takes a few seconds to record a picture to the Tape When recording to tape select ...

Page 2: ... Show Playback Order Indication 1 4 Turn the PUSH Dial to adjust the playback time and press the dial Playback Time Second Indication 2 The Indication 3 is displayed to the picture set To select the next picture repeat the Steps 2 to 4 above 5 Press the MENU Button to end the setup To Play Back the Slide Show That Has Been Set You must set SLIDE SHOW EDIT first 1 1 1 1 Set CARD FUNCTIONS CARD EDIT...

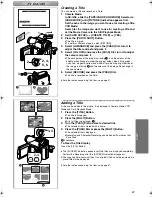
Page 3: ...the original colour black blue green cyan red magenta yellow and white after which the bright portion of the image is missing 2 and the colours of the dark portion change in the above order 6 Select RECORD and press the PUSH Dial The title is recorded on the Card For other notes concerning this item see page 47 Adding a Title A title can be added to the picture It is displayed in Camera Mode VCR M...

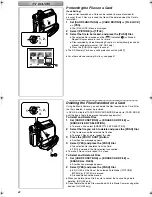
Page 4: ...tored In NV GS5 slide the TAPE CARD CARD MODE Selector to CARD MODE until the type of data to be erased indication appears first To Select and Delete Files 1 Set CARD FUNCTIONS ERASE CARD FILE ERASE FILE BY SELECTION To erase a title select ERASE TITLE BY SELECTION 2 Select the file you wish to delete and press the PUSH Dial The frame around the selected file flashes To erase 2 files or more repea...

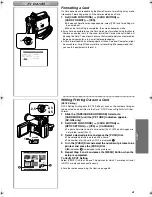
Page 5: ...t might take more time for recording We recommend that you use this equipment to format it Writing Printing Data on a Card DPOF Setting DPOF Setting Printing data DPOF Settings such as the number of images to be printed can be written to the Card DPOF means Digital Print Order Format 1 Slide the TAPE CARD CARD MODE Selector to CARD MODE until the PICTURE Indication appears NV GS5 only 2 Set CARD F...

Page 6: ...arch l 27 R Repeat Playback l 45 2k Variable Speed Search l 26 1 500 When you adjust shutter speed manually this indication appears l 23 SLIDE Slide Show Playback l 38 SLIDE Slide Show Playback Pause l 38 M SLIDE Manual Slide Show Playback l 38 M SLIDE Manual Slide Show Playback Pause l 38 F2 4 When you adjust the F Number manually this indication appears l 23 AWB Automatic White Balance Mode l 21...

Page 7: ...es please check the condition of the Movie Camera Some Indications may not be displayed according to the model 3 Condensation has occurred l 49 Y The accidental erasure prevention slider on the inserted Cassette is open that is set to SAVE You are about to do audio dubbing on the unrecorded blank portion of the tape No Cassette is inserted l 10 6 The Battery is low Recharge it l 9 0 The built in b...

Page 8: ...r When the shutter speed is 1 750 s or faster When EFFECT1 is set to WIPE MIX STROBE GAINUP TRACER MOSAIC MIRROR When the pictures are displayed on a Multi screen ªZoom In Out Functions When you are zooming on a faraway subject a sharper focus is achieved if the recording subject is 1 2 metres or more away from the Movie Camera ªImage Stabilizer Function The Image Stabilizer Function does not oper...

Page 9: ...of the following operations is carried out stored images will be erased and Wipe and Mix Functions cannot be used Use the Camera Search Function Press the STILL Button Picture in Picture If the Movie Camera is turned off the smaller picture disappears Titles cannot be inserted into the smaller picture Multi Picture Mode If the MULTI Button is pressed while self recording Mirror Mode l 17 is used t...

Page 10: ...be able to perform Digital Dubbing in some cases Date or other information to be displayed cannot be displayed if the software of the connected equipment does not support the display function ªRecording on a Card The Shutter Effect cannot be used If NORMAL or ECONOMY is selected for recording mosaic pattern noise may appear on a playback image depending on the image content During automatic copyin...

Page 11: ... Movie Camera The SD Memory Card has a write protection switch on it If the switch is moved to the LOCK side you cannot write to or format the Card If it is moved back you can ªUsing a Card in a Personal Computer NV GS4 GS5 only To erase pictures that you recorded on the Card by using the Movie Camera be sure to erase them on the Movie Camera not on the computer Using the optional DV Editing Softw...

Page 12: ...ed images or sounds may be adversely affected Do not use this Movie Camera for surveillance purpose or other business use If you use the Movie Camera for a long period of time the internal temperature increases and consequently this may cause malfunction This Movie Camera is not intended for business use When you use your Movie Camera on a beach or similar place do not let sand or fine dust get in...

Page 13: ...the image is not still clear repeat Steps 1 to 3 Do not use the Head Cleaner for 3 times or more consecutively Notes Do not rewind every time you use the Head Cleaner Rewind only when the tape reaches the end and then use it again from the beginning in the same manner as before If the heads become dirty soon after cleaning the tape may be damaged In this case immediately stop using that Cassette D...

Page 14: ...orded content may be damaged After use be sure to remove the Card from the Movie Camera After usage store the supplied SD Memory Card in the enclosed bag Do not touch the terminals on the back of the Card with your fingers Do not allow dirt dust or water to enter it ªLCD Monitor Viewfinder Lens Hood LCD Monitor In a place with drastic temperature changes condensation may form on the LCD Monitor Wi...

Page 15: ...ndication does not match the actual remaining tape time 3 1 If scenes of less than 15 seconds are continuously recorded the remaining tape time cannot be displayed correctly 3 2 In some cases the Remaining Tape Time Indication may show remaining tape time that is 2 to 3 minutes shorter than the actual remaining tape time Playback Pictures 1 Pictures cannot be played back even when the 1 Button is ...

Page 16: ...rrectly 4 Recording a subject that is surrounded by objects with glossy surfaces or by highly reflective objects Because the Movie Camera focuses on the objects with glossy surfaces or on highly reflective objects the recording subject may become blurry 5 Recording a fast moving subject Because the focus lens inside moves mechanically it cannot keep up with the fast moving subject 6 Recording a su...

Page 17: ...316 mV 600 ohm Video Input Level NV GS5 1 0 Vp p 75 ohm S Video Input Level NV GS5 Y Input 1 0 Vp p 75 ohm C Input 0 3 Vp p 75 ohm Audio Input Level Line NV GS5 316 mV 10 kohm or more Mic Input Mic sensitivity 50 dB 0 dB 1 V Pa 1 kHz Stereo mini jack Digital Still Picture Digital Still Picture Output Control Signal Input Output Transfer rate max 115 kbps USB Mini SystemD NV GS4 GS5 Card reader wri...

Page 18: ...ose up 18 Manual Focus 23 Memory Stop 52 Menu Screen 12 Microphone 18 Mirror Mode 24 Mix Mode 24 Mosaic Mode 24 Moving Picture MPEG4 Recording 35 ªN Negative Mode 24 ªP Photoshot 18 33 Picture Size 37 Playback Digital Effects 29 Playback Zoom 28 Portrait Mode 21 Programme AE 21 ªQ Quick Start 20 ªR Recording Check 17 Recording Pause Mode 17 Recording Speed 16 Remaining Tape Time 42 Remote Controll...

Page 19: ...55 ...

Page 20: ...B VQT9670 F0202To0 5900 A C Matsushita Electric Industrial Co Ltd Web site http www panasonic co jp global ...

Reviews: