background image

- 88 -

Using the [Rec] menu

[Digital Zoom]

 •For [Rec] menu setting procedures (→39)

Zoom 4 times further than Optical/Extended optical zoom. (Note that enlarging will 

decrease picture quality with Digital Zoom.)


Recording mode:                   


Settings: [ON] / [OFF]


This is fixed to [ON] when [Macro Zoom] is set.


When Digital Zoom is used simultaneously with i.Zoom, you can only increase the 

zoom ratio up to 2 times.

[Burst]

 •For [Rec] menu setting procedures (→39)

For details (→72).

[Color Mode]

 •For [Rec] menu setting procedures (→39)

Set color effects.


Recording mode:                   


Settings:  [STANDARD] / [VIVID]

1

 (sharper)

 / [B&W] / [SEPIA] / [Happy]

2


1


Except [Intelligent Auto] Mode

2

 [Intelligent Auto] Mode only

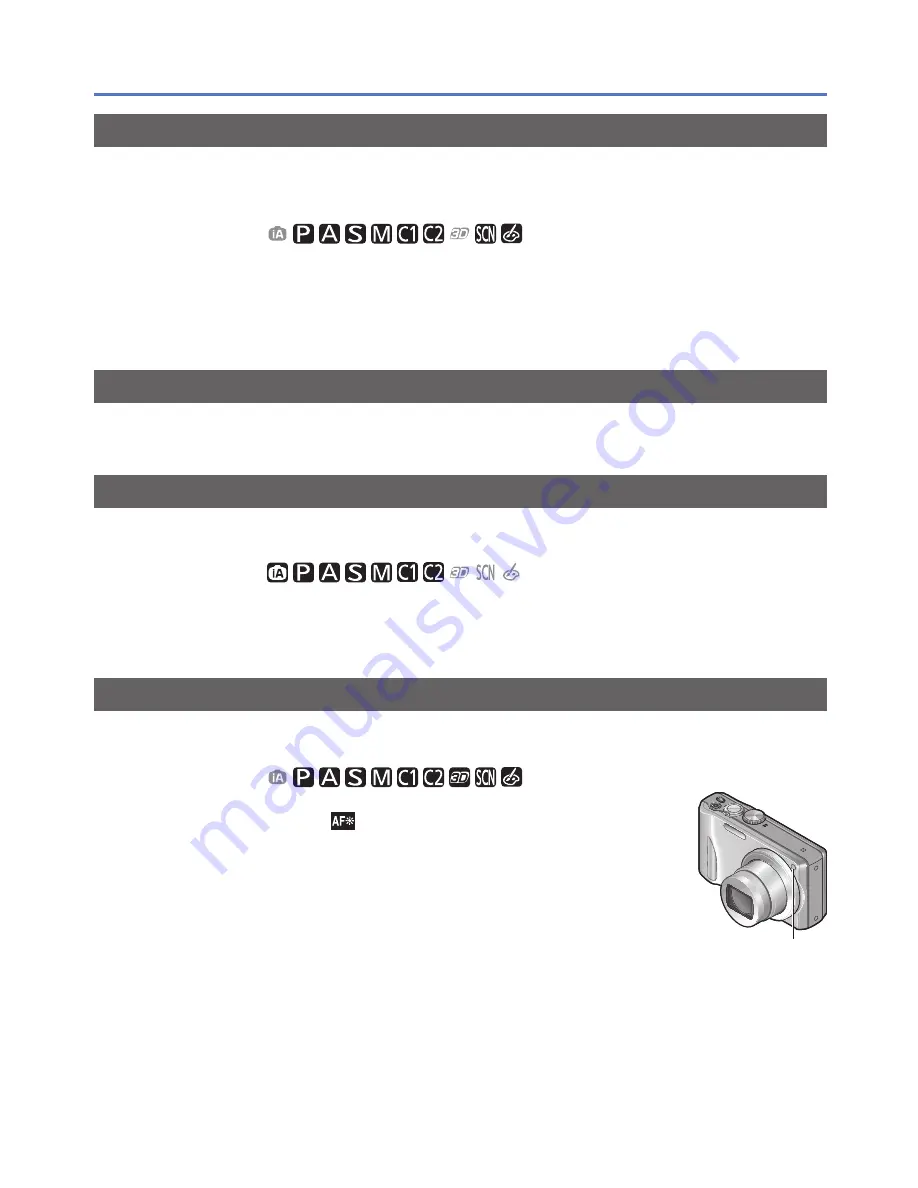
[AF Assist Lamp]

 •For [Rec] menu setting procedures (→39)

Illuminates lamp when dark to facilitate focus alignment.


Recording mode:                   


Settings: [ON]   :

  Lamp illuminated with halfway press of shutter 

button (  and larger AF area displayed)

AF Assist Lamp

[OFF] :

  Lamp off (taking pictures of animals in the dark, 

etc.)


The AF Assist Lamp has an effective distance of 1.5 m (4.9 feet).

 •Do not block the lamp with your fingers or look at it from close 

range.


The setting is fixed to [OFF] in the following Scene Modes: 

[Scenery] [Night Scenery] [Handheld Night Shot] [Sunset] [Glass 

Through] [Underwater] 

Summary of Contents for Lumix DMC-ZS15

Page 1: ...VQT4B46 1 M0112KZ1 Owner s Manual for advanced features Digital Camera Model No DMC ZS15 Before connecting operating or adjusting this product please read the instructions completely ...

Page 2: ...de 49 Before use Before use 5 Standard Accessories 7 Names and Functions of Main Parts 8 Cursor button 9 Preparations Charging battery 10 Inserting the battery 11 Charging the battery 12 Remaining battery 13 Guidelines for number of recordable pictures and operating time 14 Inserting and removing the card optional 15 Picture save destination cards and built in memory 16 Memory capacity 17 Recordin...

Page 3: ... Night Shot 66 HDR 67 Food 67 Baby 67 Pet 67 Sunset 68 High Sens 68 Glass Through 68 Underwater 68 Taking 3D pictures 3D Photo Mode 69 Register your own settings and record Custom Mode 70 Cust Set Mem 70 Custom 71 Burst function 72 Recording with the Face Recognition function Face Recog 74 Registering face pictures 75 Editing or deleting information about registered persons 76 Useful features for ...

Page 4: ... Face Rec Edit 108 Copy 109 Connecting with other devices Viewing on TV screen 110 VIERA Link HDMI HDAVI Control 112 Viewing 3D still pictures 114 Keep the recorded still pictures and motion pictures 116 Copy by inserting the SD card into the recorder 116 Dubbing playback pictures via AV cables optional 116 Use PHOTOfunSTUDIO to copy to your computer 117 Using with your PC 118 Copying still pictur...

Page 5: ... into contact with the camera Avoid using the camera under the following conditions which present a risk that sand water or foreign material may enter the camera through the lens or openings around buttons Be especially careful because these conditions may damage the camera and such damage may not be repairable In extremely dusty or sandy places In the rain or by the shore where the camera may be ...

Page 6: ...for missed shots We cannot compensate for missed shots if technical problems with the camera or card prevent recording Carefully observe copyright laws Unauthorized use of recordings which contain works with copyright for purposes other than personal use is prohibited under copyright law Recording of certain material may be restricted even for the purpose of personal use Also refer to Usage cautio...

Page 7: ...Card and SDXC Memory Card are indicated as card in the text Please dispose of all packaging appropriately Keep small parts in a safe place out of the reach of children Optional accessories Cards are optional You can record or play back pictures on the built in memory when you are not using a card 16 If any accessories are lost customers in the USA and Puerto Rico should contact Panasonic s parts d...

Page 8: ...dicator 56 AF Assist Lamp 88 Lens barrel Card Battery door 11 15 Release lever 11 15 Zoom lever Operate this when zooming in on a distant subject to record it larger Motion picture button Record motion pictures Camera ON OFF switch Use this to turn the camera s power on and off Shutter button Use this to focus and record still pictures Lens Speaker 43 Tripod receptacle 139 Microphone 21 ...

Page 9: ...In the recording mode Quick menu is displayed In the playback mode Pictures are deleted During menu operations The previous screen is restored REC PLAY switch 18 Use this to select the recording mode or playback mode The illustrations and screens in this manual may differ from the actual product MENU SET Use this to display the menus enter the settings etc Left cursor button Self timer Down cursor...

Page 10: ... made About batteries that you can use with this unit It has been found that counterfeit battery packs which look very similar to the genuine products are made available to purchase in some markets Some of these battery packs are not adequately protected with internal protection to meet the requirements of appropriate safety standards There is a possibility that these battery packs may lead to fir...

Page 11: ...ry compartment in the direction of the arrow Always use genuine Panasonic batteries If you use other batteries we cannot guarantee the quality of this product Remove battery from camera after use Keep the battery in a plastic bag making sure that it is kept away from metallic objects such as clips when carrying or storing the battery To remove the battery turn the camera off and wait until the LUM...

Page 12: ...ding on the computer specifications If the computer enters hibernation mode during charging charging may be stopped If a notebook computer that is not connected to an electrical outlet is connected to the camera the battery of the notebook computer will be depleted Do not leave the camera and notebook connected for a long period of time Always connect the USB connection cable to the USB connector ...

Page 13: ... so may cause malfunction of the camera Do not use a USB extension cable The AC adaptor supplied and the USB connection cable supplied are dedicated accessories of this camera Do not use them for other devices If there is any trouble related to the electrical outlet i e power failure charging may not complete properly Disconnect the USB connection cable supplied and reconnect it to the camera If t...

Page 14: ...lever from Tele to Wide or vice versa in every recording Turning the camera off every 10 recordings and leaving it until the temperature of the battery decreases Number reduced if intervals are longer e g to approx one quarter for 2 minute intervals under the above conditions Recording motion pictures Rec Quality AVCHD FSH MP4 FHD Available recording time 1 Approx 85 min Approx 85 min Actual avail...

Page 15: ... it clicks Do not touch terminal To remove card Press the center of the card Keep the Memory Card out of reach of children to prevent swallowing To remove the card turn the camera off and wait until the LUMIX indicator on the LCD monitor goes off Failure to wait may cause the camera to malfunction and may damage the card or recorded data Close the card battery door Slide to the LOCK position OPEN ...

Page 16: ...built in memory 109 The access time for the built in memory may be longer than the access time for a card Compatible memory cards optional The following SD standard based cards Panasonic brand recommended Type of Card Capacity Notes SD Memory Cards 8 MB 2 GB Using a card of SD speed Class 4 or above is recommended for recording motion pictures Can be used with devices compatible with the respectiv...

Page 17: ...the recording picture capacity and the recording time capacity of the card may be reduced 100 Recording picture capacity still pictures Picture Size Built in memory 2 GB 32 GB 64 GB 12M 15 380 6260 12670 5M 25 650 10620 21490 0 3M 400 10050 162960 247150 When the number of recordable pictures exceeds 99 999 99999 is displayed Recording time capacity motion pictures When the AVCHD recording mode is...

Page 18: ...Please set the clock message appears This message does not appear in playback mode Press MENU SET Press to select the items year month day hour minute display order or time display format and press to set To cancel Press button Press MENU SET to set Press MENU SET To return to the previous screen press button The clock is not set when the camera is shipped Set REC PLAY switch to before turning on ...

Page 19: ...talled in the camera for 24 hours beforehand Select Clock Set from the Setup menu or Rec menu 39 Set the date and time Perform steps 18 If the clock is not set the correct date cannot be printed when you order a photo studio to print the picture or when you stamp the date on the pictures with Date Stamp or Text Stamp If the clock is set the correct date can be printed even if the date is not displ...

Page 20: ...r own settings 22 Aperture Priority Mode Determine aperture then record pictures 59 Shutter Priority Mode Determine shutter speed then record pictures 59 Manual Exposure Mode Determine aperture and shutter speed then record pictures 60 Custom Mode Record pictures using pre registered settings 70 3D Photo Mode Record 3D still pictures 69 Scene Mode Take pictures according to scene 63 Creative Contr...

Page 21: ...strap AF Assist Lamp To avoid camera shake hold it with both hands keeping your arms close to your body while standing with your feet slightly apart Do not touch the lens Do not block the microphone when recording motion pictures Do not block the flash or the lamp Do not look at it from close range Make sure that the camera does not move at the moment the shutter button is pressed We recommend usi...

Page 22: ...r speed Using the Rec menu to change settings and set up your own recording environment Slide the REC PLAY switch to Set to Program AE Mode Take a picture Press halfway press lightly to focus Press fully press the button all the way to record Changing recording information display Each time you press the DISP button the display will be switched as follows Recording information Number of recordable...

Page 23: ... objects or objects with no color contrast Taking pictures through glass or near objects emitting light In dark or with significant jitter When too close to object or when taking pictures of both distant and close objects together in the same picture How to adjust focus The focus display flashes and beep sounds when focus is not aligned Use the focus range displayed in red as a reference Even if t...

Page 24: ...y from information such as face movement brightness and distance just by pointing the camera at the subject meaning that clear pictures can be taken without the need to make settings manually Slide the REC PLAY switch to About flash Press to select or When is selected the optimum flash is selected automatically depending on conditions 52 When or is selected the red eye reduction function is activa...

Page 25: ...Detection is activated and the focus and exposure are adjusted for the recognized faces About Backlight Compensation Backlight is a condition where a light shines from behind a subject When there is a backlight a subject appears darker and the camera automatically corrects the exposure by increasing the brightness of an entire image Backlight compensation is automatically activated in Intelligent ...

Page 26: ...several still pictures taken with different exposures into a single properly exposed picture with rich gradation Settings Press MENU SET Press to select Rec menu and press MENU SET Press to select iHDR and press MENU SET Press to select ON and press MENU SET Recording Press the shutter button halfway Press the shutter button fully This function is automatically activated only when is displayed on ...

Page 27: ... AWB Sensitivity AF Mode Face Detection Quick AF ON i Exposure STANDARD Red Eye Removal ON 23 area focusing when face cannot be recognized The following functions cannot be used Histogram Exposure Auto Bracket WB Adjust Digital Zoom Min Shtr Speed AF Tracking This function enables the camera to continue to focus on the subject and adjust the exposure of the subject even when the subject is moving ...

Page 28: ... picture button after pressing it You can also use zoom while recording motion pictures The zoom speed will be slower than normal When using zoom while recording motion pictures it may take some time to focus Still pictures can be taken during motion picture recording 31 Press the motion picture button again to end recording You can record motion pictures with audio monaural Slide the REC PLAY swi...

Page 29: ...g videos to the Internet You can record a motion picture to the built in memory only in MP4 using the VGA setting About the compatibility of the recorded motion pictures Motion pictures recorded in AVCHD or MP4 may be played back with poor picture or sound quality or playback may not be possible even when played back with equipment compatible with these formats Also the recording information may n...

Page 30: ...o save all important data to your computer or other media before formatting as all data saved to the card will be erased The Optical Image Stabilizer functions regardless of the settings before a motion picture is recorded The following functions are not available AF tracking Extended optical zoom flash Face Recog Rotate Disp for pictures taken vertically For certain memory cards recording may end...

Page 31: ...cording When the burst setting is set to or still pictures are automatically recorded using the setting Even at the or setting the focus is fixed at the first picture When you press the shutter button halfway during motion picture recording the camera will automatically refocus on a subject This refocus movement is recorded even during motion picture recording When priority is to be given to the m...

Page 32: ...age file format Files that are not DCF compliant cannot be played back Use the cursor button to select a picture that you want to play back Hold down to quickly scroll forwards backwards View pictures Folder File number Picture number Total pictures When a card is in the camera pictures are played back from the card and without a card pictures are played back from the built in memory Slide the REC...

Page 33: ...ality setting Operations during motion picture playback Pause play Stop Fast rewind 2 steps Single frame rewind while paused Fast forward 2 steps Single frame forward while paused If is pressed during fast forward or rewind it will return to normal playback speed Volume can be adjusted with the zoom lever It may not be possible to properly play back the motion pictures recorded using other cameras...

Page 34: ...playback Press MENU SET A confirmation screen is displayed Select Yes with cursor button and then press MENU SET Rec Quality of the original motion picture Picture Size Aspect Ratio FHD HD FSH SH 2M 16 9 VGA 0 3M 4 3 The picture quality becomes slightly lower because of the Rec Quality setting of the original motion picture It may not be possible to capture still pictures from motion pictures that...

Page 35: ...t be used during motion picture playback Viewing a list of pictures Multi Playback Turn to W side Picture no Total no Motion pictures Panorama pictures Turn the zoom lever further toward the W side and you can switch the display methods in the following order 12 picture screen 30 picture screen Calendar playback Turn the lever to the T side to return When you select a picture using the cursor butt...

Page 36: ...e using the cursor button and press MENU SET the display method changes to the 12 picture screen Only months when pictures were taken are shown on the calendar screen Pictures taken without clock settings are displayed with the date January 1st 2012 Pictures taken with destination settings made in World Time are displayed in the calendar screen using the appropriate date for the destination s time...

Page 37: ...cted pictures Card switch is in LOCK position Pictures not of DCF standard 32 Press to delete displayed picture A confirmation screen is displayed Select Yes with cursor button and then press MENU SET Pictures will be deleted from the card if the card is inserted or from the built in memory if the card is not inserted Deleted pictures cannot be recovered ...

Page 38: ...Delete All and press MENU SET Delete Multi Use cursor button to select picture and press DISP button To cancel Press DISP button again To execute Press MENU SET Picture selected You can select All Delete Except Favorite in Delete All if there are pictures that have been set as Favorite 106 A confirmation screen is displayed Select Yes with cursor button and then press MENU SET May take time depend...

Page 39: ...r to the procedure below for an example on how to operate the menus Example Changing AF Mode in the Rec menu in Program AE Mode Press MENU SET The menu selection screen is displayed Select Rec menu and press MENU SET Press to select AF Mode and press MENU SET Pages The pages can also be selected with the zoom lever Menu description Menu items Operation guide Press to select a setting and then pres...

Page 40: ...ient to use 42 Displays settings for ease of use such as adjusting the clock and changing the beep sounds Playback Mode menu REC PLAY switch Viewing recorded pictures 95 Choose Playback Mode to see Slide Shows or to narrow down the pictures for display etc Playback menu REC PLAY switch Using your pictures 100 Enables you to specify picture protection resizing and other settings for pictures you ha...

Page 41: ...ecording you can easily call some of the menu items and set them Press Q MENU button Press to select a menu item Press to select the settings Press MENU SET The menu items and setting items that are displayed differ depending on the recording mode ...

Page 42: ...er of days elapsed in your travels 77 Travel Setup SET Register departure and return dates OFF Location SET Input name of location OFF Beep Change or mute the beep shutter sounds Beep Level Low High Mute Beep Tone Change beep tone Shutter Vol Low High Mute Shutter Tone Change shutter tone Clock Set Economy and Auto Review are important for clock setting and battery life Please check these before u...

Page 43: ...Power LCD The brightness is adjusted automatically depending on how bright it is around the camera Power LCD Makes screen brighter than normal for outdoor use High Angle Makes screen easier to see when taking pictures from high positions becomes harder to see from the front OFF Cannot select Auto Power LCD and High Angle in playback mode Power LCD returns to ordinary brightness if there is no oper...

Page 44: ...ample Dark OK Bright Histogram from time of recording is different to Histogram in playback and displayed in orange when recording with flash or in dark locations Also Histogram may differ from Histograms made with image editing software Histogram is not displayed during a performance of Intelligent Auto Mode or Playback Zoom Video Rec Area Enables verification of the recordable area for a motion ...

Page 45: ...display during recording to minimize battery consumption except for the Digital Zoom area Note however that there is no effect on the recorded picture The setting in LCD Mode is prioritized over the setting in LCD Power Save for the brightness of the LCD monitor Auto Review Automatically display still pictures immediately after taking them 1SEC 2SEC HOLD Auto review screen remains until a button o...

Page 46: ...s Reset setup parameters Information registered in Face Recog is reset if recording settings are reset Resetting the setup parameters will also reset the following Age in years months and name settings in Baby and Pet Scene Modes Folder numbers and clock settings will not be reset Camera movement may be audible as the lens function is reset This is not a fault USB Mode Select communication method ...

Page 47: ... Operations may be performed via the remote control of the VIERA Link compatible device Not all operations will be available Operability of the camera s own buttons will be limited OFF Operations must be performed via the camera s own buttons 3D Playback Set how 3D still picture is output 3D 2D If you want to play back a picture in 2D conventional picture on a 3D television set to 2D This item of ...

Page 48: ... In Memory Error or Memory Card Error appears or when formatting the built in memory or card When a card built in memory is formatted the data cannot be restored Check the content of the card built in memory carefully before formatting This requires a sufficiently charged battery When formatting the built in memory remove the cards Only inserted card will be formatted if present built in memory wi...

Page 49: ...er is shown on graph estimate Extent of jitter Extent of jitter after correction During demo screen display the Optical Image Stabilizer switches ON and OFF every time MENU SET is pressed Cannot display during playback mode Auto Demo View introductory Slide Show ON OFF Auto Demo cannot be displayed on external devices such as TVs For details about the setting procedure in the Setup menu 39 ...

Page 50: ...lens barrel during zooming The zoom ratio and the zoom bar displayed on the screen are estimates The camera may make a rattling noise and vibrate when the zoom lever is operated this is not a fault You can adjust the area of a picture to be taken using zoom Zoom In Out Capture a wider area wide angle Enlarge the subject telephoto When Extended optical zoom is set Optical Zoom range Zoom bar Digita...

Page 51: ...gy to increase the zoom ratio up to 2 times higher than the original zoom ratio with limited deterioration of picture quality 87 When i Resolution is set to i ZOOM Intelligent Resolution technology is applied to the picture The i ZOOM functions in the following cases Intelligent Auto Mode except when Motion Deblur is ON Scene Modes Portrait Soft Skin Scenery Sports Night Portrait Night Scenery Foo...

Page 52: ...es where flash use is prohibited 1 Only in the mode 2 Two flashes will be emitted Do not move until after the second flash Interval between flashes varies according to brightness of subject If Red Eye Removal on the Rec menu is ON the appears with the flash icon red eye is automatically detected and still picture data is corrected Only when AF Mode is Face Detection The available flash range when ...

Page 53: ...ient neither the proper exposure nor White Balance is achieved The flash effect may not be sufficient in the following cases Slow shutter speed Flash Burst is set Flash charging may take time if battery is low or if using flash repeatedly Available types in each mode Available Not available Default setting Scene Mode 1 1 Set to or depending on the subject and brightness The flash cannot be used wh...

Page 54: ...ven larger images of the subject setting to Macro Zoom enables the subject to appear even larger than when using AF Macro Press to display Macro Mode Use cursor button to select Macro Zoom and press MENU SET Adjust the Digital Zoom magnification with the zoom lever Return Enlarge The zoom position is fixed at the Wide end Focus range is 3 cm 0 098 feet Digital Zoom magnification 1 x to 3 x In Macr...

Page 55: ...edges of the picture Focus range When a subject is too close to the camera the picture may not be properly focused The shortest recording distance differs depending on the zoom ratio and the setting in macro recording mode Shortest recording distance Zoom Macro Mode OFF Max W 3 cm 0 098 feet 50 cm 1 6 feet Max T 1 m 3 3 feet 2 m 6 6 feet The shortest recording distance is the distance from the len...

Page 56: ... press MENU SET Take a picture Press the shutter button fully to start recording after the preset time Self timer indicator Flashes for set duration To cancel while in operation Press MENU SET Focus will be automatically adjusted immediately before recording if the shutter button is pressed fully After Self timer indicator stops flashing it may then be lit for AF Assist Lamp This function cannot b...

Page 57: ...icture is too dark adjust the exposure to the direction If the picture is too bright adjust the exposure to the direction After exposure adjustment the adjustment value for example is displayed in the bottom left corner of the screen Taking pictures with Exposure Compensation Depending on the brightness this may not be possible in some cases The Exposure Compensation value you set is retained even...

Page 58: ...pictures in continuous succession while exposure is changed automatically After exposure adjustment the adjustment value is set as the standard Recording mode Press several times to display Auto Bracket Use cursor button to select a value and press MENU SET Value displayed after Exposure Compensation set The first still picture is recorded without compensation the second still picture is recorded ...

Page 59: ... the picture shows up clearly from the position of the camera to the background When the aperture value is reduced the range of depth in focus shrinks and the background can get blurry Press EXPOSURE button Shutter Priority Mode When recording you can control the shutter speed to meet your recording purposes Aperture is automatically adjusted to be appropriate for the set shutter speed Set mode di...

Page 60: ...tter speed Press EXPOSURE button Manual exposure assist estimate If the shutter button is pressed halfway manual exposure assist is displayed Shows pictures with standard brightness Shows brighter pictures For standard brightness either use a faster shutter speed or increase aperture value Shows darker pictures For standard brightness either use a slower shutter speed or reduce aperture value Reco...

Page 61: ...ize the bright portions Sepia This picture effect creates a picture with sepia tone Dynamic Monochrome This picture effect creates a monochromatic picture with a higher contrast and more dramatic atmosphere High Dynamic This picture effect creates a picture with a well balanced brightness for the entire picture from dark areas to bright areas Toy Effect This picture effect creates a picture that r...

Page 62: ...longer than actual time needed for recording When the recording mode is changed be sure to check the recordable time When you take a picture using a large picture size setting the screen will become dark for a certain period of time after the picture is taken However this occurs due to signal processing and is not a defect Notes on the Soft Focus setting The recording screen is displayed with a sl...

Page 63: ...scene and press MENU SET Recording motion pictures in Records a motion picture at the optimum settings for the selected scene Some scenes are switched to the following scenes Selected scene Scenes for motion picture Baby Portrait motion picture Night Portrait Night Scenery Handheld Night Shot Low light motion picture Sports HDR Pet Normal motion picture Selecting a Scene Mode inappropriate for the...

Page 64: ...a single panorama picture by stitching multiple still pictures taken in rapid succession Use cursor button to select the recording direction and press MENU SET to set Check the recording direction and press MENU SET Special panorama guidelines will be displayed during recording Press the shutter button halfway to focus Press the shutter button fully and pan the camera in a small circular motion in...

Page 65: ...s per horizontal line and vertical line of a Panorama picture varies depending on the recording direction and number of stitched pictures The maximum number of recording pixels is as follows Taking pictures in landscape orientation Approx 8000 1080 Taking pictures in portrait orientation Approx 1440 8000 Panorama pictures may not be created or pictures may not be recorded properly when taking pict...

Page 66: ...seconds to process the signal This is not a malfunction Night Scenery Takes clear pictures of night scenes Tips Tripod self timer recommended Notes Shutter speed may slow down up to 8 seconds After recording the shutter may stay closed up to 8 seconds to process the signal This is not a malfunction Handheld Night Shot Takes clear still pictures of night scenes with less jitter and less noise by co...

Page 67: ... pictures under certain recording conditions Food Takes natural looking pictures of food Baby Uses weak flash to bring out skin colors To record age and name Baby1 and Baby2 can be set separately Select Age or Name with cursor button press MENU SET select SET and press MENU SET Set the birthday and name Age Set birthday with cursor button and press MENU SET Name See Entering Text 79 Use cursor but...

Page 68: ...lass instead of a subject The color of pictures may appear unnatural due to the color of the glass You may be able to reproduce the appropriate color by adjusting the White Balance Underwater Takes pictures with natural colors suitable for an underwater scene Tips For fast moving subjects align with the AF area and press AF Lock Press again to release AF Lock focus fixed AF area If the zoom is ope...

Page 69: ...s and the exposure press the shutter button fully and then slide the camera Hold the camera so that the subject is slightly to the right of the center on the display at the start of the recording This makes it easier to position the subject in the center of the recorded picture 3D still pictures cannot be recorded by holding this camera vertically 3D still pictures are recorded in MPO format 3D Th...

Page 70: ...press MENU SET A confirmation screen is displayed Select Yes with cursor button and then press MENU SET The custom settings registered in C1 can be used with the of the mode dial It will be convenient if the custom setting used often is registered since it can be used by just setting the mode dial The custom settings registered in C2 1 C2 2 or C2 3 can be selected in the of the mode dial Up to 3 c...

Page 71: ...ettings When changing the menu settings Even if the menu settings are changed temporarily when C1 C2 1 C2 2 or C2 3 is selected for using the custom set the currently registered settings will remain unchanged To change the currently registered settings overwrite the registered data using Cust Set Mem 70 on the Setup menu Changing from one custom setting to another custom setting Custom menu To use...

Page 72: ...perating during motion picture recording the focus is fixed to the first picture The burst speed may be reduced under certain recording conditions 100 Approx 5 pictures sec Approx 10 pictures sec Focus exposure and White Balance are fixed in the first picture 4 40 pictures sec Focus exposure and White Balance are fixed in the first picture Note on the picture size setting 73 40 60 pictures sec Foc...

Page 73: ... the or setting may be distorted if the subjects were moving or the camera was moved Auto Bracket is released The flash is set to Forced Flash Off However when Flash Burst is selected the flash is fixed to Forced Flash On Settings will be stored even if power is turned off The burst function cannot be used in the following cases Creative Control Mode Toy Effect Miniature Effect Soft Focus Scene Mo...

Page 74: ...s performed recording information relating to Face Recognition is put only on the first picture If you press the shutter button halfway then point the camera at a different subject and record recording information for a different person may be put on the picture Face Recognition does not work in the following cases Creative Control Mode Miniature Effect Soft Focus Scene Modes Panorama Shot Night S...

Page 75: ...t No Faces of subjects other than people e g pets cannot be registered When DISP button is pressed an explanation is displayed Use cursor button to select the item for editing and press MENU SET Name Select SET with cursor button and then press MENU SET Enter the name Entering text 79 Age Set the birth date Select SET with cursor button and then press MENU SET Use to select year month and day set ...

Page 76: ...ersons Information about registered people can be edited or deleted Select the face picture to be edited or deleted in step 75 and press MENU SET Use cursor button to select the item and press MENU SET Info Edit Edit name or other registered information 75 Priority Set priority order for focus and exposure Select the registration order with cursor button and then press MENU SET Delete Delete infor...

Page 77: ...on Select Location in step above Use cursor button to select SET and press MENU SET Enter your location Entering text 79 The travel date is calculated from the set departure date and the date set in the camera s clock When destination is set in World Time days elapsed are calculated based on local destination time When Travel Setup is set to OFF the number of days elapsed is not recorded It is not...

Page 78: ...se cursor button to select area and press MENU SET City area name Difference with home time Current time at selected destination When Destination has been selected To set summer time Press in step Press again to release the setting When summer time is set the current time is advanced by 1 hour If the setting is canceled the time automatically returns to the current time If you cannot find your des...

Page 79: ...ted at the cursor position To change the character type Select and press MENU SET Editing text Use cursor button to move the cursor to text to edit You can also use the zoom lever to reposition the cursor Use cursor button to select Delete and then press MENU SET Use cursor button to select the correct text and then press MENU SET When you are finished entering text use cursor button to select Set...

Page 80: ...pect Ratio 12 M 8 M 5 M 3 M 2 M 0 3 M 4000 3000 3264 2448 2560 1920 2048 1536 1600 1200 640 480 Picture Size Aspect Ratio 10 5 M 7 M 4 5 M 2 5 M 0 3 M 4000 2672 3264 2176 2560 1712 2048 1360 640 424 Picture Size Aspect Ratio 9 M 6 M 3 5 M 2 M 0 2 M 4000 2248 3264 1840 2560 1440 1920 1080 640 360 Picture Size Aspect Ratio 9 M 6 M 3 5 M 2 5 M 0 2 M 2992 2992 2448 2448 1920 1920 1536 1536 480 480 Thi...

Page 81: ...c menu setting procedures 39 Set ISO Sensitivity sensitivity to lighting manually We recommend higher settings to take clear pictures in darker locations Recording mode Settings AUTO Intelligent ISO 100 200 400 800 1600 3200 Setting guide Sensitivity 100 3200 Location recommended Bright outdoors Dark Shutter speed Slow Fast Interference Low High Subject blur High Low AUTO is automatically set in a...

Page 82: ... lighting type so use AWB or White Balance setting is fixed to AWB in the following cases Scene Modes Scenery Night Portrait Night Scenery Handheld Night Shot Food Sunset Underwater Even if the camera s power is OFF the set White Balance is remembered If the Scene Mode is changed the white balance setting returns automatically to AWB White Balance fine adjustment excluding AWB White Balance settin...

Page 83: ...s OFF the set White Balance is remembered It may not be possible to set the correct White Balance if subjects are too bright or too dark In this case adjust the brightness and try to set the White Balance again AWB operational range 10000K 9000K 8000K 7000K 6000K 5000K 4000K 3000K 2000K Cloudy sky rain Shade Incandescent lighting Sunset sunrise Candlelight Sunlight White fluorescent lighting Blue ...

Page 84: ...ces within the yellow AF area are also focused Automatically locking the focus on a moving subject AF Tracking Align the AF Tracking frame with the subject and then press AF Tracking frame When the subject is recognized the AF Tracking frame changes from white to yellow and the subject is automatically kept in focus If AF Lock fails a red frame lights up To clear AF Lock press Focus same as macro ...

Page 85: ...ate correctly When AF Tracking does not work focus will be on 1 area focusing Cannot set to in the following cases Panorama Shot Scene Mode B W and SEPIA in Color Mode Creative Control Mode Sepia Dynamic Monochrome High Dynamic Toy Effect Soft Focus While recording motion pictures and the setting is other than Face Detection focus will be on 1 area focusing Quick AF For Rec menu setting procedures...

Page 86: ...ot Center and close surrounding area Great difference between brightness of subject and background e g person in spotlight on stage backlighting i Exposure For Rec menu setting procedures 39 Automatically adjusts contrast and exposure to give more lifelike colors when there is significant contrast between background and subject Recording mode Settings LOW STANDARD HIGH OFF LOW STANDARD and HIGH in...

Page 87: ... dark when using faster values such as 1 250 we recommend that still pictures are taken in bright locations flashes red when shutter button is pressed halfway if still picture will be dark displayed on screen for settings other than AUTO i Resolution For Rec menu setting procedures 39 You can use the camera s Intelligent Resolution technology to record still pictures with sharper outlines and clea...

Page 88: ...effects Recording mode Settings STANDARD VIVID 1 sharper B W SEPIA Happy 2 1 Except Intelligent Auto Mode 2 Intelligent Auto Mode only AF Assist Lamp For Rec menu setting procedures 39 Illuminates lamp when dark to facilitate focus alignment Recording mode Settings ON Lamp illuminated with halfway press of shutter button and larger AF area displayed AF Assist Lamp OFF Lamp off taking pictures of a...

Page 89: ...for motion pictures will automatically function This decreases the jitter of the image when recording motion pictures while walking etc Recording mode Settings ON OFF The setting is fixed to ON either during motion picture recording or in Handheld Night Shot Scene Mode The setting is fixed to OFF in the following Scene Mode Panorama Shot Scene Mode Cases where Optical Image Stabilizer may be ineff...

Page 90: ...e cannot be stamped when Auto Bracket or Burst is set when recording a motion picture or when the Panorama Shot Scene Mode is set Do not request date printing in store or make date printing on printer for still pictures with date stamps Date printing may be overlapping Cannot change the setting in Intelligent Auto Mode The setting in other Recording Mode is applied Clock Set For Rec menu setting p...

Page 91: ...dures 39 Sets the data format of the motion picture that is recorded Recording mode Settings AVCHD This is a data format suitable for playback on high definition TVs MP4 This data format is suited for playing back motion pictures on a computer and other such devices For details 29 ...

Page 92: ...fps Aspect Ratio FHD 1920 1080 pixels Approx 20 Mbps 30 16 9 HD 1280 720 pixels Approx 10 Mbps VGA 640 480 pixels Approx 4 Mbps 4 3 What is bit rate This is the volume of data for a definite period of time and the quality becomes higher when the number gets bigger This unit is using the VBR recording method VBR is an abbreviation of Variable Bit Rate and the bit rate volume of data for definite pe...

Page 93: ...N OFF Fix focus position at the start of motion picture recording Wind Cut For Motion Picture menu setting procedures 39 Reduces recording of wind sounds wind noise when recording in a strong wind Recording mode Settings ON OFF When Wind Cut is set to ON lower sounds will be eliminated and the sound quality will differ from that of normal recordings The Wind Cut setting is fixed to OFF when Miniat...

Page 94: ...e displayed To return to the representative screen display Press Re acquiring the burst group information When the power is turned on the acquiring information icon may appear While is displayed pictures cannot be deleted and the Playback menu cannot be used Only Normal Play or Calendar is available as the Playback Mode Playback menu items cannot be used while the display appears within each burst...

Page 95: ...he playback method for the 3D pictures can be switched This menu is only displayed during HDMI output For details 114 Slide Show Automatically play pictures in order and to music Recommended when viewing on TV screen Use cursor button to select the playback method and press MENU SET All Play all Picture Only Plays back still pictures Motion Pic Only Plays back motion pictures 3D Play Plays back on...

Page 96: ...tart with cursor button and press MENU SET Operations during Slide Show The operation guide appears on the bottom right of the LCD monitor If you do not perform any operation for approx 2 seconds the operation guide is turned off To display the guide again press the DISP button During motion picture burst group panorama picture playback During still picture playback Pause play Previous Next Stop V...

Page 97: ... play back the pictures by date or by travel location using cursor button and press MENU SET When All is selected the pictures recorded with Travel Date are played back Select the date or travel location using cursor button and press MENU SET Category Selection Play back pictures that have been narrowed down by category such as Scene Mode Select the category using cursor button and press MENU SET ...

Page 98: ...ect ON and press MENU SET A confirmation screen is displayed If you select Yes the new retouched still picture is saved When OFF is selected you can restore a picture to its original condition before retouching The retouch effect may be less apparent in some still pictures Some still pictures may have higher noise levels after retouching It may not be possible to use Auto Retouch with still pictur...

Page 99: ...icture High Key This picture effect creates a brighter and lighter toned appearance for the entire picture Dynamic Monochrome This picture effect creates a monochromatic picture with a higher contrast and more dramatic atmosphere Toy Effect This picture effect creates a picture that resembles pictures taken by a toy camera with a reduced amount of peripheral light About adjusting color shade Press...

Page 100: ...ard Upload Set You can select pictures on the camera for uploading to image sharing websites Facebook or YouTube You can only upload motion pictures to YouTube while you may upload both motion pictures and still pictures to Facebook Pictures on the built in memory cannot be set Copy pictures to a card 109 before making Upload Set settings Use cursor button to select SINGLE or MULTI and then press ...

Page 101: ...s etc to your favorite still pictures Use cursor button to select SINGLE or MULTI and then press MENU SET Select a still picture SINGLE Use cursor button to select a still picture and press MENU SET MULTI up to 100 pictures with the same text Use cursor button to select a still picture and press DISP button Title Edit setting Title Edit already set To cancel Press DISP button again To execute Pres...

Page 102: ...I up to 100 pictures Use cursor button to select a still picture and press DISP button Text Stamp setting To cancel Press DISP button again To execute Press MENU SET Use cursor button to select Set and press MENU SET Use cursor button to select items and press MENU SET Use cursor button to select settings and press MENU SET Press button Use cursor button to select OK and press MENU SET Use cursor ...

Page 103: ...lapping Video Divide A single motion picture can be split into 2 parts This is convenient when you want to keep just the necessary scenes or if you wish to delete unnecessary scenes to increase free space on your card such as when traveling Select Video Divide from Playback menu 39 Select the motion picture to split with cursor button and then press MENU SET Play back the motion picture and pause ...

Page 104: ... Confirmation screen is displayed If you select Yes the operation is executed MULTI Select MULTI in step above Use cursor button to select size and press MENU SET Use cursor button to select a still picture and press DISP button up to 100 pictures Number of pixels before after resizing Resize setting To cancel Press DISP button again To execute Press MENU SET Confirmation screen is displayed If yo...

Page 105: ...d press MENU SET Expand Change position Confirmation screen is displayed If you select Yes the operation is executed Picture quality is reduced after cropping Cannot crop the following pictures Motion pictures Still pictures that date or other texts had already been stamped Still pictures recorded in Panorama Shot Scene Mode 3D still pictures Original Face Recognition information will not be copie...

Page 106: ...y back your favorite pictures only or you can delete all pictures except your favorites Use cursor button to select SINGLE or MULTI and press MENU SET Use cursor button to select picture and press MENU SET SINGLE MULTI Favorite picture setting Favorite picture setting To cancel Press MENU SET again To clear all Select CANCEL in step and select Yes ...

Page 107: ...repeat steps and when using MULTI up to 999 pictures SINGLE MULTI Date print set No to print Date print set No to print Date print setting release Press DISP button To clear all Select CANCEL in step and select Yes Depending on the type of printer the printer settings may take priority over camera settings Cannot be set for files that are not compliant with the DCF standard Some DPOF information s...

Page 108: ...ar all Select CANCEL in step and select Yes To cancel while releasing all Press MENU SET May not be effective when using other devices Face Rec Edit For Playback menu display and operation methods 39 Edit or delete the recognition information for pictures with mistaken Face Recognition Use cursor button to select REPLACE or DELETE and press MENU SET Use cursor button to select the picture and pres...

Page 109: ...tep Copy 1 picture at a time from card to built in memory Select picture with cursor button and press MENU SET Use cursor button to select Yes and press MENU SET To cancel Press MENU SET After all the pictures are copied from the built in memory to the memory card the display returns automatically to the playback screen Copying pictures may take several minutes Do not turn off power or perform oth...

Page 110: ...n HDMI mini cable optional Check the socket direction and insert straight in Damage to socket can lead to faulty operation HDMI mini cable optional To HDMI video audio input socket To connect with an AV cable optional Check the socket direction and insert straight in Damage to socket shape can lead to faulty operation AV cable optional White To audio socket Yellow To video socket Turn on TV Set to...

Page 111: ...ictures may be momentarily distorted immediately after commencing playback or pausing on certain televisions To connect with an AV cable optional Always use a genuine Panasonic AV cable optional Also consult TV operating manual Pictures rotated to portrait may be blurred slightly Change picture mode settings on TV if aspect ratios are not displayed correctly on widescreen or high definition televi...

Page 112: ...nic HDMI CEC compatible devices Refer to your product manual to verify compatibility with VIERA Link HDMI This camera supports VIERA Link HDMI Version 5 This is the latest Panasonic standard that also supports previous Panasonic VIERA Link devices As of November 2011 Always use a genuine Panasonic HDMI mini cable optional Cables that do not comply with HDMI standards will not work If you are unsur...

Page 113: ...A Link operating panel Other related operations Power OFF The camera s power can also be switched off when switching the television s power off with the remote control Automatic input select This function automatically switches the television input to the camera screen whenever the camera s power is switched on while it is connected via the HDMI mini cable The television can also be switched on vi...

Page 114: ...evision VIERA the television automatically switches its input and the playback screen is displayed 3D appears on the thumbnail of the 3D still pictures To select and play back only still pictures recorded in 3D Select 3D Play in Filtering Play of the Playback Mode menu 97 To perform Slide Show playback of only still pictures recorded in 3D Select 3D Play in Slide Show of the Playback Mode menu 95 ...

Page 115: ...es Viewing 3D still pictures too close to a TV may cause eyestrain When a TV has not been converted for viewing 3D still pictures do necessary preparation on the TV For details about the necessary preparation of the TV read the manual for the TV When an image is not suitable for 3D viewing due to excessive parallax etc During Slide Show playback The image is displayed in 2D During Filtering Play A...

Page 116: ...back pictures via AV cables optional Videos that are played on this camera can be dubbed on media such as a disc hard disk or videotape using a device such as a video recorder This method is useful as it allows dubbing to be performed even with devices that are not compatible with high definition images Picture quality will be reduced from high definition to standard definition Connect camera to r...

Page 117: ...oftware on the supplied CD ROM operation environment and installation refer to Basic Owner s Manual Connect the camera to your computer For connection procedures 119 Use PHOTOfunSTUDIO to copy pictures to your computer For details on how to use PHOTOfunSTUDIO see the PHOTOfunSTUDIO manual PDF Files and folders containing copied AVCHD motion pictures cannot be played back or edited if they have bee...

Page 118: ...ng support website http panasonic net avc sdcard information SDXC html Computer specifications You can connect the camera to a computer that can detect a mass storage device device that stores a large volume of data Windows Windows 7 Windows Vista Windows XP Windows 2000 Windows Me Mac OS X10 1 10 7 Some motion pictures recorded in AVCHD may not be scanned correctly by copying a file or folder Whe...

Page 119: ...pears on the sidebar When using Windows XP Windows Vista Windows 7 or Mac OS X The camera can be connected to your computer even if USB Mode 46 is set to PictBridge PTP Only picture output can be performed It may not be possible to import if there are 1000 or more pictures on the card Motion pictures cannot be read Getting Ready Charge the battery sufficiently When importing pictures from the buil...

Page 120: ...er by dragging and dropping folders and files into separate folders on your computer Folder and file names on computer Do not use any other USB connection cables except the supplied one Turn off power before inserting or removing memory cards When the battery begins to run out during communication a warning beep sounds Cancel communication via your computer immediately Use a sufficiently charged b...

Page 121: ...XUP EXE to start it If you have installed PHOTOfunSTUDIO from the CD ROM supplied Uploading tool LUMIX Image Uploader may start automatically Select the upload destination Do the further steps in accordance with the instructions displayed on the computer screen Because YouTube and Facebook services and specifications are subject to change operation of online services cannot be guaranteed in the fu...

Page 122: ...PTP and press MENU SET Use cursor button to select a picture to print and press MENU SET Use cursor button to select Print start and press MENU SET Print settings 124 To cancel print Press MENU SET Check socket direction and insert straight in Damage to socket shape can lead to faulty operation Do not disconnect the USB connection cable when the cable disconnection icon is displayed may not be dis...

Page 123: ...em and press MENU SET Multi Select Scroll between pictures with cursor button select pictures to print with the DISP button Press DISP button again to release selection Press MENU SET when selection is complete Select All Print all pictures Print Set DPOF Print pictures selected in Print Set Favorite Print pictures selected as Favorite Use cursor button to select Print start and press MENU SET Pri...

Page 124: ...ctures Use cursor button to select setting and press MENU SET Items may not be displayed if incompatible with printer To arrange 2 pictures or 4 pictures in the same still picture set the number of prints for the still picture to 2 or 4 To print to paper sizes layouts not supported by this camera set to and make settings on the printer Consult your printer s operating manual Even with completed Pr...

Page 125: ...ng to be designated before giving the card to the store When printing still pictures of 16 9 Aspect Ratio check in advance that the store can accept this size Using computer Print settings for recording date and text information can be made using PHOTOfunSTUDIO on the supplied CD ROM Using printer Recording date can be printed by setting Print Set on the camera or by setting Print with Date 124 to...

Page 126: ...e time World time 78 Name 67 75 Age in years months 67 75 Destination settings 77 Travel elapsed days 77 9 Exposure Compensation 57 AF Tracking 84 AF Assist Lamp 88 Metering Mode 86 ISO Sensitivity 81 Aperture value Shutter speed 22 59 60 10 LCD Mode 43 Elapsed recording time 28 XXhXXmXXs 11 Date Stamp 90 12 Focus 23 13 Save destination 16 Recording state 14 Number of recordable pictures 17 Availa...

Page 127: ...e Retouch 99 Picture Size 80 Quality 81 3 Battery capacity 13 4 Picture number Total pictures 32 Elapsed playback time 33 XXhXXmXXs 5 Print settings 107 6 Histogram 44 7 Burst group display 94 8 Recording Mode 20 Flash 52 White Balance 82 Exposure Compensation 57 ISO Sensitivity 81 Aperture value Shutter speed 22 59 60 9 Recording date time World time 78 Name 67 75 Age in years months 67 75 Destin...

Page 128: ...gain Consult the dealer or your nearest Service Center if display still remains Some pictures cannot be copied Copy could not be completed Pictures cannot be copied in following cases Picture of same name already exists in built in memory when copying from card File is not of DCF standard 32 Picture taken or edited on a different device Not enough space on built in memory Not enough memory on the ...

Page 129: ...ed If this happens we recommend backing up the data on the memory card and formatting it 48 Motion picture recording may be automatically terminated with certain cards A folder cannot be created Folder numbers in use have reached 999 Save needed data on a computer or other device and then use Format on the camera 48 Folder number is reset to 100 when performing No Reset 46 Picture is displayed for...

Page 130: ...ery needs recharging Camera switches off as soon as power is turned on Battery needs recharging Sleep Mode is activated 45 Press shutter button halfway to release This unit is turned off automatically If you connect to a TV compatible with VIERA Link with an HDMI mini cable optional and turn off the power on the TV with the remote control for the TV the power on this unit also turns off If you are...

Page 131: ...g recording This is characteristic of MOS sensors which serve as the camera s pickup sensors It appears when the subject has a bright part Some unevenness may occur in the surrounding areas but this is not a malfunction It is recorded in motion pictures but is not recorded on still pictures It is recommended that you take pictures while taking care not to expose the screen to sunlight or any other...

Page 132: ...function Monitor is too bright too dark LCD Mode is activated 43 Use LCD Display to adjust the brightness of the LCD monitor 43 Black blue red green dots or interference appears Monitor looks distorted when touched This is not a fault and will not be recorded on the actual pictures Flash No flash emitted Flash set to Forced Flash Off 52 The flash becomes unavailable in the following cases Auto Bra...

Page 133: ...en with low battery Use Format to delete 48 Incorrect date displayed in Calendar Playback Picture edited on computer or taken on different device Clock Set is incorrect 18 Incorrect date may be displayed in Calendar Playback on pictures copied to computer and then back to camera if computer and camera dates differ White round spots like soap bubbles appear on the recorded picture If you take a pic...

Page 134: ... on TV Image blurred or not colored Not connected correctly 110 The television has not been switched to auxiliary input TV screen display different to LCD monitor Aspect ratio may be incorrect or edges may be cut off with certain televisions Cannot play motion pictures on TV Card is inserted into TV Connect with AV cable optional or HDMI mini cable optional and play on camera 110 Picture is not di...

Page 135: ...he login information login ID user name e mail address and password is correct Confirm that the computer is connected to the Internet Confirm that the resident software such as anti virus software and the firewall etc is not blocking access to YouTube or Facebook Check the YouTube or Facebook site Cannot print when connecting to printer Printer not compatible with PictBridge Set USB Mode to PictBr...

Page 136: ...19 A long time was taken to set the clock clock will be behind by the same lapse of time When using zoom picture becomes slightly warped and the edges of the subject become colored Pictures may be slightly warped or colored around the edges depending on the zoom ratio but this is not a fault Zoom movement stops momentarily The zoom movement stops momentarily during Extended Optical Zoom operation ...

Page 137: ... and or sound may be adversely affected Do not extend the supplied cord or cable Do not allow camera to come into contact with pesticides or volatile substances can cause surface damage or coating to peel Never leave the camera and the battery in a car or on a car hood in the summer It may cause leakage of the battery electrolyte a generation of heat and may cause a fire and the battery to burst d...

Page 138: ...loyed to produce the LCD monitor screen However there may be some dark or bright spots red blue or green on the screen This is not a malfunction The LCD monitor screen has more than 99 99 effective pixels with a mere 0 01 of the pixels inactive or always lit The spots will not be recorded on pictures on the built in memory or a card About charging the battery The time required for charging varies ...

Page 139: ...r to the tripod instructions You may not be able to remove the card or the battery when using a tripod or unipod About 3D viewing Anyone who is hypersensitive to light suffers from heart disease or is otherwise unwell should avoid viewing 3D pictures Viewing 3D pictures may have an adverse effect to the individual If you feel tired uncomfortable or otherwise strange when viewing 3D pictures stop v...

Page 140: ...ntaining personal information When ordering repairs or transferring disposing of the camera To protect your personal information please reset the settings 46 If any pictures are contained in the built in memory copy 109 them to a memory card if necessary and then format 48 the built in memory Remove the memory card from the camera When ordering repairs the built in memory and other settings may be...

Page 141: ...ther countries iMovie Mac and Mac OS are trademarks of Apple Inc registered in the U S and other countries YouTube is a trademark of Google Inc This product uses DynaFont from DynaComware Corporation DynaFont is a registered trademark of DynaComware Taiwan Inc Other names company names and product names printed in these instructions are trademarks or registered trademarks of the companies concerne...

Reviews: