background image

92   

VQT3H43

VQT3H43

   93

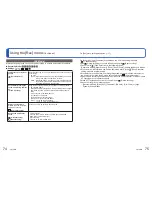
Using the [Playback] menu


(Continued)

Playback Mode: 

For the [Playback] menu setting procedure (

17)


Uploading to image-sharing websites

When setting [Upload Set], the built-in uploading tool automatically makes copies 
on the card inside the camera. Connect the camera to your computer (

103) before 

performing uploading operations. For more details, refer to (

105). 


To clear all 

Select [CANCEL] in step   and select [Yes].


May not be compatible with pictures taken on other devices.


Not available on cards with less than 512 MB.

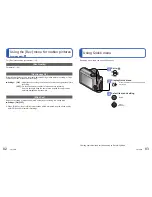
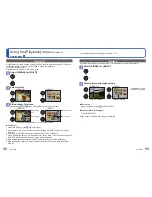
 [Title Edit]

You can give titles, etc. to your favorite still pictures. 

Press 

▲▼

 to select [SINGLE] or [MULTI], and then press 

[MENU/SET]
Select still picture


[SINGLE]


[MULTI] (up to 50 pictures with the same text) 


 [Title Edit] setting
  [Title Edit] already set


• To cancel 

 Press 

[DISP.] again.


• To execute 


Press [MENU/SET].

Enter characters 

(Entering text (

84))

To delete a title, delete all the characters in the character input screen.


Cannot be used with still pictures taken by other devices or motion pictures.


To print text, use [Text Stamp] or the supplied CD-ROM “PHOTOfunSTUDIO”.

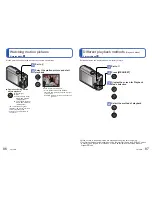
 [Text Stamp]

The recording date and time, location name information and the text registered in the 
[Baby], [Pet] Scene Modes, [Travel Date] and [Title Edit] are stamped on the still picture.

Press 

▲▼

 to select 

[SINGLE] or [MULTI], and 

then press [MENU/SET]

Select still picture


[SINGLE]


[MULTI] (up to 50 pictures)

  [Text 

Stamp] 

setting


• To cancel 

  Press [DISP.] button 

again.


• To execute 

 Press [MENU/SET].

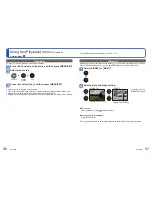
Select [Set]

Select the item

Select the setting

Select [OK]

Select whether to stamp 

age 


• If [Name] is [OFF] in Step 

this screen will not be displayed.

Select [Yes]

(Screen varies according to picture 
size, etc.)


• When you have selected 

[SINGLE], after step 

, press 

[  / 

] to return to the menu 

screen.

Summary of Contents for Lumix DMC-TZ18

Page 1: ...Owner s Manual for advanced features Digital Camera Model No DMC ZS9 DMC ZS8 DMC TZ18 Before connecting operating or adjusting this product please read the instructions completely VQT3H43 ...

Page 2: ... Dynamic 59 Photo Frame 59 Underwater 59 Saving commonly used scenes My Scene Mode 60 Taking motion pictures Motion Picture Mode 61 Rec Quality 62 Recording with the Face Recognition function Face Recog 63 Registering face pictures 64 Editing or deleting information about registered persons 66 Useful features for travel 68 Travel Date 68 World Time 69 Using the Rec menu 70 Aspect Ratio 70 Picture ...

Page 3: ...ouding Condensation may occur when the camera is exposed to sudden changes of temperature or humidity Avoid these conditions which may make the lens dirty cause mold or damage the camera If condensation does occur turn off the camera and wait about two hours before using it Once the camera adjusts to the surrounding temperature clouded lenses will clear naturally Connecting with other devices Usin...

Page 4: ...es 120 Check that all the accessories are supplied before using the camera The accessories and their shape will differ depending on the country or area where the camera was purchased For details on the accessories refer to Basic Owner s Manual Battery pack is indicated as battery pack or battery in the text Battery charger is indicated as battery charger or charger in the text Please dispose of al...

Page 5: ...otection to meet the requirements of appropriate safety standards There is a possibility that these battery packs may lead to fire or explosion Please be advised that we are not liable for any accident or failure occurring as a result of use of a counterfeit battery pack To ensure that safe products are used we recommend that a genuine Panasonic battery pack is used Use the dedicated charger and b...

Page 6: ...harging varies depending on conditions of battery usage Charging takes longer at high or low temperatures and when the battery has not been used in some time Battery will be warm during charging and for some time thereafter Battery will run out if not used for long periods of time even after being charged Charge the battery with the charger indoors 10 C 30 C 50 F 86 F Keep any metal items such as ...

Page 7: ...nce with battery recycling laws Call the RBRC hotline at 1 800 822 8837 for information Charged battery check orientation Card check orientation terminals face LCD Do not touch terminal Lever Using the AC adaptor optional and DC coupler optional instead of the battery By using the AC adaptor optional and DC coupler optional you can record and play back without worrying about the remaining battery ...

Page 8: ...in 10 s 42 min 20 s QVGA 2 min 30 s 2 min 20 s 1 h 2 min 59 min 10 s 2 h 4 min 1 h 57 min Motion pictures can be recorded continuously up to 2 GB To record more than 2 GB press the shutter button again Remaining time for continuous recording is displayed on the screen The time displayed in the table is the total time 1 DMC ZS8 DMC TZ18 2 DMC ZS9 Picture save destination cards and built in memory B...

Page 9: ...ct the language and press MENU SET The Please set the clock message appears This message does not appear in Playback Mode Press MENU SET Press to select the items year month day hour minute display order or time display format and press to set Select either 24hrs or AM PM for the time display format Select the display order for the day month and year M D Y D M Y or Y M D To cancel Press Press MENU...

Page 10: ...stination Set the local time at travel destination Home Set date and time at home area Travel Date Record the number of days elapsed in your travels 68 Travel Setup SET Register departure and return dates OFF Location SET Input name of destination OFF Beep Change or mute the beep shutter sounds Beep Level Low High Mute Beep Tone Change beep tone Shutter Vol Low High Mute Shutter Tone Change shutte...

Page 11: ... notes Zoom Resume Remember the zoom position when turning the power off ON OFF Cannot be set when using Self Portrait Scene Mode Economy Turn off the power or make the LCD monitor go dark while not using the camera to minimize battery consumption Sleep Mode 2 MIN 5 MIN 10MIN OFF Automatically shut off power while not in use To restore Press the shutter button halfway or turn on the power again Ca...

Page 12: ...o a computer Item Settings notes Output Operates when AV cable is connected Video Out DMC ZS8PU DMC TZ18PR only NTSC PAL Change the video output format when connected to a TV etc Playback Mode only TV Aspect Rotate Disp Automatically rotate portrait still pictures Rotate Display is turned on Rotate Display is turned on for TV output only OFF Rotate Disp cannot be used with motion pictures Still pi...

Page 13: ...MENU SET Auto Demo cannot be displayed on external devices such as TVs Recording motion pictures Press the shutter button Gently press the shutter button Press halfway Adjust the focus Press and hold the shutter button to begin recording Press fully Press the shutter button again to finish recording Press fully Taking still pictures Press the shutter button Gently press the shutter button Press ha...

Page 14: ...etected People and night scenery are detected 2 Only when is selected Baby is detected 1 Scenery is detected Night scenery is detected A sunset is detected A close up shot is detected Reads subject movement to avoid blurring when the scene does not correspond to any of the above 1 When babies under 3 years that are registered with the Face Recognition function are recognized 2 We recommend using a...

Page 15: ...ognized The following functions cannot be used Histogram Exposure Auto Bracket WB Adjust Digital Zoom Min Shtr Speed About Happy colors If Color Mode is set to Happy still pictures are clearer with more vivid coloring Face Detection and Face Recognition If the camera automatically identifies the scene and determines that people appear as subjects in the picture Face Detection is activated and the ...

Page 16: ...subject when complete red green Shutter button Useful when subject is not in the center of picture First adjust focus according to subject Hold down halfway Align the AF area with the subject AF area Subjects environments which may make focusing difficult Fast moving or extremely bright objects or objects with no color contrast Taking pictures through glass or near objects emitting light In dark o...

Page 17: ...ash Burst Pin Hole When i Resolution in the Rec menu is set to i ZOOM 34 When Digital Zoom in the Rec menu is set to ON 36 Screen display is displayed Digital Zoom area is displayed What is Extended Optical Zoom EZ If for example set to 3M equivalent to 3 million pixels a picture will only be taken of a 3M sized central part of a 14 M equivalent to 14 1 million pixels area meaning that the picture...

Page 18: ...h Sens Hi Speed Burst Flash Burst Pin Hole Easy Zoom For zooming rapidly to maximum ratio Zoom to max T in one touch Press to change zoom ratio Each time you press the ratio changes Change of zoom ratio When the Picture Size is 10 5 M or more Current recording ratio or 1 X Optical Zoom Maximum ratio 1 Extended Optical Zoom Maximum ratio 2 Digital Zoom Maximum ratio 3 When the Picture Size is 10 M ...

Page 19: ...es the longer you press Speed may vary according to playback conditions Some pictures edited on a computer may not be viewed on this camera If the REC PLAY switch is moved from to while the power is on the lens barrel will be retracted after approx 15 seconds This camera is compliant with the unified DCF Design rule for Camera File system standard formulated by the Japan Electronics and Informatio...

Page 20: ...to 50 or all pictures after step DISP Change between different LCD monitor displays such as Histograms Histogram Displays distribution of brightness in picture e g if the graph peaks at the right this means there are several bright areas in the picture Guide A peak in the center represents correct brightness correct exposure This can be used as a reference for exposure correction 46 etc Histogram ...

Page 21: ...e flash range when Sensitivity setting is AUTO W side Max Approx 60 cm 1 97 feet 5 0 m 16 4 feet T side Max Approx 1 0 m 3 28 feet 2 8 m 9 18 feet Shutter speeds are as follows 1 60 3 1 4000th 1 3 4 1 4000th 3 Varies according to Min Shtr Speed setting 4 When Min Shtr Speed is set to AUTO and a jitter is detected when Stabilizer is turned to ON the maximum speed is 1 4 second Also varies according...

Page 22: ... When Macro Zoom is set Extended Optical Zoom or i ZOOM does not work When AF Tracking is set zoom macro is canceled Using a tripod and Selftimer is recommended Also when recording a subject that is close to the camera setting Flash to Forced Flash Off is recommended Moving the camera after aligning the focus is likely to result in poorly focused pictures if subject is close to the camera due to t...

Page 23: ... The shortest recording distance differs depending on the zoom ratio and the setting in macro recording mode During optical zooming Zoom ratio guideline Shortest recording distance 1 Macro Mode 2 Macro Mode OFF 3 1x 3 cm 0 10 feet 50 cm 1 64 feet 2x 10 cm 0 33 feet 50 cm 1 64 feet 3x 20 cm 0 66 feet 50 cm 1 64 feet 4x 40 cm 1 32 feet 50 cm 1 64 feet 5x 1 m 3 28 feet 1 m 3 28 feet 6x 1 5 m 4 92 fee...

Page 24: ...Mode Records 3 pictures in continuous succession while exposure is changed automatically After exposure adjustment the adjustment value is set as the standard Display Auto Bracket Press several times to switch Exposure to Auto Bracket Select a value Value displayed after Exposure Compensation set The first still picture is recorded without compensation the second still picture is recorded with exp...

Page 25: ... vary from the actual still picture recorded If too bright increase the aperture and if too dark reduce the aperture Determine aperture and record Aperture Priority Mode Recording Mode When recording you can control the shutter speed to meet your recording purposes Aperture is automatically adjusted to be appropriate for the set shutter speed Set to Shutter Priority Mode Determine shutter speed At...

Page 26: ...ss either use a faster shutter speed or increase aperture value Shows darker pictures For standard brightness either use a slower shutter speed or reduce aperture value LCD monitor brightness may vary from the actual still picture recorded Determine aperture and shutter speed and record Manual Exposure Mode Recording Mode Registering your preferred Recording Mode Rec menu settings etc to Cust Set ...

Page 27: ...anging registration content reset in Cust Set Mem Register your own settings and record Custom Mode Continued Recording Mode Using Scene Mode enables you to take pictures with optimum settings exposure coloring etc for given scenes Set to Select and set the scene When the scene menu is not displayed 17 Scene menu Selecting a Scene Mode inappropriate for the actual scene may affect the coloring of ...

Page 28: ... and press MENU SET to set Alternatively press the shutter button You can take pictures again by selecting Retake Change the composition and take the picture so that a part of the picture overlaps with the previous picture To take more pictures select Next and repeat steps and Section of picture that was taken last time After you finish taking pictures select Exit and press MENU SET to set Tips Us...

Page 29: ... Notes Hi Speed Burst Takes pictures of rapid movement or a decisive moment Use to select Speed Priority or Image Priority and press MENU SET to set Select the aspect ratio and the picture size with and press MENU SET Take pictures Hold shutter button Still pictures are taken continuously while the shutter button is pressed fully Maximum speed Speed Priority Approx 10 pictures sec Image Priority A...

Page 30: ...te pictures with a grainy texture Scene Uses Tips Notes High Dynamic Reduces over and underexposure when recording into the light and in night scenes Use to select the effect and press MENU SET STD Natural coloring effect ART An impressionistic effect emphasizing contrast and color B W Monochrome effect Shutter speed may slow down up to 8 seconds After recording the shutter may stay closed up to 8...

Page 31: ...while recording a motion picture The following functions are not available Extended Optical Zoom flash Face Recog and Rotate Disp for still pictures taken vertically In AF Mode 23 area focusing is fixed In Stabilizer ON is fixed When there is no space left to store the motion picture recording automatically ends Additionally recording in progress may be stopped depending on the card used Depending...

Page 32: ...e put on the picture Face Recognition does not work in the following cases Motion picture recording Scene Modes Transform Panorama Assist Night Scenery Food Hi Speed Burst Flash Burst Starry Sky Fireworks Aerial Photo Film Grain Underwater Face Recognition searches for faces similar to those registered but there is no guarantee it will always recognize these faces Even if Face Recognition informat...

Page 33: ...red people depending on their expression or the environment Select Face Recog from the Rec menu 17 Select MEMORY with and then press MENU SET Select New with and then press MENU SET If 6 people are already registered first delete a registered person 66 Record the face picture Align the face with the guide and record Select Yes with and then press MENU SET If re recording select No Faces of subject...

Page 34: ...Select Face Recog from the Rec menu 17 Select MEMORY with and then press MENU SET Using select the person whose information you wish to edit or delete and press MENU SET Select the item Item About settings Information editing Edit name or other registered information 65 Registration order Set priority order for focus and exposure Select the registration order with and then press MENU SET Deleting ...

Page 35: ...T Select SET with and then press MENU SET Select the departure date with and then press MENU SET Set the return date in the same way To record Location Select Location from the Travel Date menu 17 Select SET and press MENU SET Enter your destination Entering text 84 The travel date is calculated from the set departure date and the date set in the camera s clock When destination is set in World Tim...

Page 36: ...tness Aspect Ratio Aspect ratio of still picture can be changed according to printing or playback format Recording Mode Settings Edges may be cut off when printing be sure to check in advance Picture Size Set the size number of pixels of still pictures Number of pictures which can be recorded depends on this setting and on Quality 71 Recording Mode Settings Picture Size Aspect Ratio 14 M 10 M 7 M ...

Page 37: ... is remembered It may not be possible to set the correct White Balance if subjects are too bright or too dark In this case adjust the brightness and try to set the White Balance again White Balance Adjust coloring to suit light source if colors otherwise appear unnatural Recording Mode Settings AWB automatic outdoor clear sky outdoor cloudy sky outdoor shade Incandescent lighting uses value set in...

Page 38: ...ition and number of subjects Recording Mode Settings Taking front on pictures of people Face Detection Detected faces up to 15 people and adjusts exposure and focus accordingly AF area Yellow When the shutter button is pressed halfway the frame turns green when the camera is focused White Displayed when more than one face is detected Other faces that are the same distance away as faces within the ...

Page 39: ...es and clearer resolution Also when i ZOOM is set the zoom ratio can be increased to about 1 3 with almost no deterioration of picture quality Recording Mode Settings ON i ZOOM OFF About i ZOOM 34 The setting is fixed to i ZOOM in Intelligent Auto Mode The setting is fixed to ON in High Sens and Hi Speed Burst Scene Modes OFF in Flash Burst and Pin Hole Scene Modes and i ZOOM in other Scene Modes ...

Page 40: ...us exposure and White Balance are fixed in the first picture Depending on changes in the brightness of the subject the second and subsequent pictures may be recorded brighter or darker Burst speed may be reduced if Sensitivity is set to high or if shutter speed is reduced in darker locations Auto Bracket setting is canceled Settings will be stored even if power is turned off Burst is not available...

Page 41: ...eye effect may not be corrected under certain conditions When the function setting is ON a appears with the flash icon Stabilizer Automatically detects and prevents jitter Recording Mode Settings ON OFF Setting fixed to ON in Self Portrait and OFF in Starry Sky Scene Modes Cases where Optical Image Stabilizer may be ineffective Heavy jitter high zoom ratio also in the Digital Zoom range fast movin...

Page 42: ...focus position at the start of motion picture recording Use this setting to keep the same focus position for subjects with little forward backward movement Wind Cut Reduces recording of wind sounds wind noise when recording in a strong wind Settings ON OFF When Wind Cut is set to ON lower sounds will be eliminated and the sound quality will differ from that of normal recordings Setting items displ...

Page 43: ... to select the correct text and then press MENU SET When you are finished entering text press to select Set and press MENU SET You can view 12 or 30 pictures at once Multi Playback or view all pictures taken on a certain date Calendar Playback To restore Turn to T side To change from 12 30 screen display to single screen display Select picture with and press MENU SET Only months when pictures were...

Page 44: ...be adjusted with zoom lever Set to Select the motion picture and start playback Motion picture recording time When playback starts the elapsed playback time is displayed in the top right of the screen Example After 3 minutes and 30 seconds 3m30s Recorded pictures can be played back in a variety of ways When no card is inserted pictures are played back from the built in memory The Playback Mode aut...

Page 45: ...le with Category Selection setting NATURAL SLOW SWING URBAN OFF Setup Duration 1 SEC 2 SEC 3 SEC 5 SEC Only available when Effect is OFF Repeat ON OFF Sound AUTO With still pictures music will play back and with motion pictures audio will play back Music Music effect will play back Audio Audio is played back from motion pictures OFF Music and audio will not play back If Video Only was selected in ...

Page 46: ...ery Starry Sky Sports Party Candle Light Fireworks Beach Snow Aerial Photo Baby Pet Food Underwater Favorite Play back pictures set as Favorite Calendar Select the date from the calendar screen to view only the pictures taken on that day 85 For the Playback menu setting procedure 17 You can set the recorded picture to upload to the image sharing websites edit the picture for example trimming and s...

Page 47: ...eady set To cancel Press DISP again To execute Press MENU SET Enter characters Entering text 84 To delete a title delete all the characters in the character input screen Cannot be used with still pictures taken by other devices or motion pictures To print text use Text Stamp or the supplied CD ROM PHOTOfunSTUDIO Text Stamp The recording date and time location name information and the text register...

Page 48: ...ess Do not request date printing in store or make date printing on printer for still pictures with date stamps Date printing may be overlapping Resize Picture size can be reduced to facilitate e mail attachment and use in web pages etc Still pictures recorded at the smallest recording pixel level cannot be further reduced SINGLE Select SINGLE Select still picture Select size Current size Size afte...

Page 49: ... not be compatible with still pictures taken on other devices Original Face Recognition information will not be copied when still pictures are cropped Favorite By labeling your favorite pictures with a star you can enjoy Slide Show or Filtering Play of these pictures only or you can delete all pictures except your favorites Select SINGLE or MULTI Select picture and make setting SINGLE MULTI Favori...

Page 50: ...pending on the type of printer the printer settings may take priority over camera settings Cannot be set for files that are not compliant with the DCF standard DPOF information set by other equipment may not be used In such cases delete all of the DPOF information and then set it again with this camera Date printing settings cannot be made for pictures with a Text Stamp applied Date print setting ...

Page 51: ...cted pictures Copy You can copy pictures between built in memory and memory card Select the copy method direction Copy all pictures from built in memory to card go to step Copy 1 picture at a time from card to built in memory Select picture with and press MENU SET for Select Yes To cancel Press MENU SET After all the pictures are copied from the built in memory to the memory card the display retur...

Page 52: ... either but still motion pictures may still be copied with compatible SD memory card reader writers Internet Explorer 6 0 or above must be installed Correct playback and operation depends on your computer s environment and cannot always be guaranteed Copying still pictures and motion pictures Getting Ready Charge the battery sufficiently Or connect the AC adaptor optional and DC coupler optional I...

Page 53: ...s to your computer After importing pictures to your computer you can print or e mail them Read the separate operating instructions for more information about the operating environment and the installation Uploading pictures to image sharing websites Using the uploading tool LUMIX Image Uploader you can upload still pictures and motion pictures to image sharing websites Facebook or YouTube There is...

Page 54: ...connect the USB connection cable when the cable disconnection icon is displayed displayed with some printers USB connection cable always use cable supplied Printing multiple pictures Select Multi Print in step on the previous page Select item See below for details Print Previous page Multi Select Scroll between pictures with select pictures to print with the DISP button Press DISP button again to ...

Page 55: ...nt with Date to ON check the date printing settings on the printer printer settings may be prioritized Getting Ready Set TV Aspect 23 Turn off both camera and TV You can view pictures on a TV screen by connecting your camera to your TV with the AV cable supplied Also consult TV operating manual Connect camera to TV Turn on TV Set to auxiliary input Turn on camera Set REC PLAY switch to When TVs or...

Page 56: ...on 14 Recording state 18 Number of recordable pictures 15 Available recording time 61 RXXhXXmXXs h m and s indicate hour minute and second 13 14 15 17 16 18 6 7 5 8 11 10 9 12 1 2 3 4 In playback Screens shown here are only examples The actual display may vary 1 Playback Mode 87 2 Protected picture 99 Favorites 97 Text stamped display 93 Date Stamp 81 Color Mode 79 Picture size 70 Quality 71 3 Bat...

Page 57: ...a Data will be deleted Memory Card Error Format this card The card format cannot be used with this camera Save needed data on a computer or other device and then use Format on the camera 23 Insert SD card again Try another card Access to card has failed Insert card again Try with a different card Memory card error This card cannot be used in this camera Format this card Card is not of SD standard ...

Page 58: ...ng slower shutter speed with Min Shtr Speed Recording Continued Cannot use Auto Bracket Only enough memory for 2 pictures or fewer Recorded pictures appear coarse or there is interference ISO Sensitivity is high or shutter speed is low Default Sensitivity setting is AUTO interference may appear with indoor pictures Lower Sensitivity 71 Set Color Mode to NATURAL 79 Take pictures in brighter locatio...

Page 59: ...ow battery Use Format to delete 23 Incorrect date displayed in Calendar Playback Picture edited on computer or taken on different device Clock Set is incorrect 16 Incorrect date may be displayed in Calendar Playback on pictures copied to computer and then back to camera if computer and camera dates differ White round spots like soap bubbles appear on the recorded picture If you take a picture with...

Page 60: ...t USB Mode to PictBridge PTP 22 The edges of pictures are cut off when printing Release any trimming or edgeless printing settings on printer before printing Consult printer operating manual The pictures were recorded in aspect ratio If printing in shop check if 16 9 sizes can be printed Others Menu not displayed in desired language Change Language setting 24 Camera rattles if shaken This sound is...

Page 61: ...uter casing and finish of the camera If using a chemically treated cloth read the supplied instructions carefully Do not touch the lens barrier When not using for a while Turn off camera power before removing battery and card ensure that battery is removed to prevent damage through over discharge Do not leave in contact with rubber or plastic bags Store together with a drying agent silica gel if l...

Page 62: ...es that have been taken Disclaimer Data containing personal information can be altered or lost due to malfunction static electricity accidents breakdowns repairs or other operations Panasonic will not be liable for any damage that occurs direct or indirect as a result of the alteration or loss of data containing personal information When ordering repairs or transferring disposing of the camera To ...

Page 63: ...c used under license therefrom YouTube is a trademark of Google Inc This product uses DynaFont from DynaComware Corporation DynaFont is a registered trademark of DynaComware Taiwan Inc Other names company names and product names printed in these instructions are trademarks or registered trademarks of the companies concerned ...

Reviews: