


Others
112
VQT0S46
n
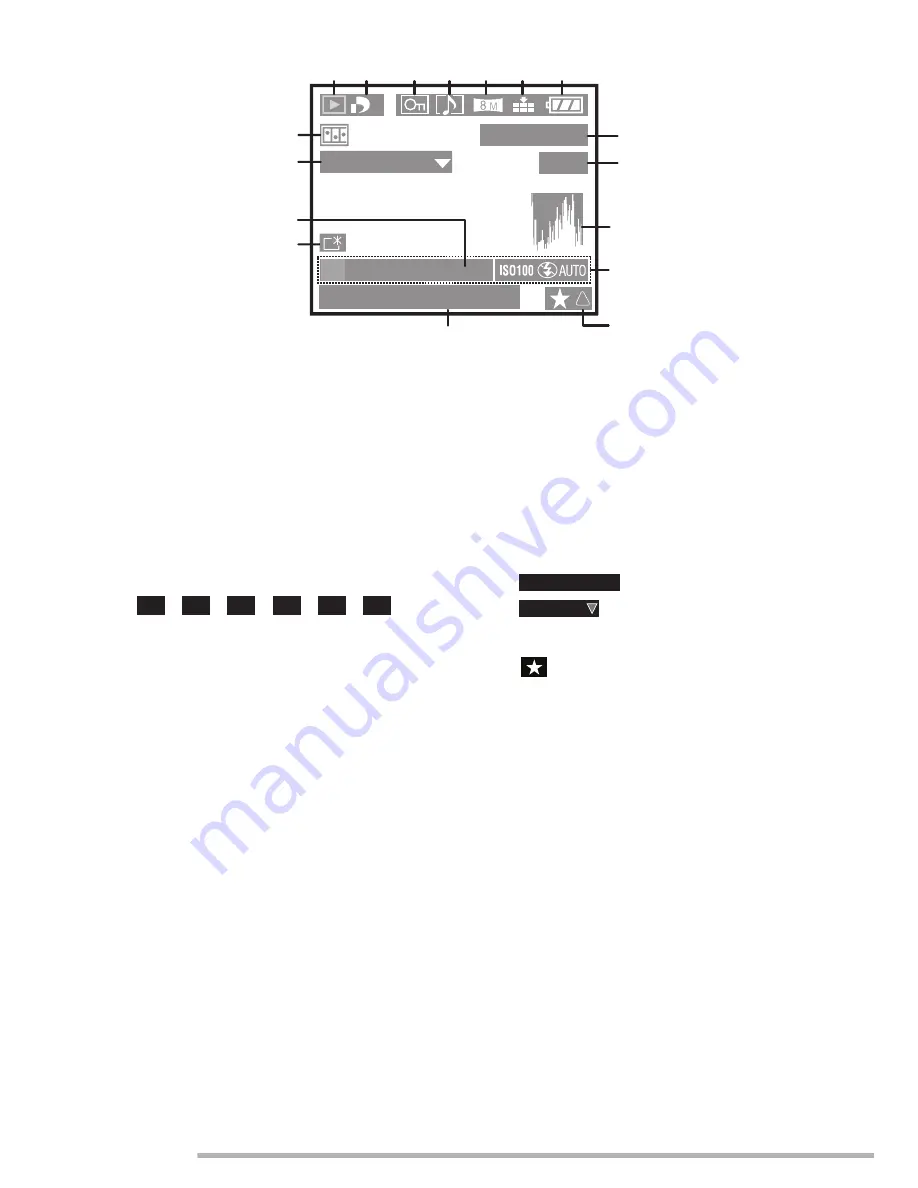
In playback
1 Playback mode
2 Number of DPOF [
d
] prints (P94)
3 Protected picture (P96)
4
A
: Still or motion pictures with audio
(P88)
5 Picture size (P72)
6 Quality (P73)
/
/
/
/
/
:
In Motion picture mode (P58)
7 Battery indication (P13)
8 Folder/File number
9 Page number/Total pictures
10 Histogram (P28)
11 Recording information
12 Favorites setting (P91)
13 Recorded date and time
14 Power LCD indication (P27)
15 Age display (P64)
16 Audio playback (P88)
: In Motion picture mode
17 Flip animation (P78)
: Favorites indicator (P91)
10:00 20.DEC.2005
100_0001
1/19
1
1 2
8
4
5
6
7
9
16
17
10
12
13
11
3
PLAY AUDIO
F2.8 1/25
P
14
15
30fps
VGA
10fps
VGA
30fps
QVGA
10fps
QVGA
30fps
16:9
10fps
16:9
PLAY MOTION
PICTURE
Summary of Contents for Lumix DMC-LX1GN
Page 125: ...Others 125 VQT0S46 MEMO ...
Page 126: ...Others 126 VQT0S46 MEMO ...
Page 127: ...Others 127 VQT0S46 MEMO ...


