background image

13

(ENG) VQT4A91

1

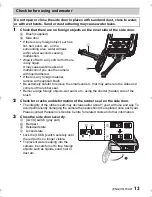
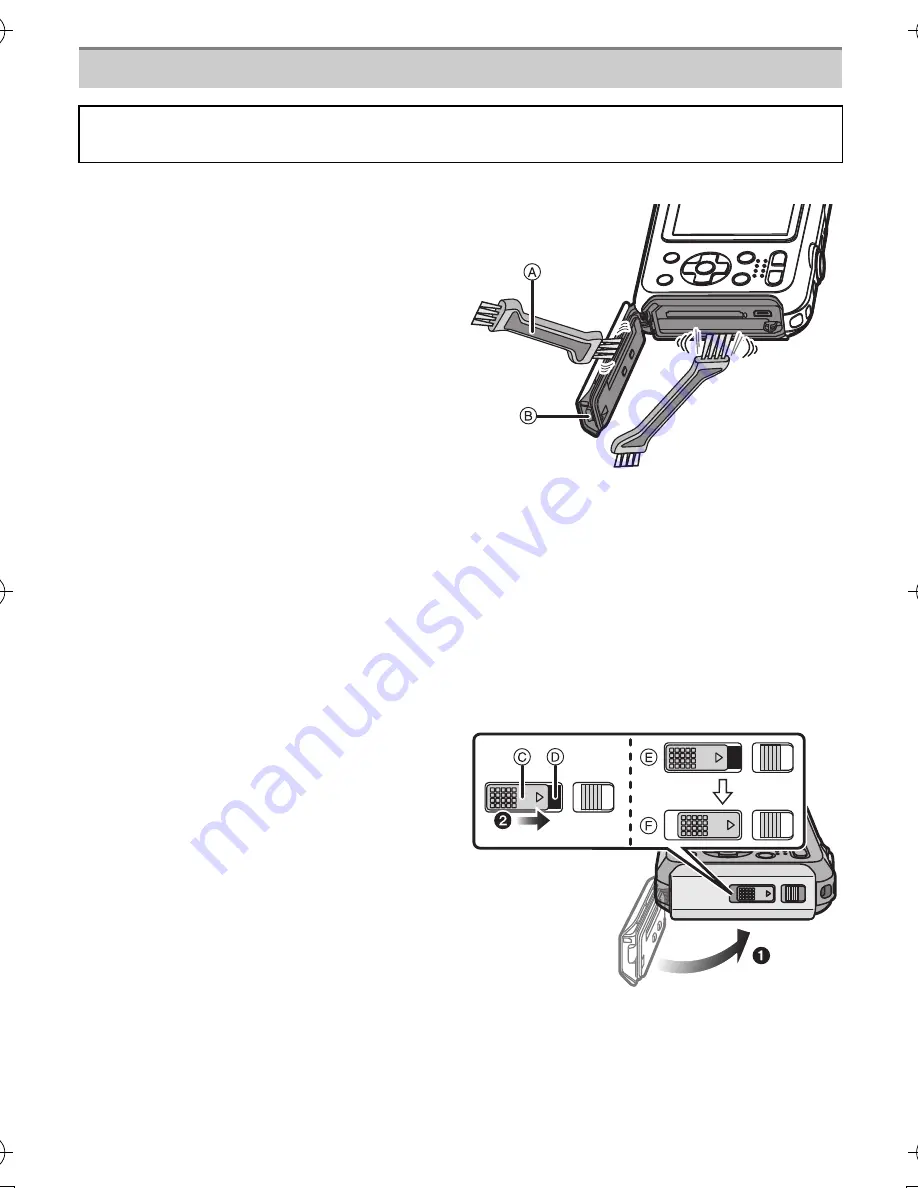
Check that there are no foreign objects on the inner side of the side door.

A

Brush (supplied)

B

Side door

If there is any foreign object, such as 
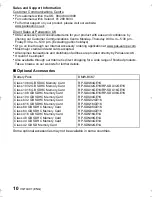
lint, hair, sand, etc., on the 
surrounding area, water will leak 
within a few seconds causing 
malfunction.

Wipe it off with a dry soft cloth if there 
is any liquid.
It may cause water leaks and 
malfunction if you use the camera 
with liquid adhered.

If there is any foreign material, 
remove with supplied brush.

Be extremely careful to remove the small sand etc. that may adhere to the sides and 
corners of the rubber seal.

Remove large foreign objects, wet sand, etc., using the shorter (harder) side of the 
brush.

2

Check for cracks and deformation of the rubber seal on the side door.

The integrity of the rubber seals may decrease after about 1 year, with use and age. To 
avoid permanently damaging the camera the seals should be replaced once each year. 
Please contact Panasonic’s Service Centre for related costs and other information.

3

Close the side door securely.

C

[LOCK] switch (grey part)

D

Red part

E

Released state

F

Locked state

Lock the [LOCK] switch securely until 
the red part is no longer visible.

To prevent water seeping into the 
camera, be careful not to trap foreign 
objects such as liquids, sand, hair or 
dust etc.

Check before using underwater

Do not open or close the side door in places with sand and dust, close to water, 
or with wet hands. Sand or dust adhering may cause water leaks.

ロヰヤレ

ロヰヤレ

ロヰヤレ

DMC-FT20&TS20EB-VQT4A91_mst.book  13 ページ  2011年12月13日 火曜日 午後5時41分

Summary of Contents for Lumix DMC-FT20

Page 1: ...ons completely More detailed instructions on the operation of this camera are contained in Operating Instructions for advanced features PDF format in the supplied CD ROM Install it on your PC to read it EB VQT4A91 F0112HY0 Web Site http www panasonic europe com Model number suffix EB denotes UK model ...

Page 2: ...r than your own private use may infringe copyright laws Even for the purpose of private use recording of certain material may be restricted Information for Your Safety Product identification marking WARNING To reduce the risk of fire electric shock or product damage Do not let water or other liquids drip or splash inside the unit Do not expose accessories battery pack battery charger SD memory car...

Page 3: ...ase observe the wiring code as stated below If in any doubt please consult a qualified electrician IMPORTANT The wires in this mains lead are coloured in accordance with the following code Blue Neutral Brown Live As these colours may not correspond with the coloured markings identifying the terminals in your plug proceed as follows The wire which is coloured Blue must be connected to the terminal ...

Page 4: ... is connected to an electrical outlet CAUTION Danger of explosion if battery is incorrectly replaced Replace only with the type recommended by the manufacturer When disposing the batteries please contact your local authorities or dealer and ask for the correct method of disposal Warning Risk of fire explosion and burns Do not disassemble heat above 60 xC or incinerate CAUTION To reduce the risk of...

Page 5: ...noise adversely affecting the pictures and or sound Recorded data may be damaged or pictures may be distorted by strong magnetic fields created by speakers or large motors Electromagnetic wave radiation generated by microprocessors may adversely affect this unit disturbing the pictures and or sound If this unit is adversely affected by electromagnetic equipment and stops functioning properly turn ...

Page 6: ...ling For more information about collection and recycling of old products and batteries please contact your local municipality your waste disposal service or the point of sale where you purchased the items Penalties may be applicable for incorrect disposal of this waste in accordance with national legislation For business users in the European Union If you wish to discard electrical and electronic ...

Page 7: ...terproof Dustproof and Anti shock Performance of the Camera 11 Names and Functions of Main Parts 17 Charging the Battery 18 Inserting and Removing the Card optional the Battery 19 Sequence of operations 20 Reading the Operating Instructions PDF format 22 Installing supplied software 23 Specifications 24 ...

Page 8: ... to 2 hours with the side door open when the temperature of the camera gets close to the ambient temperature Contact Panasonic s Service Centre if the fogging does not disappear Conditions in which inner side of the lens may be fogged Condensation may occur and the inner side of the lens may be fogged when the camera is used in areas that undergo a significant change in temperature or in high humi...

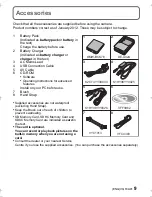
Page 9: ...s for advanced features Install on your PC before use 7 Brush 8 Hand Strap Supplied accessories are not waterproof excluding Hand Strap Keep the Brush out of reach of children to prevent swallowing SD Memory Card SDHC Memory Card and SDXC Memory Card are indicated as card in the text The card is optional You can record or play back pictures on the built in memory when you are not using a card Cons...

Page 10: ...Panasonic UK It couldn t be simpler Also available through our Internet is direct shopping for a wide range of finished products Take a browse on our website for further details Optional Accessories Some optional accessories may not be available in some countries Battery Pack DMW BCK7 Class 10 64 GB SDXC Memory Card Class 10 32 GB SDHC Memory Card Class 10 16 GB SDHC Memory Card Class 10 8 GB SDHC...

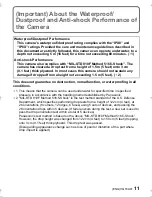
Page 11: ...es Panasonic s test method is based on the above MIL STD 810F Method 516 5 Shock However the drop height was changed from 122 cm 4 feet to 150 cm 5 feet dropping onto 3 cm 0 1 feet thick plyboard This drop test was passed Disregarding appearance change such as loss of paint or distortion of the part where drop impact is applied Waterproof Dustproof Performance This camera s waterproof dustproof ra...

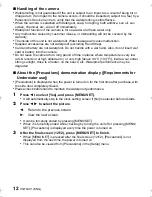
Page 12: ...e temperature is very low at ski resorts or at high altitude etc or very high above 40 oC 104 oF inside a car under strong sunlight close to a heater on the beach etc Waterproof performance may be degraded About the Precautions demonstration display Requirements for Underwater use Precautions is displayed when the power is turned on for the first time after purchase with the side door completely c...

Page 13: ...horter harder side of the brush 2 Check for cracks and deformation of the rubber seal on the side door The integrity of the rubber seals may decrease after about 1 year with use and age To avoid permanently damaging the camera the seals should be replaced once each year Please contact Panasonic s Service Centre for related costs and other information 3 Close the side door securely C LOCK switch gr...

Page 14: ...open or close the side door underwater Do not apply shock to the camera underwater Waterproof performance may not be maintained and there is a chance of water leak Do not dive into the water holding the camera Do not use the camera in a location where the water will splash strongly such as rapid flow or waterfall Strong water pressure may be applied and it may cause malfunction The camera will sin...

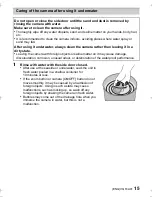
Page 15: ... the camera in water but this is not a malfunction Caring of the camera after using it underwater Do not open or close the side door until the sand and dust is removed by rinsing the camera with water Make sure to clean the camera after using it Thoroughly wipe off any water droplets sand and saline matter on your hands body hair etc It is recommended to clean the camera indoors avoiding places wh...

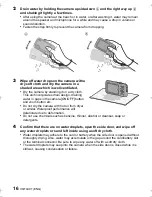
Page 16: ...g water in gaps in the camera ON OFF button and zoom button etc Do not dry the camera with hot air from dryer or similar Waterproof performance will deteriorate due to deformation Do not use chemicals such as benzine thinner alcohol or cleanser soap or detergents 4 Confirm that there are no water droplets open the side door and wipe off any water droplets or sand left inside using a soft dry cloth...

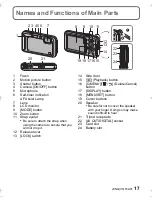
Page 17: ... when using the camera to ensure that you will not drop it 12 Release lever 13 LOCK switch 14 Side door 15 Playback button 16 Q MENU Delete Cancel button 17 DISPLAY button 18 MENU SET button 19 Cursor buttons 20 Speaker Be careful not to cover the speaker with your finger Doing so may make sound difficult to hear 21 Tripod receptacle 22 AV OUT DIGITAL socket 23 Card slot 24 Battery slot モヷチヰヶヵチバチュ...

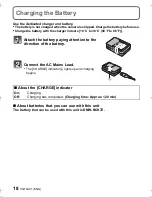
Page 18: ...arger indoors 10 oC to 30 oC 50 oF to 86 oF About batteries that you can use with this unit The battery that can be used with this unit is DMW BCK7E Attach the battery paying attention to the direction of the battery Connect the AC Mains Lead The CHARGE indicator A lights up and charging begins About the CHARGE indicator On Charging Off Charging has completed Charging time Approx 120 min ...

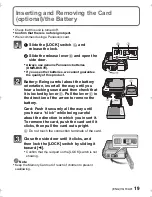
Page 19: ...ion insert all the way until you hear a locking sound and then check that it is locked by lever C Pull the lever C in the direction of the arrow to remove the battery Card Push it securely all the way until you hear a click while being careful about the direction in which you insert it To remove the card push the card until it clicks then pull the card out upright D Do not touch the connection ter...

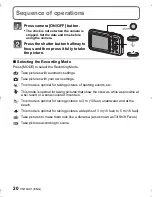
Page 20: ...es with automatic settings Take pictures with your own settings This mode is optimal for taking pictures of sporting events etc This mode is optimal for taking pictures that show the snow as white as possible at a ski resort or a snow covered mountain This mode is optimal for taking pictures to 3 m 10 feet underwater and at the beach This mode is optimal for taking pictures at depths of 3 m 10 fee...

Page 21: ...minutes 59 seconds The maximum available recording time continuously is displayed on the screen Setting the Menu Press MENU SET to display the menu screen to change the recording function camera settings and other settings Playing Back Pictures Normal Play Press Press 2 or 1 to select the picture Deleting Pictures Select the picture and then press Confirmation screen is displayed Picture is delete...

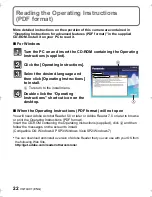
Page 22: ...ns to install A To return to the install menu Double click the Operating Instructions shortcut icon on the desktop When the Operating Instructions PDF format will not open You will need Adobe Acrobat Reader 5 0 or later or Adobe Reader 7 0 or later to browse or print the Operating Instructions PDF format Insert the CD ROM containing the Operating Instructions supplied click B and then follow the m...

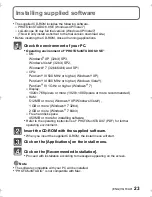
Page 23: ...higher Windows VistaR PentiumR III 1 GHz or higher WindowsR 7 Display 1024k768 pixels or more 1920k1080 pixels or more recommended RAM 512 MB or more WindowsR XP Windows VistaR 1 GB or more WindowsR 7 32bit 2 GB or more WindowsR 7 64bit Free hard disk space 450 MB or more for installing software Refer to the operating instructions of PHOTOfunSTUDIO PDF for further operating environment Insert the ...

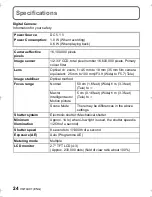
Page 24: ...de to F5 7 Tele Image stabiliser Optical method Focus range Normal 50 cm 1 6 feet Wide 1 m 3 3 feet Tele to Macro Intelligent auto Motion picture 5 cm 0 16 feet Wide 1 m 3 3 feet Tele to Scene Mode There may be differences in the above settings Shutter system Electronic shutteriMechanical shutter Minimum Illumination Approx 14 lx when i low light is used the shutter speed is 1 25th of a second Shu...

Page 25: ...tures MP4 Audio compression format AAC Interface Digital USB 2 0 High Speed Data from the PC can not be written to the camera using the USB connection cable Analogue video NTSC PAL Composite Switched by menu Audio Audio line output monaural Terminal AV OUT DIGITAL Dedicated jack 8 pin Dimensions excluding the projecting parts Approx 101 mm W k58 3 mm H k19 2 mm D 3 98q W k2 3q H k0 76q D Mass Appr...

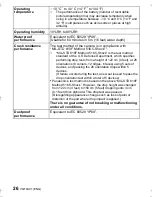
Page 26: ...andard of the U S Defense Department which specifies performing drop tests from a height of 122 cm 4 feet at 26 orientations 8 corners 12 ridges 6 faces using 5 sets of devices and passing the 26 orientation drops within 5 devices If failure occurs during the test a new set is used to pass the drop orientation test within a total of 5 devices Panasonic s test method is based on the above MIL STD 8...

Page 27: ...W BCK7E Information for your safety Input AC 110 V to 240 V 50 60 Hz 0 2 A Output DC 4 2 V 0 43 A Operating temperature 0 oC to 40 oC 32 oF to 104 oF The battery cannot be recharged in a temperature less than 0 oC 32 oF The CHARGE indicator blinks when the battery cannot be recharged Voltage capacity 3 6 V 680 mAh ...

Page 28: ... trademarks of the manufacturers who developed the system or product concerned This product is licensed under the AVC patent portfolio license for the personal and non commercial use of a consumer to i encode video in compliance with the AVC Standard AVC Video and or ii decode AVC Video that was encoded by a consumer engaged in a personal and non commercial activity and or was obtained from a vide...

Reviews: