


4.
Use
[
][
]
to select
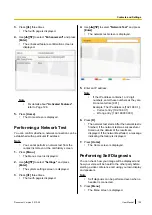
"MIC Setting"
and press
[Enter]
.
•
The auto settings screen is displayed.
Note
•
If the manual settings screen is displayed,
press
[B]
to return to the auto settings
screen.
5.
Press
[G]
.
•
A dialogue box to confirm the saving of settings
is displayed.
6.
Use
[
][
]
to select
"Yes"
and press
[Enter]
.
•
The system settings screen is displayed.
Note
•
Depending on how many Digital Boundary
Microphones are connected, the output
settings differ as follows:
–
2 or more Digital Boundary
Microphones: Monaural output
–
1 Digital Boundary Microphone: Stereo
output
•
When using Digital Boundary Microphones
and an Analogue Boundary Microphone
together, the output for all Boundary
Microphones will be monaural.
7.
Press
[Home]
.
•
The Home screen is displayed.
Setting the MIC Position manually
1.
Press
[Menu]
.
•
The Menu screen is displayed.
2.
Use
[
][
]
to select
"Settings"
and press
[Enter]
.
•
The system settings screen is displayed.
3.
Press
[
]
.
•
The second page is displayed.
4.
Use
[
][
]
to select
"MIC Setting"
and press
[Enter]
.
•
The auto settings screen is displayed.
Note
•
If the manual settings screen is displayed,
proceed to step
5.
Press
[B]
.
•
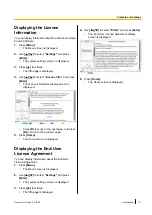
The manual settings screen is displayed.
6.
Use
[
][
]
to select the Digital Boundary
Microphone you want to configure and press
[Enter]
.
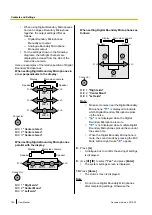
7.
Use
[
][
]
to select the Digital Boundary
Microphone’s relative position.
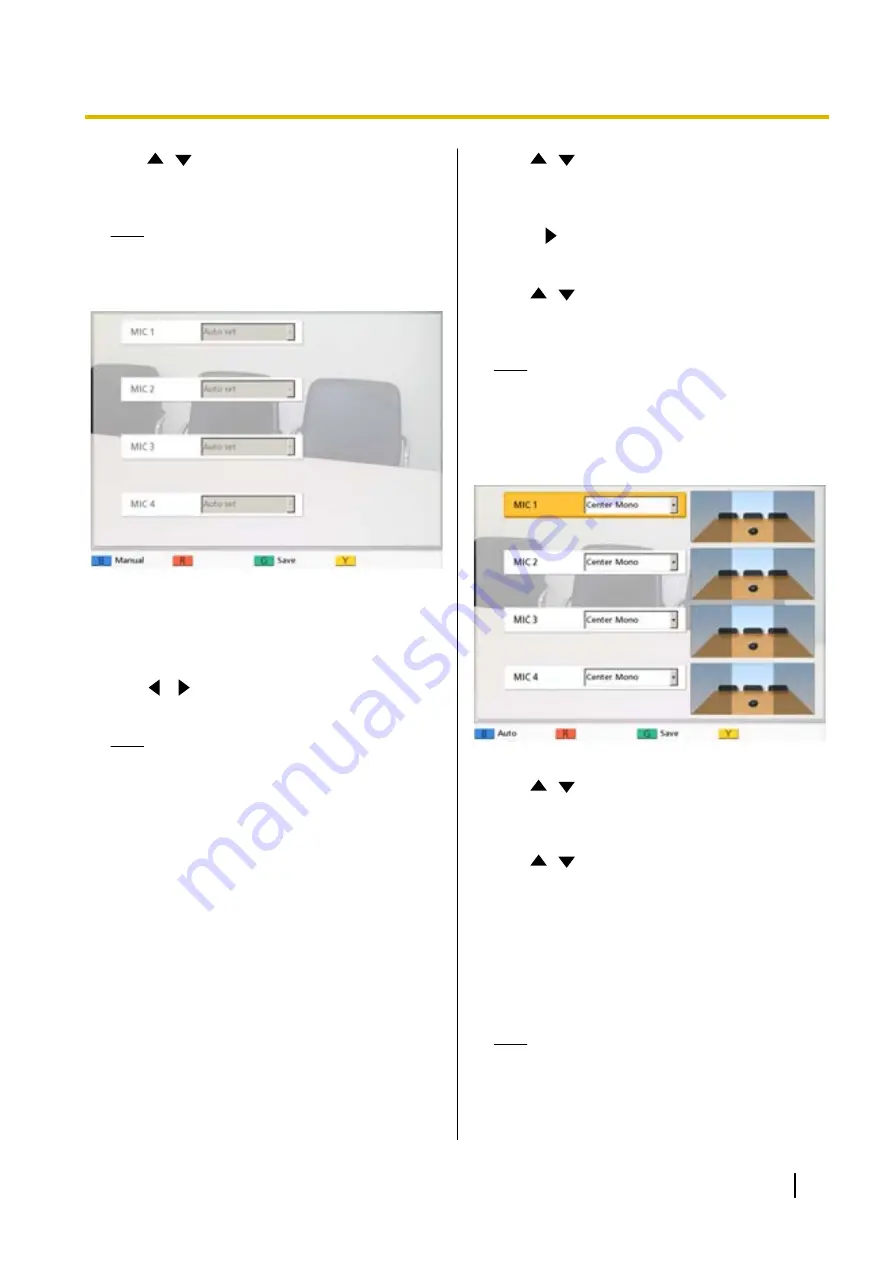
"Left side"
: Sounds on left side are played.
"Right side"
: Sounds on right side are played.
"Center Mono"
: All sounds are played through
both the left and right speakers at the same volume.
"Center stereo"
: Sounds centred on the
microphone are played through both the left and
right speakers at the same volume.
Note
•
When a Digital Boundary Microphone is set
to
"Center stereo"
, make sure that it is
placed with its connector facing the display.
Document Version 2013-09
User Manual
103
Contacts and Settings


