background image

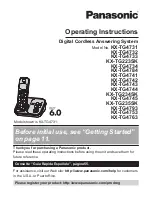
Thank you for purchasing a Panasonic product.

Please read these operating instructions before using the unit and save them for 
future reference.
This unit is compatible with Caller ID. You must subscribe to the appropriate service 
offered by your service provider/telephone company.

Before initial use, see “Getting Started” 

on page 8.

Operating Instructions

Model No.


KX-TG6611CX 

KX-TG6612CX

Digital Cordless Phone

Model shown is KX-TG6611.

TG6611_6612CX(e).book  Page 1  Thursday, March 31, 2011  5:04 PM

Summary of Contents for KX-TG6611CX

Page 1: ...his unit is compatible with Caller ID You must subscribe to the appropriate service offered by your service provider telephone company Before initial use see Getting Started on page 8 Operating Instructions Model No KX TG6611CX KX TG6612CX Digital Cordless Phone Model shown is KX TG6611 TG6611_6612CX e book Page 1 Thursday March 31 2011 5 04 PM ...

Page 2: ...alls Making calls 14 Answering calls 14 Useful features during a call 15 Key lock 16 Power back up operation 16 Phonebook Handset phonebook 18 Copying phonebook entries 19 Programming Programmable settings 20 Special programming 23 Registering a unit 25 Caller ID Service Using Caller ID service 27 Caller list 27 Voice Mail Service Voice mail service 29 Intercom Locator Intercom 30 Handset locator ...

Page 3: ...2 The handset cover comes attached to the handset Series Model No Base unit Handset Part No Part No Quantity KX TG6611 series KX TG6611 KX TG6611 KX TGA661 1 KX TG6612 KX TG6611 KX TGA661 2 No Accessory item Part number Quantity KX TG6611 KX TG6612 1 AC adaptor PNLV226BX 1 2 2 Telephone line cord 1 1 3 Rechargeable batteries 1 2 4 4 Handset cover 2 1 2 5 Charger 1 1 2 3 4 5 TG6611_6612CX e book Pa...

Page 4: ... system Accessory item Model number Rechargeable batteries HHR 4MRT 1 Battery type Nickel metal hydride Ni MH 2 x AAA R03 size for each handset DECT repeater KX A405 You can expand your phone system by registering optional handsets 6 max to a single base unit L Optional handsets may be a different colour from that of the supplied handsets Handset optional KX TGA661CX TG6611_6612CX e book Page 4 Th...

Page 5: ...malfunction resulting in an accident L Do not allow the AC adaptor or telephone line cord to be excessively pulled bent or placed under heavy objects Operating safeguards L Unplug the product from power outlets before cleaning Do not use liquid or aerosol cleaners L Do not disassemble the product L Do not spill liquids detergents cleansers etc onto the telephone line cord plug or allow it to becom...

Page 6: ...or near a swimming pool 2 Avoid using a telephone other than a cordless type during an electrical storm There may be a remote risk of electric shock from lightning 3 Do not use the telephone to report a gas leak in the vicinity of the leak 4 Use only the power cord and batteries indicated in this manual Do not dispose of batteries in a fire They may explode Check with local codes for possible spec...

Page 7: ...ential information To protect your privacy confidentiality we recommend that you erase information such as phonebook or caller list entries from the memory before you dispose of transfer or return the product Information on Disposal in other Countries outside the European Union These symbols are only valid in the European Union If you wish to discard these items please contact your local authoriti...

Page 8: ...ation L USE ONLY Ni MH batteries AAA R03 size L Do NOT use Alkaline Manganese Ni Cd batteries L Confirm correct polarities S T 100 240 V AC 50 60 Hz Use only the supplied telephone line cord To telephone line DSL ADSL filter Click Hook Hooks Click Press plug firmly Correct Wrong L When the date and time setting is displayed see page 12 100 240 V AC 50 60 Hz Hooks Rechargeable Ni MH ONLY TG6611_661...

Page 9: ...he handset base unit and charger with a soft and dry cloth once a month Before cleaning the unit disconnect from power outlets and any telephone line cords Clean more often if the unit is exposed to grease dust or high humidity Battery level Panasonic Ni MH battery performance supplied batteries Note L It is normal for batteries not to reach full capacity at the initial charge Maximum battery perf...

Page 10: ... Ringer indicator B Secure grip L Secure grip offers support when you cradle the handset between your shoulder and ear C Speaker D C Talk E s Speakerphone F Dial keypad G Receiver H Display I ic Off Power A B B C L A F D E I J H G K A B TG6611_6612CX e book Page 10 Thursday March 31 2011 5 04 PM ...

Page 11: ...d L When flashing rapidly An incoming call is now being received y Missed call 1 page 27 i The base unit transmission power is set to Low page 13 k The LCD and key backlight is off page 21 Battery level E Alarm is on page 23 6 Equalizer is set page 15 Privacy mode is on page 22 Ringer volume is off page 21 3 Night mode is on page 23 7 Blocked call 1 page 24 27 6 New voice mail message received 2 p...

Page 12: ...line service The default setting is Tone Tone For tone dial service Pulse For rotary pulse dial service 1 8 12 2 r Select the desired setting 3 M s ic One touch eco mode The ECO R button on the handset enables you to activate the eco function with one touch By activating eco mode your unit can reduce the base unit transmission power by up to 90 in standby mode Turns the key lock feature off page 1...

Page 13: ...cordless phone nearby and it is in use the base unit transmission power may not be reduced L Activating one touch eco mode reduces the range of the base unit in standby mode L If you set the repeater mode to On page 26 One touch eco mode is cancelled Eco Setup is not shown in the display menu page 21 Wall mounting Note L Make sure that the wall and the fixing method are strong enough to support th...

Page 14: ...ccess number and or PIN in the phonebook a pause is also needed page 18 Example If you need to dial the line access number 0 when making outside calls with a PBX 1 s l 2 Dial the phone number s C Note L A 3 second pause is inserted each time l is pressed Repeat as needed to create longer pauses Answering calls When a call is being received the ringer indicator flashes rapidly 1 Lift the handset an...

Page 15: ... If you receive a call while on the phone you will hear a call waiting tone If you subscribe to both Caller ID and Call Waiting with Caller ID services the 2nd caller s information is displayed after you hear the call waiting tone on the handset 1 Press ECO R to answer the 2nd call 2 To switch between calls press ECO R Note L Please contact your service provider telephone company for details and a...

Page 16: ...up mode L Do not touch the handset s charge contacts during power back up mode L If the battery level is low the unit will not work sufficiently during power back up mode In addition in case handset battery power runs out we recommend connecting a corded type telephone without AC adaptor to the same telephone line or to the same telephone line jack using a T adaptor L Calls cannot be made during a...

Page 17: ...ng the handset phonebook When only 1 handset is registered 1 Lift the handset 2 n 3 r Select the desired entry 4 Within 1 minute place the handset on the base unit L Wait until speakerphone is turned on automatically and the call is made When 2 or more handsets are registered You should leave one handset on the base unit for supplying the power and use another handset for making calls For the oper...

Page 18: ...ated on that dial key L If there is no entry corresponding to the character you selected the next entry is displayed 3 r Scroll through the phonebook if necessary 4 C Editing entries 1 Find the desired entry page 18 s 8 2 r Edit s M 3 Edit the name if necessary 16 characters max page 31 s M 4 Edit the phone number if necessary 24 digits max s M 2 times s ic Erasing entries Erasing an entry 1 Find ...

Page 19: ...ies between 2 handsets 1 1 Panasonic compatible handset Copying an entry 1 Find the desired entry page 18 s 8 2 r Copy s M 3 r Select the handset you want to send the phonebook entry to s M L When an entry has been copied Completed is displayed L To continue copying another entry r Yes s M s r Select the desired entry s M 4 ic Copying all entries 1 n s 8 2 r Copy All s M 3 r Select the handset you...

Page 20: ...setting s M L This step may vary depending on the feature being programmed L To exit the operation press ic Note L In the following table indicates the default settings L In the following table indicates the reference page number L Display menu order and sub menu may vary depending on your model Display the menu tree and direct command code table Main menu Caller List Main menu e Time Settings Mai...

Page 21: ...4 5 Ringtone 1 161 Night Mode On Off 1 On 0 Off 238 23 Night Mode Start End 23 00 06 00 237 23 Night Mode Ring Delay 1 30 sec 2 60 sec 3 90 sec 4 120 sec 0 No Ringing 239 23 Time Settings Set Date Time 1 101 12 Alarm 1 Once 2 Daily 0 Off 720 23 Time Adjustment 1 2 1 Caller ID 0 Manual 226 Handset Name 104 23 Caller Barred 1 217 24 Eco Setup Transmission Power 1 1 Normal 2 Low 725 12 Display Setup ...

Page 22: ...ng or pressing any keys including confirmation tones and error tones 7 If you subscribe to a Caller ID service and want to view the caller s information after lifting up the handset to answer a call turn off this feature 8 The recall flash time depends on your telephone exchange or host PBX Contact your PBX supplier if necessary 9 To prevent other users from joining your conversations with outside...

Page 23: ...n off 1 8 238 2 r Select the desired setting s M L If you select Off press ic to exit 3 Enter the desired hour and minute you wish to start this feature s M L You can select 24 hour or 12 hour clock format AM or PM by pressing 4 Enter the desired hour and minute you wish to end this feature s M 5 ic L When the night mode is set 3 is displayed Changing the start and end time 1 8 237 2 Continue from...

Page 24: ...Viewing editing erasing bar call numbers 1 8 217 2 r Select the desired entry L To exit press ic 3 To edit a number s Edit the phone number s M s ic To erase a number W s r Yes s M s ic Note L When editing press the desired dial key to add to erase Storing an area code to be deleted automatically In some situations phone numbers stored automatically in the caller list page 27 will include area cod...

Page 25: ...e pre registered If for some reason the handset is not registered to the base unit for example _ is displayed even when the handset is near the base unit re register the handset 1 Handset 8 13 2 Base unit Press and hold x for about 5 seconds No registration tone L If all registered handsets start ringing press x again to stop then repeat this step L The next step must be completed within 90 second...

Page 26: ...or off _ is displayed on the handset momentarily This is normal and the handset can be used once w is displayed Registering the DECT repeater KX A405 to the base unit Note L Please use a repeater that has not yet been registered to another unit If the repeater is registered to another unit deregister it first referring to the Installation Guide for the DECT repeater 1 Base unit Press and hold x fo...

Page 27: ...calls y disappears from the standby display if the following operation is performed by one of the registered handsets Being replaced on the base unit or charger Pressing ic Phonebook name display When caller information is received and it matches a phone number stored in the phonebook the stored name in the phonebook is displayed and logged in the caller list Caller list Important L Only 1 person ...

Page 28: ...the desired entry 3 W s r Yes s M s ic Erasing all caller information 1 y 2 W s r Yes s M s ic Storing caller information to the phonebook 1 y 2 r Select the desired entry s I 3 r Phonebook s M 4 To store the name continue from step 2 Adding entries page 18 TG6611_6612CX e book Page 28 Thursday March 31 2011 5 04 PM ...

Page 29: ...one or when your line is busy Messages are recorded by your service provider telephone company not your telephone When you have new messages 6 is displayed on the handset if message indication service is available Please contact your service provider telephone company for details of this service Important L If 6 still remains on the display even after you have listened to new messages turn it off ...

Page 30: ...erring calls conference calls Outside calls can be transferred or a conference call with an outside party can be made between 2 handsets 1 During an outside call press 4 to put the call on hold 2 r Select the desired unit s M 3 Wait for the paged party to answer L If the paged party does not answer press to return to the outside call 4 To complete the transfer Press ic L The outside call is being ...

Page 31: ...o move the cursor to the next space then press the appropriate dial key If you do not press any dial key within 5 seconds after entering a character the character is fixed and the cursor moves to the next space Character entry modes The available character entry modes are Alphabet ABC Numeric 0 9 Greek F Extended 1 G Extended 2 H and Cyrillic I When in these entry modes except Numeric you can sele...

Page 32: ...er table N L The following are used for both uppercase and lowercase Extended 2 character table O L The following are used for both uppercase and lowercase Cyrillic character table P TG6611_6612CX e book Page 32 Thursday March 31 2011 5 04 PM ...

Page 33: ...ed yet or not connected properly Check the connections page 8 Failed L Phonebook copy failed page 19 Confirm the other handset the receiver is in standby mode and try again Incomplete L The receiver s phonebook memory is full Erase the unwanted phonebook entries from the other handset the receiver and try again Memory Full L The phonebook memory is full Erase unwanted entries page 18 L The call ba...

Page 34: ...ephone If the working telephone operates properly contact our service personnel to have the unit repaired If the working telephone does not operate properly contact your service provider telephone company Problem Cause solution The display is in a language I cannot read L Change the display language page 12 While programming the display returns to standby mode L A call matching an entry in the cal...

Page 35: ...nce L Move closer to the base unit L If you use a DSL ADSL service we recommend connecting a DSL ADSL filter between the base unit and the telephone line jack Contact your DSL ADSL provider for details L Unplug the base unit s AC adaptor to reset the unit and turn off the handset Reconnect the adaptor turn on the handset and try again Sound quality seems to be getting worse L You have registered a...

Page 36: ... service provider telephone company the unit may display the caller s information at the 2nd ring or later L Move closer to the base unit Time on the unit has shifted L Incorrect time information from incoming Caller ID changes the time Set the time adjustment to Manual off page 20 The name stored in the phonebook is not fully displayed while an outside call is being received L Edit the phonebook ...

Page 37: ...5 Error messages 33 H Handset Deregistration 25 Locator 30 Name 23 Registration 25 Hold 15 I Incoming call barring 24 Intercom 30 K Key lock 16 Keytones 21 M Making calls 14 Missed calls 27 Mute 15 N Night mode 23 P Pause 14 Phonebook 18 PIN 25 Power failure power back up operation 16 Power on off 12 Privacy mode 22 R Recall flash 15 Redialling 14 Repeater 26 Ringer tone 21 S Speakerphone 14 T Tem...

Page 38: ...Notes 38 TG6611_6612CX e book Page 38 Thursday March 31 2011 5 04 PM ...

Page 39: ...Notes 39 TG6611_6612CX e book Page 39 Thursday March 31 2011 5 04 PM ...

Page 40: ...pair under warranty Panasonic System Networks Co Ltd 2011 Serial No Date of purchase found on the bottom of the base unit Name and address of dealer Attach your purchase receipt here 1 62 4 chome Minoshima Hakata ku Fukuoka 812 8531 Japan Web Site http www panasonic net TG6611_6612CX e book Page 40 Thursday March 31 2011 5 04 PM ...

Reviews: