background image

Installation Guide

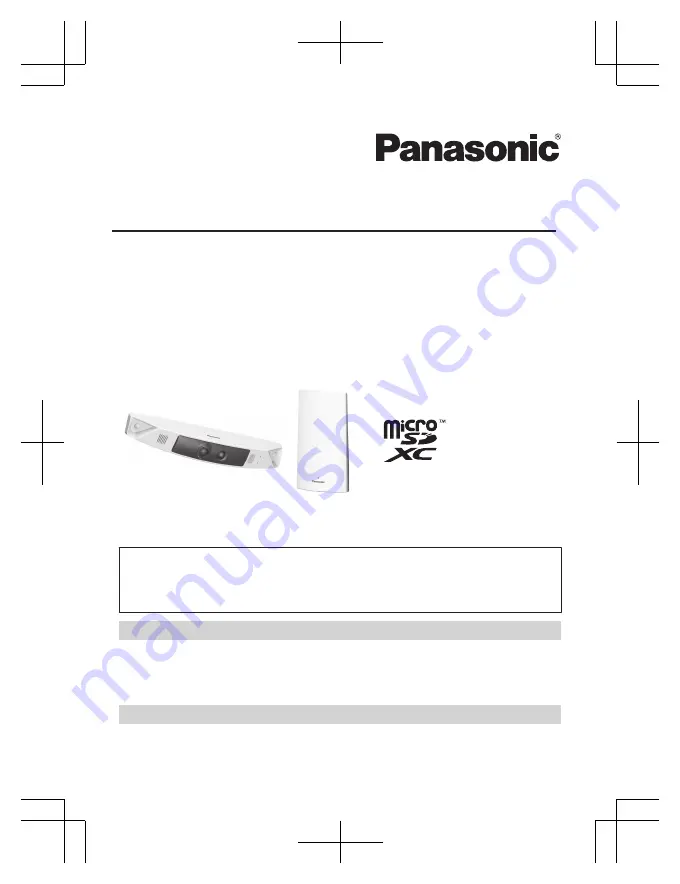
Home Monitoring Camera

HomeHawk Front Door

Model No.

KX-HN7001

HomeHawk Front Door/Outdoor

Model No.

KX-HN7002
KX-HN7003

Model shown is KX-HN7001.

Thank you for purchasing a Panasonic product.

This document explains how to configure the access point, front door camera and
optional outdoor camera using a mobile device. These steps must be followed
before you can use the system.
For details about how to use the system, refer to the User’s Guide (page 32).

Charge the cameras for about 7 hours before camera installation (page 22).

Please read this document before using the unit and save it for future reference.
For assistance, please contact us at 1-800-272-7033 or visit our Web site: 

http://shop.panasonic.com/support

 for customers in the U.S.A.

Please register your product: http://shop.panasonic.com/support

Printed in China

HN7001̲(en̲en)̲0209̲ver.140.pdf   1

2018/02/09   11:33:51

Summary of Contents for KX-HN7002

Page 1: ...steps must be followed before you can use the system For details about how to use the system refer to the User s Guide page 32 Charge the cameras for about 7 hours before camera installation page 22 Please read this document before using the unit and save it for future reference For assistance please contact us at 1 800 272 7033 or visit our Web site http shop panasonic com support for customers i...

Page 2: ...tions 17 Setup Part names and functions 18 Setup overview 22 Charging the cameras 22 Turning the power on for the cameras 23 Downloading the HomeHawk app 23 Connections for access point 24 Initial setup 24 Registering the cameras 25 Confirming the camera installation area 26 Camera installation 26 Testing the motion detection range 30 Registering another mobile device 31 Appendix Features availabl...

Page 3: ...E Spacer for front door camera PNWYAC700W01 1 1 1 F Wall mounting adaptor for outdoor camera PNWYAC710W00 1 2 G Wall mounting screws 25 mm 1 inch PNWYAC700W02 1 3 6 9 H Suspension wire tool for outdoor camera Safety wire PNWYAC710W01 Washer PNWYAC710W02 The washer for attaching safety wire to wall ø16 mm 5 8 inches Safety wire ring PNWYAC710W03 The safety wire ring for attaching the safety wire to...

Page 4: ...osoft Windows and Internet Explorer are either registered trademarks or trademarks of Microsoft Corporation in the United States and or other countries R All other trademarks identified herein are the property of their respective owners Notice R The access point supports microSDHC and microSDXC memory cards In this document the term microSD card is used as a generic term for any of the supported c...

Page 5: ... all situations cannot be guaranteed Panasonic will not be held responsible for injury or damage to property that occurs in the event of wireless communication error or failure For your safety To prevent severe injury and loss of life property read this section carefully before using the product to ensure proper and safe operation of your product WARNING Power connection R For the access point use...

Page 6: ...l parts microSD cards screws etc out of the reach of children There is a risk of swallowing In the event they are swallowed seek medical advice immediately Operating safeguards R Unplug the product from power outlets before cleaning Do not use liquid or aerosol cleaners R Do not disassemble the product R Never put metal objects inside the product If metal objects enter the product turn off the cir...

Page 7: ...n for all wireless communication R You may be vulnerable to security breaches if the unit is used with the login password at its default value Configure your own value for this settings R Do not use passwords that could be easily guessed by a third party If you keep a record of your passwords protect that record Change passwords regularly R If you lose your mobile device change the password used t...

Page 8: ...f the product R When you leave the product unused for a long period of time do as follows Access point Unplug the product from the power outlet Front door camera Outdoor camera Turn off the power slide switch R The product should be kept away from heat sources such as heaters kitchen stoves etc It should not be placed in rooms where the temperature is less than 20 C 4 F or greater than 50 C 122 F ...

Page 9: ...uct disposal transfer or return R This product can store your private confidential information To protect your privacy confidentiality we recommend that you erase information from the memory before you dispose of transfer or return the product Notice for built in battery ATTENTION A lithium ion battery that is recyclable powers the product you have purchased Please call 1 800 8 BATTERY 1 800 822 8...

Page 10: ...1 Stickers 2 Battery R Perform steps A to F lift the battery 2 and then remove it n Outdoor camera R Disconnect the power cord from the camera when removing the battery 1 2 3 4 6 5 8 7 2 2 Battery R Perform steps A to H lift the battery 2 and then remove it 10 For assistance please visit http shop panasonic com support Important Information HN7001 en en 0209 ver 140 pdf 10 2018 02 09 11 33 52 ...

Page 11: ...Notice For assistance please visit http shop panasonic com support 11 Important Information HN7001 en en 0209 ver 140 pdf 11 2018 02 09 11 33 52 ...

Page 12: ...s Guide page 32 Information about sensor features The cameras have 2 sensor features that are used for motion detection a visual sensor and an infrared sensor i e heat sensor Please read the following information before deciding where to install the camera Note R The camera s sensor features are not designed to be used in situations that require high reliability We do not recommend use of the sens...

Page 13: ... is no difference between the temperatures of objects and the surrounding environment R If the camera is mounted facing a road the sensor may detect incorrectly due to interference caused by the heat from passing cars Information about night vision mode The cameras feature color night vision mode which allows camera images to be viewable even when the surrounding area is dark Note R When Color is ...

Page 14: ... at an entrance or gate without detecting cars in the street n Front door camera Ideal example Poor example 1 1 Approx 2 2 m 7 feet 3 inches Only visitors pass in front of the camera and there are no objects to cause false detections Hanging plants on the side of the door are more likely to cause false detections Note R The visual detection range is as follows Horizontal 150 Vertical 85 14 For ass...

Page 15: ...ars in the street are less likely to cause false detections Cars in the street are more likely to cause false detections Note R The visual detection range is as follows Horizontal 150 Vertical 85 For assistance please visit http shop panasonic com support 15 Installation Location HN7001 en en 0209 ver 140 pdf 15 2018 02 09 11 33 52 ...

Page 16: ...he street are less likely to cause false detections R To prevent faces from being obscured by tall vehicles adjust the installation position and angle of the camera Cars in the street are more likely to cause false detections Note R The visual detection range is as follows Horizontal 150 Vertical 85 16 For assistance please visit http shop panasonic com support Installation Location HN7001 en en 0...

Page 17: ...d recorders broadcasted images may be distorted R Areas where hydrogen sulfide ammonia dust or toxic gases are present Installing in the following areas may cause false detections R Areas where people approach directly from the front of the camera such as narrow walkways outdoor camera R Areas where objects such as trees or hanging laundry move due to wind temperature variation and motion may caus...

Page 18: ...ter Green lit Power is on normal operations 1 or registration completed for the camera or smartphone Green blinking slowly Registration mode updating Green blinking quickly Obtaining an IP address or accessing a microSD card 1 Green lit Amber lit alternating Starting up 2 Red lit Registration failed 1 You can configure the access point so that its LED indicator does not light during normal operati...

Page 19: ... B Speaker I Lock key C Lens J micro USB connector D Light sensor K Charging LED indicator E White LED lens L MSETUPN F LED indicator M Power slide switch G Microphone For assistance please visit http shop panasonic com support 19 Setup HN7001 en en 0209 ver 140 pdf 19 2018 02 09 11 33 53 ...

Page 20: ...nfrared sensors J Power slide switch D LED indicator K Charging LED indicator E Microphone L Camera nut F Light sensor M USB cover micro USB connector G Interface cover N Wall mounting adaptor 20 For assistance please visit http shop panasonic com support Setup HN7001 en en 0209 ver 140 pdf 20 2018 02 09 11 33 53 ...

Page 21: ...point 1 Red lit Registration failed signal level is weak 3 or detecting motion 1 Red blinking quickly Streaming data 1 Amber blinking slowly Battery is running low 1 Green blinking slowly Registration mode updating Red blinking slowly Camera is out of range of the access point 1 3 1 You can configure the camera so that its LED indicator does not light during normal operation For more information r...

Page 22: ...e camera indoors and in a dry location R Charge the camera in a location with a temperature between 5 C and 40 C 41 F and 104 F The camera cannot charge in locations outside of these temperatures Charging the front door camera Charge for about 7 hours R Turn the camera off before charging the battery If the camera is turned on while charging it may take longer to charge 1 Slide the lock key A 2 Op...

Page 23: ...ent power source 5 0 V 1 0 A or higher Camera charging LED indicators You can use the charging LED indicators to confirm the charging status of the cameras Camera indicator Status Red lit Charging is completed Red blinking slowly Charging Red blinking quickly Charging failure Turning the power on for the cameras Open the cover of the cameras and then slide the power slide switch to ON page 19 n Fr...

Page 24: ...2 3 Insert a microSD card not supplied into the unit s microSD card slot C 1 3 2 2 1 Note about power connections AC adaptor connection R The AC adaptor must remain connected at all times It is normal for the adaptor to feel warm during use R The AC adaptor should be connected to a vertically oriented or floor mounted AC outlet Do not connect the AC adaptor to a ceiling mounted AC outlet as the we...

Page 25: ...e and then tap OK R The app s home screen is displayed when initial setup is completed Registering the cameras The access point and cameras are pre registered If for some reason the cameras are not registered to the access point the camera s LED indicator lights in amber for 5 seconds after turning the power on for the camera You can register each camera by using the registration buttons or the Ho...

Page 26: ...siding could become damaged Make sure you mount the camera in a location where the structure behind the siding can be used to support the weight of the camera If this is not possible due to the thickness of the siding use commercially available screws ø4 mm longer than 25 mm ø5 32 inches longer than 1 inch R Drill a pilot hole using a drill bit that is appropriate for the type of siding Remove any...

Page 27: ... Other materials mortar tile etc R Do not use the included screws R Consult the builder or licensed professional regarding the type of anchor appropriate for the installation location and materials R Do not install on gypsum board or concrete blocks Installing the front door camera 1 Attach the wall mounting adaptor to a porch wall R Secure the wall mounting adaptor to the wall by tightening the 3...

Page 28: ...ly Water resistance cannot be assured if the interface cover is open Using the spacer Use the supplied spacer to adjust the installation angle of the camera Insert the spacer between the wall mounting adaptor and the wall Removing the front door camera Rotate the camera towards the wall A and then pull it away from the wall mounting adaptor B 1 2 28 For assistance please visit http shop panasonic ...

Page 29: ...ty wire ring E 4 5 1 2 3 Important R Make sure to close the interface cover securely Water resistance cannot be assured if the interface cover is open 4 Drive the wall mounting screws into the wall 1 Longer than 25 mm 1 inch 2 Space 2 8 mm 1 8 inches 1 2 Note R Use the following template when determining the location of the screw holes 1 inch 25 4 mm For assistance please visit http shop panasonic...

Page 30: ...tion detection features For details about these operations refer to the User s Guide page 32 1 Start the HomeHawk app and then tap 2 Tap Settings 3 Tap Camera settings and select the camera to be tested 4 Tap Detection Detection Test 5 Move to an area within the camera s viewable area 6 While moving near the camera use your mobile device to observe where you are in the viewable area when the camer...

Page 31: ...the access point are connected to the same wireless router 1 Using the mobile device that you want to register download the HomeHawk app and then start the app 2 Follow the on screen instructions 3 When prompted press MSETUPN on the access point R Your mobile device will be registered to the access point 4 When prompted enter the password that will be used to log in to the access point then tap OK...

Page 32: ...er 8 and earlier versions are not supported Specifications R Frequency range Wireless LAN 2 412 GHz 2 462 GHz channels 1 11 R RF transmission power Wireless LAN Access point 200 mW peak transmission power Front door camera Outdoor camera 100 mW peak transmission power R Power source Access point 120 V AC 60 Hz Front door camera Outdoor camera 5 0 V 1 0 A 1 R Power consumption Access point Standby ...

Page 33: ...cording to the instructions in the Installation Guide and appropriate water protection measures are taken 5 Including the wall mounting adaptor Open source software notice for access point R Parts of this product use open source software supplied based on the relevant conditions of the Free Software Foundation s GPL and or LGPL and other conditions Please read all licence information and copyright...

Page 34: ...separation between the equipment and receiver Connect the equipment into an outlet on a circuit different from that to which the receiver is connected Consult the dealer or an experienced radio TV technician for help Some devices operate at frequencies that may cause interference to nearby TVs and VCRs To minimize or prevent such interference this device should not be placed near or on top of a TV...

Page 35: ...ur Panasonic products Accessories Parts for your Camera Phone A V products TV Computers Networking Personal Care Home Appliances Headphones Ba eries Backup Chargers more For Product Informa on Opera ng Assistance Parts Owner s Manuals Dealer and Service info go to http shop panasonic com support For the hearing or speech impaired TTY 1 877 833 8855 As of June 2015 For assistance please visit http ...

Page 36: ...batteries antennas and cosmetic parts cabinet This warranty only applies to products purchased and serviced in the United States This warranty is extended only to the original purchaser of a new product which was not sold as is Home Network System Products microSD card Included model only 90 days N A When shipping the unit carefully pack include all supplied accessories listed in the Owner s Manua...

Page 37: ...is attributable to acts of God THERE ARE NO EXPRESS WARRANTIES EXCEPT AS LISTED UNDER LIMITED WARRANTY COVERAGE THE WARRANTOR IS NOT LIABLE FOR INCIDENTAL OR CONSEQUENTIAL DAMAGES RESULTING FROM THE USE OF THIS PRODUCT OR ARISING OUT OF ANY BREACH OF THIS WARRANTY ALL EXPRESS AND IMPLIED WARRANTIES INCLUDING THE WARRANTY OF MERCHANTABILITY ARE LIMITED TO THE PERIOD OF THE LIMITED WARRANTY PARTS AN...

Page 38: ...38 Notes HN7001 en en 0209 ver 140 pdf 38 2018 02 09 11 33 53 ...

Page 39: ...39 Notes HN7001 en en 0209 ver 140 pdf 39 2018 02 09 11 33 53 ...

Page 40: ...camera ON OFF B For your future reference We recommend keeping a record of the following information to assist with any repair under warranty Serial No Date of purchase Found on the following locations Access point bottom of the unit Front door camera rear of the unit Outdoor camera inside the interface cover on the bottom of the unit Name and address of dealer Attach your purchase receipt here Tw...

Page 41: ... estos pasos para poder usar el sistema Para obtener detalles sobre cómo usar el sistema consulte la Guía del usuario página 22 Cargue las cámaras aproximadamente durante 7 horas antes de instalar la cámara página 13 Lea este documento antes de usar la unidad y guárdelo para consultarlo en el futuro Para obtener ayuda comuníquese con nosotros llamando al 1 800 272 7033 o visite nuestro sitio web h...

Page 42: ...men de configuración 13 Cómo cargar las cámaras 13 Cómo encender la alimentación para las cámaras 14 Cómo descargar la aplicación HomeHawk 14 Conexiones para el punto de acceso 15 Configuración inicial 15 Cómo registrar las cámaras 16 Confirmación del área de instalación de la cámara 17 Instalación de la cámara 17 Cómo probar el alcance de detección de movimiento 21 Registro de otro dispositivo mó...

Page 43: ...el usuario página 22 Información acerca de las características del sensor Las cámaras tienen 2 características de sensor que se usan para la detección de movimiento un sensor visual y un sensor infrarrojo es decir sensor de calor Lea la información siguiente antes de decidir dónde instalar la cámara Nota R Las funciones del sensor de la cámara no están preparadas para que se las use en situaciones...

Page 44: ...y el entorno R Si la cámara está montada cara a una carrete ra es posible que el sensor no detecte de forma correcta debido a la interferencia generada por el calor de los vehículos que pasan Información acerca del modo de visión nocturna Las cámaras tienen la función modo visión nocturna la cual permite que las imágenes de la cámara puedan verse incluso si los alrededores están oscuros Nota R Cua...

Page 45: ... visitantes en la entrada o puerta sin detectar los vehículos de la calle n Cámara para puerta principal Ejemplo ideal Ejemplo incorrecto 1 1 Aprox 2 2 m 7 pies 3 pulgadas Solo los visitantes pasan en frente de la cámara y no hay objetos que causen detecciones falsas Puede que las plantas colgantes al lado de la puer ta causen detecciones falsas Nota R El rango de detección visual es el siguiente ...

Page 46: ...robable que los vehículos en la calle generen detecciones falsas Es más probable que los vehículos en la calle ge neren detecciones falsas Nota R El rango de detección visual es el siguiente Horizontal 150 Vertical 85 6 Para obtener ayuda visite http shop panasonic com support Ubicación de la instalación HN7001 es es 0209 ver 120 pdf 6 2018 02 09 13 35 53 ...

Page 47: ...probable que los vehículos en la calle generen detecciones falsas R Para evitar que los vehículos altos oscurezcan los rostros ajuste la posición de instalación y el ángulo de la cámara Es más probable que los vehículos en la calle ge neren detecciones falsas Nota R El rango de detección visual es el siguiente Horizontal 150 Vertical 85 Para obtener ayuda visite http shop panasonic com support 7 U...

Page 48: ...nsmitidas se distorsionen R Áreas donde haya ácido sulfhídrico amoníaco polvo o gases tóxicos Si se instala en las áreas siguientes es posible que existan detecciones falsas R Áreas donde las personas se acercan de forma directa y frontal a la cámara como en pasillos angostos cámara exterior R Áreas donde objetos como árboles o ropa colgada se mueven por efecto del viento es posible que la variaci...

Page 49: ...Verde encendido El dispositivo está encendido funcionamiento normal 1 o se completó el registro de la cámara o el smartphone Verde parpadeando lentamente El modo de registro se está actualizando Verde parpadeo rápido Se está obteniendo una dirección IP o accediendo a una tarjeta microSD 1 Rojo encendido Ámbar encendido alternando Iniciando 2 Rojo encendido Falló el registro 1 Puede configurar el p...

Page 50: ...I Tecla de bloqueo C Lente J Conector micro USB D Sensor de luz K Carga de Led indicador E Lente LED blanco L MSETUPN Configuración F Led indicador M Interruptor de encendido G Micrófono 10 Para obtener ayuda visite http shop panasonic com support Configuración HN7001 es es 0209 ver 120 pdf 10 2018 02 09 13 35 53 ...

Page 51: ...infrarrojos J Interruptor de encendido D Led indicador K Carga de Led indicador E Micrófono L Tuerca de cámara F Sensor de luz M Tapa USB conector micro USB G Tapa de interfaz N Adaptador de instalación en pared Para obtener ayuda visite http shop panasonic com support 11 Configuración HN7001 es es 0209 ver 120 pdf 11 2018 02 09 13 35 53 ...

Page 52: ...gistro el nivel de la señal es débil 3 o se detecta movi miento 1 Rojo parpadeo rápido Datos de trasmisión 1 Ámbar parpadeo lento La batería se está agotando 1 Verde parpadeando lentamente El modo de registro se está actualizando Rojo parpadeando lentamente La cámara está fuera de alcance del punto de acceso 1 3 1 Puede configurar la cámara de forma tal que el Led indicador no se encienda durante ...

Page 53: ...a página 19 R Asegúrese de cargar la cámara en interiores y en ubicaciones secas R Cargue la cámara en una ubicación con una temperatura de entre 5 C y 40 C 41 F y 104 F La cámara no puede cargarse en ubicaciones con temperaturas fuera de ese rango Cómo cargar la cámara para puerta principal Cargue aproximadamente durante 7 horas R Apague la cámara antes de cargar la batería Si la cámara está ence...

Page 54: ...apagando dentro de los siguientes 10 segundos intente conectar el cable USB en una fuente de alimentación eléctrica diferente 5 0 V 1 0 A o superior Led indicadores de carga de cámara Puede usar los LED indicadores de carga para confirma el estado de la carga de las cámaras Indicador de cámara Estado Rojo encendido Carga completa Rojo parpadeando len tamente Cargando Rojo parpadeo rápido Falló la ...

Page 55: ...te el cable Ethernet en la toma LAN B y a continuación conecte el punto de acceso al enrutador 2 3 Inserte una tarjeta microSD no proporcionada en la ranura para tarjetas microSD C 1 3 2 2 1 Nota acerca de las conexiones de alimentación Adaptador de corriente alterna R El adaptador de corriente debe permanecer conectado en todo momento es normal que el adaptador se caliente durante su uso R El ada...

Page 56: ...a y luego toque Aceptar 6 Cuando se le solicite si es necesario introduzca un nombre para el punto de acceso y para el dispositivo móvil y toque Aceptar R Aparecerá la pantalla de inicio de la aplicación una vez completada la configuración inicial Cómo registrar las cámaras Los puntos de acceso y las cámaras ya están registrados Si por algún motivo las cámaras no se han registrado en el punto de a...

Page 57: ...evestimiento podría dañarse si el peso de la cámara se sostiene solo con el revestimiento Asegúrese de montar la cámara en un sitio donde la estructura detrás del revestimiento pueda usarse para sostener el peso de la cámara Si no es posible debido al grosor del revestimiento use tornillos disponibles de forma comercial de ø4 mm más largos de 25 mm ø5 32 pulgadas más largos de 1 pulgada R Taladre ...

Page 58: ...or resistente al agua disponibles de forma comercial Otros materiales mortero mosaico etc R No use los tornillos incluidos R Consulte con el constructor o el profesional con licencia sobre el tipo de taquete apropiado para la ubicación y los materiales de la instalación R No instale sobre tablas de yeso o bloques de concreto Cómo instalar la cámara para puerta principal 1 Coloque el adaptador de i...

Page 59: ...á abierta Uso del separador Use el separador suministrado para ajustar el ángulo de instalación de la cámara Inserte el separador entre el adaptador de instalación en pared y la pared Cómo quitar la cámara para puerta principal Gire la cámara hacia la pared A luego retírela del adaptador de instalación en pared B 1 2 Cómo instalar la cámara exterior 1 Abra la tapa de la interfaz A y a continuación...

Page 60: ...io de 2 8 mm 1 8 pulgadas 1 2 Nota R Use la siguiente plantilla cuando determine la ubicación de los orificios de los tornillos 1 pulgada 25 4 mm 5 Monte el adaptador de instalación en pared Luego coloque el cable de seguridad en la pared y la cámara en el adaptador de instalación en pared 1 Tornillos para la instalación en pared 2 25 4 mm 1 pulgada 3 Orificio Puede evitar que la cámara se caiga p...

Page 61: ... Cómo probar el micrófono Para probar el micrófono hable fuerte y claro en el micrófono mientras un usuario de dispositivo móvil observa las imágenes en vivo desde la cámara Registro de otro dispositivo móvil Para acceder al sistema desde un dispositivo móvil primero debe registrarlo en el punto de acceso Puede registrar hasta 8 dispositivos móviles en un punto de acceso Confirme lo siguiente ante...

Page 62: ... Guía del Usuario Nota R Se recomienda Android 4 1 y versiones posteriores R También puede acceder a la Guía del usuario mediante la página web a continuación https panasonic net cns pcc support homehawk manual R No se admite Microsoft Windows Internet Explorer 8 y versiones anteriores 22 Para obtener ayuda visite http shop panasonic com support Apéndice HN7001 es es 0209 ver 120 pdf 22 2018 02 09...

Page 63: ...23 Notas HN7001 es es 0209 ver 120 pdf 23 2018 02 09 13 35 53 ...

Page 64: ...HN7001 es es 0209 ver 120 pdf 24 2018 02 09 13 35 53 ...

Reviews: