background image

- 9 -

12 ridges, 6 faces) using 5 sets of devices, and passing the 
26 orientation drops within 5 devices. (If failure occurs during the 
test, a new set is used to pass the drop orientation test within a total 
of 5 devices.)
Panasonic’s test method is based on the above “MIL-STD 810F 
Method 516.5-Shock”. However, the drop height was changed from 
122 cm (4.0 feet) to 150 cm (5.0 feet) dropping onto 3 cm (0.10 feet) 
thick plyboard. This drop test was passed.
(Disregarding appearance change such as loss of paint or distortion 
of the part where drop impact is applied.)

Handling this unit

The waterproof performance may be degraded due to the strong water 
pressure when this unit is used deeper than 10 m (33 feet) underwater.

 / 

The waterproof performance may be degraded due to the strong water 
pressure when this unit is used deeper than 5 m (16 feet) underwater.

When this unit is splashed with detergent, soap, hot spring, bath 
additive, sun oil, sun screen, chemical, etc., wipe it off immediately.

Waterproof function of this unit is for sea water and fresh water only.

Any malfunction caused by customer misuse, or mishandling will not 
be covered by the warranty.

The inside of this unit is not waterproof. Water leakage will cause 
malfunction.

Supplied accessories such as battery pack etc. are not waterproof. 
(excluding handstrap)

Supplied accessories such as battery, etc., are not dustproof or 
anti-shock performance.

Waterproofing is not guaranteed if the unit is subject to an 
impact as a result of being hit or dropped etc. If an impact to this 
unit occurs, it should be inspected (subject to a fee) by a 
Panasonic’s Service Center to verify that the waterproofing is 
still effective.

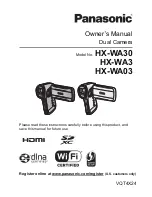
HX-WA30

HX-WA30

HX-WA3

HX-WA03

Summary of Contents for HX-WA03W

Page 1: ...ual Camera Model No HX WA30 HX WA3 HX WA03 Please read these instructions carefully before using this product and save this manual for future use VQT4X24 Register online at www panasonic com register U S customers only ...

Page 2: ...ory related component Handling of built in memory This unit is equipped with the built in memory When using this component pay attention to the following points Back up data periodically The built in memory is temporary storage In order to avoid erasing data due to static electricity electromagnetic waves breakage and failures back up the data to a PC or disc l 191 The status indicator l 19 illumi...

Page 3: ...ions that can be used for still picture recording still picture playback are indicated by in this owner s manual Functions that can be used for audio recording audio playback are indicated by in this owner s manual Pages for reference are indicated by an arrow for example l 00 File is used to mean scene still picture and audio file This owner s manual is designed for use with models and Pictures m...

Page 4: ... using in a cold climate or at low temperatures 18 Names and Functions of Main Parts 19 Power supply 22 Inserting removing the battery 22 Charging the battery 25 Charging and recording time 27 Recording to a card 30 Cards that you can use with this unit 30 Inserting removing an SD card 32 Turning the unit on off 35 About Standby Mode 36 About the high temperature warning icon 37 Selecting a mode 3...

Page 5: ... Option Menu 63 OPTION MENU 1 63 OPTION MENU 2 67 OPTION MENU 3 69 Advanced Recording Using the zoom 73 Double range zoom HX WA3 HX WA03 75 Zoom Mode 76 Image Stabilizer 78 Recording in Slow Motion Mode HX WA30 80 Recording with a filter effect 83 Burst recording 87 Recording panorama still pictures 89 Recording underwater 93 Record with color balance and audio that are suitable for recording unde...

Page 6: ...125 Various playback functions 127 Changing the playback settings and playing back the slide show 127 Playing back with a filter effect 130 Displaying file information 131 Using the playback menu 133 PLAYBACK MENU 1 133 PLAYBACK MENU 2 134 Deleting scenes still pictures audio files 140 Protecting a file 143 Watching Video Pictures on your TV 144 Connecting with an HDMI micro cable 148 TV format se...

Page 7: ...enu HX WA30 187 With a PC What you can do with a PC 191 End User License Agreement 194 Operating environment 196 Installation 200 Connecting to a PC 201 Use as a card reader 202 Using the unit as a web camera 205 Starting HD Writer VE 3 0 207 Reading the operating instructions of the software applications 207 If using Mac 208 Others LCD Display Indications 210 Messages 214 Troubleshooting 215 Caut...

Page 8: ...th the IP68 rating Provided the care and maintenance guidelines described in this document are strictly followed this unit can operate underwater to a depth not exceeding 10 m 33 feet for a time not exceeding 60 minutes 1 Anti shock Performance This unit has cleared a test conducted by Panasonic which complies with MIL STD 810F Method 516 5 Shock a drop test performed from a height of 1 5 m 5 0 fe...

Page 9: ...egraded due to the strong water pressure when this unit is used deeper than 5 m 16 feet underwater When this unit is splashed with detergent soap hot spring bath additive sun oil sun screen chemical etc wipe it off immediately Waterproof function of this unit is for sea water and fresh water only Any malfunction caused by customer misuse or mishandling will not be covered by the warranty The insid...

Page 10: ...affected Foreign objects may adhere to the inner side of the rear door around the rubber seal or connecting terminals when the rear door is opened or closed in places with sand or dust etc This may result in the impairment of the waterproof performance if the rear door is closed with foreign objects adhered Be extremely careful since it may result in malfunction etc If foreign objects are present ...

Page 11: ...ly in about 2 hours with the rear door open when the temperature of this unit gets close to the ambient temperature Contact Panasonic s Service Center if the fogging does not disappear Conditions in which inner side of the lens may be fogged Condensation may occur and the inner side of the lens may be fogged when this unit is used in areas that undergo a significant change in temperature or in hig...

Page 12: ...sand etc on the surrounding area water will leak within a few seconds causing malfunction Check before using underwater Do not open or close the rear door in places with sand and dust close to water or with wet hands Sand or dust adhering may cause water leaks 1 Unlock the LOCK lever 2 Slide the open close lever 3 Open the rear door LOCK SD CARD BATTERY ...

Page 13: ...tegrity of the rubber seals may decrease after about 1 year with use and age To avoid permanently damaging this unit the seals should be replaced once each year Please contact Panasonic s Service Center for related costs and other information 5 Close the rear door securely 1 Close the rear door 2 Slide the open close lever 3 Lock the LOCK lever Lock securely to the points where the red portion of ...

Page 14: ...he water will splash strongly such as rapid flow or waterfall Strong water pressure may be applied and it may cause malfunction This unit will sink in the water Take care not to drop this unit and lose it underwater by securely placing the strap around your wrist or similar measure Using this unit underwater Caring for this unit after using it underwater Do not open or close the rear door until th...

Page 15: ...unit in fresh water pooled in a shallow container for 10 minutes or less Do not directly rinse this unit with tap water 2 Hold this unit as shown in the illustration and shake it gently several times to drain the water Fasten the strap firmly to prevent this unit from dropping SD CARD BATTERY LOCK ...

Page 16: ... to deformation Do not use chemicals such as benzine thinner alcohol or cleanser or soap or detergents 4 Confirm that there are no water droplets open the rear door and wipe off any water droplets or sand left inside using a soft dry cloth Water droplets may adhere to the card when the rear door is opened without thoroughly drying Also water may accumulate in the gap around the card compartment th...

Page 17: ...t water that entered the gaps around the zoom button etc drains out For this reason bubbles may appear when the unit is immersed in water but this is not a malfunction Draining water from the unit Drainage holes are found on the bottom of the unit Hold the unit vertically as shown to drain off the water When draining attach the hand strap to the unit and secure the hand strap to your wrist to prev...

Page 18: ...hen the temperature is under 0 oC 32 oF If the unit gets very cold in cold places such as ski resorts or places at high altitude performance of the LCD monitor may temporarily drop immediately after turning the power on e g the picture on the LCD monitor being slightly darker than usual or ghost images appearing In cold environments keep the unit warm during use by keeping it inside your cold weat...

Page 19: ... 182 185 187 Creative Control button l 83 130 6 Status indicator l 2 25 32 165 230 7 Open close lever SD CARD BATTERY l 22 32 8 Lock lever LOCK l 22 32 Preparation Names and Functions of Main Parts Due to limitations in LCD production technology there may be some tiny bright or dark spots on the LCD monitor screen However this is not a malfunction and does not affect the recorded picture 1 2 5 6 4...

Page 20: ...enoted as shown below Example 12 In Recording Mode Zoom button W T l 73 In Playback Mode Volume button l 58 129 Zoom button W T l 125 Thumbnail display switch l 58 13 Recording start stop button l 44 14 Menu button MENU l 60 15 Rear door l 22 32 16 Card slot 17 Battery holder 18 HDMI micro connector l 144 19 USB AV connector l 25 144 153 201 Use the USB cable AV cable only the supplied cable or Se...

Page 21: ... Hand strap fixture Adjust the length after passing your arm through the hand strap 23 Speaker 24 Internal stereo microphones 25 Wi Fi Transmitter l 161 26 Tripod receptacle 20 21 23 25 24 26 22 HX WA3 HX WA03 HX WA30 HX WA3 HX WA03 HX WA30 ...

Page 22: ...se in some markets Some of these battery packs are not adequately protected with internal protection to meet the requirements of appropriate safety standards There is a possibility that these battery packs may lead to fire or explosion Please be advised that we are not liable for any accident or failure occurring as a result of use of a counterfeit battery pack To ensure that safe products are use...

Page 23: ...the battery A terminal markings Confirm that lever B is locked on to the battery It is possible to mistakenly insert the battery upside down so be sure to check the orientation carefully To remove the battery pack Push the lever B toward the direction of arrow and pull the battery straight out ...

Page 24: ... close lever 3 Lock the LOCK lever Lock securely to the points where the red portion C of the open close lever and LOCK lever are no longer visible LOCK SD CARD BATTERY LOCK SD CARD BATTERY SD CARD BATTERY LOCK Unlocked state Locked state Open close lever Lock lever ...

Page 25: ...nt with this unit The battery is charged while the unit is off or in the Standby Mode l 36 The battery cannot be charged while the unit is recording or playing back It is recommended to charge the battery in a temperature between 10 oC and 30 oC 50 oF and 86 oF The battery temperature should also be the same A Status indicator B AC adaptor C To the AC outlet D Turn the side with the symbol up to c...

Page 26: ...proximately 1 second on 1 second off and charging begins It will turn off when the charging is completed Do not use any other AC adaptors except the supplied one Do not use any other USB cables except the supplied one We recommend using Panasonic batteries l 27 If you use other batteries we cannot guarantee the quality of this product Do not heat or expose to flame Do not leave the battery ies in ...

Page 27: ...ed battery VW VBX090 optional 3 7 V 880 mAh 2 h 30 min 1 h 5 min 40 min 1 h 15 min 45 min 1 h 10 min 40 min 1 h 25 min 45 min 1 h 50 min 55 min 1 h 25 min 50 min 1 h 55 min s HX WA3 HX WA03 Battery model number Voltage Capacity minimum Charging time Recording Mode Maximum continuous recordable time Actual recordable time Supplied battery VW VBX090 optional 3 7 V 880 mAh 2 h 30 min 1 h 40 min 1 h 1...

Page 28: ...opping recording turning the unit on off moving the zoom lever etc The batteries heat up after use or charging This is not a malfunction Battery capacity indication The display changes as the battery capacity reduces red When the charge is low is displayed Due to the characteristics of the battery it may not be possible to correctly display the charge remaining on the battery For instance at low t...

Page 29: ...oducts Association Use of supplied battery Using a Panasonic SD Memory Card 2 GB HX WA30 Number of recordable pictures Approx 230 pictures By CIPA standard Recording time Approx 115 min Playback time Approx 255 min HX WA3 HX WA03 Number of recordable pictures Approx 240 pictures By CIPA standard Recording time Approx 120 min Playback time Approx 255 min ...

Page 30: ...ing is the speed standard regarding continuous writing Check via the label on the card etc Preparation Recording to a card This unit an SDXC compatible device is compatible with SD Memory Cards SDHC Memory Cards and SDXC Memory Cards When using an SDHC Memory Card SDXC Memory Card with other equipment check the equipment is compatible with these Memory Cards Card type Capacity SD Memory Card 512 M...

Page 31: ... is required Operation of SD Memory Cards with a capacity of 256 MB or less is not guaranteed 4 GB or more Memory Cards that do not have the SDHC logo or 48 GB or more Memory Cards that do not have the SDXC logo are not based on SD Memory Card Specifications The operation of Memory cards exceeding 64 GB cannot be guaranteed When the write protect switch A on SD card is locked no recording deletion...

Page 32: ...uipment for the first time on this unit format the SD card l 68 When the SD card is formatted all of the recorded data is deleted Once the data is deleted it cannot be restored Status indicator A When this unit is accessing the SD card or built in memory the status indicator lights up red 1 Unlock the LOCK lever 2 Slide the open close lever 3 Open the rear door LOCK SD CARD BATTERY ...

Page 33: ...he illustration and press it straight in as far as it will go Press the center of the SD card and then pull it straight out 1 Close the rear door 2 Slide the open close lever 3 Lock the LOCK lever Lock securely to the points where the red portion of the open close lever and LOCK lever are no longer visible LOCK SD CARD BATTERY ...

Page 34: ...nit to vibrations or shock Performing the above while the indicator is on may result in damage to data SD card or this unit Do not expose the terminals of the SD card to water dirt or dust Do not place SD cards in the following areas jIn direct sunlight jIn very dusty or humid areas jNear a heater jLocations susceptible to significant difference in temperature condensation can occur jWhere static ...

Page 35: ...button to turn on the unit The LCD monitor turns on Preparation Turning the unit on off To turn off the unit Hold down the power button until the LCD monitor goes off Pressing the power button for a short time sends the unit into Standby Mode l 36 ...

Page 36: ...does not go into Standby Mode when you close the LCD monitor during motion picture recording or audio recording If you open the LCD monitor when in Standby Mode the unit enters Recording Mode If the unit has not been operated for approximately 5 minutes settings at the time of purchase when the power is turned on the ECONOMY function will activate and switch to Standby Mode to limit power consumpt...

Page 37: ...ture lowers will flash Battery unit internal temperature Screen display Unit operation Lighting Although it is possible to record play back please stop using the unit as soon as possible and turn off the unit Motion picture recording is no longer possible If you are recording a motion picture the recording stops Please turn off the unit Flashing After the flashing of the the unit turns off automat...

Page 38: ... the REC button Each press of the REC button changes the mode Preparation Selecting a mode Recording Mode l 44 47 51 For recording motion pictures still pictures and audio Playback Mode l 56 121 For playing back motion pictures still pictures and audio ...

Page 39: ...item DATE TIME DISP using the SET button and then tilt the SET button to the right or press the SET button 3 When DATE or TIME is selected Tilt the SET button to the left or right to select the desired item and then up and down to set the numerical values e g When DATE is selected The year can be set between 2000 and 2039 Preparation Setting date and time MENU CLOCK SET 1 ...

Page 40: ...er the notes are displayed the recording mode setting screen is automatically displayed To move to the next display press the SET button After the notes are displayed the recording standby screen is automatically displayed To exit the display press the MENU button 7 At the time of purchase only Select the desired recording mode using the SET button and then press the SET button l 94 8 At the time ...

Page 41: ...ing time information will appear as follows Recording screen display Recording time information JAN 01 2013 12 00AM To charge the built in clock battery install a fully charged battery in the unit If you leave the battery for approximately 24 hours the time settings will be stored for approximately 7 days The charging continues even when the unit is turned off ...

Page 42: ... Ensure that the lens and flash are not obstructed by your fingers or the handstrap Also ensure that your hand is not blocking the microphones on the LCD monitor Basic motion picture recording The unit should normally be held steady when recording If you move the unit when recording do so slowly maintaining a constant speed The zoom operation is useful for recording subjects you cannot get close t...

Page 43: ...ipped even if you rotate the LCD monitor towards the lens side If the surface of the unit gets hot Due to the characteristics of the unit the outer surface may become warm during use but this does not indicate a malfunction If the unit starts to feel uncomfortably hot during use you might temporarily discontinue use until it cools down or try holding it in your other hand for a while Please use a ...

Page 44: ...e motion pictures are recorded to the built in memory 1 Open the LCD monitor 2 Press the recording start stop button to start recording A When you begin recording appears 3 Press the recording start stop button again to pause recording Basic Recording motion pictures 000 00 00 000 00 00 000 00 00 ...

Page 45: ...sound when recording motion pictures while this unit is connected wirelessly to a smartphone etc howling 2 may occur In that case lower the volume of the smartphone 2 Refers to a phenomenon in which a microphone outputs an abnormal sound when it picks up a sound from a speaker Recording Mode l 80 94 Motion picture operation indicator l 212 μ Red During motion picture recording When the remaining r...

Page 46: ...this happens hold the power button until the LCD monitor turns off to turn the power to the unit off and turn the power on again Maximum number of recordings per SD card file Approx 899100 folder Approx 900 Please refer to page 234 for details about approximate recordable time About the compatibility of the recorded motion pictures They are not compatible with devices other than those that support...

Page 47: ...recorded to the built in memory 1 Open the LCD monitor 2 For Auto Focus only Press the button halfway A Focus area area inside brackets 3 Press the button fully If you continue to hold down the button you can check the recorded image on the LCD monitor Basic Recording still pictures F2 8 F2 8 F2 8 1 30 1 30 1 30 ...

Page 48: ...PHOTO VIEW is set to ON you can change the recording standby screen display to the photo view l 104 A Video recording area About the screen indications in the still picture recording Video view Photo view Still picture operation indicator l 210 Size of still pictures l 96 3000 Remaining number of still pictures ß Flash l 102 ISO400 ISO l 106 F2 8 Iris value 1 30 Shutter speed Image Stabilizer for ...

Page 49: ...the unit can focus on the subject in the center of the recording area When the risk of jitter increases due to a slower shutter speed while recording still picture camera shake icon will appear on the LCD monitor When this occurs attach the unit to a tripod to prevent jitter while recording or set FLASH to ßA AUTO l 102 When recording in a dark environment writing to the SD card may take time To p...

Page 50: ...ill picture operation indicator will turn red while recording still pictures No shutter sound is emitted when recording still pictures About picture size When you record a still picture while recording a motion picture or audio the picture size will depend on the Recording Mode l 94 Still pictures cannot be recorded during recording Still pictures cannot be recorded when recording in SLOW MOTION M...

Page 51: ...nserted the audio is recorded to the built in memory 1 Open the LCD monitor 2 Select the menu l 60 3 Start recording by pressing the recording start stop button 4 Press the recording start stop button again to stop recording Basic Recording audio MENU REC MODE VOICE RECORD 1 ...

Page 52: ...time exceeds approximately 5 hours the file is saved and the audio recording ends Audio operation indicator l 211 Red During audio recording When the remaining recordable time drops to approximately 30 seconds or less μ flashes 000 00 15 During audio recording Recording time elapsed Every time recording is stopped the indicator returns to 000 00 00 During audio recording standby Maximum recordable...

Page 53: ...priate for the condition are set just by pointing the unit to what you want to record Basic Intelligent Auto Mode Press the button to switch to Intelligent Auto Mode Please refer to page 115 for details about Manual Mode ...

Page 54: ...utomatically and the brightness is adjusted so it is recorded clearly Scenery The whole landscape will be recorded vividly without whiting out the background sky which may be very bright 1 Spotlight Very bright object is recorded clearly 1 Low Light It can record very clearly even in a dark room or twilight 2 Night Portrait A person and the background are recorded with near real life brightness 2 ...

Page 55: ...effective range of Automatic White Balance adjustment on this unit 2 Blue sky 3 Cloudy sky rain 4 Sunlight 5 White fluorescent lamp 6 Halogen light bulb 7 Incandescent light bulb 8 Sunrise or sunset 9 Candlelight If the Automatic White Balance is not functioning normally adjust the White Balance manually l 115 Auto Focus The unit focuses automatically Auto Focus does not work correctly in the foll...

Page 56: ...le to play back using the SET button and press the SET button A The information for the file in the yellow frame is displayed Tilt and hold the SET button up or down to display the next or previous page Basic Motion picture Still picture Audio playback Thumbnail display ...

Page 57: ...button operation to display it Motion picture audio playback Playback Pause Fast rewind playback Fast forward playback Stops the playback and shows the thumbnails Still picture playback Deletes still picture l 140 Displays previous file Displays next file Stops playback and returns to thumbnail display ...

Page 58: ... displayed When following operations are performed 8 file display is restored jIf you turn the unit off jIf you change the Recording Mode jIf you display the menu screen Speaker volume adjustment To adjust the speaker volume during motion picture or audio playback operate the volume button during playback When a playback of a motion picture file or audio file ends the thumbnail display is restored...

Page 59: ...ay back normally or may not play back at all on other MP4 compatible equipment Still picture compatibility This unit conforms to the universal DCF Design rule for Camera File system standard and Exif Exchangeable Image File Format stipulated by JEITA Japan Electronics and Information Technology Industries Association Files which do not conform to the DCF standard cannot be played back The file for...

Page 60: ... the left 3 Select tab A using the SET button and tilt the SET button to the right or press the SET button 4 Select from menu items B using the SET button and tilt the SET button to the right or press the SET button Basic Using the menu screen MENU MENU ...

Page 61: ...that reflects the currently displayed setting is displayed C Applicable mode indicator Setting is applied to still picture and motion picture recording Setting is applied to still picture recording Setting is applied to motion picture recording To get back to the previous screen Press the MENU button To end the menu setting Press the MENU button several times ...

Page 62: ...nu select the tab and press the SET button 4 Select from menu items using the SET button and tilt the SET button to the right or press the SET button 5 Select the setting content using the SET button and press the SET button to set Items other than those displayed on the simple menu are set to the default settings Menu items REC MODE l 94 PICTURE SIZE l 96 CREATIVE CONTROL l 83 SCENE MODE l 97 BUR...

Page 63: ...the recording time will be reduced Set to Recording Mode l 38 1 Select QUICK START with the SET button and press the SET button 2 Select ON with the SET button and press the SET button 3 Close the LCD monitor The status indicator A flashes green and the unit goes into Quick Start standby mode Pressing the power button B for a short time will also set the status to Quick Start Standby Mode Basic Us...

Page 64: ...l switch to Standby Mode If Quick Start Standby Mode is set during file transfer in Direct Mode l 158 of the Eye Fi card the unit switches to Standby Mode in approximately 5 minutes after the completion of the file transfer If ECONOMY l 66 is activated and the device switches to Quick Start Standby Status automatically pressing any button on the unit will switch to Recording Standby Status Dependi...

Page 65: ... Sets the sound emitted when recording is started and stopped ON OFF SHUTTER Sets the sound emitted when the button is pressed OFF A B C D KEY SW Sets the sound emitted when the buttons SET button MENU button etc are pressed OFF A B C D OPERATION VOL Sets the volume of the operation sounds 1 to 7 ALL OFF OPERATION SOUNDS ON Sets all operation sounds on off ...

Page 66: ...TERY REC Sets the time for which the unit is in the Recording Mode using the battery before it goes into Standby Mode OFF 1 min 3 min 5 min 10 min BATTERY PLAY Sets the time for which the unit is in the Playback Mode using the battery before going into Standby Mode OFF 1 min 3 min 5 min 10 min 30 min AC REC PLAY Sets the time for which the unit is in the Recording Playback Mode using the AC adapto...

Page 67: ...and the double range zoom will not be changed Returns the Wi Fi settings to the settings at the time of purchase The Wi Fi password is also deleted OPTION MENU 2 LANGUAGE TV OUTPUT TV SYSTEM Please refer to page 148 TV ASPECT Please refer to page 147 HDMI Please refer to page 148 VIERA Link Please refer to page 149 INITIAL SET RESET Wi Fi SETTINGS 2 HX WA3 HX WA03 HX WA30 ...

Page 68: ...SD card is to be disposed transferred Select DELETE DATA and perform a physical formatting of the built in memory when this unit is to be disposed transferred Do not turn this unit off or remove the SD card while formatting Do not expose the unit to vibrations or shock This item is displayed only when an Eye Fi card is inserted Please refer to page 155 FORMAT FORMAT A logical format is performed o...

Page 69: ...hen creating a folder Select CREATE NEW FOLDER using the SET button and press the SET button The created folder is set as the recording folder When selecting a folder Select the folder number of the desired folder using the SET button and press the SET button You cannot select folders which have been created on other equipment or folders which already contain the maximum number of files OPTION MEN...

Page 70: ...on All the recorded files are displayed in the thumbnail screen and yellow frame is displayed on the first file in the selected folder 3 Select the file to playback using the SET button and press the SET button This function sets the file numbers when the card is exchanged or formatted PLAYBACK FOLDER FILE NO CONT D ON File numbers are retained even when the card is exchanged or formatted OFF File...

Page 71: ... the file currently being recorded Example If you record files up to 0015 on a first card and then exchange the first card for a second card which already has files up to 0005 recorded on it the new file numbers on the second card will start from 0016 When the newly inserted card contains file numbers which are larger than the file numbers recorded before changing the cards The file number will be...

Page 72: ...splayed You can update the firmware version of this unit FIRMWARE VERSION FIRMWARE UPGRADE For the latest update information check the support website below As of February 2013 http panasonic jp support global cs e_cam This Site is English only ...

Page 73: ...rations the zoom bar is displayed The magnification displayed at the left and right of the zoom bar is the minimum and maximum zoom magnification Advanced Recording Using the zoom Zoom button T side Close up recording zoom in W side Wide angle recording zoom out B Optical zoom C i Zoom Digital Zoom blue A Zoom bar T W ...

Page 74: ...ecording still picture when the button is pressed halfway l 48 When recording a still picture zoom operation will run smoothly when PHOTO VIEW is set to ON before performing zoom operation l 104 The unit will focus from more than approximately 1 1 m 3 6 feet or approximately 1 m 3 3 feet when the zoom magnification is at its maximum When the zoom magnification is 1k this unit can focus on a subjec...

Page 75: ...Press the zoom range button On the normal zoom recording screen the icon is displayed On the double range zoom recording screen the icon is displayed You cannot operate the zoom range button in the i Zoom Digital Zoom region blue l 73 The image enlarged using the double range zoom can be recorded only as a motion picture Still pictures are recorded without being enlarged ...

Page 76: ...gnification The maximum zoom magnification differs according to the mode and settings of the unit When SLOW MOTION MODE SLOW MOTION CONTINUOUS MODE l 80 is set 5k MENU ZOOM MODE desired setting DIGITAL ZOOM Digital Zoom i ZOOM This zoom function allows you to maintain high definition picture quality OFF Optical zoom only Image Stabilizer for motion pictures W Wide T Tele Zoom Mode setting OFF i ZO...

Page 77: ...ture recording 1k 5k 5k 60k 1k 7k 7k 84k 1k 8 5k 8 5k 102k 1k 10k 10k 120k 1k 7 5k 7 5k 90k 1k 10k 10k 120k Image Stabilizer for motion pictures Double range zoom W Wide T Tele Zoom Mode setting OFF i ZOOM DIGITAL ZOOM Motion picture recording OFF ON 1k 6k 9k 60k 2k 12k 18k 120k ACTIVE MODE 1k 5k 6k 50k 2k 10k 12k 100k Still picture recording 1k 5k 5k 50k HX WA3 HX WA03 ...

Page 78: ...s set the field of view will differ from normal recording Advanced Recording Image Stabilizer MENU E I S VIDEO desired setting ACTIVE MODE This setting gives more stabilization and is suitable for recording when moving ON This setting is suitable for recording in a stable state such as scenery OFF Cancel the setting Video view in normal recording Video view in ACTIVE MODE 3 ...

Page 79: ...hen the E I S PICTURE is set to ON while the SCENE MODE l 97 is set to HDR Backlight Comp Stabilization may not be possible under strong camera shaking conditions When SCENE MODE is set to FIREWORKS NIGHT SCENERY NIGHT PORTRAIT or LOW LIGHT the Image Stabilizer may be less effective The screen may shake when using optical zoom or during the Auto Focus operation but this does not indicate a fault M...

Page 80: ... mode Each time you press the button display changes Advanced Recording Recording in Slow Motion Mode HX WA30 SLOW MOTION MODE Records a slow motion picture at 120 240 or 480 frames per second SLOW MOTION CONTINUOUS MODE Slow motion pictures of 60 frames per second and 120 frames per second are recorded as one scene Off The setting is canceled ...

Page 81: ... stop after 15 seconds When recording in SLOW MOTION CONTINUOUS MODE the recording mode switches to in 15 seconds Also the recording will automatically stop after 15 minutes Scenes recorded in Slow Motion Mode are indicated with or SLOW MOTION CONTINUOUS MODE on the 8 file thumbnail display Audio is not recorded for scenes recorded in Slow Motion Mode During recording in Slow Motion Mode still pic...

Page 82: ... are disabled and cannot be used j CREATIVE CONTROL ZOOM MODE SCENE MODE and FACE FRAMING ISO is set to AUTO EXPOSURE is set to PROGRAM When playing back a scene recorded in SLOW MOTION CONTINUOUS MODE time of a recording date is not displayed Example NOV 15 2013 During recording in Slow Motion Mode or playing back the recorded scene the LCD monitor or the TV screen may flicker This is due to effe...

Page 83: ...tion pictures with miniature effects as if recording a miniature model One Point Color 1CLR Record in black and white while keeping one selected color l 84 Old Movie OLD Record motion pictures with a retro feel Time Lapse Rec INTV 1 2 Record long slow moving scenes by skipping certain intervals to create a short time lapse video l 84 Ghost Effect GHOST 1 2 Record people and objects by leaving a fa...

Page 84: ...ames will makeup motion picture of 1 second Maximum recordable time is 12 hours HDR Paint HDRP 3 Record still pictures with picture effects Soft Skin SKIN Record with skin softening effects Monochrome B W Record in monochrome Sepia SEPIA Record with colors adjusted to sepia Vivid VIVID Record with reduced sharpness and increased color Soft SOFT Record with reduced sharpness for a softer image Setu...

Page 85: ...mum recordable time is 12 hours jRecorded motion picture will look like time lapsed One Point Color 1CLR jA color that is not set may stay depending on the subject Old Movie OLD jBlack vertical line is not recorded during the still picture recording except for still picture recording while recording motion picture j DIGITAL ZOOM and i ZOOM cannot be used j FACE FRAMING is disabled Time Lapse Rec I...

Page 86: ...ISH j FACE FRAMING is disabled HDR Paint HDRP jWe recommend use of a tripod jThe flash is disabled j E I S PICTURE is set to OFF j METERING MODE is set to MULTI j ISO is set to AUTO j PICTURE SIZE or setting is disabled setting is changed to setting and setting is changed to setting EXPOSURE is set to PROGRAM PICTURE SIZE setting is changed to setting jThe field of view of the recorded still pictu...

Page 87: ... BURST Records approximately 10 still pictures every 1 second The unit records as you hold down the button ending the recording when the maximum number pictures in the burst are reached 16M REVERSE BURST Records approximately 1 still picture every 1 second The unit records as you hold down the button On release of the button it stores the maximum number of pictures in the burst going back from the...

Page 88: ...d When burst recording the following functions are disabled and cannot be used j FLASH j HDR Backlight Comp in SCENE MODE j HANDHELD NIGHT SHOT in SCENE MODE j CREATIVE CONTROL j PANORAMA The following functions cannot be used with burst recording j E I S PICTURE j FACE FRAMING With burst recording the shutter speed is faster than 1 30 You can also make the setting from the simple menu l 62 BURST ...

Page 89: ...monitor 3 Pan the unit horizontally or vertically The red cross will shift in the panning direction Record in such a way that the red cross and the white cross align If the red cross separates from the guide the panorama still picture cannot be correctly recorded To stop panorama recording partway through Press the button Advanced Recording Recording panorama still pictures MENU PANORAMA 360e PANO...

Page 90: ...ng is not possible when the shake is too big HX WA30 Panorama setting Picture size Horizontal panorama still picture Vertical panorama still picture 360e PANORAMA 14144k1280 1680k14144 180e PANORAMA 7072k1280 1680k7072 HX WA3 HX WA03 Panorama setting Picture size Horizontal panorama still picture Vertical panorama still picture 360e PANORAMA 14400k720 1280k14400 180e PANORAMA 7200k720 1280k7200 ...

Page 91: ...tures j E I S PICTURE When recording panorama still pictures FOCUS is set to AUTO During panorama recording the exposure is automatically corrected according to the brightness of the subject EXPOSURE is set to PROGRAM To record with the exposure locked use the AE lock function l 114 When PANORAMA is set to 360e PANORAMA or 180e PANORAMA the field of view of the recording standby screen switches to...

Page 92: ... in the wind etc jWhen recording in a dark place jWhen recording in places with flickering light source such as fluorescent lamp candle etc jWhen recording the unit held away from your body axis of rotation The recorded panorama picture will not be saved when the recording is terminated before reaching the half of the set angle Even if the recording exceeds the halfway point when the recording is ...

Page 93: ...ss the MENU button to exit the message screen After use underwater wash the unit in fresh water and dry well l 14 Do not use the Under Water Mode except when recording underwater When recording underwater the sound of the unit motor will be recorded at a relatively high volume However in Under Water Mode the sound of the motor is suppressed through the action of an audio filter sound quality diffe...

Page 94: ...setting screen Set the REC MODE in accordance with uses A REC MODE B Recommended icon Recommended use icons are displayed in blue Advanced Recording Recording functions of menus RECORDING MENU 1 REC MODE MENU REC MODE desired setting Records with 1920k1080 pixels 60i Records with 1920k1080 pixels 30p Records with 1280k720 pixels 60p Records with 1280k720 pixels 30p Records with 960k540 pixels 30p ...

Page 95: ...ng in mode mosaic type noise may appear at playback You can also make the setting from the simple menu l 62 Recommended icon Appropriate for playing on high vision television Appropriate for playing on a computer Appropriate for playing videos recorded using this unit via a Wi Fi connection to a DLNA compatible television Appropriate for playing videos recorded using this unit on a smartphone via ...

Page 96: ...e refer to page 83 SLOW MOTION MODE PICTURE SIZE MENU PICTURE SIZE desired setting Picture size Aspect ratio HX WA30 HX WA3 HX WA03 4608k3456 4608k3456 4 3 3616k2712 4352k3264 4 3 2560k1920 3072k2304 4 3 2048k1536 2048k1536 4 3 640k480 640k480 4 3 4608k2592 4352k2448 16 9 3840k2160 3744k2106 16 9 2560k1440 2560k1440 16 9 1920k1080 1920k1080 16 9 CREATIVE CONTROL HX WA30 1 ...

Page 97: ...und SPOT LIGHT Improved quality when subject is brightly illuminated SNOW Improved image quality when shooting in snowy locations BEACH To make blue in the sea or sky vibrant SUNSET To make red in the sunrise or sunset vibrant FIREWORKS To capture the fireworks in the night sky beautifully LANDSCAPE For spatial scenery NIGHT SCENERY To capture the evening or night scenery beautifully NIGHT PORTRAI...

Page 98: ...yed constantly when recording still pictures but this does not indicate a fault NIGHT SCENERY NIGHT PORTRAIT HDR Backlight Comp jUsing a tripod is recommended LOW LIGHT jThe shutter speed is 1 15 or more Motion picture recording HDR Backlight Comp jWhen recording a moving subject a ghost image may appear jThe field of view of the recorded still picture is smaller than the range displayed on the re...

Page 99: ...d to Slow Motion Mode The setting is canceled EXPOSURE Fixed to SUNSET FIREWORKS PANORAMA Fixed to OFF CREATIVE CONTROL Fixed to OFF FOCUS Fixed to FLASH Fixed to ISO Fixed to AUTO FACE FRAMING Fixed to OFF EXP COMPENSATION Fixed to 0 WHITE BALANCE Fixed to Slow Motion Mode The setting is canceled EXPOSURE Fixed to LANDSCAPE PANORAMA Fixed to OFF CREATIVE CONTROL Fixed to OFF FOCUS Fixed to FACE F...

Page 100: ...TRAIT PANORAMA Fixed to OFF CREATIVE CONTROL Fixed to OFF FOCUS Fixed to Slow Motion Mode The setting is canceled EXPOSURE Fixed to HANDHELD NIGHT SHOT BURST Fixed to OFF PANORAMA Fixed to OFF CREATIVE CONTROL Fixed to OFF FOCUS Fixed to FLASH Fixed to E I S PICTURE Fixed to ISO Fixed to AUTO Slow Motion Mode The setting is canceled EXPOSURE Fixed to Setting Limitations HX WA30 HX WA30 HX WA30 ...

Page 101: ...g Slow Motion Mode The setting is canceled EXPOSURE Fixed to PICTURE SIZE setting is disabled setting is changed to setting UNDER WATER PANORAMA Fixed to OFF CREATIVE CONTROL Fixed to OFF FOCUS Fixed to Slow Motion Mode The setting is canceled EXPOSURE Fixed to LOW LIGHT PANORAMA Fixed to OFF CREATIVE CONTROL Fixed to OFF FOCUS Fixed to FLASH Fixed to ISO Fixed to AUTO Slow Motion Mode The setting...

Page 102: ... ß ON while the SCENE MODE l 97 is set to FIREWORKS NIGHT SCENERY HANDHELD NIGHT SHOT only HDR Backlight Comp or LOW LIGHT You can also make the setting from the simple menu l 62 If you register a shortcut function l 111 to the SET button you can change the flash setting from the recording screen ZOOM MODE RECORDING MENU 2 BURST PANORAMA FLASH MENU FLASH desired setting ßA AUTO The unit determines...

Page 103: ...sec is selected When you press the button or the recording start stop button the status indicator flashes red for approximately 10 seconds then recording begins On the LCD monitor an indication of appears to notify you of the recording timing After the recording the self timer setting is canceled To stop the timer midway through Press the button or the recording start stop button SELF TIMER MENU S...

Page 104: ...ing recording does not turn off automatically If you perform any of the following cases the self timer will be canceled jIf you turn the unit off jIf you change to the Playback Mode jIf you send unit into Standby Mode Selects the desired field of view photo view or video view for the recording standby screen display When photo view is selected a frame to show the field of view during video recordi...

Page 105: ...ease refer to page 115 AUTO REVIEW MENU AUTO REVIEW desired setting 1 sec Still pictures are displayed for approximately 1 second after being recorded 2 sec Still pictures are displayed for approximately 2 seconds after being recorded OFF Still pictures are not displayed after being recorded RECORDING MENU 3 E I S VIDEO E I S PICTURE WHITE BALANCE 2 1 2 3 ...

Page 106: ... more noise in the recorded image and a more grainy image SCENE MODE will be set to OFF when the ISO is set to other than AUTO while the SCENE MODE l 97 is set to FIREWORKS HDR Backlight Comp HANDHELD NIGHT SHOT only or LOW LIGHT Slow Motion Mode l 80 is set to off If you register a shortcut function l 111 to the SET button you can change the ISO sensitivity setting from the recording screen Pleas...

Page 107: ...ompensation value can be corrected in the range 1 8 to 1 8 The exposure compensation bar disappears when the SET button is pressed The exposure setting is canceled if any of the following operations are performed jSetting the pointer to n 0 jSetting Playback Mode jChanging the SCENE MODE settings jTurning off the unit jSetting Standby Mode j Setting Slow Motion Mode If you register SHORTCUTS funct...

Page 108: ...of the subject RECORDING MENU 4 FOCUS FOCUS MODE MENU FOCUS MODE desired setting 9 PT AUTOFOCUS The unit determines the focus automatically from 9 focus points in the recording range SPOT FOCUS The unit focuses on the subject over the focus mark displayed at the center of the LCD monitor 4 4 ...

Page 109: ...e METERING MODE MENU METERING MODE desired setting MULTI The unit automatically assesses the distribution of brightness over the screen and meters to ensure that the exposure is appropriate CENTER The unit averages light measurements over the entire screen giving higher weight to the subject at the center of the screen SPOT The unit meters the subject over spot meter target displayed at the center...

Page 110: ...all or dark on the LCD monitor the unit may not be able to detect it SCENE MODE will be automatically set to OFF when the FACE FRAMING is set to ON while the SCENE MODE l 97 is set to FIREWORKS LANDSCAPE or NIGHT SCENERY FOCUS MODE l 108 is set to 9 PT AUTOFOCUS and METERING MODE l 109 is set to MULTI In the following cases FACE FRAMING does not work jDuring burst recording l 87 jDuring panorama s...

Page 111: ...ipped up down left and right with the recording screen displayed 1 Select the destination up down left or right on the SET button for the function using the SET button and press the SET button 2 Select the function to register using the SET button and press the SET button WIND CUT MENU WIND CUT ON SHORTCUTS MENU SHORTCUTS Functions are registered individually to up down left and right of the SET b...

Page 112: ...ting To confirm the shortcut settings press the MENU button on the screen in Step 1 A confirmation screen appears AF LOCK Locks the focus l 113 AE LOCK Locks the exposure l 114 FOCUS Sets the focus l 120 Can be registered to and only FLASH Sets the flash operation l 102 EXP COMPENSATION Corrects the exposure l 107 ISO Sets the ISO sensitivity l 106 Ø SELF TIMER Sets the self timer l 103 EXPOSURE S...

Page 113: ... lock will appear on the LCD monitor When FOCUS is set to MANUAL AF Lock is disabled The AF lock setting is canceled if any of the following operations are performed jIf the SET button is tilted in the direction used to register AF lock jSetting Playback Mode jIf SCENE MODE is set to FIREWORKS jIf the FOCUS setting is changed jTurning off the unit jSetting Standby Mode jSetting Slow Motion Mode HX...

Page 114: ...anceled if any of the following operations are performed jIf the SET button is tilted in the direction used to register AE lock jSetting Playback Mode jIf the SCENE MODE setting is changed jIf CREATIVE CONTROL is set to HDR Paint HDRP jIf the ISO setting is changed jIf the WHITE BALANCE setting is changed jIf the EXP COMPENSATION setting is changed jTurning off the unit jSetting Standby Mode jSett...

Page 115: ...to setting select AUTO Advanced Recording Manual recording MENU WHITE BALANCE AUTO The unit adjusts the White Balance automatically SUNNY Outdoors under a clear sky CLOUDY Outdoors under cloudy sky INDOOR 1 Incandescent light video lights like in the studio etc INDOOR 2 Color fluorescent lamps sodium lamps in gymnasiums etc WHITE SET Mercury vapor lamps sodium lamps some fluorescent lights Lights ...

Page 116: ...o the recording menu When the icon appears on the recording menu the White Balance has been set When the brightness changes or the recording location changes and the color balance is no longer correct check whether the White Balance setting is suitable for the light source SCENE MODE will be set to OFF when the WHITE BALANCE is set to other than AUTO while the SCENE MODE l 97 is set to BEACH SUNSE...

Page 117: ... using the SET button and press the SET button 3 On selecting SHUTTER or APERTURE Tilt the SET button left or right to set On selecting MANUAL Tilt the SET button up down to select shutter speed or iris value and tilt left and right to set MENU EXPOSURE PROGRAM Exposure is set automatically SHUTTER Set the shutter speed APERTURE Set the iris value MANUAL Set the shutter speed and the iris value 3 ...

Page 118: ... the button When setting both the shutter speed and the iris value set the shutter speed and then set the iris value When SHUTTER APERTURE or MANUAL are set the following functions are disabled and cannot be used j PANORAMA SCENE MODE HDR Paint HDRP in CREATIVE CONTROL and Slow Motion Mode When you allocate a shortcut function l 111 to the SET button with SHUTTER APERTURE or MANUAL set you can cha...

Page 119: ... a horizontal line may appear on the screen In this case record in the Intelligent Auto Mode or set the shutter speed to 1 60 in areas where the power supply frequency is 60 Hz or 1 100 in areas of 50 Hz With a slow shutter speed you can record in darker locations but may find that noise increases in the recorded images With burst recording the shutter speed is faster than 1 30 With motion picture...

Page 120: ...d return to the recording screen When focus is set to MANUAL or MACRO the PANORAMA and SCENE MODE functions are set to OFF When you set the focus to MACRO start with the zoom set to Wide W If you register a shortcut function l 111 to the SET button you can change the focus setting from the recording screen In certain cases it may be difficult to achieve focus automatically MENU FOCUS desired setti...

Page 121: ...ast forward fast rewind playback During Playback Tilt the SET button to the right during playback for fast forward playback tilt to the left for fast rewind playback Each tip of the SET button changes the playback speed Maximum 15k normal speed Tilt the SET button in the opposite direction during forward winding or rewinding to slow the winding speed Press the SET button to restore normal playback...

Page 122: ...t to the left for reverse frame by frame playback Reverse Frame by Frame Playback will be in 1 second interval and or 0 5 second interval Press the SET button to restore normal playback Scroll playback During stop during pause Press the SET button during the display of the panorama still picture Playback automatically scrolls in the same direction as when the recording was made Pressing the SET bu...

Page 123: ...NTROL l 130 is set allows still pictures with filter effects added to be saved 2 Press the button fully 3 Select the aspect ratio of the still picture to be saved and press the SET button White bands will be recorded at the top and bottom of still pictures Date the motion picture was recorded will be registered as date of the still picture Quality will be different from the normal still picture Wh...

Page 124: ...ton to start scroll playback of the panorama still picture 3 Press the SET button to pause at the section you wish to cut out 4 Press the button fully The cut out still picture is saved with picture size of 1280k720 The date and time of the recording of the panorama still picture are stored as the date and time of the cut out picture The cut out still picture is saved with a new file number ...

Page 125: ...till picture has been recorded using face detection l 109 the unit zooms in on the detected face When you zoom in on a rotated still picture with a 4 3 or 16 9 aspect ratio the still picture before rotation is displayed With a panorama still picture the rotated picture is displayed l 134 2 Shift the position of the zoomed portion using the SET button Zooming out from the zoomed still picture Opera...

Page 126: ...e 4 3 and 16 9 rotated still pictures The rotation information is not retained for the panorama still picture but rotated still picture is saved In the case of still pictures recorded using face detection the face detection data is not retained The more a picture is enlarged the more its quality deteriorates The date and time of the recording of the original still picture are stored as the date an...

Page 127: ... the menu 3 Select the item to set using the SET button and press the SET button These settings are only available when ALL or PICTURE has been selected in MODE Advanced Playback Various playback functions MENU SLIDESHOW desired setting MODE Select the type ALL VIDEO PICTURE of the file to play back SLIDES INTERVAL Select the display interval for still picture playback EFFECT SETUP Select the effe...

Page 128: ...esired music using the SET button and press the SET button On selecting VIDEO SOUND Select an item using the SET button and press the SET button Scenes recorded with CREATIVE CONTROL set to Miniature Effect MINI 1 or Time Lapse Rec INTV 1 and scenes recorded in Slow Motion Mode 2 are played back with the music selected in MUSIC SELECT regardless of the VIDEO SOUND setting 1 only 2 only SHORT appro...

Page 129: ...playback automatically scrolls in the same direction as when the recording was made About button operations during slideshow playback Volume button Volume adjustment l 58 button CREATIVE CONTROL settings l 130 If you perform other button operations you will return to the 8 file thumbnail display HX WA3 HX WA03 ...

Page 130: ...TIVE CONTROL desired setting OFF Cancel the setting One Point Color 1CLR Playback in black and white while keeping one selected color l 84 Old Movie OLD Playback motion pictures with a retro feel Fish eye Effect FISH Playback motion pictures as if recorded through a fish eye lens Soft Skin SKIN Playback with skin softening effects Monochrome B W Playback in monochrome Sepia SEPIA Playback with col...

Page 131: ...he recording mode will unlock the setting Displaying file information You can display the information of files recorded with the unit Set to Playback Mode l 38 1 Using the SET button select file for which to display information 2 Press and hold down the MENU button for 1 second or more To make the information disappear press the MENU button 1 Recording Mode Recording format 2 Recording start time ...

Page 132: ...rrection ISO ISO sensitivity 5 Recording time 6 Eye Fi connection status 7 File number 8 Protection setting 9 File size Recording media 1 Recording Mode Recording format 2 Recording start time and date 3 Eye Fi connection status 4 File number 5 Protection setting 6 File size 7 Recording time 8 Recording media ...

Page 133: ...io files 1 Select the menu 2 Tilt the SET button right or left and press the SET button Play volume can also be set with the volume lever l 58 Please refer to page 143 Please refer to page 140 Advanced Playback Using the playback menu PLAYBACK MENU 1 SLIDESHOW CREATIVE CONTROL PLAY VOLUME MENU PLAY VOLUME PROTECT DELETE 1 1 ...

Page 134: ...ed if it has been protected Turn off the protection before the rotation operation l 143 You can reduce the size of the still picture and save as a new still picture 1 Select the still picture to resize using the thumbnail screen Move the yellow frame over the still picture you wish to resize 2 Select the menu Cannot be selected when the size of the original image is ROTATE MENU ROTATE RIGHT or LEF...

Page 135: ...en appears Check the correction location which is surrounded by a red frame and press the SET button 3 Select the saving method and press the SET button Red eye cannot be corrected in panorama still pictures or still pictures recorded with CREATIVE CONTROL set to HDR Paint HDRP Because the unit automatically corrects the portion it recognizes as requiring correction it may not always make the corr...

Page 136: ...me Playback The pause position will be the starting position of the scene If you wish the split scene to start from the beginning of the scene go to Step 4 Operations EDIT VIDEO MENU EDIT VIDEO SPLIT Play back With the unit paused tilt the SET button to the right for approximately 2 seconds to play back normally and to the left to play back in the reverse direction Pause During playback press the ...

Page 137: ... the SET button down Each downward tilt of the SET button changes the section to be deleted 6 Press the button or the recording start stop button 7 Select a saving method using the SET button and press the SET button Scene splicing 1 Select the scene with the thumbnail screen Move the yellow frame over the scene 2 Select the menu SAVE AS NEW The split scene is saved as a new scene OVERWRITE The or...

Page 138: ...lected first the scene with displayed Recording dates from the second scene onwards will not be registered You can continue selecting up to maximum of 9 scenes The scenes are spliced in numerical order according to the assigned numbers To cancel a selection press the SET button again 4 Press the button or the recording start stop button 5 Select a saving method using the SET button and press the S...

Page 139: ... or spliced To adjust the volume during a playback review operate the volume button l 58 When editing long motion pictures the processing will take longer due to the time it takes to process large files When editing scenes on the unit make sure that the battery does not run out during the processing by using a battery with sufficient charge on it or the AC adaptor For editing long scenes we recomm...

Page 140: ...nail display to 1 file display l 58 1 Select the file to delete using the SET button 2 Tilt the SET button up 3 Select DELETE using the SET button and press the SET button Advanced Playback Deleting scenes still pictures audio files Deleted scenes still pictures audio files cannot be restored so perform appropriate confirmation of the contents before proceeding with deletion Deleting displayed fil...

Page 141: ...ELETE SELECTED DELETE ALL or DELETE FOLDER and press the SET button Deleting a single file 3 When DELETE SINGLE is selected in Step 2 Select the file to delete using the SET button 4 Select DELETE using the SET button and press the SET button Deleting files using the playback menu MENU DELETE 1 ...

Page 142: ...ET button The selected files are deleted Deleting all files 3 When DELETE ALL is selected in Step 2 Select DELETE using the SET button and press the SET button A delete confirmation screen appears 4 Select YES using the SET button and press the SET button All the files will be deleted Deleting a folder 3 When DELETE FOLDER is selected in Step 2 Select the folder to delete using the SET button and ...

Page 143: ...d back on this unit may be erased Files which are protected cannot be deleted To delete a protected file first remove the protection and then delete Protecting a file Files can be protected so that they are not deleted by mistake Even if you protect some files formatting the media will delete them Set to Playback Mode l 38 1 Select the menu 2 Select the file you wish to protect using the SET butto...

Page 144: ...gh definition images you can enjoy them in high resolution with high quality sound Turn down the volume before connecting 1 Connect this unit to a TV Advanced Playback Watching Video Pictures on your TV Confirm the terminals on your TV and use a cable compatible with the terminals Image quality may vary with the connected terminals A High quality 1 HDMI terminal 2 Video terminal ...

Page 145: ...he input setting input switch and the audio input setting on the TV For more information please read the operating instructions for the TV B HDMI micro cable optional Be sure to connect to the HDMI terminal C AV cable supplied D Turn the side with the symbol up to connect Picture quality 1 High definition images when connecting to HDMI terminal 2 Standard images when connecting to video terminal C...

Page 146: ...ease check on the TV screen instead About the video output The video output destination varies depending on the status of the unit Output No output Scenes recorded with is displayed on the center of the screen in 1 4 the size of the TV screen Connection cable Video output destination TV SYSTEM l 148 Recording Mode Playback Mode Standing by Recording AV cable supplied LCD monitor of the unit NTSC P...

Page 147: ...a regular TV 4 3 If a wide screen TV is connected adjust the aspect setting on the TV Refer to the operating instructions of the TV for details MENU TV OUTPUT TV ASPECT 4 3 TV ASPECT setting 16 9 4 3 Refer to the following support site for information about Panasonic TVs with an SD card slot for playing back your pictures http panasonic net For details on how to play back please read the operating...

Page 148: ... on the TV when the setting is AUTO switch to the method 720p 1080i or 480p which enables the images to be displayed on your TV Please read the operating instructions for the TV TV format setting Set the format of the video signal output from the USB AV connector MENU TV OUTPUT HDMI AUTO 720p 1080i 480p MENU TV OUTPUT TV SYSTEM NTSC or PAL NTSC Outputs NTSC video signals PAL Outputs PAL video sign...

Page 149: ...se your remote control for the Panasonic TV for easy operations when this unit has been connected to a VIERA Link compatible device using an HDMI micro cable optional for automatic linked operations Not all operations are possible VIERA Link is a unique Panasonic function built on an HDMI control function using the standard HDMI CEC Consumer Electronics Control specification Linked operations with...

Page 150: ...inal on the TV the input channel may not switch automatically In this case use the remote control for the TV to switch the input channel If you are unsure whether or not the TV and AV amplifier you are using are compatible with VIERA Link read the operating instructions for the devices Available linked operations between this unit and a Panasonic TV is different depending on the types of Panasonic...

Page 151: ...T button and press the SET button will appear on the selected file To cancel press the SET button again You can continue selecting up to maximum of 100 files Press the MENU button to return to the previous step On selecting COPY ALL Select COPY ALL to begin copying to the SD card Copy Dubbing Copying from Built in Memory to SD card MENU COPY desired setting COPY SELECTED Copies the selected file t...

Page 152: ...the copying ends the unit returns to the playback menu You cannot change the order of the files that are to be copied If you intend to delete the original file when the copying has finished always play back the copied file before deletion to confirm that the original has been copied normally ...

Page 153: ...connected Images are dubbed in standard quality Set to Playback Mode l 38 Copy Dubbing Dubbing images onto other video devices Change the video input on the video device and TV that this unit is connected to The channel set will differ depending on the terminal to which the unit is connected See the operating instructions of the video device for details Insert the plugs as far as they will go Do n...

Page 154: ...top playback on this unit after stopping recording on the recorder Even when DISPLAY is set to OFF the battery icon will be displayed if the battery runs low Be sure to use a battery which has been charged sufficiently If the date and time display and function indication are not wanted cancel them before dubbing l 66 If the dubbed images are played back on a wide screen TV the images may be stretc...

Page 155: ...nd wireless LAN environment is required To use the Eye Fi card permission from the national or regional government is required Do not use if you have not obtained permission If you are unsure as to whether use is permitted please check with the card manufacturer Configuring the appropriate security settings encryption settings is strongly recommended to prevent interception unauthorized use spoofi...

Page 156: ...turn off the unit or set to OFF 3 When SELECT is selected in Step 2 Select the file to transfer using the SET button and press the SET button The selected file is set to be transferred and green is displayed To cancel press the SET button again Up to 255 files can be selected in succession 4 Press the button or the recording start stop button A confirmation screen for the selection transfer appear...

Page 157: ...s the SET button You can check the transfer of the file on the thumbnail screen 8 file display green File is set for transfer white File waiting for transfer gray File has been transferred orange File is being transferred File cannot be transferred ...

Page 158: ...Direct Mode may be canceled by the Eye Fi card for reasons other than the above In Direct Mode the Economy Mode function l 66 is disabled When TRANSFER l 155 is set to OFF START DIRECT MODE cannot be selected The Eye Fi transfer feature cannot be guaranteed to continue to operate in the future due to changes to the card specification etc Update the firmware of the Eye Fi card to the latest one usi...

Page 159: ...ices is forbidden such as inside aircraft etc Depending on network conditions the transfer may take some time Also if network conditions deteriorate the transfer may be suspended Files over 2 GB in size cannot be transferred Such files should first be split to reduce the file size l 136 Lighting gray Not connected Blinking white Connected Lighting white Waiting for a connection Lighting orange Tra...

Page 160: ...used in countries other than those where this unit is sold and Panasonic takes no responsibility for any violations There is the risk that data sent and received via radio waves may be intercepted Please note that there is the risk that data sent and received via radio waves may be intercepted by a third party Do not use this unit in areas with magnetic fields static electricity or interference Do...

Page 161: ...11g or IEEE802 11n compatible device when using a wireless access point When using a wireless access point we strongly recommend that you set a encryption to maintain information security When sending scenes or still pictures we recommend you use the AC adaptor If you are using the battery we recommend you use the fully charged one When sending motion pictures or still pictures on a mobile network...

Page 162: ...please read the operating instructions of the device In this owner s manual jThe smartphone and tablet are indicated as smartphone Wi Fi What you can do with the Wi Fi function and the preparations HX WA30 LINK TO CELL Linking with the smartphone you can operate this unit from a remote location Caution Be sure to pay special attention to the privacy the likeness rights etc of the subject when you ...

Page 163: ...g or IEEE802 11n 2 Install the smartphone application Image App on your smartphone l 164 When the preparation above is complete proceed to Connecting to a wireless access point l 166 A DLNA compatible TV 1 Check if the wireless access point is compatible with IEEE802 11b IEEE802 11g or IEEE802 11n 2 Check if the TV is DLNA compatible When the preparation above is complete proceed to Connecting to ...

Page 164: ... contract Install the Image App About the Image App The Image App is an application provided by Panasonic For Android apps For iOS apps OS Android 2 2 Android 4 0 iOS 4 3 iOS 6 0 Installation procedure 1 Connect your Android device to a network 2 Select Google PlayTM Store 3 Enter Image App into the search box 4 Select Image App and install it The icon will be added to the menu 1 Connect your iOS ...

Page 165: ...ngs will be displayed Select YES and then configure the access point settings l 166 In Eye Fi TRANSFER is set to ALL or SELECT the Wi Fi function cannot be used Set TRANSFER to OFF l 155 A Lit green When Wi Fi is disconnected the status indicator turns off B The connection status icon When connected to wireless access point connected to Wi Fi not connected to Wi Fi The display will change as follo...

Page 166: ...f this is the first time the Wi Fi button is pressed 1 Press Wi Fi button 2 Select YES using the SET button and then press the SET button 3 Select Easy Connection WPS using the SET button and then press the SET button 4 Set the wireless access point to waiting for WPS For further details please read the operating instructions for the wireless access point A message is displayed when the connection...

Page 167: ...s the SET button to finish the setup A message is displayed when the connection is complete A message is displayed when the connection attempt fails Press the SET button to finish the setup and set the connection again When setting from the Wi Fi setup menu 1 Press Wi Fi button 2 Select Wi Fi SETUP using the SET button and then press the SET button 3 Select Wireless Settings using the SET button a...

Page 168: ... Enter a PIN code to set the Wi Fi connection 1 Select PIN code in Step 7 and then press the SET button 2 Select the wireless access point to be connected using the SET button and then press the SET button If you select Refresh you can search for wireless access points again 3 Enter the PIN code displayed on this unit screen into the wireless access point For further details please read the operat...

Page 169: ...utton and set the connection again Confirming that the Wi Fi connection is complete is displayed on the screen When the preparations for the Wi Fi function l 162 and the Wi Fi connection are complete you can use the following functions j LINK TO CELL l 181 j DLNA PLAYBACK l 185 ...

Page 170: ...essed 1 Press Wi Fi button 2 Select YES using the SET button and then press the SET button 3 Select Manual Connection using the SET button and then press the SET button 4 Select Search for wireless network or Manual Setting using the SET button and then press the SET button Manual Connection Search for wireless network Allows you to search for wireless access points select one and set it l 172 Man...

Page 171: ...r of wireless access points please refer to Wireless Settings on page 187 5 Select SET using the SET button and then press the SET button 6 Select Manual Connection using the SET button and then press the SET button 7 Select Search for wireless network or Manual Setting using the SET button and then press the SET button Search for wireless network Allows you to search for wireless access points se...

Page 172: ...ect INPUT using the SET button and then press the SET button 3 Enter the Password using the SET button Select characters using the SET button and then press the SET button When the SET button is tilted up down several times the password entry screen switches from alphabets lower case to alphabets upper case and then to symbols When the entry is complete select ENTER using the SET button and then p...

Page 173: ...g the SET button and then press the SET button 3 Select NEXT using the SET button and then press the SET button 4 Select the desired Network Authentication method using the SET button and then press the SET button When WEP is selected proceed according to step 6 Confirming that the Wi Fi connection is complete is displayed on the screen When the preparations for the Wi Fi function l 162 and the Wi...

Page 174: ...r details on how to enter characters refer to page 172 When the entry is complete select ENTER using the SET button and then press the SET button 8 Select NEXT using the SET button and then press the SET button A message is displayed when the connection is complete Confirming that the Wi Fi connection is complete is displayed on the screen When the preparations for the Wi Fi function l 162 and the...

Page 175: ...in descending order of strength We recommend you connect with the strongest possible Encryption method If no connection can be established the wireless access point s radio waves may be too weak Refer to Messages l 214 and Troubleshooting l 215 for details Transmission speed may decrease or may not be usable depending on the environment it is used in ...

Page 176: ... the SET button 3 Select Direct Connection using the SET button and then press the SET button 4 Select Change connection type using the SET button and then press the SET button 5 Select Easy Connection WPS using the SET button and then press the SET button 6 Set the smartphone to WPS Mode Easy Connection WPS Confirming that the Wi Fi connection is complete is displayed on the screen When the prepa...

Page 177: ...he smartphone 5 Enter the Password displayed on this unit into a smartphone Transmission speed may decrease or may not be usable depending on the environment it is used in Connecting by entering an SSID and Password Confirming that the Wi Fi connection is complete is displayed on the screen When the preparations for the Wi Fi function l 162 and the Wi Fi connection are complete you can use the fol...

Page 178: ... will be aborted Reset the connection settings Check how to connect to the wireless access point and how to set the security settings Make sure the wireless access point is registered in this unit l 187 The device may be unable to locate the wireless access point due to problems with the signal Use Manual Connection l 170 The Wi Fi function will not work underwater Easy Connection Make sure the wi...

Page 179: ...ings of the smartphone Make sure this unit and the smartphone are connected to the same wireless access point Make sure the wireless access point is registered in this unit l 187 Direct Connection Make sure the smartphone is properly connected to this unit by checking the Wi Fi settings of the smartphone Make sure the SSID and password have been correctly input Make sure the smartphone is not conn...

Page 180: ...witching the ON OFF of the Wi Fi function in the Wi Fi settings of the smartphone The Wi Fi connection is disconnected immediately If there is a setting for avoiding poor connections in the Wi Fi setting menu of the Android device 4 0 or later version turn it OFF Problem Check points ...

Page 181: ...artphone B When connecting to a wireless access point Refer to Help in the Image App menu for further details on how to operate Wi Fi Recording playing back with remote operations HX WA30 Before using perform the preparations for using the Wi Fi function l 162 You need to turn on the Wi Fi function of your smartphone and install Image App l 164 Do not remove the SD card during remote operations Im...

Page 182: ...on Press the SET button The message is displayed Select YES to close the indication 1 Connect the smartphone to a wireless access point 2 Press Wi Fi button 3 Select LINK TO CELL using the SET button and then press the SET button It will go into connection standby for remote operation 4 Start up the smartphone application Image App When the connection is complete images of this unit is displayed o...

Page 183: ...Remaining battery power of this unit 2 Zoom 3 Photoshot button 4 Menu display 5 Playback mode button 6 Recording mode button 7 Recording start stop button 8 Name of the connected device Playback screen 1 Number of files 2 Camera function button 3 Menu display 4 Playback mode button 5 Recording mode button 6 File information display 7 Name of the connected device XXXXXXXXX XXXXXXXXX 1 16 MP4_0001 2...

Page 184: ... or perform playback operation when this unit is connected to the DLNA compatible TV via wireless access point using a smartphone Audio files cannot be handled It may not properly playback depending on the communication environment If the buttons on this unit are operated while recording with remote operation the LCD monitor of this unit will turn on and an image on the smartphone stops When the L...

Page 185: ...utton the Wi Fi connection is canceled When the connection is complete the screen of this unit turns off To display it again operate any button on the unit 3 Select this unit SSID by the TV side Wi Fi DLNA playback HX WA30 Before using perform the preparations for using the Wi Fi function l 163 Please read the operating instructions for the TV about connecting TV to the wireless access point Do no...

Page 186: ...imum of 10 000 recorded files can be displayed If more than 10 000 files are stored in an SD card only 10 000 of those will be displayed in descending order of the folder number file number You cannot perform playback operations with this unit It may not properly playback depending on the communication environment To exit the playback on the TV Press the SET button A message is displayed Select YE...

Page 187: ...u can add or delete wireless access points or rearrange the display order of wireless access points Up to 3 wireless access points can be set Please refer to page 166 for details about Wireless Settings To add a wireless access point 1 Select blank row using the SET button and then press the SET button 2 Select SET using the SET button and then press the SET button 3 Configure the wireless access ...

Page 188: ...ct the access point you want to switch the order using the SET button and then press the SET button 2 Select ACCESS PRIORITY using the SET button and then press the SET button The selected access point is surrounded by a red frame 3 Select a new location of the access point selected in step 1 using the SET button and press the SET button To change the wireless access point delete one of the regist...

Page 189: ...XT using the SET button and then press the SET button 5 Select INPUT using the SET button and then press the SET button 6 Enter the same Password again After finish entering the Password select ENTER 7 Select NEXT using the SET button and then press the SET button If the Passwords match with each other a message is displayed If you set the Wi Fi Password you will need to enter the Password each ti...

Page 190: ...ng the SET button and then press the SET button If you are going to connect directly to a smartphone after changing the device name SSID set the connection again with the changed device name SSID l 177 The Password entered during the setting of direct connection cannot be changed l 177 You can change or check your wireless LAN s network settings such as the IP Address Subnet Mask and MAC Address I...

Page 191: ... VE 3 0 can be played back on the unit Note however that such scenes cannot be edited on the unit Smart wizard The Smart wizard screen is automatically displayed when you connect this unit to a PC with HD Writer VE 3 0 installed l 201 Select the function you wish to use and follow the on screen instructions for easy copying With a PC What you can do with a PC Copy to PC You can copy motion still p...

Page 192: ... a Blu ray disc Motion pictures are converted to high definition H 264 motion pictures Motion pictures recorded using cannot be copied Motion pictures recorded using cannot be copied Online sharing You can upload motion still picture data on the Internet and share them with your family and friends Copying in DVD Video format Converted to conventional standard quality MPEG2 format Motion picture Ed...

Page 193: ... using a Mac Data cannot be written to the unit from a PC Motion pictures that have been recorded on another device cannot be written to the software supplied with this unit Audio files cannot be handled When motion picture data is written to and read from the SD card correct operation cannot be guaranteed with software other than that supplied with the unit Do not start the software supplied with...

Page 194: ...ow any third party whether free of charge or not to use copy or modify the Software except as expressly provided for in this Agreement Article 3 Restrictions on Copying the Software Licensee may make a single copy of the Software in whole or a part solely for back up purpose Article 4 Computer Licensee may use the Software only on one computer and may not use it on more than one computer Further L...

Page 195: ... Agreement In this event Licensee must destroy the Software and related documentation together with all the copies thereof at Licensee s own expense Article 9 With regard to MICROSOFT SQL SERVER COMPACT 3 5 produced by Microsoft Corporation 1 Licensee shall use the MICROSOFT SQL SERVER COMPACT 3 5 only when included in the Software and shall not use the MICROSOFT SQL SERVER COMPACT 3 5 in any othe...

Page 196: ... compatible with Microsoft Windows 3 1 Windows 95 Windows 98 Windows 98SE Windows Me Windows NT and Windows 2000 Operating environment for HD Writer VE 3 0 With a PC Operating environment PC IBM PC AT compatible PC OS Windows 8 32 bit 64 bit Windows 7 32 bit 64 bit Starter Home Basic Home Premium Professional Ultimate SP1 Windows Vista 32 bit Home Basic Home Premium Business Ultimate SP2 Windows X...

Page 197: ...r more Windows XP 512 MB or more 1 GB or more recommended Display High Color 16 bit or more 32 bit or more recommended Desktop resolution of 1024k768 pixels or more 1920k1080 pixels or more recommended Windows 8 Windows 7 Windows Vista DirectX 9 0c compatible video card DirectX 10 recommended Windows XP DirectX 9 0c compatible video card Compatible with DirectDraw overlay PCI Express k16 compatibl...

Page 198: ...rformance PC depending on the functions to be used It may not properly play back or properly operate depending on the environment of the PC used Refer to the operating environment and notes Operation during the playback may become slow if the CPU or memory is not fulfilling the requirements of the operating environment Always use the most current driver for the video card Always make sure there is...

Page 199: ...ows 8 Windows 7 Windows Vista 1 GHz or higher 32 bit k86 or 64 bit k64 processor including compatible CPU Windows XP Intel Pentium III 450 MHz or higher or Intel Celeron 400 MHz or higher RAM Windows 8 Windows 7 1 GB or more 32 bit 2 GB or more 64 bit Windows Vista Home Basic 512 MB or more Windows Vista Home Premium Business Ultimate Enterprise 1 GB or more Windows XP 512 MB or more 1 GB or more ...

Page 200: ...played automatically select Start Computer or double click on Computer on the desktop and then double click Panasonic 2 Click Yes 3 Click Next Operate following the instruction on the screen Select NTSC Area when the country or region of your residency is not displayed in the selection screen for the country or region Uninstalling HD Writer VE 3 0 Follow the steps below to uninstall any software a...

Page 201: ... the USB cable in the wrong direction may cause damage to the USB AV connector of the unit If the connector has become damaged it may not operate correctly including failure to recognize the cable even if it has been connected The USB function selection screen will appear 3 Select the desired Connection Mode using the SET button and press the SET button With a PC Connecting to a PC CARD READER The...

Page 202: ... an SDXC Memory Card check the following support site http panasonic net avc sdcard information SDXC html Use as a card reader Connect the unit to a PC and set the unit to Card Reader Mode l 201 The LCD monitor will turn off The Smart wizard screen is automatically displayed when HD Writer VE 3 0 is installed This unit is automatically recognized as an external drive of the PC l 203 File is read f...

Page 203: ...01CDPFP folder is created and the files are stored in this new folder The folders are numbered 102CDPFP 103CDPFP and so on 2 Recorded scenes 3 JPEG format pictures 4 Recorded audio We recommend using HD Writer VE 3 0 to copy motion picture data Using Windows Explorer or other programs on the PC to copy move or rename files and folders recorded with this unit will result in them being unusable with...

Page 204: ... PC Panasonic Blu ray disc recorder or Panasonic DVD recorder using a USB cable the battery will charge Insert the USB cable securely all the way It will not operate properly if it is not inserted all the way Do not use any other USB cables except the supplied one Operation is not guaranteed with any other USB cables Be sure to connect the unit directly to the PC Blu ray disc recorder or DVD recor...

Page 205: ...10 8 2 CPU Windows 8 Windows 7 Windows Vista 1 GHz or higher 32 bit k86 or 64 bit k64 processor including compatible CPU Windows XP Intel Pentium III 450 MHz or higher or Intel Celeron 400 MHz or higher Intel Core 2 Duo or better RAM Windows 8 Windows 7 1 GB or more 32 bit 2 GB or more 64 bit Windows Vista Home Basic 512 MB or more Windows Vista Home Premium Business Ultimate Enterprise 1 GB or mo...

Page 206: ... CAMERA reconnect the USB cable 2 On the PC Start Windows Live Messenger or Messages Check that the unit has been selected in the Windows Live Messenger or Messages settings When disconnecting the USB cable from your PC please close Windows Live Messenger or Messages before disconnecting After 12 hours the unit is automatically turned off In Web Camera Mode the following functions are disabled j D...

Page 207: ... Panasonic HD Writer VE 3 0 HD Writer VE 3 0 For details on how to use the software applications read the PDF operating instructions of the software Reading the operating instructions of the software applications You will need Adobe Acrobat Reader 5 0 or later or Adobe Reader 7 0 or later to read the PDF operating instructions Select Start All Programs Panasonic HD Writer VE 3 0 Operating Instruct...

Page 208: ...ent Even if the system requirements mentioned in this owner s manual are fulfilled some PCs cannot be used The USB equipment operates with the driver installed as standard in the OS Supplied CD ROM is available for Windows only With a PC If using Mac PC Mac OS Mac OS X 10 8 2 CPU Intel Core 2 Duo or better RAM 2 GB or more Interface USB port Other requirements Mouse or equivalent pointing device H...

Page 209: ...an CARD READER remove and then reconnect the USB cable 3 Double click on the CAM_SD or CAM_MEM displayed on the desktop Files are stored in 100CDPFP folder etc in the DCIM folder 4 Using a drag and drop operation move the pictures you want to acquire or the folder storing those pictures to any different folder on the PC To disconnect USB cable safely Drag CAM_SD or CAM_MEM disk icon to the Trash a...

Page 210: ...ack Mode the picture size is not displayed for still pictures recorded with other products that have different picture sizes from the sizes shown above Burst recording l 87 Panorama recording l 89 3000 Remaining number of still pictures l 48 High temperature warning l 37 ßA ß Flash l 102 000 00 15 000 00 15 000 00 15 MF 3000 3000 3000 ISO400 ISO400 ISO400 F2 8 F2 8 F2 8 1 30 1 30 1 30 1CLR HX WA30...

Page 211: ...106 3 only Intelligent Auto Mode l 53 Exposure l 117 F2 8 Iris value l 48 117 1 30 Shutter Speed l 48 117 Zoom Double range zoom l 75 B Eye Fi settings l 155 Gray Red Audio recording icon Recording audio Focus mark l 108 Spot metering target l 109 HX WA30 MINI 1CLR OLD INTV GHOST FISH HDRP SKIN B W SEPIA VIVID SOFT HX WA30 HX WA3 HX WA30 HX WA30 HX WA3 HX WA03 ...

Page 212: ... 000 00 15 Recording time elapsed l 45 52 Approximate remaining recordable time l 45 52 AF Lock l 113 AE Lock l 114 Ø10 Ø2 Self timer Recording l 103 Card recording possible status Built in memory recording possible status Image Stabilizer l 78 MF Focus l 120 Remaining battery power l 28 Wi Fi connection status wireless access point l 165 Wi Fi connection status direct connection l 165 HX WA30 ...

Page 213: ...ate 100 0001 Folder number file number Motion picture file Audio file Files for which protect is set l 143 Face detection l 109 Panorama still picture l 89 Creative control l 130 Eye Fi transfer status l 157 Files exceeding 4 GB in size l 59 Remaining battery power l 28 Files which cannot be played back Time display The built in battery is low l 41 Incompatible SD card is used HX WA30 1CLR OLD FIS...

Page 214: ...tion Please unlock the write protect switch l 31 Overheat Turn off camera now INTERNAL TEMPERATURE TOO HIGH PLEASE TURN UNIT OFF AND WAIT A WHILE The temperature within the unit is increasing Turn the power off and wait until the temperature decreases before starting recording again l 37 Failed to connect wireless access point No wireless access point found Check the Wi Fi setup of your wireless a...

Page 215: ... indoors white round spots may appear on the picture caused by the flash reflecting of particles of dust in the air This is not a malfunction A characteristic of this is that the number of round spots and their position differ in every picture Why does the displayed image contain some red blue and green dots or why are black spots visible Condition due to the LCD monitor characteristics Not a malf...

Page 216: ...l return to normal when the unit regains its normal temperature Power Problem Check points This unit cannot be turned on This unit does not stay on long enough Battery runs down quickly Recharge the battery pack or connect the AC adaptor l 25 In cold places the battery using time becomes shorter It is possible to insert the battery incorrectly so please pay particular attention when inserting that...

Page 217: ...t VIERA Link to OFF l 149 This unit cannot be operated though it is turned on This unit does not operate normally Remove the battery or AC adaptor wait about 1 minute and then reconnect the battery or AC adaptor Then about 1 minute later turn on the unit again Conducting the above operation while the media is being accessed may damage the data on the media If normal operation is still not restored...

Page 218: ...onnected and consult the dealer who you purchased this unit from Indication Problem Check points The battery capacity indication or the elapsed time indication is not shown DISPLAY is OFF l 66 Status indicator Problem Check points The status indicator is flashing red During battery charging the status indicator flashes red with a period of approximately 2 seconds approximately 1 second on 1 second...

Page 219: ...alfway to change to photo view To change the angle of view of the recording standby screen to photo view set PHOTO VIEW to ON l 104 The unit arbitrarily stops recording Use an SD card that can be used for motion picture recording l 30 The recordable time may have shortened due to the deterioration of the data writing speed or repeated recording and deletion Using the unit format the SD card or bui...

Page 220: ...ight etc but this is not a malfunction Record in Intelligent Auto Mode or set the shutter speed to 1 60 in areas where the power supply frequency is 60 Hz or 1 100 in areas of 50 Hz Record in Intelligent Auto Mode Playback Problem Check points Files cannot be played back Any files where the thumbnails display are displayed as cannot be played back Files cannot be deleted Release the protect settin...

Page 221: ...or the connection Change the TV ASPECT setting to match the aspect ratio of the TV l 147 When connecting with the HDMI micro cable change the HDMI setting l 148 Depending on the status of the unit and the connecting cable a picture may not appear on the TV or LCD monitor Check the status of the unit and the connection l 146 If the SD card is inserted in another device it is not recognized Check th...

Page 222: ...r on the PC when you charge the battery by connecting the USB cable to a PC First disconnect the USB Connection Cable then turn on the unit and reconnect The unit will be recognized by the PC To charge the battery first safely disconnect the USB cable and turn off the unit Then reconnect the USB cable When connected by the USB cable this unit is not detected by the PC After re inserting the SD car...

Page 223: ...nnect to wireless access point or smartphone Read page 178 if the Wi Fi connection cannot be established Cannot operate from smartphone using LINK TO CELL Install the smartphone app Image App on your smartphone l 164 Cannot use DLNA PLAYBACK Make sure the television is compatible with DLNA Read the instructions for the television you are using Make sure the wireless access point and this device ar...

Page 224: ...n place when the unit was purchased When set to RESET Wi Fi SETTINGS all Wi Fi settings including the registered wireless access points will be deleted Others Problem Check points If the SD card is inserted in this unit it is not recognized If the SD card is formatted on a PC it may not be recognized by this unit Use this unit to format SD cards l 68 Wi Fi Problem Check points ...

Page 225: ...ersely affect this unit disturbing the pictures and or sound If this unit is adversely affected by electromagnetic equipment and stops functioning properly turn this unit off and remove the battery or disconnect AC adaptor Then reinsert the battery or reconnect AC adaptor and turn this unit on Do not use this unit near radio transmitters or high voltage lines If you record near radio transmitters ...

Page 226: ...the battery or pull the AC adaptor from the AC outlet and then wipe the unit with a soft dry cloth If the unit is very dirty dip a cloth in water and squeeze firmly and then wipe the unit with the damp cloth Next dry the unit with a dry cloth Use of benzine paint thinner alcohol or dishwashing liquid may alter the camera body or peel the surface finish Do not use these solvents When using a chemic...

Page 227: ...mat or deleting the data on the built in memory of this unit only modifies the file management records and the data contained within the built in memory is not completely deleted The data may be able to be recovered using commercially available products such as data recovery restoration software Please look after the data in your built in memory carefully Panasonic will not be held responsible in ...

Page 228: ...ould be stored in the vinyl bag so metal does not come into contact with the terminals The battery should be stored in a cool place free from humidity with as constant temperature as possible Recommended temperature 15 oC to 25 oC 59 oF to 77 oF Recommended humidity 40 RH to 60 RH Extremely high temperatures or low temperatures will shorten the life of the battery Do not contaminate the terminal p...

Page 229: ...ing it into a fire may result in an explosion If the operating time is very short even after the battery has been recharged the battery has worn out Please purchase a new battery If the temperature of the battery is extremely high or extremely low charging may take time or the battery may not be charged If you use the AC adaptor near a radio radio reception may be disturbed Keep the AC adaptor 1 m...

Page 230: ...approx 0 25 second on for approx 0 25 second The battery is not charged Remove the battery from the unit and try charging again Check that the terminals of the unit or battery are not dirty or covered with a foreign object and connect the battery correctly once again If a foreign object or dirt is present turn off the unit before removing The battery or environment is at an extremely high or low t...

Page 231: ...ipe it with a soft cloth such as eyeglass cleaner When the unit has become very cold for example due to storage in a cold area its LCD monitor will be slightly darker than usual or afterimages may appear immediately after the unit is turned on The normal brightness will be restored when the unit s internal temperature rises About the SD card LCD monitor Extremely high precision technology is emplo...

Page 232: ...r countries Microsoft product screen shot s reprinted with permission from Microsoft Corporation IBM and PC AT are registered trademarks of International Business Machines Corporation of the U S Intel Pentium Celeron and Intel Core are trademarks of Intel Corporation in the U S and or other countries AMD Athlon is a trademark of Advanced Micro Devices Inc iMovie Mac and Mac OS are trademarks of Ap...

Page 233: ...aged in a personal and non commercial activity and or was obtained from a video provider licensed to provide AVC Video No license is granted or shall be implied for any other use Additional information may be obtained from MPEG LA LLC See http www mpegla com This product incorporates the following software 1 the software developed independently by or for Panasonic Corporation 2 the software owned ...

Page 234: ...s approximate recordable time Recording Mode 1 1 1 1 2 Picture size 1920k1080 1920k1080 1280k720 1280k720 640k480 SD card 4 GB 20 min 30 min 30 min 50 min 2 h 30 min 16 GB 1 h 50 min 2 h 10 min 2 h 10 min 3 h 30 min 10 h 64 GB 8 h 8 h 50 min 8 h 50 min 14 h 40 h Built in memory Approx 65 MB 15 s 20 s 20 s 40 s 2 min Recording Mode 3 Picture size 960k540 VOICE RECORD SD card 4 GB 20 min 31 h 16 GB ...

Page 235: ...n the file size exceeds 4 GB during recording A new file is created automatically every 4 GB The recording state is continued until the unit enters the paused state When recording in SLOW MOTION MODE recording ends after 15 seconds of recording When recording in SLOW MOTION CONTINUOUS MODE recording ends after 15 minutes of recording Use time in the row of 4 GB in above table as a guideline for th...

Page 236: ... of recordable pictures Picture size 4608k3456 3616k2712 2560k1920 Aspect ratio 4 3 4 3 4 3 SD card 4 GB 450 750 1400 16 GB 1900 3100 6000 64 GB 7500 12000 23000 Built in memory Approx 65 MB 5 10 25 Picture size 2048k1536 640k480 Aspect ratio 4 3 4 3 SD card 4 GB 2300 19500 16 GB 9000 78000 64 GB 36000 237000 Built in memory Approx 65 MB 40 350 HX WA30 ...

Page 237: ...prox 65 MB 10 15 30 50 Picture size 360e PANORAMA 180e PANORAMA 14144k1280 1680k14144 7072k1280 1680k7072 Aspect ratio s s SD card 4 GB 300 600 16 GB 1200 2500 64 GB 5000 10000 Built in memory Approx 65 MB 5 10 Picture size 4608k3456 4352k3264 3072k2304 Aspect ratio 4 3 4 3 4 3 SD card 4 GB 450 500 1000 16 GB 1900 2100 4200 64 GB 7500 8500 16500 Built in memory Approx 65 MB 5 5 15 HX WA3 HX WA03 ...

Page 238: ...B 9000 78000 64 GB 36000 237000 Built in memory Approx 65 MB 40 350 Picture size 4352k2448 3744k2106 2560k1440 1920k1080 Aspect ratio 16 9 16 9 16 9 16 9 SD card 4 GB 650 900 1900 3400 16 GB 2800 3800 7500 13500 64 GB 11000 15000 31000 52000 Built in memory Approx 65 MB 10 15 30 50 Picture size 360e PANORAMA 180e PANORAMA 14400k720 1280k14400 7200k720 1280k7200 Aspect ratio s s SD card 4 GB 400 80...

Page 239: ...Panasonic Corporation Web site http panasonic net ...

Reviews: