


- 137 -
≥
In these Operating Instructions, “USB hard disk drive” is indicated as “USB HDD”.
If you connect a USB HDD (commercially-available) to this unit by using a USB Connection Cable
(commercially-available), you can copy motion pictures and still pictures recorded on this unit to a
USB HDD.
It can also play back the scenes and still pictures copied to the USB HDD.
≥
You can copy scenes and still pictures recorded with this unit while maintaining the image quality.
≥
Please read the operating instructions of the USB HDD for how to use it.
Preparing for copying/playing back
≥
In the following cases, a USB HDD cannot be used by connecting it to this unit:
j
A USB HDD with a capacity of below 160 GB or above 2 TB
j
When a USB HDD has two or more partitions
j
If a USB HDD is in a format other than FAT32
j
When connected by using a USB hub
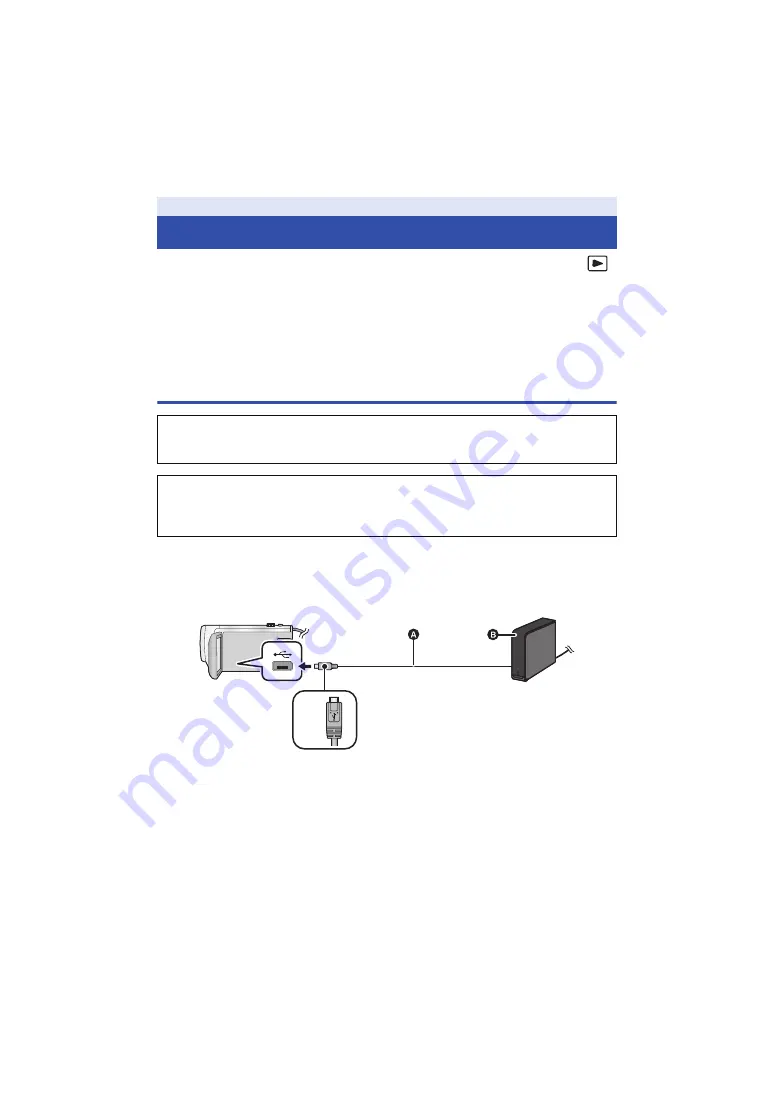
A
USB Connection Cable (commercially-available)
B
USB HDD (commercially-available)
C
Turn the side with the symbol up to connect the micro A end of the USB Connection Cable to
the USB terminal of this unit.
≥
Connect this unit to the AC adaptor
Copying/playing back with a USB HDD
Refer to the following support site for information about USB HDD.
http://panasonic.jp/support/global/cs/e_cam
(This Site is English only)
When the USB HDD that requires formatting is connected, a message is displayed. Follow the
instructions on the screen to format it.
Once the USB HDD has been formatted, all data stored on it will be deleted. The data cannot be
recovered.


