background image

25

(ENG) SQT0529

Using [Remote Ctrl] with a direct connection

Set the NFC function of the smartphone to on.

1

Start up the smartphone application “Image App”.

2

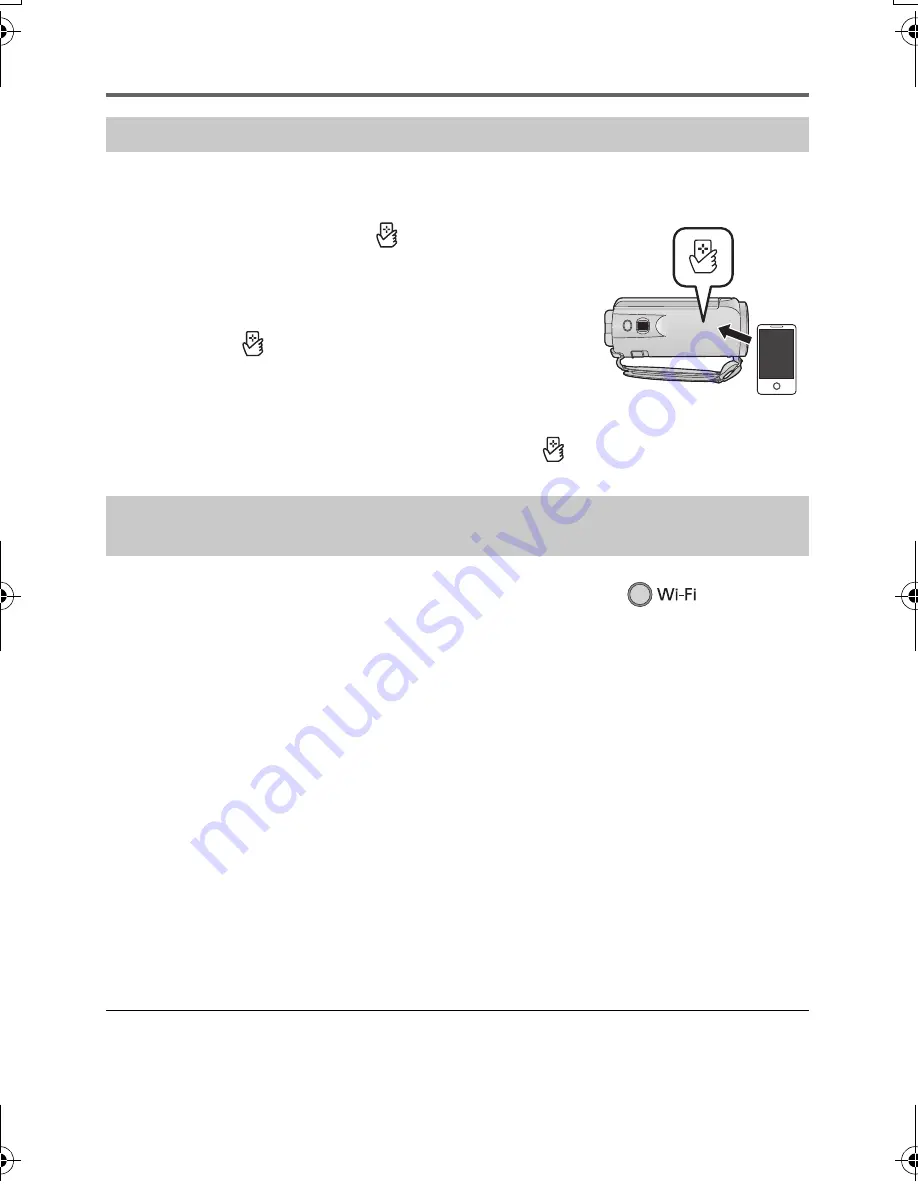
Touch the smartphone on 

 of this unit.

Touch the NFC touch area when the NFC mark is displayed on 
the smartphone screen.

If this is the first time the smartphone is connecting to this unit, 
touch [YES] on the screen of this unit, and then touch the 
smartphone on 

 of this unit again.

If the unit is not recognised even when touching the smartphone, 
change positions and try again.

The connection cannot be established while this unit is recording.

When the connection is complete, images of this unit is displayed on the smartphone screen.

This unit is turned on even if it touches the smartphone on 

 of this unit, where this unit is 

turned off with a LCD monitor.

1

Press Wi-Fi button on this unit and touch [Wi-Fi Setup]. 

2

Touch [Direct Connection].

3

Touch [Change connection type] and select [QR code]

QR code is displayed on the screen of this unit.

4

Start up the smartphone application “Image App”.

5

On the smartphone, select [QR code] to scan the QR code displayed on the 
screen of this unit.

(If the device is Android)

The connection will be completed. The image from this unit will be displayed on the smartphone screen.

(If the device is iOS)

Follow the steps below:

1

Select the option that allows you to install the app on the profile screen of the “Image App”, and 
follow the on-screen instructions to complete the installation.

2

Press the home button to close the displayed screen.

3

Select the network name (SSID) of this unit from the Wi-Fi setup of the smartphone.
The connection will be completed. The image from this unit will be displayed on the 
smartphone screen.

When you cannot scan the QR code, refer to “Connecting by entering an SSID and Password” in 
the Operating Instructions (PDF format).

Transmission speed may decrease, or may not be usable depending on the environment it is used in.

Use NFC to set up a direct connection between this unit and the smartphone.

Scan a QR code to set up a direct connection between this unit and 
the smartphone.

HC-V270&V260GC&GW&GN-SQT0529_mst.book  25 ページ  2014年10月31日 金曜日 午後5時45分

Summary of Contents for HC-V260

Page 1: ...operating instructions are available in Operating Instructions PDF format To read it download it from the website https eww pavc panasonic co jp hdw oi V270 Click the desired language SQT0529 Please...

Page 2: ...well ventilated Do not obstruct this unit s ventilation openings with newspapers tablecloths curtains and similar items Do not place sources of naked flames such as lighted candles on this unit The m...

Page 3: ...adaptor and turn this unit on Do not use this unit near radio transmitters or high voltage lines If you record near radio transmitters or high voltage lines the recorded pictures and or sound may be...

Page 4: ...d you charge it once every year and store it again after you have completely used up the charged capacity If the operating time is very short even after the battery has been recharged the battery has...

Page 5: ...as the SD card The smartphone and tablet are indicated as smartphone Function that can be used for Motion Picture Recording Mode Function that can be used for Still Picture Recording Mode Function tha...

Page 6: ...You will need Adobe Reader to browse or print the Operating Instructions PDF format You can download and install a version of Adobe Reader that you can use with your OS from the following website As...

Page 7: ...5 Setting date and time 16 Setting your home region for the first time 16 Basic Changing the Recording Mode 17 Recording motion pictures 18 Recording still pictures 18 Using the zoom 19 Motion picture...

Page 8: ...0236 HDMI mini cable K1HY19YY0021 Optional accessories GC Battery charger VW BC10E EB GW Battery charger VW BC10E GN Battery charger VW BC10GN Battery pack lithium VW VBT190 Battery pack lithium VW VB...

Page 9: ...paration Power supply It has been found that counterfeit battery packs which look very similar to the genuine product are made available to purchase in some markets Some of these battery packs are not...

Page 10: ...ly 2 seconds approximately 1 second on approximately 1 second off indicating that charging has begun It will turn off when the charging is completed Connecting to the AC outlet It is possible to use t...

Page 11: ...low temperature The actual recordable time refers to the recordable time when repeatedly starting stopping recording turning the unit on off moving the zoom lever etc Battery capacity indication The b...

Page 12: ...the data is deleted it cannot be restored Caution Check that the access lamp has gone off Preparation Recording to a card Please confirm the latest information about SD Memory Cards SDHC Memory Cards...

Page 13: ...con in Recording Mode this unit can be switched between Motion Picture Recording Mode and Still Picture Recording Mode Switching this unit between Recording Mode and Playback Mode Preparation Turning...

Page 14: ...touch operation is performed for a specific period of time To display it again touch the screen If the recording start stop button is pressed in Still Picture Recording Mode or Playback Mode this uni...

Page 15: ...Menu To display the Touch Menu Touch left side right side of on the Touch Menu to switch the operation icons It is also possible to switch the operation icons by sliding the Touch Menu right or left...

Page 16: ...ATION The year can be set between 2000 and 2039 3 Touch ENTER Touch EXIT to complete the setting You can set your home region in SET WORLD TIME 1 Select the menu l 21 A message will be displayed Touch...

Page 17: ...are in 1 2 Intelligent Auto Plus You can add manually adjusted brightness and colour balance settings to the Intelligent Auto Mode and record 1 Creative Control You can record motion pictures with ad...

Page 18: ...button again to pause recording Recording can also be started stopped by touching the recording button icon Open the lens cover before turning on the unit 1 Open the LCD monitor and set this unit to S...

Page 19: ...for playback When AVCHD is selected When MP4 iFrame is selected The recording mode icon B is displayed in the thumbnail display when the item is touched and Basic Using the zoom Basic Motion picture S...

Page 20: ...j Slide the thumbnail display upward downward while touching it j Switch the Touch Menu and then touch up down on the thumbnail scroll lever 6 Select the playback operation by touching the operation...

Page 21: ...led Language selection You can select the language on the screen display and the menu screen Formatting Please be aware that if a medium is formatted then all the data recorded on the medium will be e...

Page 22: ...Remote Ctrl Using a smartphone you can perform record playback operations from a remote location or upload motion pictures and still pictures recorded in this unit on SNS Social Networking Service Ba...

Page 23: ...rn on the Wi Fi function of your smartphone Do not remove the SD card during remote operations Caution Be sure to pay special attention to the privacy the likeness rights etc of the subject when you u...

Page 24: ...t and the smartphone l 25 If the device is Android non NFC compatible or iOS Scan a QR code to set up a direct connection between this unit and the smartphone l 25 1 Check if the wireless access point...

Page 25: ...code is displayed on the screen of this unit 4 Start up the smartphone application Image App 5 On the smartphone select QR code to scan the QR code displayed on the screen of this unit If the device...

Page 26: ...ng instructions for the wireless access point When using a tethering connection please read the operating instructions for the smartphone A message is displayed when the connection is complete Touch E...

Page 27: ...he connection is complete and a message is displayed Touch EXIT to exit Set Wireless Access Point and proceed to Step 7 6 When there is an Encryption key Password Enter the Password For information on...

Page 28: ...e Search Make sure the Password have been correctly input Radio waves of the wireless access point get disconnected The condition may improved by moving the location or changing the angle of the wirel...

Page 29: ...es shorter The battery has a limited life If the operating time is still too short even after the battery is fully charged the battery has worn out and needs to be replaced This unit cannot be operate...

Page 30: ...recorded under fluorescent light mercury light or sodium light etc but this is not a malfunction In Motion Picture Recording Mode record in Intelligent Auto Mode Intelligent Auto Plus Mode or set the...

Page 31: ...s VBR HG Average 13 Mbps VBR HE Average 5 Mbps VBR MP4 iFrame 1080 Maximum 28 Mbps VBR 720 Average 9 Mbps VBR iFrame Maximum 28 Mbps VBR Refer to the operating instructions PDF format for the picture...

Page 32: ...Microphone Minimum required illumination Approx 4 lx 1 25 with Low Light Mode in the Scene Mode Approx 1 lx with the Night Mode function AV connector video output level 1 0 Vp p 75 h PAL system HDMI...

Page 33: ...re trademarks of Apple Inc registered in the U S and other countries iPhone is a trademark of Apple Inc registered in the U S and other countries App Store is a service mark of Apple Inc Android and G...

Page 34: ...Corporation 2 the software owned by third party and licensed to Panasonic Corporation 3 the software licensed under the GNU General Public License Version 2 0 GPL V2 0 4 the software licensed under th...

Page 35: ...o below and use the Service Centre Locator for the name address of the nearest Authorised Service Centre Send or take the product to a Panasonic Authorised Service Centre together with your proof of p...

Page 36: ...Panasonic Corporation Web site http www panasonic com Panasonic Corporation 2014 SQT0529 F1114KK0...

Reviews: