background image

8

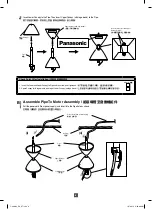
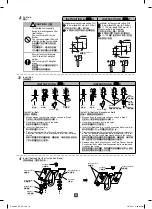
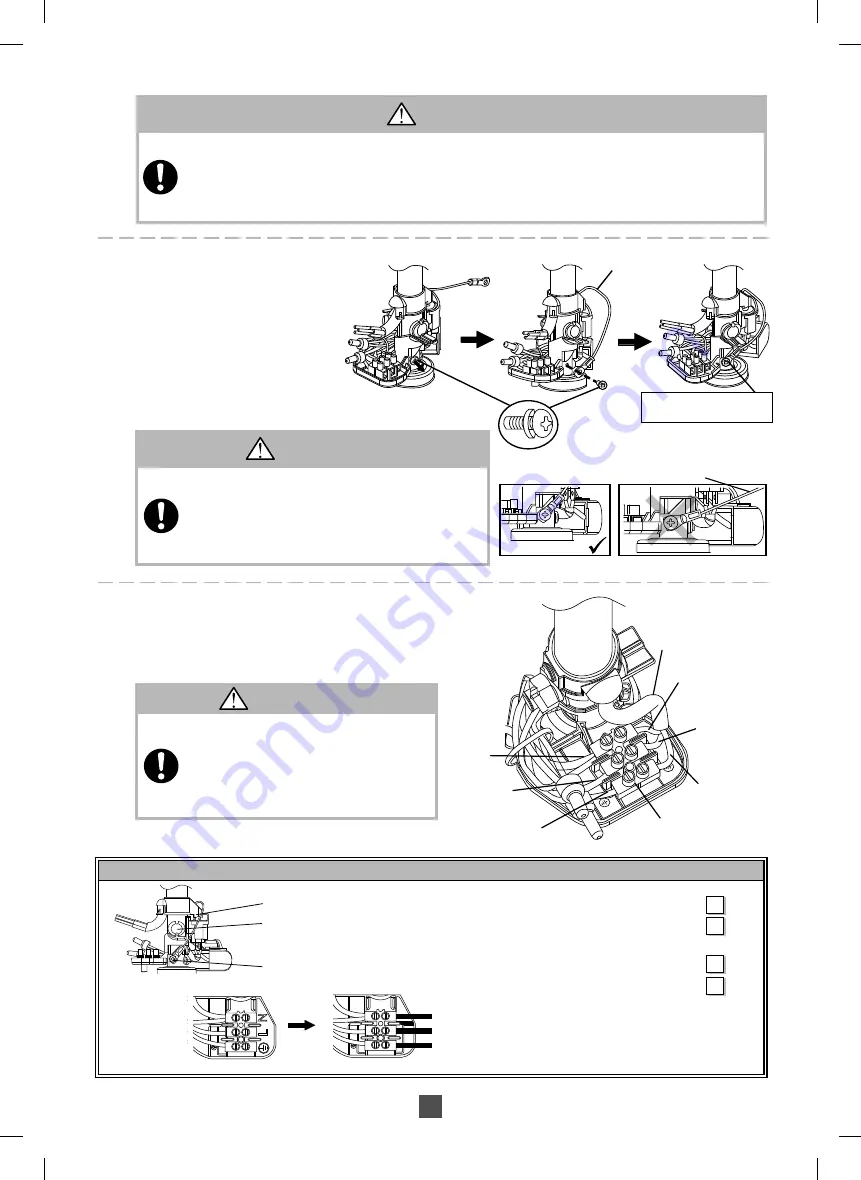
Check Point After Installation / 

安裝後的重點檢查

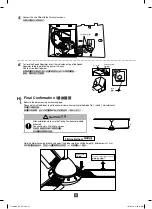
1.  Switch Lever press the Switch. / 

開關杆按壓開關。

2.  The Ellipse Bolt, P-R Washer, Spring Washer and Hexa Nut are fi rmly tightened 

and the Cotter Pin is inserted and bent for safety reason. / 

基於安全理由,橢圓螺

栓、P-R墊圈、彈簧墊圈及六角形螺帽已鎖緊,而開口銷已插入並折彎。

3.  Safety Wire Screw is fi rmly tightened. / 

保險線螺絲已鎖緊。

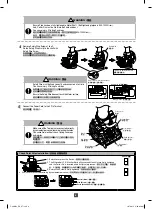
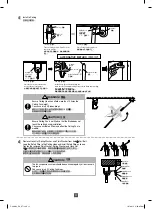
4.  All wires are connected correctly by competent personnel. / 

所有電線必須由能勝任的人員正確地連接。

Check / 

檢查


Neutral (Blue) / 

零線(藍色)

Live (Brown) /


火線 (棕色)

Earth (Green/Yellow) /


地線(綠色/黃色)

Power cord / 

電纜 

3 Pin Terminal /

3 針端子 

Live (Brown) /

火線 (棕色) 

Live (Brown) /

火線 (棕色) 

Earth (Green) / 

地線(綠色)

Neutral (Blue) /

零線(藍色) 

Earth (Green) / 

地線(綠色) 

Black / 

黑色

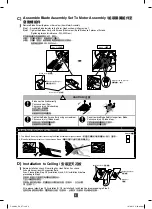
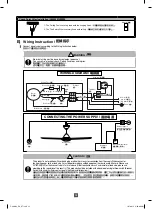
Safety Wire Screw (with washer) / 

保險線螺絲(配有墊圈)

Safety Wire / 

保險線

Tighten the Safety Wire Screw /

鎖緊保險線螺絲 

Wrong position / 

錯誤的位置

Safety Wire / 

保險線 

WARNING / 

警告

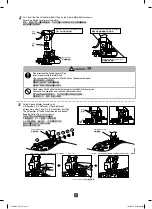
Ensure Pipe has been fully tightened to Motor Shaft.  (Bolt tightening torque is 800~1200N•cm). 
And, Cotter Pin must be fi xed into Bolt hole and bent.             
Can cause injury if Ceiling Fan drops.

確定將導管鎖緊至發動機轉動軸。

(

螺栓扭緊轉距是 

800~1200N•cm

)

而且,開口銷必須插入螺栓孔然後折彎。
若吊扇掉落會導致受傷。

4

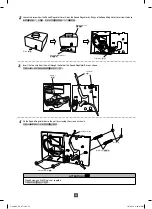
Remove Safety Wire Screw at shaft.
Fix the Safety Wire fi rmly to the shaft with 
Safety Wire Screw.

拆開轉動軸上的保險線螺絲。
使用保險線螺絲將保險線固定於轉動軸。

WARNING / 

警告

Safety Wire must be fi xed correctly and connected at all time.
Can cause injury if Ceiling Fan drops.

保險線必須正確地安裝並在任何時候都連接著。 
若吊扇掉落會導致受傷。

Ensure the Safety Wire does not touch the Motor surface. 

確定保險線沒有觸及發動機表面。

5

5

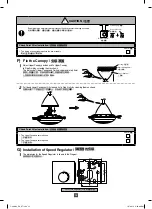
Connect the Power Cord to the 3 Pin Terminal. 

連接電纜至 3 針端子。

WARNING / 

警告

Make sure all the Terminals are connected correctly 
by competent personnel to avoid electrical hazards.
Can cause fi re, electrical shock, Ceiling Fan drops 
and injuries.

請能勝任的人員確定所有端子已正確地連接以避免
電氣危險。
這可導致火災、電擊、吊扇掉落及受傷。

F-48MS2_EN_CT.indd   8

F-48MS2_EN_CT.indd   8

1/27/2015   9:05:02 AM

1/27/2015   9:05:02 AM

Summary of Contents for F-48MS2

Page 1: ... carefully and keep this manual for future reference 操作本產品前 請仔細讀本說明書 並保存本說明書以作日後參考 Ceiling Fan 吊扇 Model Number 型號 F 48MS2 F 60MS2 Contents 目錄 Page 頁數 Safety Precautions 安全注意事項 2 Supplied Parts 配備零件 5 How to Assemble 如何組裝 5 How To Use 如何使用 16 Maintenance 維修 16 Product Specification 產品規格 16 F 48MS2_EN_CT indd 1 F 48MS2_EN_CT indd 1 1 27 2015 9 04 56 AM 1 27 2015 9 04 56 AM ...

Page 2: ...otes an action that is COMPULSORY 此符號表示有關行為是強制性的 This symbol denotes an action that is PROHIBITED 此符號表示有關行為是被禁止的 WARNING 警告 Follow strictly to all the instructions given in this manual for installation Electrical wiring must be done by competent personnel Installation must be done by a qualified personnel Installation error can cause fire electrical shock Ceiling Fan drops and injuries 安裝時請嚴格地遵守本手...

Page 3: ...Fan drops 若吊扇掉落會導致受傷 Do not sprinkle water to Ceiling Fan Or do not wet Ceiling Fan 切勿向吊扇灑水 或者 切勿弄濕吊扇 Can cause fire explosion short circuit and electrical shock 這可導致火災 爆炸 短路及電擊 Tighten the Blade Screws firmly using a screwdriver 使用螺絲起子將扇翼螺絲鎖緊 Can cause injury if Blade drops 若扇翼掉落會導致受傷 Do not use power supply other than rated voltage mentioned 切勿使用本文指定的額定電壓以外的電 源 Overheating can cause electrical s...

Page 4: ...tion can cause the Ceiling Fan to fall 震動會導致吊扇掉落 After installation make sure the Ceiling Fan does not wobble extremely 安裝完畢後 請確保吊扇不會過度搖晃 Can cause injury if Ceiling Fan drops 若吊扇掉落會導致受傷 This product is for in house use only Do not install at a windy places 本產品只供室內使用 切勿安裝在多風的 地方 Can cause rusty discolour damage and injury 這可導致生銹 褪色 損壞及受傷 Do not connect the Ceiling Fan to dimmer switch 切勿將吊扇連接至調光開關...

Page 5: ...p 蓋子 Carl Bolt Plug 卡爾螺栓塞子 Spring Washer 彈簧墊圈 Hexa Nut 六角形螺帽 P R Washer P R 墊圈 1 5 3 2 5 3 4 4 2 2 2 1 2 2 6 6 Supplied Parts 配備零件 HOOK SET 吊鉤組 NOTE These are not supplied 注意 這些都不提供 3 Suspension Bolts 3 個懸掛螺栓 Hook Set 吊鉤組 NOTE 備註 Do not place the Ceiling Fan directly on the floor 切勿直接放置吊扇在地板上 Can cause scratches to the product 這可導致產品被刮花 How to Assemble 如何組裝 A Insert the Canopy 嵌入罩蓋 1 1 Pull out th...

Page 6: ...ipe 將下罩蓋嵌入導管 然後將上罩蓋 印有品牌標誌 嵌入導管 Check Point After Installation 安裝後的重點檢查 1 Insert the Lower and Upper Canopy to Pipe and the screw is not tightened 將下罩蓋和上罩蓋嵌入導管 並且螺絲沒被鎖緊 2 Upper Canopy with logo brand is on top of Lower Canopy no logo brand 上罩蓋 印有品牌標誌 是在下罩蓋 無品牌標誌 的頂部 Check 檢查 B Assemble Pipe To Motor Assembly 組裝導管至發動機組件 1 1 Pull the power cord from power supply and insert into the Pipe hole as show...

Page 7: ... operate if Switch has not been pressed down 切勿拆除導管上的開關杆 將導管正確地插入發動機轉動軸 若沒壓下開關可導致產品無法操作 Do not press Switch with other object except using the Switch Lever given Can cause fire explosion short circuit and electrical shock 除了使用原有的開關杆以外 切勿與其他東西同時推按開關 這可導致火災 爆炸 短路及電擊 NOTE Do not remove this Switch Lever 注意 切勿拆除此開關杆 3 3 Fix the Pipe and Motor Assembly with a Ellipse Bolt b P R Washer c Spring Washer d...

Page 8: ...pe has been fully tightened to Motor Shaft Bolt tightening torque is 800 1200N cm And Cotter Pin must be fixed into Bolt hole and bent Can cause injury if Ceiling Fan drops 確定將導管鎖緊至發動機轉動軸 螺栓扭緊轉距是 800 1200N cm 而且 開口銷必須插入螺栓孔然後折彎 若吊扇掉落會導致受傷 4 Remove Safety Wire Screw at shaft Fix the Safety Wire firmly to the shaft with Safety Wire Screw 拆開轉動軸上的保險線螺絲 使用保險線螺絲將保險線固定於轉動軸 WARNING 警告 Safety Wire must be f...

Page 9: ... No please follow Step D2 Installation B D3 Installation B and Step 4 before proceeding to Step 5 如果沒有 請按照步驟5 然后再進行D2的 安裝B 步驟D3 安裝B 和步驟 4 的安裝 CAUTION 注意 Blade must be fixed correctly Can cause no air flow Can cause injury if blades drop 必須正確上緊扇翼 這會導致沒有氣流 若扇翼掉落會導致受傷 Tighten the Blade Screws firmly using a screwdriver Can cause injury if Blade drops 用螺絲起子將扇翼螺絲鎖緊 若扇翼掉落會導致受傷 Do not remove Blade Safety...

Page 10: ...NSTRUCTION A 指示 指示 A INSTRUCTION B 指示 指示 B Install Carl Bolt 安裝卡爾螺栓 1 Make holes on the concrete ceiling as shown in Step 2 在混凝土天花板鑽個孔如圖所示步驟 2 2 Use blower to remove dust in the holes 使用吹除機清除孔內的灰塵 3 Insert Carl Bolt to hole a 將卡爾螺栓插入孔 a 4 Tighten the supplied Plain Washer Spring Washer Hexa Nut of the Carl Bolt This is for making the Carl Bolt fix to the ceiling 鎖緊卡爾螺栓附帶的普通墊圈 彈簧墊圈 六角形螺帽 這是為 了把卡爾螺栓...

Page 11: ...the Ceiling Fan weight Can cause injury if Blades drops 確定天花板鉤子可以承受超過吊扇的 10 倍重量 若扇翼掉落會導致受傷 CAUTION 注意 Ensure Ceiling Fan is not tilted so that the Blade does not touch the ceiling during installation Can cause unstable air flow and effect the Ceiling Fan to wobble 确保吊扇不傾斜 使扇翼在安裝過程中不触及天花板 可以導致不穩定氣流和吊扇搖晃 6 6 Remove Hexa Nut Spring Washer and Plain Washer from hole Carl Bolt Loop the Safety Wire to t...

Page 12: ...wn 棕色 Connector 連接器 Capacitor 電容器 Source 來源 Ceiling Fan 吊扇 Wall switch On Off 牆壁開關 開 關 Connector 連接器 Brown 棕色 CONNECTING THE POWER SUPPLY 連接電源 CAUTION 注意 This product is not provided with cord and plug or with other means for connection from the supply When connect or change the power cord or lead wire it must be performed by qualified personnel in order to avoid a hazard Please use 227IEC53 RVV o...

Page 13: ...the Diagram 調速器的尺寸如圖所示 CAUTION 注意 Should there be a dimmer switch disconnect it and reconnect the wiring as shown 如果有調光開關 切斷該連接 然後如圖所示再次進行接線 Connect Directly 直接連接 Power Supply 電源 Dimmer Switch 調光開關 2 2 Pull down Lower Canopy untill it stop and fix to Pipe firmly by screwing them as shown 如圖所示拉下下罩蓋直至下罩蓋停止 然後將之旋緊至導管 Check Point After Installation 安裝後的重點檢查 Check 檢查 1 The wiring is connected properly ...

Page 14: ... lifting up the Speed Regulator Cover from the base 鬆開調速器蓋子上的螺絲 從底部提起調速器蓋子以打開調速器 3 3 Insert the live wire from the wall through the hole of the Speed Regulator Base as shown 如圖所示將火線從牆壁通過調速器底部的孔插入 4 Fix the Speed Regulator box to the wall by screwing the screws as shown 如圖所示鎖緊螺絲以安裝調速器箱至牆壁 ATTENTION 留意 留意 Wood Screw and Wall Plug is not supplied 木螺絲和壁式插座並不提供 F 48MS2_EN_CT indd 14 F 48MS2_EN_CT indd ...

Page 15: ...d Regulator to the two protruding parts at the base Finally screw them together 將調速器頂部的兩個孔插入底部的兩個突出部分以關閉調速器 最後 以螺絲將它們鎖緊 H Final Confirmation 最後確認 1 1 Measure the distance using a measuring tape Please adjust all the Blades to get the equal distance from ceiling to the Blade Tip L within 1 mm tolerance 使用捲尺測量距離 請調整所有扇翼 使天花板至扇翼末端L的距離相等 1 毫米公差之 CAUTION 注意 After installation make sure the Ceiling Fan ...

Page 16: ...r maintenance shop show this instruction to them and maintain correctly 當您質詢服務 銷售或維修商店時 請向他們出示此指示以便他們正確地進行維修 5 If the product is broken or damage please remove the Ceiling Fan from ceiling and replace with a new Ceiling Fan This is to avoid the Ceiling Fan drops 若產品已折斷或損壞 請從天花板上拆除吊扇 然後換上新的吊扇 這是為了防止吊扇掉落 6 Recommendation for the Ceiling Fan suspension system shall be examined at least once every two...

Reviews: