background image

8

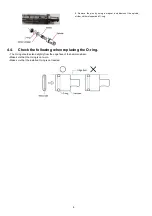
4.4.

Check the following when replacing the O-ring.

• The O-ring should extend slightly from the edge face of the hammer/striker.
• Make sure that the O-ring is not worn.
• Make sure that the installed O-ring is not twisted.

8.  Remove  the  pins  by  using  a  magnet,  and  dismount  the  spindle,
striker, striker stopper and O-ring.

Summary of Contents for EY7881

Page 1: ...distribution is a violation of law ORDER NO PTD1809E53CE Cordless Rotary Hammer Model No EY7881 Europe TABLE OF CONTENTS PAGE PAGE 1 Warning 2 2 Specifications 2 3 Troubleshooting Guide 3 4 Disassembly and Assembly Instructions 6 5 Exploded View and Replacement Parts List 11 ...

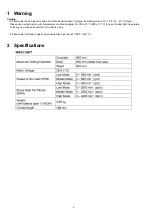
Page 2: ...ing point is 50 70 F 30 40 C higher Please use a soldering iron with temperature control and adjust it to 750 20 F 400 10 C In case of using high temperature soldering iron please be careful not to heat too long Pb free solder will tend to splash when heated too high about 1100 F 600 C 2 Specifications ...

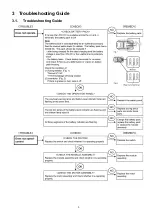
Page 3: ...3 3 Troubleshooting Guide 3 1 Troubleshooting Guide ...

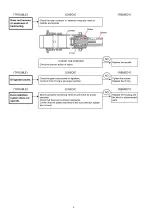
Page 4: ...4 ...

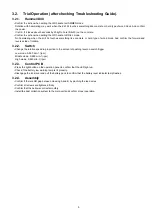
Page 5: ... and reverse side of rotation 3 2 2 Switch Change the rotation speed in proportion to the amount of pushing level on switch trigger Low mode 0 560 min 1 rpm Middle mode 0 680 min 1 rpm High mode 0 840 min 1 rpm 3 2 3 Control PCB Press the light button on the operation panel to confirm that the LED light up Check if the battery low warning lamp is lit properly Disengage the lock lever and pull the ...

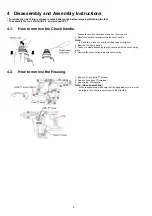
Page 6: ...he unit 2 Pluck the chuck cover depressing the chuck handle Note If it is hardly to take out use the slotted head screwdriver 3 Remove the chuck handle 4 Take out a steel ball pushing the chuck spring with the chuck spring plate 5 Remove the chuck spring plate and chuck spring 1 Remove 21pcs delta PT screws 2 Remove 2pcs truss TP screwss 3 Remove the H D handle Note when assembling When reassembli...

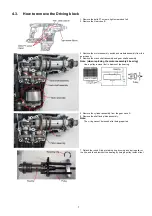
Page 7: ...assembly and gear shaft assembly Note when replacing the motor assembly s bearing Use a pulley removal tool to dismount the bearing 5 Remove the cylinder assembly from the gear case A 6 Remove the shaft and piston assembly Note The o ring cannot be reused after being repaired 7 Detach the round S type retaining ring by using a snap ring plier or the like and then dismount the bearing by using a pu...

Page 8: ... O ring should extend slightly from the edge face of the hammer striker Make sure that the O ring is not worn Make sure that the installed O ring is not twisted 8 Remove the pins by using a magnet and dismount the spindle striker striker stopper and O ring ...

Page 9: ...9 4 5 Apply grease ...

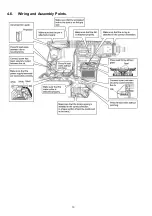
Page 10: ...10 4 6 Wiring and Assembly Points ...

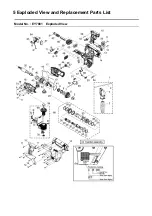
Page 11: ...Model No EY7881 Exploded View 5 Exploded View and Replacement Parts List ...

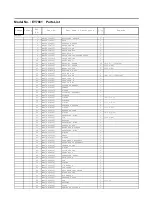
Page 12: ...22 5 1 5 26 WEY7881L1237 STRIKER 1 27 WEY7881K0947 O RING 1 11 8 2 4 28 WEY7881L0497 STRIKER STOPPER 1 29 WEY7881K0997 O RING 1 18 3 55 30 WEY7881L3717 RUBBER HOLDER 1 31 WEY7881K0967 O RING 1 9 12 3 53 32 WEY7881K0417 RETAINING RING 1 33 WEY7881S0507 PIN 1 4PCS PK 34 WEY7881S4957 BEARING 1 35 WEY7881K0427 RETAINING RING 1 36 WEY7881L0487 THRUST PLATE 1 37 WEY7881L0367 BEVEL GEAR SLEEVE 1 38 WEY78...

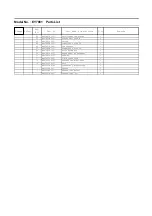
Page 13: ...127 CONNECTOR COVER 6P 1 66 WEY7881L2887 LED HARNESS 1 67 WEY75A8W3117 CONNECTOR COVER 2P 1 68 WEY7881L1007 MOTOR ASSEMBLY 1 69 WEY7881S4377 ROTOR BEARING ASSEMBLY 1 70 WEY7881S1127 BEARING 1 71 WEY7881L2087 8 PIN CONNECTOR 1 72 WEY7880L2157 BATTERY TERMINAL BASE 1 73 WEY7881F0247 FELT 1 WEY7881K8108 OPERATING INSTRUCTIONS 1 WEY004X8987 GREASE 1 WEY003W8957 GREASE PERMALUB 1 WEY6811X5537 GREASE AS...

Reviews: