background image

21

English

1

 Press the 

 button to turn on the 

power.

The registered button will flash.

2

 Select your favorite program.

Press

Massage for the registered program will start after the body 
scanning.

To change and overwrite the registered settings

Press 

 button.

To delete the registered settings

1

 Press the 

 button to turn on the power.

The registered button will flash.

2

 Press the button you want to delete for more than 

3 seconds.

Press

3

 Press again if only the pressed button changes to 

flashing.

Press

Delete is completed once 
the flashing stops.

1

2

To start the registered program

Summary of Contents for EP-MA20KU

Page 1: ...N de modelo N de mod le EP MA20 Before operating this unit please read these instructions completely Antes de utilizar esta unidad lea compleatamente estas instrucciones y gu rdelas para referencia f...

Page 2: ...8 Never operate the unit if it has a damaged power cord or plug Return the unit to the nearest authorized service center if it is not working properly if it has been dropped or damaged or if it has be...

Page 3: ...al operation Failure to align the shoulder position correctly can lead to injury 6 Do not stretch the back muscles for more than approximately 15 minutes at a time To avoid overstretching the muscles...

Page 4: ...not treat the chair roughly such as turning the chair on its side turning the chair over or standing on it 4 Do not treat the covering roughly Keep sharp or pointed objects away from the covering of t...

Page 5: ...126 cm Approx 24 2 in 30 7 in 76 8 in 62 cm 78 cm 195 cm Weight of Unit Approx 155 lbs 70 kg Dimension of box H W D Approx 28 3 in 30 7 in 65 4 in 72 cm 78 cm 166 cm Weight in box Approx 188 lbs 85 kg...

Page 6: ...h to approx 4 7 in 12 cm 1 Retracted position of massage heads 2 Pillow 3 Back Cushion 4 Backrest Includes integrated massage heads 5 Armrest 6 Seat 7 Leg Sole massage section Includes air massage fun...

Page 7: ...10 Back Cover 11 Controller tray 12 Controller See page 7 to 8 13 Child Safety Decal 14 Power Supply Box Lock Switch Power Switch Lock Switch Key Lock Switch Key Tag For preventing children from swal...

Page 8: ...18 5 User Memory Registration button See page 20 6 Manual Operation Selection button See page 24 7 Display This illustration is when all lamps are illuminated See page 8 8 Quick Stop button Press thi...

Page 9: ...g Display During massage After finishing massage 2 Massage Intensity Display Current massage intensities pressure of the massage heads pressing onto the body for each region are displayed in 8 steps 3...

Page 10: ...from the wall Approx 77 195 cm Width approx 30 7 78 cm Approx 13 32 cm Approx 15 37 cm Mat Area where legrest could touch the floor Area where unit touches the floor 2 Removing everything from the box...

Page 11: ...n the sole massage section prior to leaving the factory Controller Tray Attachment Screw Cap 4 pcs Attachment Screws M6 16 4 pcs Allen Key Cross section 1 6 in 4 mm Lock Switch Key This is initially i...

Page 12: ...Left indication Groove Protrusion Front Back 2 Fasten the armrest with the attachment screws 4 positions How to tighten the screws Attachment screw Hole Allen key Tighten loosely with your finger Make...

Page 13: ...wall or similar If you want to mount the controller on the left side 1 Press the button on the controller to turn on the power 2 Press button on the controller and hold until the legrest has risen fa...

Page 14: ...controller onto the controller tray 5 Attaching the back cushion 1 Attach the back cushion to the velcro fasteners on the unit Velcro fasteners Back Cushion 6 Attaching the pillow 1 Attach the pillow...

Page 15: ...2 Check the power cord and the power plug See Warning No 8 on page 1 3 Switching on the power supply 1 Insert the power plug into an electrical outlet 2 Turn the lock switch key to the open position 3...

Page 16: ...Press the button twice to return the massage heads to the retracted position See Caution No 3 on page 2 Leg Sole massage section 4 Make sure the legrest is in the fully lowered position To lower the l...

Page 17: ...ly kneading to manipulate and loosen muscles Recommended for those with mild stiffness and tension Uses mainly shiatsu massage to loosen up deep seated knots of tension Recommended for those with seve...

Page 18: ...e Head Tapping action Keep your head on the pillow until the soft tapping begins Lifting your head from the pillow will result in incorrect determination of the shoulder position 3 Confirm that the sh...

Page 19: ...e feeling is different depending on the person or the position For safety reasons it is designed not to increase the intensity drastically even if the dial is turned rapidly If you do not feel enough...

Page 20: ...of Back Lower back 3 Ultra knead Kneading of Neck Shoulder 4 Ultra knead Kneading of Back Lower back 5 Ultra knead Kneading of Neck Shoulder 6 Ultra knead Kneading of Lower back 7 Ultra knead Kneading...

Page 21: ...k Off on and the intensity of the air massage Off on of the Leg Stretch Setting at the point when or is pressed will be registered Beware that the contents registered will not be saved when the power...

Page 22: ...ing To change and overwrite the registered settings Press button To delete the registered settings 1 Press the button to turn on the power The registered button will flash 2 Press the button you want...

Page 23: ...lect the part of body you want to massage You can select an action combined with FULL ROLL by pressing the button List of massages operation display that can be selected is displayed Example When SHOU...

Page 24: ...at a time checking how it feels For safety reasons it is designed not to increase the intensity drastically even if the dial is turned rapidly If you do not feel enough intensity even it is set to ma...

Page 25: ...etching the body along the backbone 5 Using Leg Sole air massage and or Leg Stretch together Turning the operation Off On can be done with the button Off button lamp off On button lamp on Intensity of...

Page 26: ...3 minutes after turning on the power 2 Open the cover 3 Select the operation with and or buttons Off button lamp off On button lamp on Intensity of the air can be adjusted in 5 steps with button Inten...

Page 27: ...he legrest so that your sole fits on it completely For a person with small body dimensions For a person with large body dimensions If the legrest is raised it is easier to fit your sole on it Press th...

Page 28: ...th air the legs are stretched as the legrest is lowered approximately 10 degrees from the massage position 2 Once the legrest returns to the original angle the legrest is then lowered approximately 25...

Page 29: ...on the power 2 Press the or button to adjust the angle Movement will continue until a beep beep beep sound is heard if the buttons are held down The movement of the legrest may be delayed slightly App...

Page 30: ...elease the legrest slide lever when it reaches your favorite position Adjusting the pillow for correct height during a massage 1 Remove the pillow 2 Adjust the height of the pillow so that the bottom...

Page 31: ...ll complete automatically approximately 15 minutes after the start of operations Sole section will retract and the legrest will be lowered automatically so you can stand up safely Sole section will no...

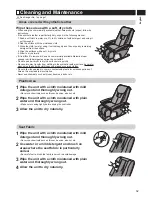
Page 32: ...n No 2 on page 2 and No 10 on page 3 1 Slide the power switch to the off position 2 Turn the lock switch key to the lock position 2 1 Power supply box 3 Remove the power plug from the electrical outle...

Page 33: ...hing to the synthetic leather surface be careful when using the unit with clothing such as jeans or colored clothes Do not allow these areas to come in contact with plastic for extended periods of tim...

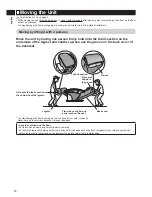
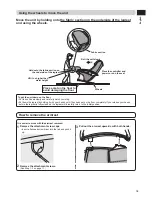
Page 34: ...the groove on the back cover of the backrest Fabric section Groove Place the controller and power cord on the seat Legrest Back cover Hold onto the fabric section on the underside of the legrest Plac...

Page 35: ...grest To put the unit down on the floor Put the unit down slowly and carefully watch your step Put down the legrest by holding it with your hands until it has been set on the floor completely If you r...

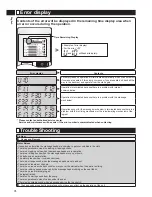
Page 36: ...ance will be easier if the error number is communicated when contacting Trouble Shooting Problem Cause and Remedy Motor Noises It sounds and feels like the massage heads are straining to get over wrin...

Page 37: ...than the actual position during the body scanning Sit on the seat in the deepest position and put your head on the pillow and then repeat the operations again from the start See page 17 The height of...

Reviews: