background image

RQTC0152

24

25

RQTC0152

RQTC0152

24

25

RQTC0152

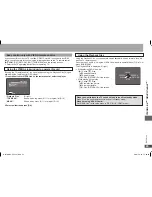
VIERA Link

TM

 “HD

A

VI Contr

ol

TM

VIERA Link

TM

 “HDAVI Control

TM

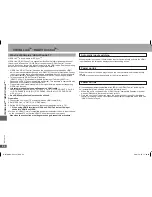
VIERA Link “HDAVI Control” is a convenient function that offers linked operations of 

this unit, and a Panasonic TV (VIERA) or receiver under “HDAVI Control”. You can 

use this function by connecting the equipment with the HDMI cable. See the operating 

instructions for connected equipment for operational details.

VIERA Link “HDAVI Control”, based on the control functions provided by HDMI 

which is an industry standard known as HDMI CEC (Consumer Electronics Control), 

is a unique function that we have developed and added. As such, its operation with 

other manufacturer’s equipment that supports HDMI CEC cannot be guaranteed.

This unit supports “HDAVI Control 2” function. 

“HDAVI Control 2” is the newest standard (current as of February, 2007) for 

Panasonic’s HDAVI Control compatible equipment. This standard is compatible with 

Panasonic’s conventional HDAVI equipment.

Please refer to individual manuals for other manufacturers’ equipment supporting 

VIERA Link function.

It is recommended that you use Panasonic’s HDMI cable. 

Recommended part number: RP-CDHG10 (1.0 m/3.3 ft.), RP-CDHG15 (1.5 m/4.9 

ft.), RP-CDHG20 (2.0 m/6.6 ft.), RP-CDHG30 (3.0 m/9.8 ft.), RP-CDHG50 (5.0 

m/16.4 ft.), etc.

Non-HDMI-compliant cables cannot be utilized.

Preparation

1 Connect this unit to your TV or amplifier with an HDMI cable (

 8).

2 Set “VIERA Link” to “ON” (

 19, “HDMI” menu).

3 Set the “HDAVI Control” operations on the connected equipment (e.g., TV).

When using HDMI2 terminal of VIERA as HDAVI Control, set the input 

channel to HDMI2 on VIERA.

4 Turn on all “HDAVI Control” compatible equipment and select this unit’s input channel 

on the connected TV so that the HDAVI Control function works properly.

Also when the connection or settings are changed, repeat this procedure.

What is VIERA Link “HDAVI Control”?

Automatic input switching

When play starts on the unit, the television input will automatically switch to the HDMI 

input mode and the television displays the corresponding action.

Power on link

When the television is off and play starts on the unit, the television will automatically 

turn on.

(Picture or sound may not be available for the first few seconds.)

Power off link

All connected equipment compatible with VIERA Link “HDAVI Control” including this 

unit automatically turns off when you switch the television off.

When this unit is connected to an “HDAVI Control” compatible Panasonic receiver 

with an HDMI cable, the receiver will also turn off.

Only this unit turns off when you press the power button of the unit or the remote 

control for shutting it down. Other connected equipment compatible with VIERA Link 

“HDAVI Control” stay on.

VIERA Link

TM

 is a new name for EZ Sync

TM

.

RQTC0152-P(12.19).indd   24

2007-12-25   11:30:02

Summary of Contents for DVD-S54S

Page 1: ...d Operations Reference 1 ALL 2 4 1 Region number The player plays DVD Video marked with labels containing the region number 1 or ALL Example Dear customer Thank you for purchasing this product Before connecting operating or adjusting this product please read the instructions completely Please keep this manual for future reference As an ENERGY STAR Partner1 Panasonic has determined that this produc...

Page 2: ...__ TELEPHONE NUMBER _______________________________________________ In the U S A To order accessories refer to Accessory Purchases on page 26 In Canada To order accessories call the dealer from whom you have made your purchase Accessories 2 IMPORTANT SAFETY INSTRUCTIONS 4 Product Service 4 Discs that can be played 5 Maintenance 6 Getting started STEP 1 Connection 7 STEP 2 The remote control 9 STEP...

Page 3: ...nd receiver Connect the equipment into an outlet on a circuit different from that to which the receiver is connected Consult the dealer or an experienced radio TV technician for help Any unauthorized changes or modifications to this equipment would void the user s authority to operate this device This device complies with Part 15 of the FCC Rules Operation is subject to the following two conditions...

Page 4: ...s been damaged in any way such as power supply cord or plug is damaged liquid has been spilled or objects have fallen into the apparatus the apparatus has been exposed to rain or moisture does not operate normally or has been dropped 1 Damage requiring service The unit should be serviced by qualified service personnel if a The AC power supply cord or AC adaptor has been damaged or b Objects or liqu...

Page 5: ...enus Read the disc s instructions carefully Commercial discs Discs that cannot be played Blu ray HD DVD DVD Audio Version 1 0 of DVD RW DVD ROM CD ROM CDV CD G SACD Photo CD DVD RAM that cannot be removed from their cartridge 2 6 GB and 5 2 GB DVD RAM PAL discs and Chaoji VCD available on the market including CVD DVCD and SVCD that do not conform to IEC62107 Recorded discs Available Not available ...

Page 6: ...se a malfunction Clean discs Wipe with a damp cloth and then wipe dry Format Disc Extension Reference CD R RW WMA wma You cannot play WMA files that are copy protected This unit is not compatible with Multiple Bit Rate MBR a file that contains the same content encoded at several different bit rates DVD RAM DVD R RW CD R RW MP3 mp3 Sampling frequency DVD RAM DVD R RW 11 02 12 22 05 24 44 1 and 48 kHz...

Page 7: ...iver to enjoy stereo sound Select DARKER from the BLACK LEVEL page 18 VIDEO menu To enjoy progressive video Connect to a progressive output compatible television Set VIDEO PRIORITY to OFF page 19 HDMI menu Set VIDEO OUT I P to PROGRESSIVE then follow the instructions on the menu screen page 19 VIDEO menu All Panasonic televisions with 480p input connectors are compatible Consult the manufacturer i...

Page 8: ...to a television through the COMPONENT VIDEO terminal only set VIDEO PRIORITY to OFF too page 19 HDMI menu To enjoy digital surround sound in addition to digital high definition video You can still enjoy surround sound when your television is not HDMI compatible by connecting an HDMI compatible amplifier 1 Audio will be output in 2 channels when output as PCM Change DOLBY DIGITAL and DTS page 19 AUDI...

Page 9: ... same time take apart or short circuit To household AC outlet AC IN R6 LR6 AA attempt to recharge alkaline or manganese batteries use batteries if the covering has been peeled off Mishandling of batteries can cause electrolyte leakage which can damage items the fluid contacts and may cause a fire Remove batteries if the remote control is not going to be used for a long period of time Store in a cool...

Page 10: ...art play Slow motion Forward direction only Slow motion Does not work Pause Press q PLAY to restart play DISCS CONTINUE TO ROTATE WHILE MENUS ARE DISPLAYED Press g when you finish to preserve the unit s motor and your television screen To play or contents on DVD RAM set DVD VR DATA to DATA page 19 OTHERS menu Total title number may not be displayed properly on 4R 4RW If you are experiencing problem...

Page 11: ...en item select OK VCD DVD V DVD VR DVD V DVD VR Plays the programs page 13 DVD V DVD VR Plays a playlist page 13 VCD Information screen Main unit display Number display Time display JPEG Enter number 1 2 3 5 6 7 8 9 0 4 OK e g To select 12 10 1 2 DVD V DVD VR VCD CD MP3 JPEG MPEG4 WMA e g To select 123 10 1 2 3 OK Select Register Basic play DivX VCD DVD VR RQTC0152 P 12 19 indd 11 2007 12 25 11 29...

Page 12: ...le groups repeat this step Press ANGLE PAGE to skip page by page To select all items in a disc select ALL Only when the disc has multiple titles Press e r to select a title and press OK will be displayed next to the selected title 4 Press q PLAY to start play To exit random mode press PLAY MODE several times e g MP3 JPEG MPEG4 WMA DivX Random play DVD V RANDOM SELECT TITLE TITLE 2 TITLE 3 TITLE 1 ...

Page 13: ...dert 04 Cartoons 05 Trilobites Formula one Starperson Baseball Lady Starfi Life on Jup Starperson Soccer ROOT Formula one RETURN OK Files are treated as contents and folders are treated as groups in these instructions Press ANGLE PAGE to skip page by page Press RETURN to go back to previous screen Press MENU to display exit the screen The video content is distorted according to the recorded method...

Page 14: ... dark scenes CINEMA2 Sharpens images and enhances detail in dark scenes DYNAMIC Enhances the contrast for powerful images ANIMATION Suitable for animation SOFT SKIN Softens the skin of people in the images Repeat play Only when the elapsed play time can be displayed you can use even if there is no elapsed time display JPEG Press REPEAT to select an item to be repeated To cancel press REPEAT to sel...

Page 15: ...propriately converts it VIDEO Select when using AUTO1 and AUTO2 and the content is distorted With HDMI AV OUT connection If you have set VIDEO FORMAT to 480p 720p 1080p or 1080i page 17 On Screen Menu 4 Select between AUTO1 AUTO2 and VIDEO for the method of conversion for progressive output Reducing noise in pictures Smoothes block noise and reduces the smudging that appears around contrasting sec...

Page 16: ...or when the disc tray is opened Note Press Make the settings Using On Screen Menus REPEAT MODE page 14 Repeat play A B Repeat To repeat a specified section Except still picture on JPEG DivX MPEG4 Press OK at the starting and ending points Select OFF to cancel SUBTITLE page 14 Changing subtitles ANGLE page 14 Angle select JPG DATE DATE DISPLAY JPEG Displays the photograph date OFF ON ROTATION page 1...

Page 17: ...VANCED SURROUND page 14 Enjoying advanced surround Note You cannot use settings in On Screen Menu 3 during pause slow motion and search On Screen Menu 4 HDMI HDMI STATUS Indicates various information when connected with HDMI AV OUT terminal below Confirming HDMI information Confirming HDMI information HD ENHANCER With HDMI connection When VIDEO PRIORITY is set to ON page 19 HDMI menu Makes the quali...

Page 18: ... 16 9ZOOM 4 3PAN SCAN The sides of the picture are cut off so it fills the screen unless prohibited by the disc 4 3LETTERBOX Picture is shown in the letterbox style 4 3ZOOM Scales down the horizontal edges of a 4 3 aspect ratio image 16 9NORMAL Stretches a 16 9 aspect ratio image horizontally 16 9SHRINK Displays a 4 3 aspect ratio image in the center of the screen 16 9ZOOM Adjusts the horizontal wi...

Page 19: ...e with 88 2 or 96 kHz Signals from copy protected discs are converted to 48 or 44 1 kHz Some equipment cannot handle sampling frequencies of 88 2 kHz even if they can handle 96 kHz Read your equipment s operating instructions for details DOLBY DIGITAL With COAXIAL or HDMI AV OUT connections pages 8 and 9 BITSTREAM PCM Select BITSTREAM when the equipment can decode the bitstream digital form of mul...

Page 20: ...igh visual quality that maintains a relatively small file size Down mixing This is a process of remixing the multi channel audio surround sound on some discs into two channels When you want to listen to the audio on a DVD with a 5 1 channel digital surround track through your television speakers the down mixed audio will be output Film and video DVD Videos are recorded using either film or video Thi...

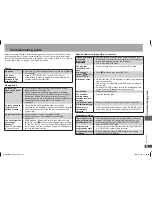
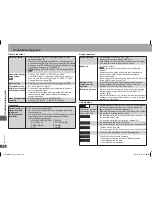
Page 21: ...r to Customer Services Directory on page 26 if you reside in the U S A or refer to Product information on page 4 if you reside in Canada Troubleshooting guide Troubleshooting guide There is ghosting when progressive or HDMI output is on This problem is caused by the editing method or material used on DVD Video but should be corrected if you use interlace output Change VIDEO OUT I P in VIDEO menu t...

Page 22: ...haven t inserted the disc correctly Insert it correctly 10 The connected equipment is not HDMI compatible The HDMI connection acts unusually The connected equipment is not HDMI compatible The HDMI cable is too long The HDMI cable is damaged Troubleshooting guide Troubleshooting guide Picture distorted Ensure that the unit is not connected through a video cassette recorder 7 Make sure that progress...

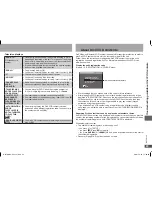
Page 23: ...ight protection In order to play DivX VOD content on this unit you first need to register the unit Follow the on line instructions for purchasing DivX VOD content to enter the unit s registration code and register the unit For more information about DivX VOD visit www divx com vod Display the unit s registration code page 19 REGISTRATION in OTHERS menu We recommend that you make a note of this code...

Page 24: ...t be utilized Preparation 1 Connect this unit to your TV or amplifier with an HDMI cable 8 2 Set VIERA Link to ON 19 HDMI menu 3 Set the HDAVI Control operations on the connected equipment e g TV When using HDMI2 terminal of VIERA as HDAVI Control set the input channel to HDMI2 on VIERA 4 Turn on all HDAVI Control compatible equipment and select this unit s input channel on the connected TV so that...

Page 25: ...Link in the setup menu to OFF 19 HDMI menu Using the Playback Disc If you connect this unit to the TV that has HDAVI Control 2 function with an HDMI cable you can operate this unit using the following buttons on the TV remote control e r w q OK RETURN EXIT SUB MENU and the colored buttons Refer to the TV operating instructions for operating TV Using the VIERA Link window to operate this unit By us...

Page 26: ... or commercial use such as hotel office restaurant or other business rental use of the product or service by anyone other than a Factory Servicenter or other Authorized Servicer or damage that is attributable to acts of God THERE ARE NO EXPRESS WARRANTIES EXCEPT AS LISTED UNDER LIMITED WARRANTY COVERAGE THE WARRANTOR IS NOT LIABLE FOR INCIDENTAL OR CONSEQUENTIAL DAMAGES RESULTING FROM THE USE OF TH...

Page 27: ...er this warranty This warranty is extended to the original end user purchaser only A purchase receipt or other proof of date of original purchase is required before warranty service is performed THIS EXPRESS LIMITED WARRANTY IS IN LIEU OF ALL OTHER WARRANTIES EXPRESS OR IMPLIED INCLUDING ANY IMPLIED WARRANTIES OF MERCHANTABILITY AND FITNESS FOR A PARTICULAR PURPOSE IN NO EVENT WILL PANASONIC CANAD...

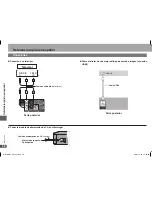
Page 28: ...l cable de alimentación de CA en último lugar Cable de alimentación de CA incluido A la toma de corriente CA doméstica Cómo disfrutar de una mejor calidad de sonido e imagen conexión HDMI Parte posterior Cable de audio vídeo incluido Parte posterior N I O I D U A L R O E D I V N I Referencia rápida en español RQTC0152 P 12 19 indd 28 2007 12 25 11 30 04 ...

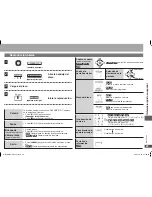
Page 29: ...s pistas etc También puede saltar hasta los marcadores Salto Cuadro a cuadro durante la pausa en sentido de avance solamente Menú del disco Muestra el menú inicial de un disco Muestra el menú de un disco con control de reproducción Muestra el menú de un disco Vuelta a la pantalla anterior Selección de elementos en la pantalla Seleccionar Registrar VCD DVD V DVD VR DVD V DVD VR Reproduce los progra...

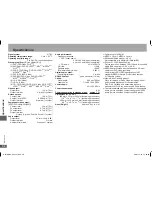
Page 30: ...stortion 0 003 Digital audio output Coaxial digital output Pin jack HDMI AV output Type A Connector 19 pin Pickup Wave length 653 nm 790 nm Laser power CLASS 1 CLASS 3A Power supply AC 120 V 60 Hz Power consumption 8 W Power consumption in standby mode approx 1 W Dimensions W x D x H 430 mm x 231 mm x 43 mm excluding protrusions 16 15 16 x 9 1 16 x 1 11 16 excluding protrusions 430 mm x 239 mm x 4...

Page 31: ...se Additional information including that relating to promotional internal and commercial uses and licensing may be obtained from MPEG LA LLC See http www mpegla com Windows Media and the Windows logo are trademarks or registered trademarks of Microsoft Corporation in the United States and or other countries This product is protected by certain intellectual property rights of Microsoft Corporation ...

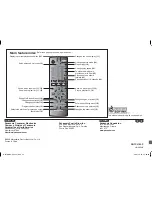
Page 32: ...ovies easier to hear 15 Skips back about 10 seconds 14 Skips about one minute forward 15 Repeat play 14 Shows a disc menu 11 13 Plays a playlist 11 13 Changes angles or rotates 14 Enter and exit Setup menu 18 Reduces noise in pictures 15 Changes the zoom ratio 15 Selects the method of progressive output conversion 15 Changes subtitles 14 Program random play 12 Shows On Screen Menus 16 Shows a disc...

Reviews: