Getting started
- 5 -
Getting started
Accessories
Check the supplied accessories before using this
unit.
≥
Product numbers are provided in this Owner’s Manual
correct as of April 2018.
These may be subject to change.
≥
Do not use AC power supply cord with other equipment.
∫
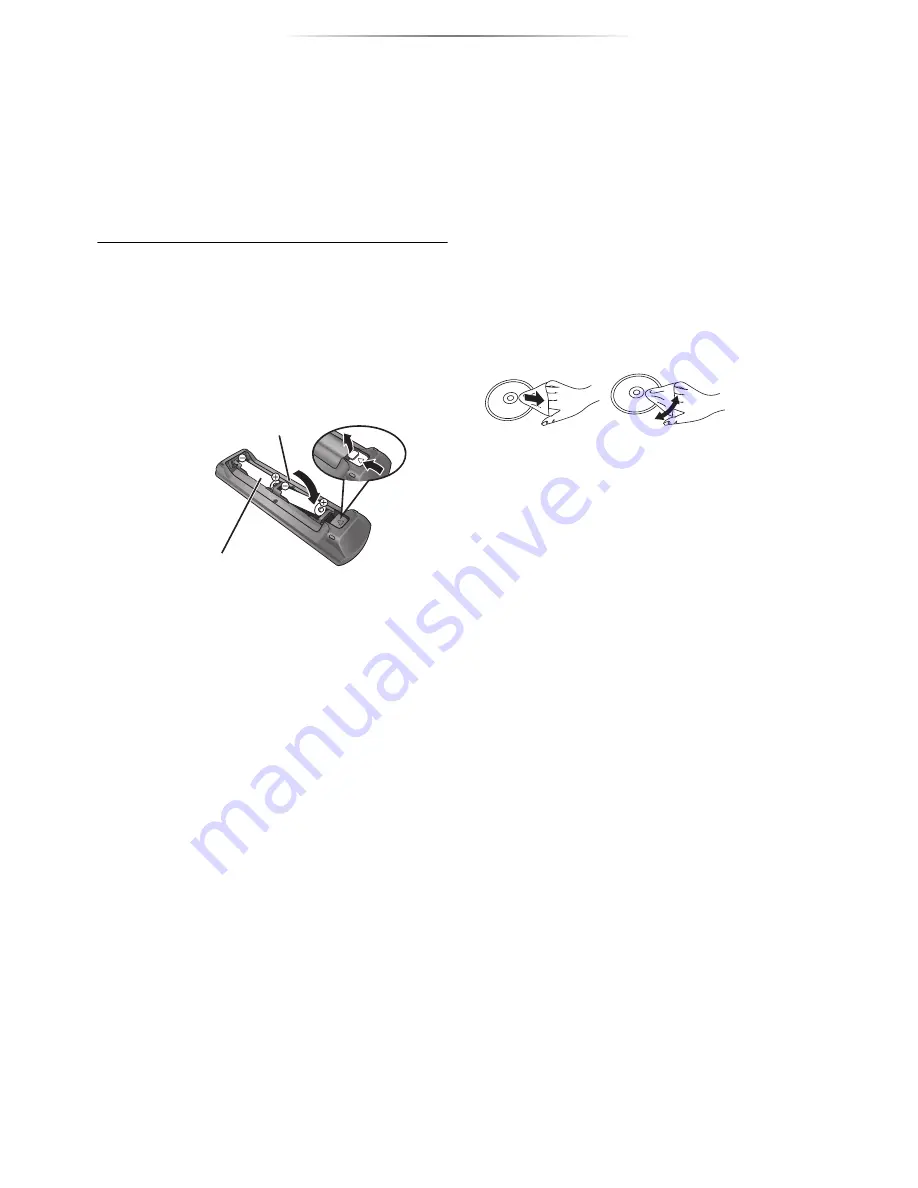
Using the remote control
Insert the batteries to the terminal so that it (
i
and
j
) matches those in the remote control.
Unit and media care
∫
Clean this unit with a soft, dry
cloth
≥
Never use alcohol, paint thinner or benzine to
clean this unit.
≥
Before using chemically treated cloth, carefully
read the instructions that came with the cloth.
∫
This unit’s lens
Use the lens cleaner (not supplied) to clean the
unit’s lens.
∫
Clean discs
Wipe with a damp cloth and then wipe dry with a
dry cloth.
∫
Disc handling precautions
≥
Handle discs by the edges to avoid inadvertent
scratches or fingerprints on the disc.
≥
Do not attach labels or stickers to discs.
≥
Do not use disc cleaning sprays, benzine,
thinner, static electricity prevention liquids or
any other solvent.
≥
Do not use the following discs:
– Discs with exposed adhesive from removed
stickers or labels (rented discs, etc.).
– Discs that are badly warped or cracked.
– Irregularly shaped discs, such as heart
shapes.
1
Remote control
(N2QAYB001206)
2
Batteries for remote control
1
AC power supply cord
(K2CB2YY00092)
Point it at the remote control signal sensor on this
unit. (
>
9)
R6/LR6, AA
(Alkaline or manganese batteries)
DO
DO NOT
Value Electronics
Factory Direct Authorized Dealer
www.ValueElectronics.com


