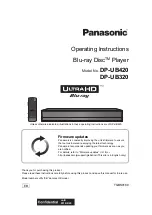
Panasonic DP-UB420 Operating Instructions Manual Download Page 2

- 2 -

Unit

To reduce the risk of fire, electric shock or product damage,

Do not expose this unit to rain, moisture, dripping or 

splashing.

Do not place objects filled with liquids, such as vases, on 

this unit.

Use the recommended accessories.

Do not remove covers.

Do not repair this unit by yourself. Refer servicing to 

qualified service personnel.

Do not let metal objects fall inside this unit.

Do not place heavy items on this unit.

AC mains lead

To reduce the risk of fire, electric shock or product damage,

Ensure that the power supply voltage corresponds to the 

voltage printed on this unit.

Insert the mains plug fully into the socket outlet.

Do not pull, bend, or place heavy items on the lead.

Do not handle the plug with wet hands.

Hold onto the mains plug body when disconnecting the 

plug.

Do not use a damaged mains plug or socket outlet.

The mains plug is the disconnecting device.

Install this unit so that the mains plug can be unplugged from 

the socket outlet immediately.

Unit

This unit utilizes a laser. Use of controls or adjustments or 

performance of procedures other than those specified 

herein may result in hazardous radiation exposure.

Do not place sources of naked flames, such as lighted 

candles, on this unit.

This unit may receive radio interference caused by mobile 

telephones during use. If such interference occurs, please 

increase separation between this unit and the mobile 

telephone.

This unit is intended for use in moderate climates.

Some portions of this unit may become hot during use. 

When moving or cleaning this unit, disconnect the AC 

mains lead and wait for 3 minutes or longer.

Placement

Place this unit on an even surface.

To reduce the risk of fire, electric shock or product damage,

Do not install or place this unit in a bookcase, built-in 

cabinet or in another confined space. Ensure this unit is 

well ventilated.

Do not obstruct this unit’s ventilation openings with 

newspapers, tablecloths, curtains, and similar items.

Do not place the unit on amplifiers/receivers or equipment 

that may become hot. The heat can damage the unit.

Do not expose this unit to direct sunlight, high 

temperatures, high humidity, and excessive vibration.

Batteries

Mishandling of batteries can cause electrolyte leakage and 

may cause a fire.

Danger of explosion if battery is incorrectly replaced. 

Replace only with the type recommended by the 

manufacturer.

When disposing of the batteries, please contact your local 

authorities or dealer and ask for the correct method of 

disposal.

Do not mix old and new batteries or different types at the 

same time.

Do not heat or expose to flame.

Do not leave the battery(ies) in a car exposed to direct 

sunlight for a long period of time with doors and windows 

closed.

Do not take apart or short circuit.

Do not recharge alkaline or manganese batteries.

Do not use batteries if the covering has been peeled off.

Remove batteries if you do not intend to use the remote 

control for a long period of time. Store in a cool, dark place.

Precautions

WARNING

CAUTION

Caution for AC Mains Lead

(For the AC mains plug of three pins)

For your safety, please read the following text carefully.
This appliance is supplied with a moulded three pin mains 

plug for your safety and convenience.

A 5-ampere fuse is fitted in this plug.

Should the fuse need to be replaced please ensure that the 

replacement fuse has a rating of 5-ampere and that it is 

approved by ASTA or BSI to BS1362.
Check for the ASTA mark 

Ï

 or the BSI mark 

Ì

 on the body 

of the fuse.
If the plug contains a removable fuse cover you must ensure 

that it is refitted when the fuse is replaced.

If you lose the fuse cover the plug must not be used until a 

replacement cover is obtained.

A replacement fuse cover can be purchased from your local 

dealer.

Before use

Remove the connector cover.

How to replace the fuse

The location of the fuse differ according to the type of AC 

mains plug (figures A and B). Confirm the AC mains plug 

fitted and follow the instructions below.

Illustrations may differ from actual AC mains plug.
1.  Open the fuse cover with a screwdriver.

2.  Replace the fuse and close or attach the fuse cover.

Fuse cover

Figure A

Figure B

Figure A

Figure B

Fuse

(5 ampere)

Fuse

(5 ampere)

Summary of Contents for DP-UB420

Page 1: ...UK model Unless otherwise indicated illustrations in these operating instructions are of DP UB420 Firmware updates Panasonic is constantly improving the unit s firmware to ensure that our customers a...

Page 2: ...ivers or equipment that may become hot The heat can damage the unit Do not expose this unit to direct sunlight high temperatures high humidity and excessive vibration Batteries Mishandling of batterie...

Page 3: ...In this case it complies with the requirement set by the Directive for the chemical involved Declaration of Conformity DoC Hereby Panasonic Corporation declares that this product is in compliance with...

Page 4: ...played back please check your TV settings as follows An example of the message This player is not connected to a High Dynamic Range HDR compatible TV 1 When you use a Panasonic TV that is compatible...

Page 5: ...his unit s lens Use the lens cleaner not supplied to clean the unit s lens Clean discs Wipe with a damp cloth and then wipe dry with a dry cloth Disc handling precautions Handle discs by the edges to...

Page 6: ...A DVD R DL DVD RW Video AVCHD R RW R DL Music CD Music CD DA CD R CD RW MKV JPEG MPO AAC AIFF ALAC FLAC MP3 Music CD DA WAV WMA USB devices up to 4 TB AVCHD AVCHD 3D MKV MP4 MPEG2 JPEG MPO AAC AIFF AL...

Page 7: ...e rear of the unit supports USB 3 0 Super Speed UB420 The USB port on the rear of the unit supports an HDD formatted in FAT32 and NTFS If the HDD is not recognized the power to the HDD may not be supp...

Page 8: ...aracter when entering a password for Ratings in the Setup menu for example 5 Change soundtrack 20 6 Basic playback control buttons 19 7 Show Pop up menu 20 8 Show Top menu 20 9 Show Option menu 26 10...

Page 9: ...I VIDEO OUT terminal 10 5 UB320 HDMI AV OUT terminal 10 6 LAN port 16 7 UB420 USB port HDD DC 5 V 900 mA This port supports USB 3 0 Super Speed 8 UB420 DIGITAL AUDIO OUT terminal OPTICAL terminal 12 1...

Page 10: ...ou need an HDMI cable that supports 18 Gbps When outputting 1080p or 24p 4K signal please use HDMI cables 5 0 meters or less It is recommended that you use Panasonic s HDMI cable If you connect this u...

Page 11: ...ERA Link 25 Enjoying video with a 4K compatible TV and audio with a 4K compatible amplifier HDMI IN HDMI IN HDMI cable 18 Gbps HDMI cable Amplifier receiver UB420 Setting Set the following items in th...

Page 12: ...he setup menu 29 Set HDMI VIDEO Output Mode to Automatic Video Only Video Audio 29 Set HDMI AUDIO Output Mode to Audio Only 29 To enjoy audio with an amplifier connected to the OPTICAL terminal Set Au...

Page 13: ...HDMI AUDIO Output Mode to Audio Only 29 To enjoy audio with an amplifier connected to the OPTICAL terminal Set Audio Output to Off in Advanced Settings 30 To enjoy audio with a TV Set HDMI VIDEO Outp...

Page 14: ...et HDMI VIDEO Output Mode to Automatic Video Only Video Audio 29 Set HDMI AUDIO Output Mode to Audio Only 29 To enjoy audio with an amplifier connected to the OPTICAL terminal Set Audio Output to Off...

Page 15: ...al Set Audio Output to Off in Advanced Settings 30 To enjoy audio with a TV Set HDMI VIDEO Output Mode to Video Audio 29 To enjoy video with a projector Set HDMI AUDIO Output Mode to Video Audio 29 It...

Page 16: ...the unit Firmware can be updated 18 You can enjoy BD Live Network Service 21 22 You can access other devices Home Network 23 UB420 This unit supports Direct Access and can make a wireless connection...

Page 17: ...nd if the video is not displayed correctly please wait for the next display The connection check could take up to 30 seconds to display the new message screen OK RETURN Easy Network Setting After comp...

Page 18: ...date Removing the AC mains lead while the update is in progress may damage the unit After the firmware is installed unit will restart and the following screen will be displayed You can also download t...

Page 19: ...njoy BD Video that supports Dolby Atmos or DTS XTM 31 UB420 If you press the blue button while displaying the playback screen of an album or similar group of songs containing a sound source recorded a...

Page 20: ...detailed video content playback status Press RETURN to exit BD Video DVD Video MKV MP4 MPEG2 except Network Contents While playing press STATUS The status messages give you information about what is c...

Page 21: ...version is a function that converts HDR video signals into video signals suited to TVs that do not support HDR input Preparation Connect this unit to a 3D compatible TV 10 Perform the necessary prepar...

Page 22: ...ng 17 You must agree to the terms of use for the Internet function and the privacy policy 34 Legal Notices 1 Press INTERNET 2 Select the item and press OK To exit from Network Service Press HOME Slide...

Page 23: ...of the services Some features of websites or content of the service may not be available Some content may be inappropriate for viewers Some content may only be available for specific countries and ma...

Page 24: ...ork Contents server 1 on the Renderer this unit Possible applications 1 Press HOME 2 Select Home Network and press OK 3 Select Media Renderer and press OK 4 UB420 Select Home Network or Direct Access...

Page 25: ...g is On The buttons and functions that you can use for this unit vary depending on the TV For details refer to the operating instructions of the TV The operation of this unit may be interrupted when y...

Page 26: ...whether to play shuffle or not Start Slideshow Start the slideshow Status Show the status messages Rotate RIGHT Rotate LEFT Rotate the still picture Wallpaper Set the still picture to the wallpaper of...

Page 27: ...utput converting to a SDR Standard Dynamic Range video signal If you set a smaller value their contrast will be reproduced more faithfully but the entire screen will appear darker To increase the brig...

Page 28: ...quality preferences Dialogue Enhancer 2 The volume of the centre channel is raised to make dialog easier to hear UB420 High Clarity Sound Stop processing signals that affect the audio quality to make...

Page 29: ...upports 4K 50p 60p 4 2 0 8 bit select 4K 50p 60p 4 2 0 24p Output Content recorded at 24p 3 such as BD Video films is output at 24p when played back When this unit is connected to TV compatible with 4...

Page 30: ...g 27 hHDCP Output Setting If you connect to a TV that does not support HDCP2 2 via an amplifier or speaker some images may be displayed as black screens In that case select HDCP1 4 Limit hContents Typ...

Page 31: ...ts Dolby Atmos or DTS XTM Connect this unit to an AV amplifier or similar device that supports it with an HDMI cable and select the following settings Dolby Audio Bitstream DTS DTS HD Bitstream BD Vid...

Page 32: ...each disc will be selected When the selected language is not recorded on the disc or depending on how the navigation is created on the disc it may playback in a different language than the selected l...

Page 33: ...IP address and DNS related Press OK to show the respective setting hProxy Server Settings This is for checking the state of connection with the Proxy server and performing settings Press OK to show th...

Page 34: ...speaker when the unit is operated from that device When Voice Control is set to On and the HOME menu is displayed this setting is also displayed by pressing and holding OPTION for more than 5 seconds...

Page 35: ...e Check When this equipment remains connected to the Internet it will check for the latest firmware version when it is turned on and you can update it if necessary hUpdate Now You can update the firmw...

Page 36: ...button and the blue button on the remote control at the same time for more than 5 seconds POWER LED starts to flash and 00 RET is displayed on the screen 2 Press 1 right repeatedly on the remote contr...

Page 37: ...USB device while a screen other than the Home screen is displayed it will not be detected Display the Home screen and reconnect the USB device you want to use Images from this unit do not appear on t...

Page 38: ...Conversion to Automatic 30 UB320 Set HDR High Dynamic Range Output and HLG PQ Conversion to Automatic 30 3D video is not output h Connect to a 3D compatible device e g TV and amplifier receiver h Whe...

Page 39: ...terminal and HDMI VIDEO Output Mode is set to Automatic Video Only Video Audio 29 When Audio Output in Advanced Settings is set to Off 30 While playback is being performed with Audio Output in Settin...

Page 40: ...Select the automatic address acquisition if necessary UB420 The wireless access point currently has a low network security setting It is recommended to change to a higher setting h Set a stronger net...

Page 41: ...nsions WkHkD Including the projecting parts UB420 320 mmk45 mmk199 mm UB320 320 mmk45 mmk193 mm Mass UB420 Approx 1 4 kg UB320 Approx 1 3 kg File format File format Extension Reference MKV Compression...

Page 42: ...ideo without secondary audio or navigation sounds the audio is output as the original format 3 The audio output is amplified from 5 1ch or 6 1ch to 7 1ch depending on the DTS Inc specifications File f...

Page 43: ...jarati 7185 Hausa 7265 Hebrew 7387 Hindi 7273 Hungarian 7285 Icelandic 7383 Indonesian 7378 Interlingua 7365 Irish 7165 Italian 7384 Japanese 7465 Javanese 7487 Kannada 7578 Kashmiri 7583 Kazakh 7575...

Page 44: ...er license from Verance Corporation All rights reserved This product incorporates the following software 1 the software developed independently by or for Panasonic Corporation 2 the software owned by...

Page 45: ...45 Reference...

Page 46: ...phoning our Customer Communications Centre Monday Friday 9 00 am 5 00 pm Excluding public holidays Or go on line through our Internet Accessory ordering application at www pas europe com Most major c...

Reviews: