background image

46

RQT9048

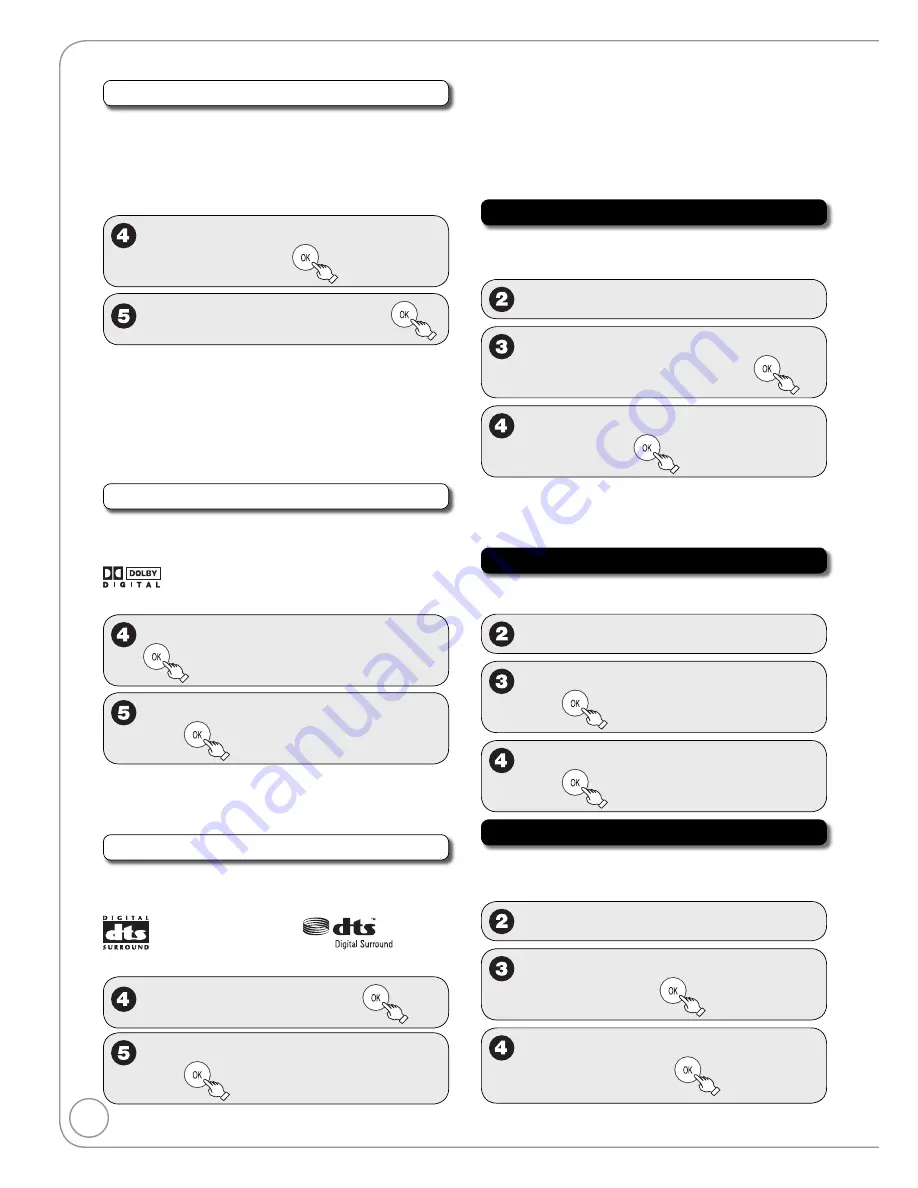
PCM Down Conversion

Select how to output audio with a sampling frequency 

of 96 kHz or 88.2 kHz. Signals are converted to 48 kHz 

or 44.1 kHz despite the settings if the signals have a 

sampling frequency of over 96 kHz or 88.2 kHz, or the 

disc has copy protection.
After selecting “Digital Audio Output” (

 45, step 3).


e

r

 to select “PCM Down 

Conversion”, then 


e

r

 to select “On” or “Off”, then 

[On]  

Signals are converted to 48 kHz or 44.1 kHz.

(Choose when the connected equipment 

cannot process signals with sampling 

frequency of 96 kHz or 88.2 kHz.)

[Off]  

Signals are output as 96 kHz or 88.2 kHz.

(Choose when the connected equipment can 

process signals with sampling frequency of 96 

kHz or 88.2 kHz.)

Dolby Digital

*

Choose whether to output by “Bitstream”, which processes 

Dolby Digital signals on other connected equipment, or to 

convert the signals to “PCM” (2ch) on the unit before output.

After selecting “Digital Audio Output” (

 45, step 3).


e

r

 to select “Dolby Digital”, then 


e

r

 to select “Bitstream” or “PCM”, 

then 

[Bitstream]  

When you have connected the unit to 

equipment displaying the Dolby Digital logo.

[PCM]  

When you have connected the unit to 

equipment that doesn’t have Dolby Digital logo.

DTS*

Choose whether to output by “Bitstream”, which processes 

DTS signals on other connected equipment, or to convert 

the signals to “PCM” (2ch) on the unit before output.


After selecting “Digital Audio Output” (

 45, step 3).


e

r

 to select “DTS”, then 


e

r

 to select “Bitstream” or “PCM”, 

then 

[Bitstream]  

When you have connected the unit to 

equipment displaying the DTS logo.

[PCM]  

When you have connected the unit to 

equipment that doesn’t have the DTS logo.

*  Incorrect settings can cause noise to be output which 

can be harmful to your ears and speakers, and audio will 

not be recorded properly on media such as mini discs.

Select Audio Channel For DV Input

You can select the kind of audio when recording from 

the unit’s DV IN terminal (

 22).

Perform step 1 of “Accessing the Setup Menu” (

 42).


e

r

 to select “Audio”, then 

q


e

r

 to select “Select Audio 

Channel For DV Input”, then 


e

r

 to select “Stereo 1”, “Stereo 2” 

or “Mix”, then 

[Stereo 1]  Records audio (L1, R1)

[Stereo 2]   Records added audio such as narration 

(L2, R2) subsequent to original recording.

[Mix] 

Records both Stereo 1 and Stereo 2.

Status Messages

Choose whether to show status messages automatically or not.

Perform step 1 of “Accessing the Setup Menu” (

 42).


e

r

 to select “Display”, then 

q


e

r

 to select “Status Messages”, 

then 


e

r

 to select “Automatic” or “Off”, 

then 

On-screen Language

Choose the language for these menus and the on-

screen messages.

Perform step 1 of “Accessing the Setup Menu” (

 42).


e

r

 to select “Display”, then 

q


e

r

 to select “On-screen 

Language”, then 


e

r

 to select “English”, “Español” 

or “Français”, then 

Setup Menus

Summary of Contents for DMR-EA18K

Page 1: ...ructions completely Please keep this manual for future reference Region number supported by this unit Region numbers are allocated to DVD players and DVD Video according to where they are sold The region number of this unit is 1 The unit will play DVDs marked with labels containing 1 or ALL Example 1 ALL 2 4 1 If you have any questions contact 1 800 211 PANA 7262 The warranty can be found on page ...

Page 2: ...The mains plug of the power supply cord shall remain readily operable To completely disconnect this apparatus from the AC Mains disconnect the power supply cord plug from AC receptacle FCC Note This equipment has been tested and found to comply with the limits for a Class B digital device pursuant to Part 15 of the FCC Rules These limits are designed to provide reasonable protection against harmfu...

Page 3: ...nto the apparatus the apparatus has been exposed to rain or moisture does not operate normally or has been dropped Unit Care The precision parts in the unit are readily affected by the environment especially temperature humidity and dust Cigarette smoke also can cause malfunction or breakdown Do not place the unit on amplifiers or equipment that may become hot The heat can damage the unit Do not p...

Page 4: ...kip 23 Direct Play 23 Quick View Play x1 3 24 Slow motion Play 24 Frame by Frame Viewing 24 Time Slip 24 CM Skip 24 Create Chapters 24 Changing Audio during Playback 24 Playing MP3s 25 Playing Still Pictures JPEG 26 Playing Playlists 28 Playlist Properties View Chapters 28 Status Messages 28 Entering Text 29 FUNCTIONS Window 29 Linked Operations with the TV VIERA Link HDAVI Control 30 Easy Control...

Page 5: ...cessories Please check and identify the supplied accessories Use numbers indicated in parentheses when asking for replacement parts Product numbers correct as of December 2007 These may be subject to change To order accessories refer to Accessory Purchases on page 71 1 Remote control N2QAYB000211 2 Batteries for remote control 1 Set Top Box Control cable K2ZZ02C00008 1 Audio video cable K2KA2BA000...

Page 6: ...8 bo br bs bk bl bm bn cp cq cn co cr 2 1 Turn the unit on or off 10 2 Select the drive DVD SD or USB 16 25 26 3 Select channels and recording numbers etc Enter numbers 23 4 Cancel 5 Basic operations for recording and play 6 Skip the specified time 24 7 Direct Navigator 23 32 8 Selection Enter Frame by frame 10 24 9 Show sub menu 23 32 bk Select audio 24 A for Recordings screen 16 bl Show on scree...

Page 7: ...time to respond to OPEN CLOSE when the DVD Drive is selected with no disc in the drive Inserting an SD Card Opening the front panel 6 Inserting the card Press on the center of the card until it clicks into place Insert the card label up with the cut off corner on the right Removing the card Press on the center of the card and pull it straight out ADAPTER If you are using a miniSD card microSD card...

Page 8: ...set top box with this unit s remote control Place the Set Top Box Control cable in front of the signal sensor of the set top box Read the set top box operating instructions regarding positioning of the signal sensor If necessary use the double sided adhesive tape included to secure the Set Top Box Control cable to a flat surface Red White Yellow AC IN AC IN AC IN Cable from the wall or satellite a...

Page 9: ...the HDMI logo as shown on the cover It is recommended that you use Panasonic s HDMI cable Recommended part number RP CDHG10 1 0 m 3 3 ft RP CDHG15 1 5 m 4 9 ft RP CDHG20 2 0 m 6 6 ft RP CDHG30 3 0 m 9 8 ft RP CDHG50 5 0 m 16 4 ft etc Non HDMI compliant cables cannot be used PR PB Y COMPONENT VIDEO OUT AC IN SET TOP BOX CONTROL OPTICAL DIGITAL AUDIO OUT PCM BITSTREAM R AUDIO L VIDEO S VIDEO IN1 OUT...

Page 10: ...ck Start Function e r to select On or Off then Quick Start Setting The unit can be turned on faster in about 1 second Please note that Quick Start mode slightly increases power consumption when the unit is off See Operation Instructions for details Turn Quick Start on On Off Set Top Box Control Settings e r to select Yes then If you do not control your set top box with this unit Select No The unit...

Page 11: ...rs OK STB Set Top Box IR Settings Channel STB Type Cable Box DVR Brand Name Panasonic Max CH digits 3 Digit OK Key Operation On IR Code 1 0 Number 0 9 Confirmation screen appears e r to select the item then Yes try other channels Even if this unit can select a channel on the set top box it is recommended to select Yes try other channels and verify whether or not other channels can be selected and ...

Page 12: ...Clock Settings then press OK 4 Press e r to select Set the time change dates for DST then press OK 5 Press e r w q to set the Month Day Hour and Minute then press OK Reinitializes the settings Setup Setup Disc Video Audio Display TV Screen Set the time change dates for DST OK AM 3 SUN 2nd 2 00 Month Beginning Day Hour Minute AM 11 SUN 1st 2 00 Restore Default Month End Day Hour Minute Acquiring th...

Page 13: ...begins Stopping Play Press g STOP The stopped position is memorized Resume play function The stopped position is cleared when you press g STOP two or more times or press OPEN CLOSE Pausing Play Press h PAUSE Press again to restart play Tips Icons such as RAM indicate usable discs Refer to pages 55 and 56 Notes The unit takes some time to read the disc before play starts Discs continue to rotate wh...

Page 14: ...d press OPEN CLOSE again to close the tray 3a When the set top box is controlled with this unit to select desired channel or 3b When the set top box is not controlled with this unit to select IN1 or IN2 Select a channel on the connected equipment to select the recording mode Recording mode should be determined by program length and available time on the disc 18 Recording mode Remaining time to sta...

Page 15: ...ime Hold button to change in 30 minute increments Mode Recording mode see page 18 Name Press OK see page 29 To delete all items 1 Press SUB MENU 2 Press e r to select Delete then press OK Preview of selected channel SCHEDULED RECORDING Channel Input Date Frequency On Off Mode Name 4 1 Remaining RecordingTime 3 26 Tue 12 53 PM 1 58 SP DVD Set Channel Input To input from the keypad please press SUB ...

Page 16: ... 8 10 27 Mon 08 S SUB MENU Select Next Previous Video Picture B A e r w q to select the recording then w to select Delete then Tips To return to the previous screen Press RETURN To view other pages Press e r w q to select Previous or Next then press OK You can also press u i to view other pages Multiple editing Select with e r w q then press h PAUSE Repeat A checkmark appears Press h PAUSE again t...

Page 17: ...ad only and can no longer be used for recording DVD RW can be reused after finalizing Whether DL discs recorded on this unit can be played on other DVD players will depend entirely on the capabilities of that player 100 compatibility is not guaranteed CHG SEARCH ENTER OFF MENU RETURN TOP MENU DISPLAY VOL ON A SURROU ND MONITOR MODE PICTURE MODE REPEAT OPEN DC IN 9V ê I ê CD SEQUENTIAL DISC DOUBLE ...

Page 18: ...isc in DVD Management Format No Yes w to select Yes then Tips Refer to Formatting Discs or Cards 40 for more detail of formatting It will take several minutes to format the disc DVD RAM may take up to a maximum of 70 minutes FR Flexible recording mode Using Flexible Recording is convenient in these kinds of situations When the amount of free space on the disc makes selecting an appropriate recordi...

Page 19: ...ning recording time Press STATUS to show the remaining recording time Rec 0 59 Stereo DVD RAM CH 20 Remaining time Playing while you are recording Chasing Playback RAM Allows playback from the beginning of what you are recording When recording to DVD RAM at least 20 seconds after recording starts If the Status Messages in the Setup menu is set to Automatic 46 both the Play and Rec indicators will ...

Page 20: ...1 58 SP DVD Channel No Date On New Scheduled Recording Off Mode Check A B A Schedule List screen icons Currently recording Programs are overlapped Recording of the program with the later start time starts when the earlier program finishes recording Q You stopped a weekly or daily scheduled recording The icon disappears when the next scheduled recording starts The disc was full not enough space The...

Page 21: ...broadcasts 17 Insert a disc to select the recording mode 18 1 OK IN1 2 IN2 3 DV Input Select e r to select IN1 or IN2 then If a program is recorded from a set top box equipped with a Hard Drive etc connected to IN1 on the rear then select IN1 Front Panel inputs are IN2 Start play on the external device to start recording the program from the external device Tips If the external equipment only has ...

Page 22: ...are recorded as a single item breaks in the images create chapters Compatibility with video camcorders from other manufacturers is not guaranteed It is not possible to operate the unit from the connected DV equipment The DV equipment name may not be shown correctly Date and time information is not recorded even if displayed on the camcorder The DV IN terminal is not meant to be connected to a comp...

Page 23: ... to the Recordings screen e r w q to select the recording you want to watch then Tips To select the recording with the numbered buttons e g 5 0 5 15 1 5 To view other pages Press e r w q to select Previous or Next then press OK You can also press u i to view other pages To exit the DIRECT NAVIGATOR screen Press DIRECT NAVIGATOR DIRECT NAVIGATOR screen icons Protected Not recorded due to recording ...

Page 24: ...or 10 minute intervals CM Skip RAM R R DL RW V R R DL RW RW VR Skips 1 minute forward with each press During playback Create Chapters RAM During playback Tips You can skip to the start of a chapter by pressing u i Tips Depending on the disc some operations may not be possible Changing Audio during Playback to select the audio Available audio will differ based on disc type See below RAM RW VR Stere...

Page 25: ...ng Tips To select file type 1 Press RETURN 2 Press FUNCTIONS 3 Press e r to select Menu then press OK 4 Press e r to select MP3 Music then press OK To stop playing Press g STOP e g OK Music and pictures on disc Please select playback mode Multimedia content MP3 Music Pictures To exit the menu screen Press DIRECT NAVIGATOR To view other pages Press u i To select the track with the numbered buttons ...

Page 26: ...d perform steps 1 4 in To select file type on the upper Tips on page 25 selecting Pictures in step 4 to change the playback mode e r w q to select an album then The Picture JPEG View screen appears e r w q to select a picture then to view Notes You can use 8MB to 2GB SD memory cards 4GB 8GB 16GB SDHC memory cards 56 Still pictures cannot be played during recording Thumbnails for large JPEG files a...

Page 27: ...position Press e r to select the opposite rotation in step 2 then press OK Rotation information will not be stored R R DL CD When disc or album is protected When played on other equipment When copying pictures Zoom While playing a picture To zoom in e r to select Zoom In then Rotate Left Zoom In Rotate Right Control Panel FUNCTIONS OK Notes To return the picture to its original size Press e r to s...

Page 28: ... then select View Playlists and press OK To view other pages Press u i The following messages and displays appear to let you know what operations are being performed and the status of the unit Press STATUS to cycle through available displays e g 1 45 SP 12 24 6 34 PM No Display T12 0 01 23 SP g g g T12 0 12 34 SP Rec English Tray Open DVD RAM 4 1 KPO SD Rec English Tray Open DVD RAM 4 1 KPO SD Rem...

Page 29: ...sible picture quality that fits the recording within the remaining disc space Flexible Recording q 22 DV automatic recording function DV Camcorder Rec q 42 You can change the unit s settings using Setup menu Setup q 39 You can manage discs through formatting finalizing and other operations DVD and Card Management Entering Text When viewing the Name screen _ Recording Name 1 2 3 4 5 A B C a D E F d...

Page 30: ...t switching When the TV is on and the following operations are performed the TV s input will automatically switch to HDMI input mode and the TV displays the corresponding action Picture or sound may not be available for the first few seconds Press FUNCTIONS 1 q PLAY 2 DIRECT NAVIGATOR SCHEDULE etc When the TV is off Power on link When the TV is off and the following operations are performed the TV...

Page 31: ...or the still picture 23 27 Zoom out e g Drive Select FUNCTIONS Zoom In Control Panel OK Select an item then Using the Control Panel Using the Control Panel you can operate search backward search forward stop etc with the TV remote control Perform steps 1 and 2 of Using the SUB MENU window to operate this unit The Control Panel is displayed right While playing a recording or DVD Video etc e Pause r...

Page 32: ...Refer to Editing Operations to Recordings right Using menus to play still pictures 26 Notes You cannot edit during recording R R DL Management information is recorded in unused sections when you edit discs The available space on these discs decreases each time you edit their contents Tips To exit the menu screen Press DIRECT NAVIGATOR To view other pages Press e r w q to select Previous or Next th...

Page 33: ... end of a recording press u start or i end For better precision use Slow motion and Frame by Frame Viewing 24 Divide Recording Perform steps 1 4 of Accessing the Recording View 32 RAM Once divided recordings cannot be recombined e r to select Divide Recording then S SUB MENU Select No 0 9 DIRECT NAVIGATOR Divide Recording DVD RAM Page 02 02 Previous 06 1 1 SUN Next ENTER 07 06 1 1 SUN 08 Next Vide...

Page 34: ...er to Album Picture Operations right e g SD Editing a still picture Delete Picture Set Protection Cancel Protection Album View Refer to Album Picture Operations right You can go back to the Album View screen Refer to Copying Still Pictures via the Album View Screen 36 Tips To view other pages Press e r w q to select Previous or Next then press OK You can also press u i to view other pages Multiple...

Page 35: ... You can give a name for the album 29 Notes Album names entered using this unit may not display on other equipment Delete Navigator RAM SD USB Important Once deleted contents cannot be recovered to select the drive DVD SD or USB With the unit stopped Playback Program Delete Other Functions FUNCTIONS Cartridge Protection Off Disc Protection Off DVD RAM OK e r to select Delete then RAM When the Reco...

Page 36: ...it saves information about imported still pictures Therefore if still pictures are imported from the same SD card or USB memory then only new still pictures will be imported With the unit stopped Insert an SD Card or USB memory The menu is automatically displayed e g SD SD Card inserted Select an action or press RETURN SD Card Operations Go to Album View Copy pictures e r to select Copy pictures t...

Page 37: ... pages Multiple editing Select with e r w q then press h PAUSE Repeat A checkmark appears Press h PAUSE again to cancel Chapter Operations Create Chapter Perform steps 1 7b of Accessing the Chapter View left 8 e r to select Create Chapter then DIRECT NAVIGATOR Create Chapter DVD RAM Page 02 02 Previous 06 1 1 SUN Next 07 06 1 1 SUN 08 End Next 06 Play Create Exit 0 43 21 08 Video Picture B A 9 at ...

Page 38: ...on off Subtitle on off information cannot be recorded using this unit If the subtitles overlap the closed captions recorded on discs turn the subtitles off DVD V Turn the subtitle on off and select the language below Soundtrack Subtitle language Audio channel RAM RW VR Changing Audio during Playback 24 Angle DVD V Change the number to select an angle Soundtrack Subtitle language CES Czech MAL Mala...

Page 39: ...duces video tape noise during recording Depending on the video signal jittering may occur On Noise reduction works for any video input Off Noise reduction is off Select when you want to record input as is Audio Menu RAM R R DL RW V R R DL RW DVD V RW VR V Surround Sound Dolby Digital with 2 0 or more channels only This function does not work for SAP recordings Enjoy a surround sound effect if you ...

Page 40: ... Notes Deleting does not work if one or more recordings are protected Formatting Discs or Cards Important Once formatted contents cannot be recovered RAM RW V RW RW VR SD Perform preparation steps 1 4 of Accessing the Management Menus 39 e r to select Format Disc DVD or Format memory card then w to select Yes then w to select Start then Formatting starts RAM may take up to a maximum of 70 minutes ...

Page 41: ...he confirmation screen approximately 4 times longer After finalizing R R DL R R DL The disc becomes play only and you can no longer record or edit it RW V You can record and edit the disc after formatting although it becomes play only after finalizing The disc finalized on the unit may not be playable on other players depending on the condition of the recording There is a pause of several seconds ...

Page 42: ...et Top Box Type Select the service being used After selecting IR Settings above step 3 e r to select STB Set Top Box Type then e r to select Cable Box DVR Satellite Box DVR Converter Box or IPTV Other STBs then Brand Name Select the set top box brand After selecting IR Settings left step 3 e r to select Brand Name then e r w q to select the set top box brand then You can also use u or i to view ot...

Page 43: ...ock Settings left step 3 e r to select Set Clock Manually then w q to select the item you want to change e r to change the setting Repeat steps 5 6 to change other items to confirm new date and time and to initiate the clock Set the time change dates for DST Set the beginning and end dates for DST 12 Quick Start One Sec Quick Start for Recording on DVD RAM From the power off state recording on DVD...

Page 44: ...r to select English French Spanish Original Other then Subtitle Language After selecting Settings for Playback left step 3 e r to select Subtitle Language then e r to select Automatic English French Spanish Other then Menu Language After selecting Settings for Playback left step 3 e r to select Menu Language then e r to select English French Spanish Other then Notes DVD V Choose the language for a...

Page 45: ...essing the Setup Menu 42 e r to select Video then q e r to select Black Level Control then Input Level Adjusts the black level of the input signal After selecting Black Level Control left step 3 e r to select Input Level then e r to select Lighter or Darker then Output Level Composite S Video Adjusts the black level of the output signal from the VIDEO OUT and S VIDEO OUT terminal After selecting B...

Page 46: ...other connected equipment or to convert the signals to PCM 2ch on the unit before output After selecting Digital Audio Output 45 step 3 e r to select DTS then e r to select Bitstream or PCM then Bitstream When you have connected the unit to equipment displaying the DTS logo PCM When you have connected the unit to equipment that doesn t have the DTS logo Incorrect settings can cause noise to be out...

Page 47: ...t This setting allows you to select the type of television connected Perform step 1 of Accessing the Setup Menu 42 e r to select TV Screen then q e r to select TV Aspect then e r to select 4 3 or 16 9 then Notes Aspect 4 3 16 9 4 3 16 9 4 3 standard aspect television 16 9 widescreen television Digital programs broadcast in the 16 9 aspect ratio may appear with black bands at the edges of the scree...

Page 48: ... the unit If this unit is connected to an amplifier etc via an HDMI cable with HDMI Priority set to On the video will be fixed to 480i Turn it Off and set it again If the TV Aspect is set to 4 3 47 then 480i or 480p can only be selected Functions of HDMI Perform step 1 of Accessing the Setup Menu 42 e r to select TV Screen then q e r to select Functions of HDMI then HDMI Priority After selecting F...

Page 49: ... to match the screen size Normal Video is output as 4 3 aspect Side panels black bars on the left and right will appear on the screen HDMI RGB Output Range Effective when connected to a device that only supports RGB output After selecting Functions of HDMI 48 step 3 e r to select HDMI RGB Output Range then e r to select Standard or Enhanced then Enhanced When the black and white images are not dis...

Page 50: ...0 0181 0182 0183 0185 0236 0270 0280 0282 0463 0623 Envision 0030 0813 Epson 0833 0840 Fisher 0154 0159 Fujitsu 0179 0186 0683 0809 0853 GE 0021 0027 0029 0047 0051 0055 0135 0138 0174 0178 0251 0279 0282 0451 0747 1347 1447 Go Video 0886 Haier 0768 1034 Hannspree 1348 1351 1352 Hewlett Packard 1088 1089 1101 1494 1502 Hisense 0748 Hitachi 0016 0032 0038 0056 0095 0097 0145 0151 0173 0227 0279 040...

Page 51: ...170 1505 1775 Dishpro 0775 1005 1505 1775 Echostar 0775 1005 1170 1505 1775 Expressvu 0775 1775 GE 0392 0566 General Instrument 0869 GOI 0775 1775 Goodmans 1246 Hisense 1535 Hitachi 0819 1250 HTS 0775 1775 Hughes 0749 1442 1749 Hughes Network Systems 0749 1142 1442 1443 1444 1749 Satellite Receiver Continued Manufacturer Code iLo 1535 Janeil 0152 Jerrold 0869 JVC 0775 1170 1775 LG 1226 1414 Magnav...

Page 52: ...UDIO IN R L VIDEO IN Rear of VCR Rear of Set Top Box Rear of TV This unit s front panel AUDIO OUT L R VIDEO OUT RF IN RF OUT Yellow White Red Yellow White Red step 4 step 3 step 2 Perform step on page 8 Coaxial cable from the RF OUT on the Set Top Box to the RF IN on the VCR Coaxial cable from the RF OUT on the VCR to the VHF UHF RF IN on the TV Audio video cable from the AV OUT on the VCR to the ...

Page 53: ... not included Leave the yellow cable unconnected You can enjoy better quality sound by changing the audio cable connection between this unit and your TV on page 8 as follows Using an Audio Cable for Better Sound Audio Cable not included Use this connection to play sound through speakers connected to an amplifier or system component PR PB Y COMPONENT VIDEO OUT AC IN SET TOP BOX CONTROL OPTICAL DIGI...

Page 54: ...tc Depending on the unit images may not display properly or at all when connecting with a DVI HDMI switching cable audio cannot be output Media Care RAM Use cartridges to protect them from scratches and dirt Holding a disc or card Handle discs by the edges to avoid inadvertently scratching or getting oil from your fingers on the disc Do not touch the signal surface of discs the shiny side or the t...

Page 55: ...ble disc versions and recording speeds Tips Visit Panasonic s homepage for more information about DVDs http www panasonic com playDVD R This site is in English only Buy Discs from www panasonic com and receive Special 20 Discount Coupon Code DVDMEDIA Offer good only in 50 United States Notes RAM will show an increase in available space whenever a recording has been erased RW V and RW discs will on...

Page 56: ...ion of the recording Operation and sound quality of CDs that do not conform to CD DA specifications copy control CDs etc cannot be guaranteed The producer of the disc can control how discs are played So you may not always be able to control play as described in these operating instructions Read the disc s instructions carefully SD Cards Usable with this Unit Type Standard symbol Data that can be r...

Page 57: ...ile play may not be possible Still Picture JPEG Information Playable media RAM R R DL CD SD USB File format JPEG Files must have the extension jpg or JPG Number of pixels between 34 x 34 and 6144 x 4096 Sub sampling is 4 2 2 or 4 2 0 Number of folders RAM R R DL SD USB This unit can handle a maximum of 300 folders CD This unit can handle a maximum of 99 folders Number of files RAM R R DL SD USB Th...

Page 58: ... this unit What are the constraints regarding DVD R DVD R DL DVD RW R R DL and RW compatibility with the unit The unit records and plays DVD R DVD R DL DVD RW DVD Video format R R DL and RW and plays DVD RW DVD Video Recording format 55 56 The unit also records and plays high speed recording compatible discs 70 After recording but before finalizing these discs except RW disc You may not be able to...

Page 59: ...6565 Afrikaans 6570 Albanian 8381 Amharic 6577 Arabic 6582 Armenian 7289 Assamese 6583 Aymara 6589 Azerbaijani 6590 Bashkir 6665 Basque 6985 Bengali Bangla 6678 Bhutani 6890 Bihari 6672 Breton 6682 Bulgarian 6671 Burmese 7789 Byelorussian 6669 Cambodian 7577 Catalan 6765 Chinese 9072 Corsican 6779 Croatian 7282 Czech 6783 Danish 6865 Dutch 7876 English 6978 Esperanto 6979 Estonian 6984 Faroese 707...

Page 60: ...ded on other equipment You can format the disc when the format confirmation screen is displayed 18 40 is displayed on the unit s display This unit is confirming that it is connected with equipment compatible with HDAVI Control F74 The HDMI connection could not be authenticated due to a transfer malfunction Consult the dealer where the unit was purchased F75 The HDMI connection could not be authent...

Page 61: ...ith the disc Press OPEN CLOSE on the main unit to remove the disc to check for scratches and dirt The unit turns off automatically after you open the tray Please set the clock The clock is not set when recording programs or setting scheduled recording Set the clock 43 This is a non recordable disc The unit cannot record on the disc you inserted Insert a DVD RAM or unfinalized DVD R DVD R DL DVD RW...

Page 62: ...supply cord securely into a known active AC outlet 8 The unit switches to standby mode This is a power saving feature Change Off Timer in the Setup menu to Off to always keep the unit on 43 One of the unit s safety devices is activated Press POWER 8 on the main unit to turn the unit on The power is turned off automatically If you connected this unit to an HDAVI Control compatible TV with an HDMI c...

Page 63: ...pears One of the unit s safety devices may have been activated Reset the unit as follows Press POWER 8 on the main unit to switch to off If the unit doesn t switch to off reset the unit 62 To restore the unit if it freezes U88 is displayed and the disc cannot be ejected The unit is carrying out the recovery process Do the following to eject the disc 1 Press POWER 8 on the main unit to switch to of...

Page 64: ...ding time display and the displayed recording times of MP3s are different from the actual time Times shown may disagree with actual times R R DL R R DL The remaining capacity does not increase even if recordings are deleted Available space on a DVD RW DVD Video format or RW disc increases when you delete the last recording space may increase slightly when you delete other recordings If you record ...

Page 65: ...ges do not appear Select Automatic in Status Messages in the Setup menu 46 The 4 3 aspect ratio picture expands left and right Screen size is wrong If you connect an HDMI cable set HDMI Output Display Aspect in the Setup menu to Normal 49 Check the settings for TV Aspect 4 3 TV settings for DVD Video or 4 3 TV settings for DVD RAM in the Setup menu 47 48 There is a lot of after images when playing...

Page 66: ...nit and record the program on a DVD RAM 17 You have used a digital connection Set Dolby Digital to PCM or connect using an audio cable analog connection 46 53 There are discs whose audio cannot be changed due to how the disc was created Playback Issues Operation Page Play fails to start even when q PLAY is pressed Play starts but then stops immediately Insert the disc correctly with the label faci...

Page 67: ...DVD RW DVD Video Recording format discs If you repeatedly insert discs or turn the unit on and off about 50 times or more the recording or editing of DVD R DVD R DL DVD RW DVD Video format R R DL and RW discs may be disabled A DVD R DVD R DL DVD RW DVD Video format R R DL or RW disc recorded on the unit may not be recordable on other Panasonic DVD recorders The broadcast you are trying to record i...

Page 68: ...re not possible with still pictures Cannot delete chapters When the chapter is too short to delete use Combine Chapters to make the chapter longer RAM 37 The available recording time doesn t increase even after deleting recordings on the disc Available space on DVD R DVD R DL R or R DL does not increase even after deleting previous recordings Available space on DVD RW DVD Video format or RW increa...

Page 69: ...ure quality is generally better A field still shows less picture information so it may be rougher but there is no blurring HDMI High Definition Multimedia Interface HDMI is a next generation digital interface for consumer electronic products Unlike conventional connections it transmits uncompressed digital video and audio signals on a single cable This unit supports high definition video output 72...

Page 70: ...ng the REC button Quick Start Mode Video system Recording system MPEG2 Hybrid VBR Input LINE pin jack 2 1 0 Vp p 75 Ω S connector 2 Y 1 0 Vp p 75 Ω C 0 286 Vp p 75 Ω Output LINE pin jack 1 1 0 Vp p 75 Ω S connector 1 Y 1 0 Vp p 75 Ω C 0 286 Vp p 75 Ω Component video output Y PB PR 1 Y 1 0 Vp p 75 Ω 480i 480p 720p 1080i PB 0 7 Vp p 75 Ω PR 0 7 Vp p 75 Ω Audio system Recording system Dolby Digital 2...

Page 71: ...rental use of the product service by anyone other than a Factory Servicenter or other Authorized Servicer or damage that is attributable to acts of God THERE ARE NO EXPRESS WARRANTIES EXCEPT AS LISTED UNDER LIMITED WARRANTY COVERAGE THE WARRANTOR IS NOT LIABLE FOR INCIDENTAL OR CONSEQUENTIAL DAMAGES RESULTING FROM THE USE OF THIS PRODUCT OR ARISING OUT OF ANY BREACH OF THIS WARRANTY As examples th...

Page 72: ...izar un aparato integrando el convertidor y el descodificador con el mando a distancia de esta unidad Coloque el cable de control del aparato integrando el converti dor y el descodificador delante del sensor de señal del aparato Lea las instrucciones de funcionamiento del aparato integrando el convertidor y el descodificador para saber cómo posicionar el sensor de señal Si fuena necesario utilice ...

Page 73: ... elemento luego Tipo Receptor Multimedia Seleccione el servicio utilizado Marca Seleccione la marca del aparato integrando el convertidor y el descodificador Máximo de dígitos Seleccione el número máximo de dígitos de canal a introducir en su aparato integrando el convertidor y el descodificador Tecla de operación OK Seleccione si confirmar o no un canal pulsando OK conforme con su aparato integra...

Page 74: ...ucir RAM R R DL RW V R R DL RW RW VR Realice los pasos 1 y 2 de Reproducción de discos arriba 1 Oprima DIRECT NAVIGATOR 2 e r w q para seleccionar la grabación que desea ver luego oprima OK Grabación de programas de Set Top Box RAM R R DL RW V R R DL RW Preparación RAM Si el disco está protegido libere la protección para encender la unidad OPEN CLOSE para abrir la bandeja botón ubicado en la parte...

Page 75: ...ra enviar desde el teclado por favor presione SUB MENU Canal Entrada Fecha Frecuencia Act Des Modo OK Nombre Número 0 9 4 1 Tiempo grabación restante 3 26 Vie 12 53 PM 1 58 SP DVD Suprim S SUB MENU Repita los pasos 2 a 4 para programar otras grabaciones cuando haya finalizado los cambios de programación El indicador z se enciende en el visualizador de la unidad Importante Una vez borrados los cont...

Page 76: ... lens 3 main unit 3 Clock Settings 43 Closed Caption 47 CM Skip 24 Connection amplifier system component 53 54 DV IN terminal 22 external device 21 22 HDMI 9 54 Set Top Box 8 52 television 8 9 52 53 54 video cassette recorder 21 52 Copying Still Pictures 36 CPRM 69 Create Chapter 24 37 Create DVD Top Menu 41 DDelete album 35 all recordings 40 chapter 37 recording 16 32 still picture 35 Delete Navi...

Reviews: