13
3.4.
How to Update Firmware
The firmware of the unit may be renewed to improve the quality including operational performance and playability.
Make sure to refer the following procedure when performing version-up.
3.4.1.
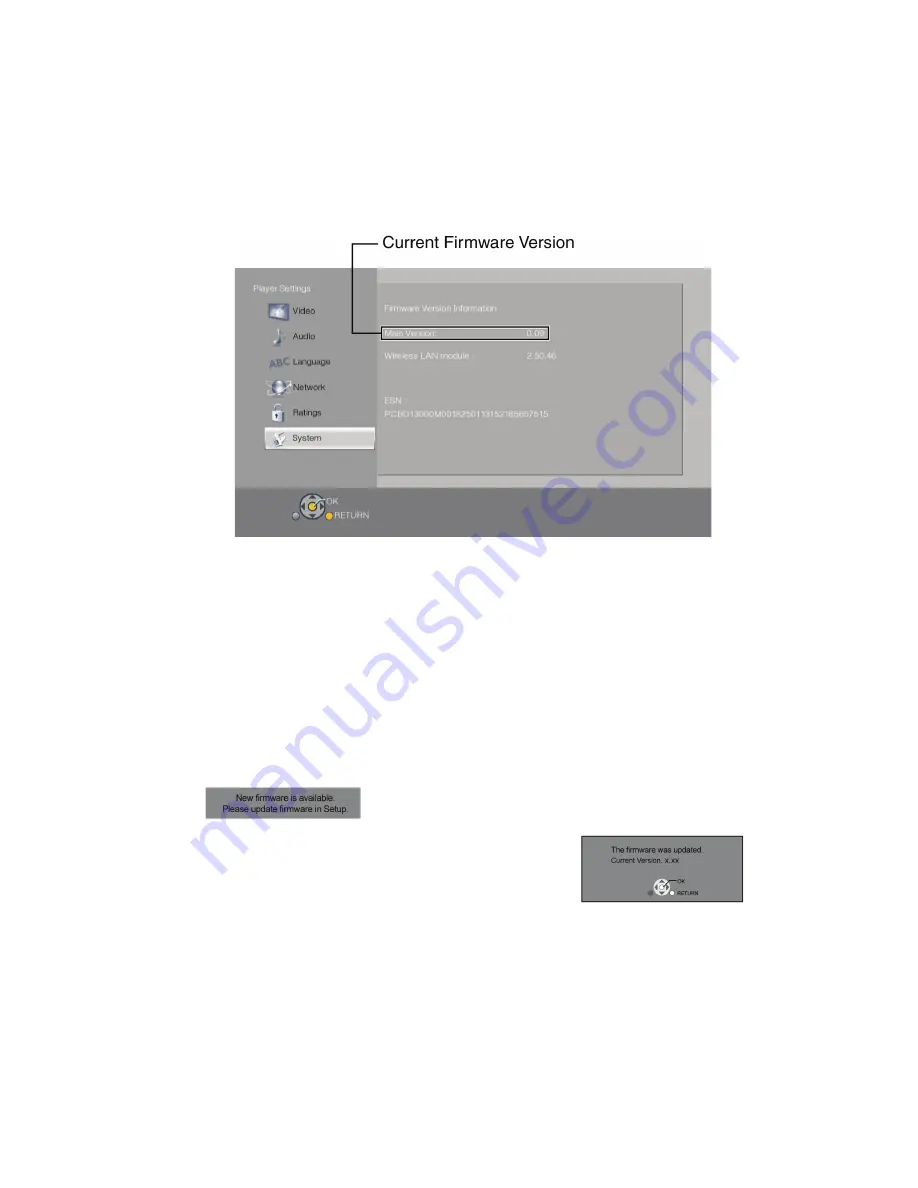
Confirmation of the Firmware Version
Perform following steps to checking the firmware version currently installed in the unit.
1. Turn the unit on and wait the Home screen is displayed.
2. Select [Setup]
→
[Player Settings]
→
[System]
→
[System Information]
→
[Firmware Version Information].
3. Firmware Version Information screen is displayed.
3.4.2.
Updating Firmware
This unit has 2 updating method, one way to update via the internet, the other way to update using CD-R or USB device which is
stored pre-downloaded firmware update file.
3.4.2.1.
Updating firmware via the internet
Occasionally, Panasonic may release updated firmware for this
unit that may add or improve the way a feature operates. These
updates are available free of charge.
This unit is capable of checking the firmware automatically
when connected to the Internet via a broadband connection.
When a new firmware version is available, the following mes-
sage is displayed.
To update the firmware
Press [HOME]
• press the [SETTINGS] button on the remote control
• select “System’’
and press [OK]
• select “Firmware Update’’ and press [OK]
• select “Update Now’’ and press [OK]
DO NOT DISCONNECT the unit from the AC
power or perform any operation while the update takes place.
After the firmware is installed, INFO LED and POWER LED
flash 3 times and “FIN’’ will be displayed on the screen. Unit will
restart and the following screen will be displayed.
Summary of Contents for DMP-BD79GA
Page 2: ...2 ...
Page 3: ...3 ...
Page 7: ...7 1 3 Caution for AC cord Only for BD79GC ...
Page 9: ...9 2 2 Precaution of Laser Diode ...
Page 16: ...16 5 Location of Controls and Components ...
Page 17: ...17 ...
Page 38: ...38 9 2 5 Grease ...
Page 42: ...42 9 3 3 How to Clean the Lens of Optical Pick UP ...
Page 43: ...43 9 4 Adjustment of BD Drive 9 4 1 Repair Flowchart ...
Page 46: ...46 10 1 2 Checking and Repairing of BD Drive and Digital P C B ...
Page 55: ...Model No DMP BD79GA BD79GC BD79GN BD79GT BD79GW BD79PU BD79PH SCHEMATIC DIAGRAM NOTICE ...
Page 56: ...Model No DMP BD79GA BD79GC BD79GN BD79GT BD79GW BD79PU BD79PH PART LIST NOTICE ...
Page 57: ...Model No DMP BD79GA BD79GC BD79GN BD79GT BD79GW BD79PU BD79PH ABBREVIATION ...
Page 58: ...Model No DMP BD79GA BD79GC BD79GN BD79GT BD79GW BD79PU BD79PH POWER SECTION POWER P C B ...
Page 59: ...Model No DMP BD79GA BD79GC BD79GN BD79GT BD79GW BD79PU BD79PH LED SECTION POWER P C B ...
Page 60: ...Model No DMP BD79GA BD79GC BD79GN BD79GT BD79GW BD79PU BD79PH AUDIO DAC SECTION DIGITAL P C B ...
Page 61: ...Model No DMP BD79GA BD79GC BD79GN BD79GT BD79GW BD79PU BD79PH AV SECTION DIGITAL P C B ...
Page 63: ...Model No DMP BD79GA BD79GC BD79GN BD79GT BD79GW BD79PU BD79PH DDR SECTION DIGITAL P C B ...
Page 64: ...Model No DMP BD79GA BD79GC BD79GN BD79GT BD79GW BD79PU BD79PH MTK SECTION DIGITAL P C B ...
Page 65: ...Model No DMP BD79GA BD79GC BD79GN BD79GT BD79GW BD79PU BD79PH FE SA SECTION DIGITAL P C B ...
Page 66: ...Model No DMP BD79GA BD79GC BD79GN BD79GT BD79GW BD79PU BD79PH POWER P C B COMPONENT SIDE ...
Page 67: ...Model No DMP BD79GA BD79GC BD79GN BD79GT BD79GW BD79PU BD79PH POWER P C B FOIL SIDE ...
Page 68: ...Model No DMP BD79GA BD79GC BD79GN BD79GT BD79GW BD79PU BD79PH DIGITAL P C B COMPONENT SIDE ...
Page 69: ...Model No DMP BD79GA BD79GC BD79GN BD79GT BD79GW BD79PU BD79PH DIGITAL P C B FOIL SIDE ...
Page 77: ...Model No DMP BD79GA BD79GC BD79GN BD79GT BD79GW BD79PU BD79PH Exploded View ...
Page 78: ...Model No DMP BD79GA BD79GC BD79GN BD79GT BD79GW BD79PU BD79PH Mechanism View ...
Page 79: ...Model No DMP BD79GA BD79GC BD79GN BD79GT BD79GW BD79PU BD79PH Packing View ...


