101
RQT9431
Display and Connection Settings
Others
Setup
(
➔
95, Accessing the Setup Menu)
All factory default settings are indicated with “Underlined” text.
Display
e
,
r
select “Display”
➔
Display
RETURN
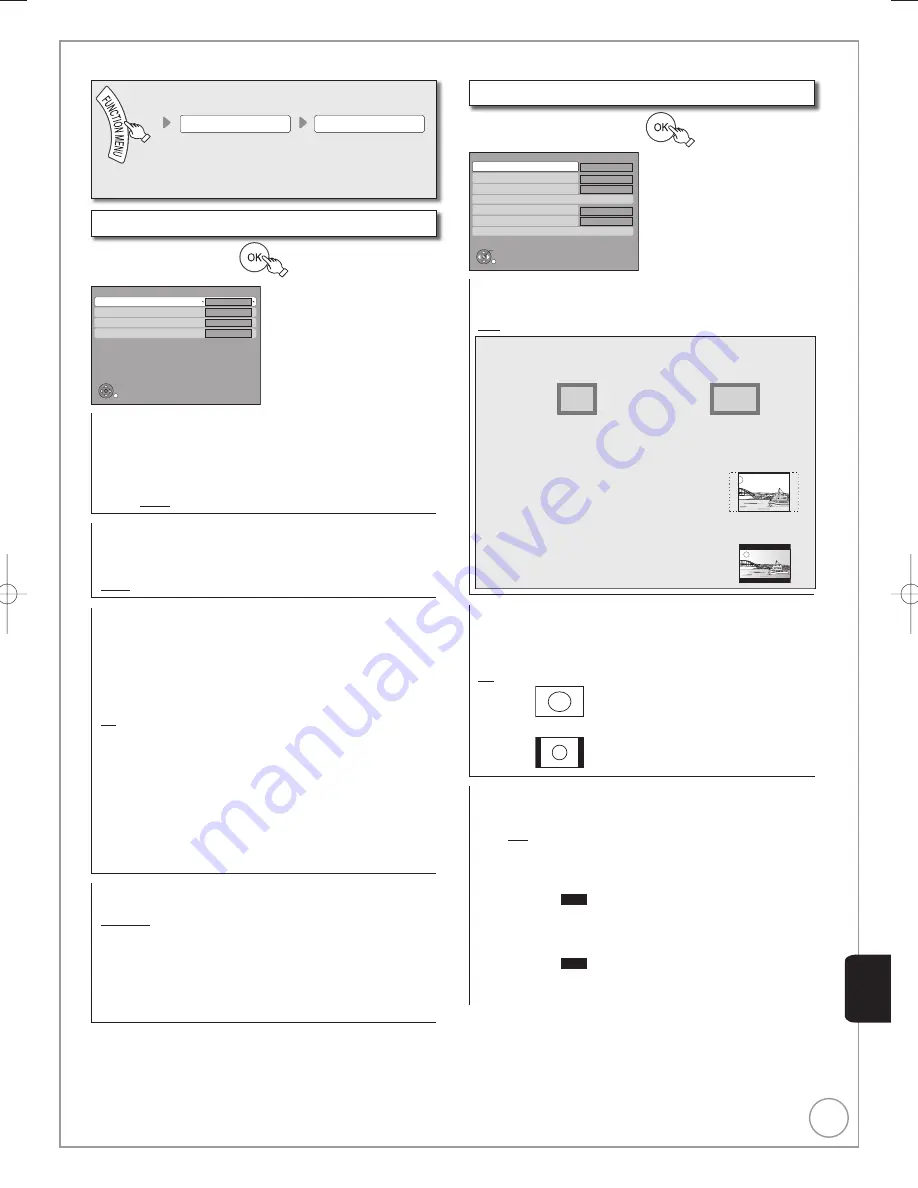
Unit’s Display
Bright
Screen Saver
On
Teletext
FASTEXT
On-Screen Messages
5 sec.
On-Screen Messages
Choose the approximate time until the digital satellite channel
information screen (
➔
88) disappears automatically.
The length of time the control panel (
➔
85) is displayed can also
be changed, but “Off” does not work.
[Off]
The digital satellite channel information is not displayed.
[3 sec.] [5 sec.] [7 sec.] [10 sec.]
Unit’s Display
Changes the brightness of the unit’s display.
Regardless of the setting, when “Power Save” (
➔
104) is “On” and
this unit is turned off, the unit’s display is turned off.
[Bright]
[Dim]
Screen Saver
This is to prevent burn-in on the screen.
When this is set to “On”, the masked-off area on the screen
becomes black.
[Only when connecting with an HDMI cable or a component
video cable and “HDMI Video Format” (
➔
102) is set to any other
mode than “576p/480p”, or “Component Resolution” (
➔
102) is
set to “720p” or “1080i”.]
[On] If there is no operation for 5 minutes or more, the displayed
screen switches to the other states automatically.
When the DIRECT NAVIGATOR, Copying list, DELETE
Navigator or FUNCTION menu is displayed, the screen
saver is not displayed.
When music is played, the display returns to the screen
saver mode. (Playback continues.)
When still pictures are shown (except for slideshows),
the display returns to the DIRECT NAVIGATOR screen.
The display returns to the screen saver mode when it is
paused by the Pause Live TV. (Pause status will continue.)
–
–
–
–
[Off]
•
Teletext
Select the Teletext display mode. (
➔
89)
[FASTEXT] Four differently coloured subjects are situated at the
bottom of the screen. To access more information
about one of these subjects, press the appropriately
colour button. This facility enables fast access to
information on the subjects shown.
[List]
Four differently coloured page numbers are situated at
the bottom of the screen. Each of these numbers can
be altered and stored in this unit.
Connection
e
,
r
select “Connection”
➔
Connection
OK
RETURN
HDMI Connection
AV2 Settings
AV1 Output
RGB 2
TV System
PAL
Aspect for 4:3 Video
4:3
TV Aspect
16:9
Component Resolution
576i / 480i
TV Aspect
This setting needs to be changed when connected to a 4:3
standard aspect TV.
[16:9] [4:3] [Letterbox]
Notes
Aspect 4:3/16:9
4:3
16:9
4:3 standard aspect television
16:9 widescreen television
• 16:9: When connected to a 16:9 widescreen television. However,
the 4:3 aspect ratio picture expands left and right.
• 4:3: When connected to a 4:3 aspect
television, side picture is trimmed for
16:9 picture (
➔
135, Pan&Scan).
The “4:3” setting may not work and the
pictures may be shown in the letterbox
style depending on the content.
Letterbox: When connected to a 4:3 aspect
television, widescreen picture is
shown in the letterbox style (
➔
135).
•
•
Aspect for 4:3 Video
To play a 4:3 title when connected with an HDMI cable, set how to
show pictures on a 16:9 widescreen television. 4:3 picture from HDMI
output will be slightly smaller than that from the other outputs, e.g.
Scart and component, this is not a malfunction of the unit.
[4:3]
Picture output expands left or right.
[16:9]
Picture is output as original aspect with side panels.
TV System
Change this setting if you connect an NTSC television or to record
NTSC video from another source.
[PAL]
Select when connecting to a PAL or Multi-
system television. Programmes recorded
using NTSC are played as PAL60.
Select to record television programmes
and PAL input from other equipment.
HDD
Select when playing a PAL
input title recorded on the HDD.
–
–
–
[NTSC]
Select when connecting to an NTSC television.
Television programmes cannot be recorded properly.
Select to record NTSC input from other equipment.
HDD
Select when playing an NTSC
input title recorded on the HDD.
–
–
–
Con
venient
Functions


