background image

Conv

enie

nt fun

c

tion

s

VQT3C81

85

Clock

If the time is not set correctly, use the settings listed in 
the method below.

Automatic

This unit usually obtains time and date information 
from digital broadcasts.
But, if the time is not set correctly, set it to “Off” and 
perform “Manual Setting”.

Time Zone

When the time is not correct, set “Time Zone”.
(GMT - 6 to + 6)

Manual Setting

1

Select “Off” of “Automatic”, then press [OK].

2

Select the item you want to change.

3

Change the setting.

4

Press [OK] when you have finished the settings.

Owner ID

In order to prevent another person from using this unit 
if it is stolen, you can set a PIN and input your personal 
information (NAME, HOUSE NO, POSTCODE). 

Once the PIN has been set, you cannot return to 
the factory preset. Make sure not to forget this.

PIN Entry

You can set/change the PIN for parental control. 
(

>

74)

System Update

¾

Software Update in Standby

When you set this unit to standby mode, software 
(firmware) updates (

>

87) are downloaded 

automatically.

¾

Software Update Now ( Broadcast )

Software of this unit will be updated from 
broadcasts if update information is detected. 
(

>

87)

¾

Software Update Now ( Internet )

Software of this unit will be updated from Internet 
if update information is detected. (

>

87)

¾

Software Licence

Information about the software licence is 
displayed.

¾

Post Code

Input the postal code which is necessary to 
download area specific information of GUIDE 
Plus+ system.

¾

Guide Plus+ System Information

You can check the condition of GUIDE Plus+ 
system of this unit.
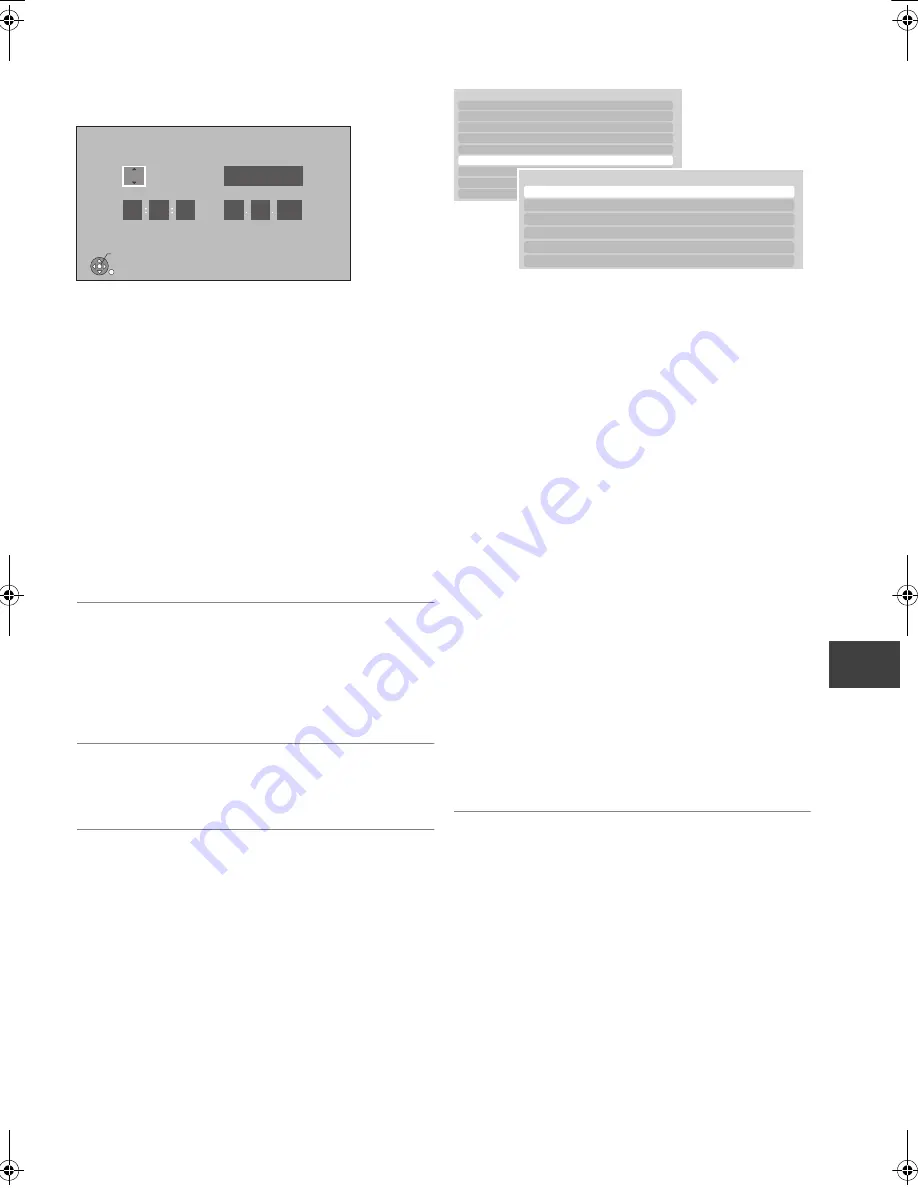
Clock

Time

Date

Time Zone

Automatic

Please set the clock.
OK : access     RETURN : leave

OK

RETURN

0

 00

10

Automatic

On

1

1

2011

Others

System Update

System Update

Software Update in Standby

Enlgish

Software Update Now ( Broadcast )
Software Update Now ( Internet )
Software Licence
Post Code
GUIDE Plus+ System Information

DMR-PWT500EB-VQT3C81_eng.book  85 ページ  2011年8月9日 火曜日 午後5時16分

Summary of Contents for Diga DMR-PWT500

Page 1: ... to view channels only It does not receive pay TV or encrypted channels The titles recorded onto the HDD of this unit cannot be copied to the media DVB and the DVB logos are trademarks of the DVB Project Blu ray Disc Player HDD Recorder Model No DMR PWT500 Region management information BD Video This unit plays BD Video marked with labels containing the region code B DVD Video This unit plays DVD V...

Page 2: ...t services such as YouTube video communication etc can be accessed easily by using the VIERA CAST button VIERA Link HDAVI ControlTM 66 Operation of this unit can be controlled by the remote control of the TV VIERA DVB T DVB T2 tuner built in 24 31 This unit has two DVB Digital Video Broadcasting terrestrial tuners built in DVB T2 is an advanced digital terrestrial system for more efficient transmi...

Page 3: ...rol N2QAYB000615 2 Batteries for remote control 1 AC mains lead K2CT2YY00003 Do not use AC mains lead with other equipment 1 RF coaxial cable K1TWACC00003 Insert so the poles i and j match those in the remote control Use alkaline or manganese batteries Point it at remote control signal sensor on this unit 9 Supplied accessories Using the remote control R6 LR6 AA ...

Page 4: ... unit may receive radio interference caused by mobile telephones during use If such interference occurs please increase separation between this unit and the mobile telephone This unit is intended for use in moderate climates Placement Place this unit on an even surface To reduce the risk of fire electric shock or product damage Do not install or place this unit in a bookcase built in cabinet or in...

Page 5: ...fying the terminals in your plug proceed as follows The wire which is coloured Blue must be connected to the terminal which is marked with the letter N or coloured Black or Blue The wire which is coloured Brown must be connected to the terminal which is marked with the letter L or coloured Brown or Red WARNING DO NOT CONNECT EITHER WIRE TO THE EARTH TERMINAL WHICH IS MARKED WITH THE LETTER E BY TH...

Page 6: ...ure in picture in BD Video 39 Playing recorded video contents 40 Using the DIRECT NAVIGATOR VIDEO 42 Playback from Chapter View 44 Operation during play 45 Enjoying 3D video 47 Editing video Deleting recorded titles 48 Editing recorded titles 49 Photo Playing photos 52 Photo play option 54 Slideshow Settings 54 Editing photos 55 Copying photos 57 Selecting and copying the photos 57 Copying automat...

Page 7: ...Link 98 Network 98 To reset this unit 98 Reference Unit care 99 Regarding DivX 100 Operations that can be performed simultaneously 101 Operations that can be performed while recording programme 101 Starting the timer recording while executing other operation 101 Specifications 102 About recorded titles 103 Audio information 104 About JPEG MPO MP3 DivX MKV MPEG2 AVCHD files 104 Licenses 106 Index 1...

Page 8: ...e with instruction on the screen Start recording 29 Show Timer Recording screen 36 Create chapter 44 Switching to the radio channel list 26 Transmit the remote control signal TV operation area 88 A Channel select 24 Change pages in the DIRECT NAVIGATOR screen etc B Show VIERA CAST 65 C Listen to Audio Description 27 46 D Start up a video communication 65 E Exit the menu screen F Show the TV Guide ...

Page 9: ...tion 65 6 Remote control signal sensor Angle Approx 20 up and down 30 left and right Distance Within approx 7 m in front of the unit 7 Open close disc tray 22 8 USB port 22 9 SD card slot 22 Stop Start play Display 1 Drive HDD BD or SD indicator 2 SD card slot indicator 3 USB port indicator 4 Copying indicator 5 Disc indicator 6 Remote control signal indicator 7 Main display section indicator Curr...

Page 10: ...N FOR AC MAINS LEAD ON PAGE 5 Required setting Set HDMI Audio Output to On 81 The default setting is On After completing the connections proceed to Easy Setting 13 Keep the RF coaxial cables as far away as possible from other cables Do not roll up the RF coaxial cables HDMI RF IN HDMI AV OUT RF IN RF OUT AC IN HDMI cable Aerial cable RF Coaxial cable supplied AC mains lead supplied TV s rear panel...

Page 11: ...P Depending on the device images may not display properly or at all when connecting with a DVI HDMI switching cable Audio cannot be output If you are connecting to a TV that is only compatible with 2 channel audio output audio with 3 channels or more will be down mixed and output as 2 channels even if connecting with an HDMI cable Some discs cannot be down mixed When the unit is not to be used for...

Page 12: ...ts stations cafes etc Precautions of Wireless LAN connection The following limits are in place regarding the usage of this unit You must be aware of these limits before using this unit Panasonic will in no way be responsible for any incidental damage which may arise due to a failure to obey these limits or to any condition of use or disuse of this unit Data transmitted and received over radio wave...

Page 13: ...efault PIN is 0000 1 Press the number buttons to enter 4 digit PIN Make a note of PIN in case you forget it 2 Press OK Easy Setting OK RADIO TV STATUS 10s 60s PROG CHECK REC TEXT STTL CHAPTER F U N C T I O N M E N U D I R E C T N A V I G A T O R GUIDE PLAY x1 3 PAUSE PAUSE LIVE TV STOP SLOW SEARCH SKIP CH PAGE CH AV TV DRIVE SELECT DEL AD EXIT OPTION MANUALSKIP VOL 0 2abc 5jkl 8tuv 1 4ghi 7qrs p 3...

Page 14: ...D is displayed on the unit s display 3 Press OK on the remote control or OPEN CLOSE on the main unit The PIN is not displayed To edit the Channel List 75 Channel List To check the signal condition 76 Signal Condition To change PIN for parental control 85 PIN Entry To sort the Channel List by region 75 Channel Sorting by Region On It will go into the Power Save in Standby mode On Timer Set the star...

Page 15: ... Input the encryption key of your network WPS PUSH button If your Wireless router supports WPS PUSH button you can easily perform the settings by pressing WPS button on it WPS Wi Fi Protected SetupTM is a standard that facilitates settings relating to the connection and security of wireless LAN devices 1 Press WPS button or corresponding button of Wireless router until the lamp starts flashing For...

Page 16: ...ur dealer OK Wireless Settings Complete Network name SSID Wireless type Authentication type Encryption type Reception Press OK to check network connection For better performance of Home Network DLNA it is recommended using a wireless access point compatible with 802 11n 5GHz Display Check the following 1 LAN cable connection or Wireless setting Fail Connection of the LAN cables 12 Settings of the ...

Page 17: ...g Network Easy Setting in the Setup menu 82 You can redo these settings individually using Network Settings 82 Do not use this unit to connect to any wireless network for which you do not have usage rights During automatic searches in a wireless network environment wireless networks SSID for which you do not have usage rights may be displayed however using these networks may be regarded as illegal...

Page 18: ...ents Hard disk drive HDD HDD Video AVCHD JPEG MPO MP3 BD Video BD V Movie and music BD RE BD RE Video AVCHD JPEG MPO BD R BD R Video AVCHD DivX MKV DVD Video 1 DVD V Movie and music Video in finalised disc DVD R DVD R DL DVD R Video AVCHD DivX MKV JPEG MPO MP3 DVD RW DVD RW Video AVCHD R R DL R Video AVCHD RW RW Video AVCHD ...

Page 19: ...ession on the equipment used for recording to play on this unit It may not be able to playback depending on the device that was used to record With certain recording states and folder structures the play order may differ or playback may not be possible Media type Standard symbol Playable contents Recordable contents Audio CD CD DA CD Music CD including CD R RW DivX MKV JPEG MPO MP3 SD Cards SD AVC...

Page 20: ...t and SDXC Memory Cards in exFAT format Setting the protection Using miniSD card or microSD card Usable memory is slightly less than the card capacity If the SD card is formatted on other equipment the time necessary for recording may be longer Also if the SD card is formatted on a PC you may not be able to use it on this unit In these cases format the card on this unit 72 SDHC Memory Cards and SD...

Page 21: ...a damp cloth and then wipe dry Handling precautions Do not attach labels or stickers to discs Do not use record cleaning sprays benzine thinner static electricity prevention liquids or any other solvent Do not use ballpoint pens or other hard writing implements when writing on the label side of the disc Do not expose the terminals of the SD card to water garbage or other strange things Do not drop...

Page 22: ... the connected equipment For details refer to the instructions for the connected equipment To select a drive Press DRIVE SELECT to select the media drive that you operate The HOLD function deactivates all buttons on the unit and remote control To cancel the HOLD function Press and hold OK and BACK RETURN simultaneously until X HOLD disappears Preparations Turning on this unit STATUS F U N C T I O ...

Page 23: ...ctable items will change depending on the type and status of the media Basic operation To return to the previous screen Press To exit the screen Press Display navigation Menu screen OK OK Select Enter BACK RETURN EXIT Page 001 002 Select OPTION LIVE CAT 2 SPORTS NEWS World news 29 10 29 10 2 29 10 1 1 1 1 1 PLAY RETURN PHOTO MUSIC KD2A DOG LIVE CAT 04 10 04 10 29 10 Delete Page Up Page Down World ...

Page 24: ...lect the channel Everytime you change the channel channel information appears automatically Unit s display You can also select the channel with the number buttons STATUS F U N C T I O N M E N U D I R E C T N A V I G A T O R GUIDE PLAY x1 3 PAUSE PAUSE LIVE TV STOP SLOW SEARCH SKIP CH PAGE CH AV TV DRIVE SELECT DEL EXIT OK OPTION VOL 0 2abc 5jkl 8tuv 1 4ghi 7qrs p 3def 6mno 9xyz w INPUT REWINDLIVET...

Page 25: ...t the screen Press BACK RETURN Using TV Guide system Landscape TV Guide WED 13 10 2011 19 36 WED 13th All Channels AllTypes Time RETURN OK Select Programme Select Channel 24 hours Prog Type Category Page Up Page Down Portrait Landscape Info CH GUIDE 19 00 20 00 OPTION Advert 1 2 3 4 5 6 7 Portrait TV Guide WED 13 10 2011 19 36 WED 13th All Channels AllTypes RETURN OK Select Channel Select Programm...

Page 26: ...tal TV Menu then press OK 3 Select Favourites Edit then press OK 4 Refer to page 74 Favourites Edit To switch between the current programme and the next programme Press 2 1 To check the programmes currently broadcasting on other channels Press 3 4 You can switch to another channel displayed on the channel information by pressing OK Press RADIO TV To switch to the all channels Press RADIO TV again ...

Page 27: ...26 1Press AD 2Select Audio Description and set to Automatic 3Select Volume then adjust the volume with 2 1 Audio Description may not be available depending on the type of audio format When Dolby D Dolby D Dolby TrueHD MPEG or HE AAC is set to Bitstream or Bitstream Dolby D the Audio Description may not work Set them to PCM 79 Digital Audio Output You can also set Audio Description active in the Se...

Page 28: ...played To stop REWIND LIVE TV or PAUSE LIVE TV 1 Press STOP 2 Select Yes then press OK To hide the display information Press EXIT Temporary save stops in the following cases When switching to other channels or other screen When recording of the watching programme is started When 2 programmes simultaneous recording is started When performing PAUSE LIVE TV or REWIND LIVE TV for more than 8 hours Thi...

Page 29: ...Press Recording starts STATUS F U N C T I O N M E N U D I R E C T N A V I G A T O R GUIDE PLAY x1 3 PAUSE PAUSE LIVE TV STOP SLOW SEARCH SKIP CH PAGE CH AV TV DRIVE SELECT DEL EXIT OK OPTION VOL 0 2abc 5jkl 8tuv 1 4ghi 7qrs p 3def 6mno 9xyz w INPUT REWINDLIVETV BACK RETURN AD RADIO TV 10s 60s PROG CHECK REC TEXT STTL CHAPTER MANUALSKIP CH REC REC1 REC1 or REC2 will light Unit s display Select Auto...

Page 30: ... split into separate titles If paused while recording the paused part may become a still picture for a moment during playback of that programme Operation during recording To check the recording programme To switch the Channel To display the recording programme on the TV e g While recording 2 programmes simultaneously REC2 1 5 REC1 OTR AUTO D D H Recording programme displayed on the TV Recording pr...

Page 31: ... OK While recording Record another programme with steps on page 29 REC1 and REC2 will light Channel cannot be switched except to the recording programmes To stop recording Stop Recording Yes No Recording of this programme is in progress Stop this recording OK RETURN 1 Stop Recording 2 recordings are in progress Which recording would you like to stop OK RETURN 1 2 To perform 2 programmes simultaneo...

Page 32: ...ress This screen may not appear depending on the programme Single Timer Rec Timer programme is set for selected programme Series Timer Rec Timer programme is set for all the episodes of a series programme Recommended Recommendation Booking Refer to page 34 If Programme Selection screen appears Depending on the signal sent from the broadcaster both High Definition picture programme and Standard Def...

Page 33: ... if any part of the selected programme is recorded The series recording will be cancelled if there has been no episode of the series for 13 weeks Press You cannot change Channel Day Date etc 36 Timer recording options You can adjust Start and Stop up to 10 minutes in case of Series Timer Rec The timer programme is stored and the timer icon red is displayed Red Delete programme Green Record Repeat ...

Page 34: ...e other programmes e g news When setting timer from the 1st split programme other parts of the programme will be automatically set and indicated by the timer icon on the TV Guide This is indicated by Split in the Timer Recording screen in step 33 You can record a programme that the broadcaster recommends 1After performing steps 32 Select Recommended then press OK Recommendation List is displayed 2...

Page 35: ...ding of the current or next programme 1 While watching a programme Press STATUS e g 2 Display the channel information of a programme to record Switch the programme with 2 1 Switch the channel with 3 4 3 Press the Yellow button 4 Go to step on page 33 You cannot change Channel Day Date etc To search the programme Landscape view The unit displays programmes in grey that do not belong to the selected...

Page 36: ...New Timer Programme Info Channel Name Schedule Space Timer Recording Remain 30 30 HDD WED 13 10 2011 19 41 New Timer Programme OK Programme Name FRI 15 10 23 00 23 30 Check for available space on HDD when is displayed 37 Timer icon red Timer recording options Channel Press 3 4 You can select Category with the Red button to switch Favourites etc Day Date Press 3 4 You can select Date or Weekly by p...

Page 37: ...lete the No Data item after you confirm the last episode of the series is recorded To confirm and edit a timer programme Channel Name Schedule Space NewTimer Programme OK RETURN Page Up Page Down CH Turn Timer Off Total 4 32 Resolve overlap Timer Recording 30 30 HDD Remain WED 13 10 2011 19 50 DEL Delete Info MON 18 10 22 00 23 00 MON 18 10 23 05 23 35 MON 23 15 23 30 MON 18 10 23 20 23 50 OK OK H...

Page 38: ...ring the timer recording the recording is continued When you programme successive timer recordings to start about last 1 minute of earlier programme will not be recorded About 2 programmes simultaneous recording 31 Starting the timer recording while executing other operation 101 To cancel recording when timer recording has already begun Stop Recording Yes No Timer recording of this programme is in...

Page 39: ... or instruction manual of the disc for information on acquiring an account BD Live may need to be changed for certain discs 77 BD Live When discs supporting BD Live are played back the player or disc IDs may be sent to the content provider via the Internet During search slow motion or frame by frame only the primary video is displayed When BD Video Secondary Audio is set to Off secondary audio wil...

Page 40: ...s e g HDD STATUS F U N C T I O N M E N U D I R E C T N A V I G A T O R GUIDE PLAY x1 3 PAUSE PAUSE LIVE TV STOP SLOW SEARCH SKIP CH PAGE CH AV TV DRIVE SELECT DEL EXIT OK OPTION VOL 0 2abc 5jkl 8tuv 1 4ghi 7qrs p 3def 6mno 9xyz w INPUT REWINDLIVETV AD BACK RETURN DRIVE SELECT D I R E C T N A V I G A T O R OK Time Remaining 30h30m HDD Page 003 003 Select Grouped Titles VIDEO OPTION Birds World news...

Page 41: ...r then press OK You cannot select folders that contain no compatible files 3Select the folder then press OK The file list for the folder appears Using the tree screen to find a folder Video Menu Select Folder F 5 12 CD Video OK RETURN Page 01 01 F Selected folder no Total folder no including DivX and MKV title ...

Page 42: ...ns right Programme type HDD only Thumbnail HDD only Time Remaining 30h30m HDD Grouped Titles Start Time Prog Type Rec time Drama Sport Not Viewed DIRECT NAVIGATOR Channel Date Title Name All Movie Movie 21 00 0h30m 04 10 04 10 29 10 29 10 Screen icons Currently recording programme Protected title Title was not recorded due to recording protection t Title cannot be played When copying a title to th...

Page 43: ...w button A check mark is displayed Repeat this step Press the Yellow button again to cancel If you perform Remove select the title in the group 2Press OPTION 3Select the item then press OK HDD 1Select the group then press OPTION 2Select Edit then press OK 3Select Enter Title Name then press OK 73 Entering text Even if the group name is changed the title names in the group will not be changed Switc...

Page 44: ...nnot perform the Resume play function 40 or the Change Thumbnail 51 with the title Playback from Chapter View Time Remaining 30h30m HDD Page Select Grouped Titles VIDEO OPTION Start Time Prog Type Rec time PLAY RETURN PHOTO MUSIC Drama Sport Video AVCHD Movie Not Viewed DIRECT NAVIGATOR Channel Date Title Name Titles All Delete Page Up Page Down Movie 21 00 0h30m 04 10 04 10 29 10 29 10 SOCCER Pre...

Page 45: ...H 6 or SLOW SEARCH 5 Press PLAY a1 3 1 to restart play The speed increases up to 5 steps R RW Up to 3 steps Audio is heard during first level search forward DivX and MKV Audio is not heard during all levels search Skip forward 1 minute Press MANUAL SKIP 60s Skip backward 10 seconds Press MANUAL SKIP 10s Each time you press play skips forward or backward DivX and MKV This function is not effective ...

Page 46: ...ipped 1Press OPTION 2Select Playback Settings in Playback Menu 70 3Select Multi Audio in the Disc menu then select the desired audio HDD BD RE BD R 1Press STTL 2Select On or Off If you want to switch the subtitle language select the subtitle with Subtitle Language in the Disc menu 70 BD V DVD V DivX MKV and AVCHD 1Press OPTION 2Select Playback Settings in Playback Menu 3Select Subtitles in the Dis...

Page 47: ... video might not output as settings of HDMI Video Format 81 and 24p Output 81 It may display as Side by Side 2 screen structure when playback of the 3D video is started Depending on the operation the setting of the Signal Format may return to Original and the setting of the 3D Picture Mode may return to Normal when the content is switched or some other operation is performed while viewing 3D BD Vi...

Page 48: ...ef 6mno 9xyz w INPUT REWINDLIVETV BACK RETURN RADIO TV 10s 60s PROG CHECK REC TEXT STTL CHAPTER MANUALSKIP AD DRIVE SELECT D I R E C T N A V I G A T O R Time Remaining 30h30m HDD Page 003 003 Select Grouped Titles VIDEO OPTION Birds World news Football Dogs and Cats 1 1 1 1 04 10 04 10 29 10 29 10 Start Time 22 46 Prog Type Drama Rec Time 0h30m PLAY RETURN PHOTO MUSIC Drama Sport Video AVCHD Movie...

Page 49: ...om accidental deletion 1Select Set up Protection or Cancel Protection in Edit then press OK 2Select Yes then press OK appears when setting the protection e g HDD Time Remaining 30h30m HDD Page 003 003 Select Grouped Titles VIDEO OPTION Birds World news Football Dogs and Cats 1 1 1 1 04 10 04 10 29 10 29 10 Start Time 22 46 Prog Type Drama Rec Time 0h30m PLAY RETURN PHOTO MUSIC Drama Sport Video AV...

Page 50: ... end point before a start point 1Select Divide Title in Edit then press OK 2Press OK at the point to divide the title To confirm the division point Select Preview then press OK The unit plays 10 seconds before and after the division point To change the division point Restart play and select Divide then press OK at the division point 3Select Continue then press OK 4Select Divide then press OK Video...

Page 51: ... the chapter then press DEL Multiple editing Select the chapter then press the Yellow button A check mark is displayed Repeat this step until you select the chapters to be deleted Press the Yellow button again to cancel 2Select Delete then press OK To combine chapters Delete chapter mark 1Select the chapter then press OPTION 2Select Combine Chapters then press OK 3Select Combine then press OK The ...

Page 52: ...press BD RE DVD R CD SD USB 1Insert the disc SD card or USB memory 2Select View Photos then press F U N C T I O N M E N U OK OK Select the event then press e g HDD e g SD To select the label Press 2 1 Start Slideshow 1 Select a date or folder then press the Green button 2 Select Start Slideshow then press OK Switching the Calendar screen HDD Press PAUSE Select the photo then press Press 2 1 to dis...

Page 53: ...DEO Label Album HDD Placing photos in albums of your choice makes it easier to find them 56 3D Label 3D photos MPO are automatically sorted Select from this label to playback in 3D It will playback in 2D when selected from other labels Photo protected HDD New photo which is stored and not viewed HDD Page Select Slideshow Calendar PHOTO OPTION 03 01 2010 29 10 2010 25 02 2011 05 01 2010 0002 0002 C...

Page 54: ...on Effect Effect for the next photo to display can be set This function is not available during the 3D photo playback Repeat Play You can setup to playback repeatedly Music Selection You can select background music on either from HDD or USB or off This function is not available during the 3D photo playback Background Music You can select background music from HDD My Favourites or Playlists or USB ...

Page 55: ... the item then press the Yellow button Repeat this step A check mark is displayed Press the Yellow button again to cancel SD Card OK RETURN SD card is inserted Play Video AVCHD View Photos Copy Video AVCHD Copy New Photos Copy Video MPEG2 e g HDD Page Select Slideshow Calendar PHOTO OPTION 03 01 2010 29 10 2010 25 02 2011 05 01 2010 0002 0002 Copy OK RETURN VIDEO MUSIC 8 12 18 4 DIRECT NAVIGATOR D...

Page 56: ... press OK HDD While selecting album label Select Enter Album Name in Edit then press OK 73 Entering text Select Enter Event Name in Edit then press OK 73 Entering text SD 1While selecting photo Select Set up Protection or Cancel Protection then press OK 2Select Yes then press OK appears when the protection is set Even if the protection is set the photo may be deleted by another unit 1While selecti...

Page 57: ...e of the copied photos will be changed If the number of files folders to be copied exceeds the maximum 104 copying will stop partway through Selecting and copying the photos HDD SD SD USB HDD 1 HDD 1Press FUNCTION MENU 2Select Photo in Playback Contents then press OK SD USB 1Insert the SD card or USB memory e g SD 2Select View Photos then press OK SD Card OK RETURN SD card is inserted Play Video A...

Page 58: ...ying Press and hold BACK RETURN for 3 seconds Photos without shooting date will be categorised using the creation date If the space on the destination drive runs out or the number of files folders to be copied exceeds the maximum 104 copying will stop partway through The name of the copied photos will be changed Copying automatically SD Card OK RETURN SD card is inserted Play Video AVCHD View Phot...

Page 59: ... a disc or USB memory e g USB Music CD Playback will automatically start DVD R CD Playback will automatically start if only MP3 is recorded Select Play Music MP3 or Play Copy Music MP3 then press Playback will start USB To copy MP3 to HDD Press Select Copy then press Copying starts All tracks in the folder will be recorded Cannot record track by track It will be recorded as 1 album to the HDD in 1...

Page 60: ...Press the Red button 2Select VIDEO or PHOTO then press OK HDD DVD R CD USB Playing music recorded on HDD DIRECT NAVIGATOR Music Menu MUSIC OK RETURN Please select to access music Artists Frequently Played Albums Total Tracks 53 HDD Random Play My Favourites OPTION Playlists VIDEO PHOTO Artists My Favourites Frequently Played Random Play Albums Playlists Switching to the VIDEO or PHOTO screens Oper...

Page 61: ...playing the music Press the Red button To change the photos to display 1 While slideshow playing Press OPTION 2 Select Select Photo Album then press OK 3 Select the album then press OK e g To end the slideshow Press BACK RETURN How to create the photo album 56 Add to Album To play music continuously even if the Power off link works 66 Useful functions during music play Registering a track to the M...

Page 62: ...g text Tracks themselves are not deleted from the HDD While displaying the Playlists screen 1Select Remove All Tracks then press OK 2Select Remove then press OK While displaying the Music Menu screen 1Select Clear My Favourites or Clear Frequently Played then press OK 2Select Clear then press OK While displaying the My Favourites Track List of Playlists or Frequently Played screen 1Select Remove t...

Page 63: ...ed into titles every 99th scene and copied This unit cannot copy the titles in the HDD to the media Be careful when deleting the original title after copying to the HDD USB connection cable specified cable such as accessories of the USB equipment Copying HD Video AVCHD format 1 From video equipment Connect the video camera Make the video camera ready for data transfer on the video camera From an S...

Page 64: ...screen icons 63 step 4 Copying SD Video MPEG2 format 1 From video equipment Connect the video camera Make the video camera ready for data transfer on the video camera From an SD card Insert an SD card e g SD Card OK RETURN SD card is inserted Play Video AVCHD View Photos Copy Video AVCHD Copy New Photos Copy Video MPEG2 Copy Video MPEG2 List Start RETURN OK Press OK to start copying SD Card HDD Ed...

Page 65: ...ERA CAST cannot be accessed In the following cases settings are possible using Internet Content Settings 83 When restricting the use of VIERA CAST When the audio is distorted If using slow Internet connection the video may not be displayed correctly A high speed Internet service with a speed of at least 6 Mbps is recommended Be sure to update the software firmware when a software firmware update n...

Page 66: ...nction does not work when recording copying etc The following operations make it possible to keep the power of the unit on and to play music continuously When the unit is directly connected to an amplifier receiver 1While playing music Press OPTION 2Select TV Power Off then press OK Sound may be discontinued for several seconds when the power to the TV is turned off You can operate this unit with ...

Page 67: ...ERA Link function VIERA Link HDAVI Control based on the control functions provided by HDMI which is an industry standard known as HDMI CEC Consumer Electronics Control is a unique function that we have developed and added As such its operation with other manufacturers equipment that supports HDMI CEC cannot be guaranteed These functions may not work normally depending on the equipment condition Ab...

Page 68: ... hub or broadband router as the unit Files not on the HDD cannot be played back Playing back 3D video recorded on this unit may not work properly 3D photos copied to this unit cannot be played back in 3D Editing is not possible Following titles can not be played back A title with remote access restriction A title currently being recorded on this unit A title with audio only format A title with inc...

Page 69: ...en press OK 4 Select the item to playback folder then press OK Menu structure will be different depending on the equipment connected to this unit Select the contents by repeating the operation Convenient functions can be used by pressing OPTION depending on the contents You may not be able to use the Control Panel even if you use the Panasonic DLNA compatible equipment Depending on the contents an...

Page 70: ...sc Play Picture Sound Other Soundtrack Subtitles 1ENG Angle Off 1 Digital 2 0 ch Menu Item Setting Subtitles Turn the subtitle on off and change the language depending on the media Multi Audio Switch in the case of multiple audio Subtitle Language Select the subtitle language in the case of multiple languages Subtitle Style Select the subtitle style recorded on the disc Angle Change the number to ...

Page 71: ...ty when it is output as 1080i 1080p from the HDMI terminal Progressive Select the method of conversion for progressive output to suit the type of title being played Auto Automatically detects the film and video content and appropriately converts it Video Select when using Auto and the content is distorted Film Select this if the edges of the film content appear jagged or rough when Auto is selecte...

Page 72: ... if you have set protection 1Select Format Card then press OK 2Select Yes then press OK 3Select Start then press OK 4Press OK Do not disconnect the AC mains lead while formatting This can render the card unusable When a card has been formatted using this unit it may not be possible to use it on any other equipment If you no longer need BD Live data recorded on the HDD you can delete data with the ...

Page 73: ... then the screen returns to the DIRECT NAVIGATOR screen and so on To end partway Press BACK RETURN Text is not added If a name is long parts of it may not be shown in some screens 1 Press 7 to move to the 7th row 2 Press 7 twice to highlight R 3 Press OK _ Enter Title Name 1 2 3 4 5 A B C a D E F d G H I N O g J K L j M m 6 7 8 9 0 b c e f h i k l n _ o Space Set Delete P Q R S p T U V t W X Y Z w...

Page 74: ...her Favourites list Press the Green button To add channels to the Favourites list 1 Select the channel in the All DVB Channels column then press OK Repeat this step Yellow Add all the available channels to the Favourites This function is available only when there are no channels in the Favourites To change the order of the channels list 1 Select the channel in the Favourites column to move then pr...

Page 75: ...shed Channel Sorting by Region If you want to sort the channel list best suited to your region follow the on screen instructions to select the region you live in Manual Tuning You can set each channel manually 1 Select the frequency with 3 4 Adjust the frequency by checking the signal strength and signal quality displays 2 Press OK to start scan The set channel is displayed in the table Update Cha...

Page 76: ...e selected language is not available then the original language will be selected Audio Description Select whether the Audio Description is set to be active or not Preferred Subtitles Choose the subtitle language for broadcast If the selected language is not available then the original language will be selected After performing Update Channel List or Manual Tuning if the channel number has already ...

Page 77: ...Control Set an age limit of BD Video play Follow the on screen instructions PIN is required to change 74 DVD Video Parental Control Set a rating level to limit DVD Video play Follow the on screen instructions PIN is required to change 74 Child Lock You can restrict playback of the following titles Titles that are recorded with guidance information Titles restricted by Child Lock 76 Titles with ico...

Page 78: ...the downmix system of multi channel to 2 channels sound Select Surround encoded when the connected equipment supports the virtual surround function There is no effect on Bitstream via HDMI AV OUT and DIGITAL AUDIO OUT terminal The audio will be output in Stereo in the following cases AVCHD playback BD V Playback of clicking sound on the menu and audio with secondary video in picture in picture mod...

Page 79: ... Mis sync between the video and audio is corrected by delaying the audio output On Screen Information Select the approximate time until the channel information screen 26 disappears automatically Unit s Display Changes the brightness of the unit s display Screen Saver This is to prevent burn in on the screen If On is selected the masked off area on the screen becomes grey Depending on the condition...

Page 80: ... to match the type of TV connected Aspect for 4 3 Video To play a 4 3 title set how to show pictures on a 16 9 widescreen TV TV System Set in accordance with the TV System for the connected TV Connection Setup Connection Connection TV Aspect 3D Settings Aspect for 4 3 Video TV System HDMI Connection Connection 3D Settings 3D Settings 3D Type 3D Playback Message 16 9 When connected to a 16 9 widesc...

Page 81: ...ther to use Deep Colour output when a TV that supports Deep Colour is connected HDMI Audio Output Select Off when connected to an amplifier not compatible with HDMI with a DIGITAL AUDIO OUT terminal 7 1ch Audio Reformatting BD V Surround sound with 6 1 ch or less is automatically expanded and played back at 7 1 ch If Off is selected sound is played over the original number of channels Note that in...

Page 82: ... 2 channels use the same frequency band and there is consequently a greater risk of reception interference This can cause the connection speed to drop or the connection to become unstable Network Setup Network Network Network Easy Setting Network Settings Network Network Settings Network Settings Wireless Settings IP Address DNS Settings Proxy Server Settings Internet Content Settings Home Network...

Page 83: ...nnection Setting device name It is also possible to change the name of this unit on the network Select from a preset list Select the preset name then press OK Create name Enter the name 73 Entering text Registration type for remote devices Remote device list This function cannot be enabled when Automatic is selected in Registration type for remote devices above To register equipment manually 1 Sel...

Page 84: ...ed the aerial signal is output from this unit Remote Control Change the remote control code on the main unit and the remote control if you place other Panasonic products close together Use Set Code 1 the factory set code under normal circumstances 1 Select the code then press OK 2 While pressing OK press and hold the number button 1 to 6 for more than 5 seconds 3 Press and hold OK for more than 5 ...

Page 85: ... the PIN for parental control 74 System Update Software Update in Standby When you set this unit to standby mode software firmware updates 87 are downloaded automatically Software Update Now Broadcast Software of this unit will be updated from broadcasts if update information is detected 87 Software Update Now Internet Software of this unit will be updated from Internet if update information is de...

Page 86: ... 6779 Croatian 7282 Czech 6783 Danish 6865 Dutch 7876 English 6978 Esperanto 6979 Estonian 6984 Faroese 7079 Fiji 7074 Finnish 7073 French 7082 Frisian 7089 Galician 7176 Georgian 7565 German 6869 Greek 6976 Greenlandic 7576 Guarani 7178 Gujarati 7185 Hausa 7265 Hebrew 7387 Hindi 7273 Hungarian 7285 Icelandic 7383 Indonesian 7378 Interlingua 7365 Irish 7165 Italian 7384 Japanese 7465 Javanese 7487...

Page 87: ...de The unit s display during the update e g When FINISH is displayed update of the software firmware has completed It may take up to a few hours until the update is completed depending on the network or broadcast environment If the timer recording is scheduled within the following time at the start of the download the download will not be executed From broadcast Within 5 hours From Internet Within...

Page 88: ...eration area of the remote control Perform the setting if you cannot operate the TV with the buttons in the TV operation area 1 While pressing Í TV enter the code 89 with the number buttons 2 Point the remote control at the TV Test by turning on the TV and changing channels Repeat the procedure until you find the code that allows correct operation If the brand of your TV is not listed or the code ...

Page 89: ... 05 PROVIEW 52 RADIOLA 05 NOBLEX 33 NORDMENDE 10 ONWA 30 39 70 PEONY 49 69 PHILIPS 05 06 46 PIONEER 37 38 PYE 05 SABA 10 FUJITSU 53 ITT LG GOLDSTAR 05 50 51 GRADIENTE 36 25 JVC 17 30 39 70 KOLIN 45 05 50 51 MAG 52 LOEWE 07 46 FUNAI 63 67 GOODMANS 05 GRUNDIG 09 IRRADIO 30 KDS 52 KONKA 62 HITACHI 05 22 23 40 41 SALORA 26 SANSUI 05 32 42 43 65 68 SAMSUNG SCHNEIDER 05 29 30 SELECO 05 25 SIEMENS 09 SON...

Page 90: ...ier with a digital audio cable to enjoy the TV audio on the amplifier Amplifier connections HDMI ARC compatible HDMI IN HDMI OUT ARC compatible HDMI AV OUT This unit s rear panel 3D programmes can be played back when this unit is connected to a 3D compatible amplifier and a 3D compatible TV using a High Speed HDMI cable You will not be able to view 3D programmes with this connection if your amplif...

Page 91: ...ur Audio is not output during 3D playback of BD Video When using DIGITAL AUDIO OUT terminal OPTICAL IN DIGITALAUDIOOUT PCM BITSTREAM OPTICAL This unit s rear panel Amplifier s rear panel Optical digital audio cable Insert fully with this side up Do not bend the cable sharply When using AUDIO OUT terminal AUDIO OUT L R AUDIO IN L R This unit s rear panel Audio cable Amplifier s rear panel ...

Page 92: ...timer programmes 37 REMOVE The USB device is drawing too much power Remove the USB device START Update of the software firmware is started You cannot operate the unit until the update is complete 87 SW DL Software firmware is downloading Download will stop when the unit is turned on or the timer recording starts 87 UNSUPPORT You have inserted a disc the unit cannot play 18 You tried to operate wit...

Page 93: ...Now press Í I on the main unit again to turn the unit on H or F stands for a number There is something unusual The service number displayed after H and F depends on the unit s condition Check the unit using the troubleshooting guide 94 If the service number does not disappear do the following 1 Disconnect the plug from the household mains socket wait a few seconds then reconnect it 2 Press Í I to ...

Page 94: ...dby mode when the TV is set to standby mode The display is dim Change Unit s Display 79 0 00 is flashing on the unit s display Set the clock 85 The clock does not display on the unit when switched to standby The clock does not display when Power Save in Standby is activated Ensure Power Save in Standby is set to Off 84 Screen size is wrong Check the TV Aspect or Aspect for 4 3 Video 80 Adjust the ...

Page 95: ...d with HDMI cables Reduce the number of connected devices The picture may be distorted or a black screen may appear between scenes recorded with different aspect ratios DVD R DL and R DL discs have two writable layers on one side Video and audio may momentarily cut out when the unit is switching layers Set Deep Colour Output or Contents Type Flag to Off 81 3D video is not output correctly Check th...

Page 96: ...may be lost or the HDD may become unusable We cannot offer any guarantee regarding lost programmes Auto Renewal Recording does not work properly The programme will not be overwritten in the following cases the programme is protected any programme is being played back a screen such as DIRECT NAVIGATOR is displayed Instead the programme will be saved as a separate programme and that will be overwrit...

Page 97: ... If inserted during playback the USB device may not be recognized by this unit Disconnect and reconnect the USB device If it still does not recognize the connection turn this unit off and on again USB devices connected using a USB hub may not be recognized by this unit The TV Guide System does not receive any data If signal quality is bad ghost images or limited reception the TV Guide system may n...

Page 98: ...eous use with a microwave cordless telephone etc at 2 4 GHz may result in connection interruptions or other problems On the Wireless Settings screen 82 the continuous lighting of at least 4 Reception indicators is the target for a stable connection If 3 or fewer indicators are lit or the connection is being interrupted change the position or angle of your Wireless router and see if the connection ...

Page 99: ...n without turning the unit on let the unit adjust to the room temperature and wait 2 3 hours until condensation is gone Cigarette smoke etc causes malfunction or breakdown The unit may breakdown if cigarette smoke or bug spray vapour etc gets inside the unit Before moving the unit ensure the disc tray is empty 1 Turn the unit off Wait until BYE disappears from the display 2 Remove the AC mains lea...

Page 100: ... not displayed If you purchase DivX VOD content using a registration code different from this unit s code you will not be able to play this content To cancel the unit s registration Select Yes in DivX Registration Use the deregistration code to cancel the registration in www divx com Regarding DivX VOD content that can only be played a set number of times Some DivX VOD contents can only be played ...

Page 101: ...he timer recording starts Operations that can be performed while recording programme Playback of HDD Playback of discs 1 2 Playback of AVCHD title on SD Card Playback of photo Playback of music recorded on HDD Playback of USB memory Starting the timer recording while executing other operation Executing operation Starting of the timer recording Recording the title 1 Playing the title 2 Editing the ...

Page 102: ...ms at 1 kHz Output impedance Less than 1 k Digital audio out Optical terminal PCM Dolby Digital DTS MPEG HDMI terminal PCM Dolby Digital DTS MPEG Dolby Digital Plus Dolby TrueHD DTS HD Master Audio DTS HD High Resolution Audio HDMI Output 19 pin type A 1 pc This unit supports HDAVI Control 5 function Other terminals USB Port Type A 2 pcs SD Card Slot 1 pc LAN Ethernet Port 10BASE T 100BASE TX Inte...

Page 103: ... times Depending on the content being recorded the recording time may become shorter than indicated Recording time may vary depending on the bit rate of broadcasting High Definition HD quality estimated bit rate is 8 Mbps Standard Definition SD quality estimated bit rate is 4 Mbps Regarding recording time remaining Remaining time is calculated with a bit rate of approx 8 Mbps But the bit rate diff...

Page 104: ...ile system MPO conforming MPF Multi Picture Format Maximum numbers of folders and files MP3 Playable media HDD DVD R DVD R DL CD R CD RW USB device Compression rate 32 kbps to 320 kbps Sampling rate 16 kHz 22 05 kHz 24 kHz 32 kHz 44 1 kHz 48 kHz Maximum numbers of folders and files Audio information Terminal Digital Audio Output Bitstream PCM HDMI AV OUT Output using original audio 1 BD Video 7 1c...

Page 105: ...sible from USB device to HDD After Video recording transfer to HDD is completed the playback becomes possible 3 SD Video Entertainment Video Profile HD Video High Definition Playable media SD Card USB device Codec MPEG 4 AVC H 264 File Format AVCHD format conforming Video Recording conversion and transfer is possible from USB device to HDD After Video Recording conversion and transfer to HDD is co...

Page 106: ...e Content so that their intellectual property including copyright in such content is not misappropriated This device uses WM DRM software to play Secure Content WM DRM Software If the security of the WM DRM Software in this device has been compromised owners of Secure Content Secure Content Owners may request that Microsoft revoke the WM DRM Software s right to acquire new licenses to copy display...

Page 107: ...ation YouTube is a trademark of Google Inc The FREEVIEW service is subject to coverage An aerial upgrade may be required The FREEVIEW FREEVIEW FREEVIEW HD and FREEVIEW HD words and logos are trade marks of DTV Services LTD DTV Services Ltd 2002 2008 GUIDE Plus SHOWVIEW are 1 registered trademarks or trademarks of 2 manufactured under license from and 3 subject of various international patents and ...

Page 108: ...ifier 90 Basic connection 10 HDMI cable 10 90 Network 12 Copy Music 59 Copy Photo 57 Copy Video HD Video AVCHD 63 SD Video MPEG2 64 D Delete Delete BD Video data 72 Music 62 Photo 56 Video 48 Delete all photos HDD 77 Delete all titles HDD 77 Delete BD Video data 72 Digital text 27 DIRECT NAVIGATOR Music 60 Photo 53 Video 42 Disc Media information 18 Playback menu 70 Display Navigation 23 Divide Ti...

Page 109: ... Firmware Update 87 VIERA CAST 65 Network easy setting 15 82 P Partial Delete 50 PAUSE LIVE TV 28 Photo Copy 57 Delete 56 DIRECT NAVIGATOR 53 Edit 55 Playback 52 Protection 56 Slideshow 52 61 Picture Playback menu 71 Picture in picture 39 PIN 74 Play Playback menu 70 Playback Music Audio CD 59 MP3 59 Recorded on HDD 60 Playback Photo 52 Slideshow 52 61 Playback Video AVCHD 40 BD Video 39 BD Video ...

Page 110: ...Network 82 Others 84 Picture 78 Sound 78 Tuning 74 Signal condition 76 SkypeTM 65 Slideshow 52 61 Software Firmware Update 87 Sound Playback menu 71 Specifications 102 Subtitles Broadcasts 27 Playback 46 T Timer recording 32 Auto Renewal Recording 36 Confirm and edit 37 Guide Link 34 Manually programming timer recording 36 Recommendation Booking 34 Series Timer Recording 34 Split Programme 34 Tuni...

Page 111: ...ere you purchased the items Penalties may be applicable for incorrect disposal of this waste in accordance with national legislation For business users in the European Union If you wish to discard electrical and electronic equipment please contact your dealer or supplier for further information Information on Disposal in other Countries outside the European Union These symbols are only valid in th...

Page 112: ...s Take a browse on our website for further details Digital Switchover for Terrestrial broadcasts Starting in late 2007 and ending in 2012 TV services in the UK will go completely digital TV region by TV region If you have any questions please call Digital UK on 08456 50 50 50 or visit www digitaluk co uk Digital Switchover will cover a period of several weeks When it starts you will lose all Analo...

Reviews: