40
RQT9059
Editing titles/chapters
[HDD]
[RAM]
[-R]
[-R]DL]
[-RW‹V›]
[+R]
[+R]DL]
(You cannot edit finalized discs.)
[+RW]
[-RW‹VR›]
≥
The maximum number of items on a disc:
[HDD]
– Titles: 499
– Chapters: Approx. 1000 per title
(Depends on the state of recording.)
[RAM]
[-R]
[-R]DL]
[-RW‹V›]
[+R]
[+R]DL]
[+RW]
– Titles:99 (
[+R]
[+R]DL]
[+RW]
49 titles)
– Chapters:Approx. 1000 (
[+R]
[+R]DL]
[+RW]
Approx. 254)
(Depends on the state of recording.)
[Note]
≥
Once deleted, divided or partially deleted, recorded content cannot
be restored to its original state. Make certain before proceeding.
≥
You cannot edit during recording or copying, etc.
≥
Restricted recording information remains even after editing (e.g.
dividing a title etc).
≥
[+R]
[+R]DL]
Each time you edit a title the information is saved to the
free space on the disc. If you do this numerous times, the amount
of free space decreases.
We recommend that you edit on the HDD and then copy to disc.
You can modify (remove unnecessary parts, divide, etc.) recorded
programmes.
Preparation
≥
Turn on the television and select the appropriate AV input to suit
the connection to this unit.
≥
Turn the unit on.
≥
Press [DRIVE SELECT] to select the drive containing the recorded
title to be edited.
≥
[RAM]
Release protection (
➡
58, Setting the protection).
1
During play or while stopped
Press [DIRECT NAVIGATOR].
[HDD]
[RAM]
When “VIDEO” is not selected, Press the “Red”
button to select “VIDEO”.
2
Press [
3
,
4
,
2
,
1
] to select the title.
3
Press [OPTION].
4
Press [
3
,
4
] to select the operation
and press [OK].
≥
If you select “Edit”, press [
3
,
4
] to select the operation and
press [OK].
∫
If you select “Chapter View”
5
Press [
3
,
4
,
2
,
1
] to select the
chapter.
To start play
➡
Press [OK].
To edit
➡
Step 6.
≥
To show other pages/Multiple editing (
➡
above)
6
Press [OPTION], then [
3
,
4
] to select
the operation and press [OK].
≥
You can go back to Title View.
To return to the previous screen
Press [RETURN].
To exit the screen
Press [DIRECT NAVIGATOR].
Title/Chapter
Programmes are recorded as a single title consisting of one
chapter.
[HDD]
[RAM]
You can divide a title into multiple chapters. Each
section between the division points becomes a chapter. (
➡
30, 41,
Create Chapter)
[HDD]
[RAM]
You can change the order of chapters and create a
playlist (
➡
42).
Editing titles/chapters and playing
chapters
Title
Chapter
Start
End
Chapter
Title
Chapter
Chapter
Chapter
To show other pages
Press [
3
,
4
,
2
,
1
] to select “Previous” or “Next” and
press [OK].
≥
You can also press [
:
,
9
] to show other pages.
Multiple editing
Select with [
3
,
4
,
2
,
1
] and press [
;
]. (Repeat.)
A check mark appears. Press [
;
] again to cancel.
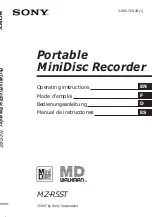
DIRECT NAVIGATOR
Grouped Titles
Previous
Pa
g
e 02/02
Next
ARD 10.10.
ARD 11.10.
00
8
HDD
Select
OK
RETURN
OPTION
Previous
Next
MUSIC
PICTURE
VIDEO
Title View screen
Set up Protection
Cancel Protection
Partial Delete
Divide Title
Chan
g
e Thumbnail
Enter Name
Properties
Edit
Create Group
Release Groupin
g
Table Display
PICTURE/MUSIC
All Titles
Chapter View
Delete
Refer to “Title
operations”
(
➡
41).
Switching the Direct Navigator
appearance (
➡
31)
≥
Playing still pictures (
➡
34)
≥
To play music recorded on HDD
(
➡
36)
To edit the group of titles
[HDD]
(
➡
31)
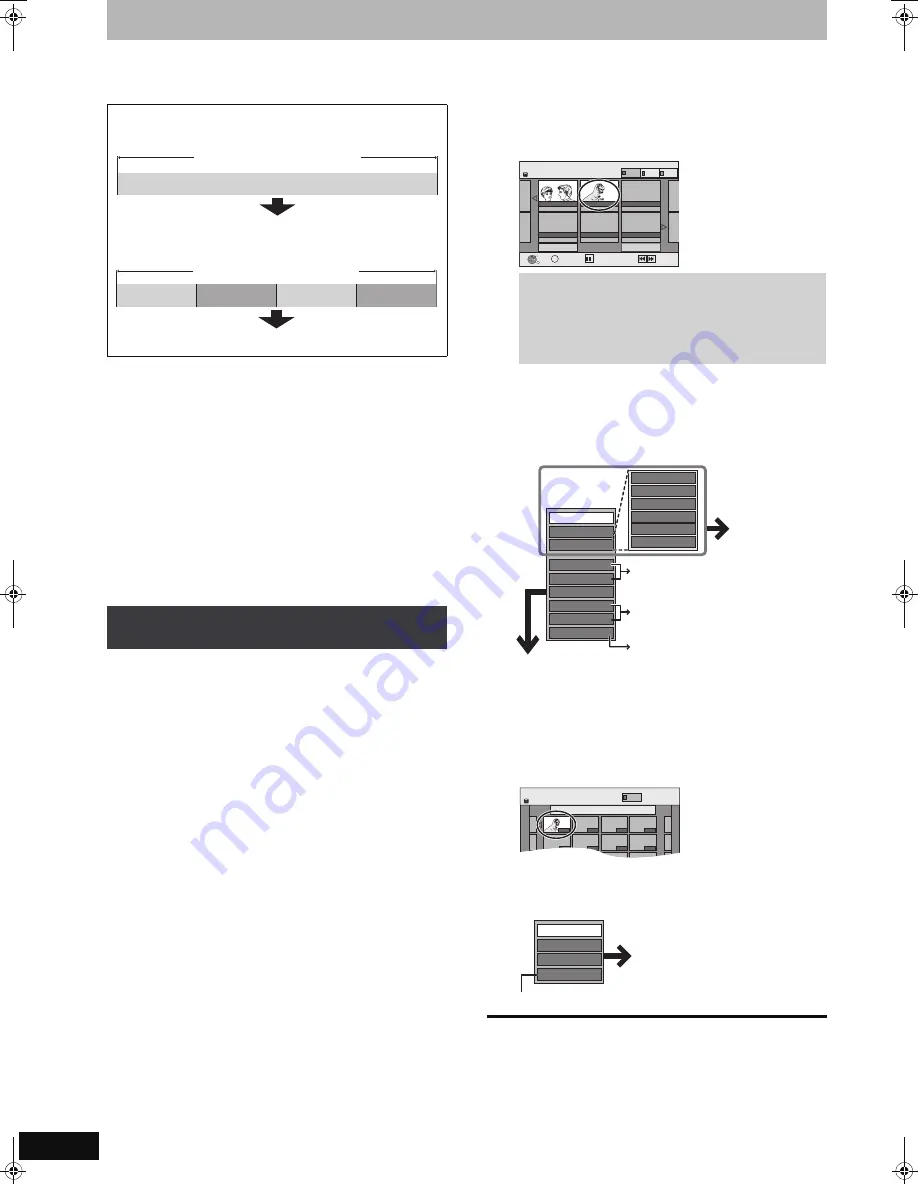
DIRECT NAVIGATOR Chapter View
00
8
ARD 11.10.
---
---
---
HDD
0:31.24
VIDEO
Chapter View screen
Create Chapter
Combine Chapters
Title View
Delete Chapter
Refer to “Chapter operations”
(
➡
41).
DMREH585EG-RQT9059-L_eng.book 40 ページ 2007年12月24日 月曜日 午後6時42分