background image

N

AVEGACION

D

EL

M

ENU

D

E

I

CONOS

15

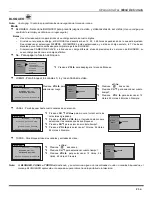
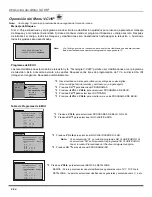
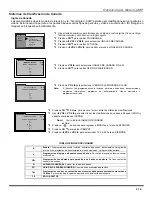
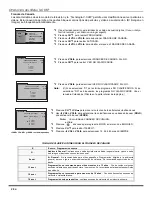
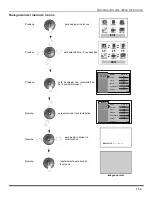
Navegación del menú de íconos

Presione

para deplegar los íconos.

Presione

para seleccionar el ícono deseado.

Presione

para desplegar las características
del ícono seleccionado

Presione

para seleccionar la característica.

Presione

MODO                     VIVID

COLOR

TINTE

BRILLO

CONTRASTE

NITIDEZ

NORMAL

NO

u

-- --

 --

 I -- -- --


 -- -- -- -- --

-- -- -- -- --

 -- 

I

-- --

 --

 I -- -- --


-- --

 --

 I -- -- --


-- --

 --

 I -- -- --


IMAGEN

AJ. IMAGEN

OTROS  AJ.

u

MODO                     VIVID

COLOR

TINTE

BRILLO

CONTRASTE

NITIDEZ

NORMAL

NO

u

-- --

 --

 I -- -- --


 -- -- -- -- --

-- -- -- -- --

 -- 

I

-- --

 --

 I -- -- --


-- --

 --

 I -- -- --


-- --

 --

 I -- -- --


IMAGEN

AJ. IMAGEN

OTROS  AJ.

u

para ajustar o activar la
característica

BRILLO 32 -- -- -- I -- -- --

Presione

repetidamente para salir de
los menús.

Imágen normal

EXIT

EXIT

Summary of Contents for CT 32SX12

Page 1: ...evision Operating Instructions CT 32SX12 CT 32SX12U CT 36SX12 CT 36SX12U TQB2AA0383 0 20404 PRINTED IN USA For assistance please call 1 800 211 PANA 7262 or send e mail to consumerproducts panasonic com USA only ...

Page 2: ... EXPRESSLY APPROVED BY MATSUSHITA ELECTRIC CORPORATION OF AMERICA COULD CAUSE HARMFUL INTERFERENCE WHICH WOULD VOID THE USER S AUTHORITY TO OPERATE THIS EQUIPMENT FCC CAUTION THIS PRODUCT UTILIZES BOTH A CATHODE RAY TUBE CRT AND OTHER COMPONENTS THAT CONTAIN LEAD DISPOSAL OF THESE MATERIALS MAY BE REGULATED IN YOUR COMMUNITY DUE TO ENVIRONMENTAL CONSIDERATIONS FOR DISPOSAL OR RECYCLING INFORMATION...

Page 3: ...tion 9 Remote Control Operation 10 Battery Installation 10 Mode Operational Key Chart 11 Programming the Remote 12 Programming With a Code 12 Programming Without a Code 12 Component Codes 13 Icon Menu Navigation 15 Main Menu Icons 16 Icon Menus 16 Icon Menu Operation 17 Set Up 17 Picture 19 Timer 20 Audio 21 Channels 22 Lock 23 V Chip Menu Operation 24 Troubleshooting Chart 29 Limited Warranty 30 ...

Page 4: ...a mild soap solution or window cleaner with a soft clean cloth DO NOT USE ABRASIVE CLEANERS Avoid excessive moisture and wipe dry Note Do not spray any type of cleaning fluid directly on the screen Cabinet and Remote Control For cabinets and remote control use a soft cloth dampened with water or a mild detergent solution Avoid excessive moisture and wipe dry Do not use benzene thinner or other pet...

Page 5: ...in instability causing possible injury Optional Cable Connections Shielded audio and video cables should be used between components For best results Use 75 ohm coaxial shielded cables Use appropriate input and output connectors that match your component connectors Avoid long cables to minimize interference AC Power Supply Cord CAUTION TO PREVENT ELECTRIC SHOCK MATCH WIDE BLADE OF PLUG TO WIDE SLOT...

Page 6: ...s television is designed to display constantly moving images on the screen Continuous viewing of stationary images such as letterbox pictures on standard screen TVs with top bottom bars non expanded standard 4 3 pictures on wide screen TVs with side bars shown on each side of an image stock market report bars ticker running at the bottom of the screen video game patterns fixed scoreboards bright s...

Page 7: ...ETIC CORRECTION u TILT CORRECTION u Press VOL to select TV or CABLE IDIOMA LANGUE ENGLISH CABLE MODE AUTO PROGRAM PRESS ACTION TO EXIT u u u AUTO SET UP FIRST PLEASE CONNECT THE ANTENNA GEOMAGNETIC CORRECTION u TILT CORRECTION u Press VOL to start Auto Programming IDIOMA LANGUE ENGLISH CABLE MODE AUTO PROGRAM PRESS ACTION TO EXIT u u u AUTO SET UP FIRST PLEASE CONNECT THE ANTENNA GEOMAGNETIC CORRE...

Page 8: ...l Press to select VIDEO 3 input mode Note The front control panel located behind the customer control door can be used to access menus and switch video mode when the remote control is not available A second VCR Camcorder a video disc player video game equipment or DSS equipment can also be connected to the video inputs See the optional equipment manual for details Procedure 1 Connect equipment to ...

Page 9: ...ion to CH 3 or CH 4 depending on the Cable box RF out 2 Using the cable box tune to the premium cable channel you want to view Recording a premium scrambled cable channel Procedure 1 Press the TV VIDEO button on the remote control to select the video input VIDEO 1 VIDEO 2 etc connected to your VCR 2 Turn the VCR ON 3 Tune the VCR to Channel 3 or 4 depending on your VCR 4 Using your cable box tune ...

Page 10: ...r recording and monitoring Amplifier Connection To Audio Amp Connect to an external audio amplifier input for listening to a stereo system Note TO AUDIO AMP terminals cannot be connected directly to external speakers Audio Adjustments 1 Select TV SPEAKERS ON from AUDIO menu 2 Set amplifier volume to minimum 3 Adjust TV volume to desired level 4 Adjust amplifier volume to match the TV 5 Select TV S...

Page 11: ...ponent color inputs provide luminance and color separation Use the L left and R right audio inputs Select DTV STB to 480i output mode TV set can receive 480i signal only TERMINALS ON BACK OF DTV STB OR DVD PLAYER DIGITAL TV OUTPUT PR PB Y MAIN VIDEO NTSC OUTPUT R AUDIO L S VIDEO R AUDIO L VIDEO TERMINALS ON BACK OF TV CABLES NOT SUPPLIED S VIDEO AUDIO VIDEO Y PB PR PROG OUT L COMPONENT TO AUDIO AM...

Page 12: ...omponent function buttons Press numeric keypad to select any channel 7 4 1 2 5 8 0 9 6 3 R TUNE Press to switch to previously viewed channel or video mode EUR7613Z10 Battery Installation Use two AA batteries Remove battery cover by pushing in and up near arrow Install batteries matching and polarity signs Replace the battery cover Note Incorrect installation can cause battery leakage and corrosion...

Page 13: ...EFT TV VOLUME NAVIGATION LEFT ACTION ACTION DBS MENU RECALL DISPLAY TV DISPLAY DBS PROG INFO ONSCREEN VCR DISPLAY DVD DISPLAY EXIT DBS EXIT GUIDE DBS GUIDE 1 DIGIT 1 DIGIT 1 DIGIT 1 2 DIGIT 2 DIGIT 2 DIGIT 2 3 DIGIT 3 DIGIT 3 DIGIT 3 4 DIGIT 4 DIGIT 4 DIGIT 4 5 DIGIT 5 DIGIT 5 DIGIT 5 6 DIGIT 6 DIGIT 6 DIGIT 6 7 DIGIT 7 DIGIT 7 DIGIT 7 8 DIGIT 8 DIGIT 8 DIGIT 8 9 DIGIT 9 DIGIT 9 DIGIT 9 0 DIGIT 0 ...

Page 14: ...uence method Confirm that the external component is plugged in and on Turn the component off Press and together for at least 5 seconds Press appropriate component button on the Remote Control Press VOL to move forward to the next code Press VOL to move backward Press the Remote Control to test the component If the procedure was successful the component will turn on Note Repeat the above steps unti...

Page 15: ... JVC 310 311 334 339 Kenwood 306 310 311 339 LXI 300 305 306 307 308 309 Magnavox 323 324 331 Marantz 310 311 339 Marta 306 Memorex 309 324 MGA 338 340 341 347 348 Minolta 300 345 Mitsubishi 338 340 341 347 348 Multitech 304 347 NEC 310 311 334 339 Olympic 323 324 Optimus 306 321 328 335 Brand Code Orion 320 326 Panasonic 321 322 323 324 J C Penney 300 305 310 311 324 339 345 Pentax 300 311 345 Ph...

Page 16: ...15 Realistic 232 Regal 212 218 240 241 242 245 Regency 234 Rembrandt 205 232 237 Samsung 205 Scientific Atlanta 211 212 213 Slmark 201 205 Sprucer 205 210 Stargate 205 232 Teleview 201 205 Texscan 244 Tocom 235 Toshiba 204 Unika 225 232 Universal 222 232 Videoway 206 Viewstar 229 230 Zenith 200 217 Zenith Drake Satellite 200 Brand Code Saba 101 Samsung 110 Sharp 108 Sony 104 Technics 100 Thomson 1...

Page 17: ... Press to select feature Press VIDEO ADJ PICTURE PIC MODE VIVID COLOR TINT BRIGHTNESS PICTURE SHARPNESS NORMAL NO u I I I I I OTHER ADJ VIDEO ADJ PICTURE PIC MODE VIVID COLOR TINT BRIGHTNESS PICTURE SHARPNESS NORMAL NO u I I I I I OTHER ADJ to adjust or activate feature BRIGHTNESS 32 I Press repeatedly to exit menus NORMAL PICTURE EXIT EXIT ...

Page 18: ...EFER TO PAGE CLOCK SET TIME DAY 20 SLEEP HOW LONG 20 TIMER DAY ON TIME OFF TIME ENTER CHANNEL SET 20 REFER TO PAGE CAPTION MANUAL CAPTION INPUT LABEL 22 REFER TO PAGE AUDIO ADJ MODE STEREO SAP or MONO BASS TREBLE BALANCE OR NORMAL 21 OTHER ADJ AI SOUND BBE 21 SURROUND MODE 21 SPEAKERS ON OFF VARIABLE AUDIO OUT OFF FIXED AUDIO OUT 21 REFER TO PAGE VIDEO ADJ PIC MODE COLOR TINT BRIGHTNESS PICTURE SH...

Page 19: ...PROGRAM To manually add or delete channels Press VOL to select English Spanish or French SETUP CC IDIOMA LANGUE PROG CHAN OTHER ADJ MODE ENGLISH u Press VOL to select TV or CABLE SETUP CC IDIOMA LANGUE PROG CHAN OTHER ADJ MODE AUTO PROGRAM MANUAL PROGRAM u u u CABLE Press VOL to start AUTO PROGRAM SETUP CC IDIOMA LANGUE PROG CHAN OTHER ADJ MODE AUTO PROGRAM MANUAL PROGRAM u u u CABLE Press VOL to ...

Page 20: ...nded set up for Closed Caption on Mute is CC ON MUTE C1 CC MODE OFF SETUP IDIOMA LANGUE PROG CHAN OTHER ADJ CC CC MODE OFF CC ON MUTE NO CC Press VOL to select OFF When Closed Caption is not desired C1 For video related information to be displayed up to 4 lines onscreen at a time It does not block relevant parts of the picture Text may be in any language C2 Another Closed Captioning mode for video...

Page 21: ... to adjust picture tilt SETUP IDIOMA LANGUE PROG CHAN OTHER ADJ CC AUTO POWER ON OFF CHAN BANNER OFF u GEOMAGNETIC CORR TILT CORRECTION u TILT CORRECTION 0 t TO ADJUST u PRESS ACTION TO EXIT l Press VOL to select VIVID This is the default mode It provides enhanced picture contrast and sharpness for viewing in a well lighted room STANDARD Recommended for normal viewing conditions with subdued room ...

Page 22: ...the automatic OFF after 90 minutes will be cancelled TIMER Activation The TIMER is active when the television is OFF or ON The television will switch to the selected channel at the selected time set in the TIMER Press VOL or VOL to select hours AM or PM Press CH to select minutes position Press VOL or VOL to select minutes Press CH to highlight DAY then press VOL to select day CLOCK SET TIMER TIME...

Page 23: ...VOL or VOL to adjust BASS Increase or decrease the low frequency response TREBLE Increase or decrease the high frequency response BALANCE Emphasize the left right speaker volume NORMAL Reset BASS TREBLE and BALANCE adjustments to factory default settings AUDIO ADJ AUDIO OTHER ADJ SURROUND SPEAKERS NO u STEREO SAP MONO MODE BASS TREBLE BALANCE NORMAL Press VOL to select ON or OFF OTHER ADJ AUDIO AU...

Page 24: ...input GAME Select when Video GAME is connected to video input AUX Select when other components are connected _____ Select to delete input label Press VOL to display next menu Use remote numeric keypad to select desired channel refer to your local TV guide Press CH to select ENTER CAPTION Press VOL or VOL to select characters Note Delete channel captions by entering spaces in all four character slo...

Page 25: ...E CHANNEL or ALL is selected and if a blocked channel or video input is selected the message LOCKED displays in the upper right corner of the TV screen Press VOL to display LOCK MODE GAME menu MODE LOCK LOCK SET BLOCK PROGRAMS U S TV PROGRAMS OFF HOW LONG STATUS ENTER CODE FIRST OFF Press twice Press CH to highlight HOW LONG Press VOL to select 12 Hours 24 Hours 48 Hours or ALWAYS ACTION LOCK LOCK...

Page 26: ...o remember and record it in a safe place Press CH to enter the BLOCK PROGRAMS field Press VOL or VOL to select U S TV PROGRAMS Press CH to highlight STATUS Press VOL or VOL to display U S TV PROGRAMS RATING CHART MODE LOCK LOCK SET BLOCK PROGRAMS U S TV PROGRAMS OFF HOW LONG STATUS ENTER CODE FIRST OFF Press VOL to select U S TV PROGRAMS ON or OFF Press CH to select VIEW NR PROGRAMS LOCK U S TV PR...

Page 27: ...ience It contains little or no violence no strong language and little or no sexual dialogue or situations TV PG Parental guidance suggested The program may contain infrequent coarse language limited violence some suggestive sexual dialogue and situations TV 14 Parents strongly cautioned This program may contain sophisticated themes sexual content strong language and more intense violence TV MA Mat...

Page 28: ... U S MOVIES ON or OFF Press CH to select VIEW NR PROGRAMS LOCK U S MOVIES VIEW NR PROGRAMS OFF u YES u G PG PG 13 R NC 17 X Press VOL to select VIEW NR PROGRAMS YES or NO Note Some movies are not rated for a variety of reasons Old movies and foreign films are usually not rated LOCK U S MOVIES VIEW NR PROGRAMS OFF u YES u G PG PG 13 R NC 17 X Press CH or CH to move between different ratings Use VOL...

Page 29: ...TS ONLY Use the numeric keypad to enter your four digit code Use a code that is easy to remember and record it in a safe place Press CH to enter the BLOCK PROGRAMS field Press VOL or VOL to select CANADIAN ENGLISH Press CH to highlight STATUS Press VOL or VOL to display CANADIAN ENGLISH RATING CHART MODE LOCK LOCK SET BLOCK PROGRAMS CANADIAN ENGLISH OFF HOW LONG STATUS ENTER CODE FIRST OFF Press V...

Page 30: ...ter your four digit code Use a code that is easy to remember and record it in a safe place Press CH to enter the BLOCK PROGRAMS field Press VOL or VOL to select CANADIAN FRENCH Press CH to highlight STATUS Press VOL or VOL to display CANADIAN FRENCH menu rating chart MODE LOCK LOCK SET BLOCK PROGRAMS CANADIAN FRENCH OFF HOW LONG STATUS ENTER CODE FIRST OFF Press VOL to select CANADIAN FRENCH ON or...

Page 31: ...No Audio Normal Video Increase Volume Check Mute Check television SPEAKERS on off Change Channel Noisy Audio No Video with Snow Set TV or Cable Mode Properly Check Antenna Cables No Audio No Video Check Power Cord is Plugged into Active Outlet Adjust Brightness and Audio Controls Change Channel Check Cable Connections Program the Remote Control Again Check Second Video Source Operation Normal Audi...

Page 32: ...home service in home service available only for 22 diagonal and larger screen as applicable during the warranty period If non rechargeable batteries are included they are not warranted This warranty only applies to products purchased and serviced in the United States or Puerto Rico This warranty is extended only to the original purchaser of a new product which was not sold as is A purchase receipt...

Page 33: ...ble to acts of God THERE ARE NO EXPRESS WARRANTIES EXCEPT AS LISTED UNDER LIMITED WARRANTY COVERAGE THE WARRANTOR IS NOT LIABLE FOR INCIDENTAL OR CONSEQUENTIAL DAMAGES RESULTING FROM THE USE OF THIS PRODUCT OR ARISING OUT OF ANY BREACH OF THIS WARRANTY As examples this excludes damages for lost time cost of having someone remove or re install an installed unit if applicable or travel to and from t...

Page 34: ...ature Request Dealer Locations and all Customer Service inquiries please contact 1 800 211 PANA 7262 Monday Friday 9am 9pm Saturday Sunday 9am 7pm EST Web Site http www panasonic com You can purchase parts accessories or locate your nearest servicenter by visiting our Web Site Accessory Purchases 1 800 332 5368 Customer Orders Only Panasonic Services Company 20421 84th Avenue South Kent WA 98032 6...

Page 35: ...G Geomagnetic Corr 18 Geomagnetic Correction 5 I Icon Menu Navigation 15 Icon Menu Operation 17 Icon Menus 16 IDIOMA LANGUE 5 17 Important Information 4 Input Label 22 Input Label Chart 22 Installation 3 L Limited Warranty 30 Lock 23 M Main Menu Icons 16 Manual Caption 22 Manual Program 17 Mode Operational Key Chart 11 Mono 21 N Normal 19 O Optional Cable Connections 3 Optional Equipment Connectio...

Page 36: ... Corporation of America One Panasonic Way Secaucus New Jersey 07094 www panasonic com Panasonic Sales Company Division of Matsushita Electric of Puerto Rico Inc PSC Ave 65 de Infantería Km 9 5 San Gabriel Industrial Park Carolina Puerto Rico 00985 Tel 787 750 4300 Fax 787 768 2910 ...

Page 37: ...peración TQB2AA0383 0 20404 IMPRESO EN EE UU Para asistencia llame al teléfono 1 800 211 PANA 7262 o envíe un correo electrónico a la dirección consumerproducts panasonic com Solo en Estados Unidos CT 32SX12 CT 32SX12U CT 36SX12 CT 36SX12U ...

Page 38: ...ir al usuario de que los documentos que acompañan al aparato incluyen importantes instrucciones de funcionamiento y reparación ADVERTENCIA Con el objeto de prevenir el riesgo de incendio o de descarga eléctrica este aparato no deberá verse expuesto a la lluvia ni a la humedad Este producto utiliza un tubo de rayos catódicos TRC así como otros componentes que contienen plomo El desecho de estos mat...

Page 39: ...visión Digital 9 Operación del Control Remoto 10 Instalación de pilas en el Control 10 Tabla del Modo Operacional de las Teclas 11 Programando el Control Remoto 12 Programando Con Código 12 Programando Sin Código 12 Códigos de Componentes 13 Navegación del Menú de Iconos 15 Menú de Iconos Principal 16 Menús de íconos 16 Operación del Menú de Iconos 17 Ajuste 17 Imagen 19 Cronómetro 20 Audio 21 Can...

Page 40: ...NO USE LIMPIADORES ABRASIVOS Evite la humedad excesiva y seque bien Nota Evite rociar cualquier tipo de limpiadores directamente sobre la pantalla Gabinete y Control Remoto Para control remoto y gabinetes de plástico use un paño suave humedecido con agua o una solución detergente suave Evite exceso de humedad y frote hasta secar No use benceno diluyentes u otros productos a base de petróleo Especi...

Page 41: ...es blindados de audio y video deben usarse entre los componentes Para obtener mejores resultados Use cable coaxial blindado de 75 ohmios Use los conectores de entrada y salida apropiados iguales a los de su componente Evite el uso de cables largos para minimizar interferencia Cable de Suministro de Corriente Alterna PRECAUCION PARA PREVENIR UNA DESCARGA ELECTRICA BUSQUE LA CLAVIJA ANCHA DEL ENCHUF...

Page 42: ...ta diseñado para desplegar imágenes en movimiento constante en la pantalla El uso constante de imágenes fijas tal como películas en formato letterbox en pantallas estándar con barras arriba y abajo de la imágen películas estándar no expandidas 4 3 en TV s de pantalla ancha con barras laterales visibles a cada lado de la imágen barras de reporte de la bolsa mercantil barra con información en movimi...

Page 43: ...NACION u Presione VOL para seleccionar modo de TELEVISIÓN o CABLE IDIOMA LANGUE ESPAÑOL CABLE MODO PROGRAMA AUTO PRESIONE ACTION PARA SALIR u u u AUTO PROGRAMACION CONECTADA LA ANTENA DEBE ESTAR CORRECCION GEOMAGNETICA u INCLINACION u Presione VOL para iniciar la programación automática de canales IDIOMA LANGUE ESPAÑOL CABLE MODO PROGRAMA AUTO PRESIONE ACTION PARA SALIR u u u AUTO PROGRAMACION CON...

Page 44: ... Panel de Control Frontal Presione para seleccione el modo de entrada video 3 Nota El panel de control frontal puede ser usado para accesar el menú ó cambiar el modo de video cuando no se disponga del control remoto Abra la puerta del panel frontal de la TV para usar estas conexiones para su equipo opcional videocámara VCR u otros componentes de video Seleccione el modo de entrada video 3 presiona...

Page 45: ...evisión al canal 3 2 Usando el decodificador de cable sintonize al canal de cable premium que desea ver Grabando un canal de cable premium codificado Procedimiento 1 Presione el botón TV VIDEO en el control remoto para seleccionar la entrada de video VIDEO 1 VIDEO 2 etc que está conectada con su videocasetera 2 Encienda la videocasetera 3 Sintonize la videocasetera al canal 3 o 4 dependiendo de su...

Page 46: ...minal de entrada del AMP amplificador de sonido externo para escuchar el sonido en sistema estéreo Nota Las terminales TO AUDIO AMP no pueden ser usadas directamente para bocinas externas Ajustes de Sonido Audio 1 Seleccionar ALTAVOCES SI en el menú de SONIDO AUDIO 2 Ajuste el volumen del AMP amplificador al mínimo 3 Ajuste el volumen de la Televisión al nivel deseado 4 Ajuste el volumen del AMP h...

Page 47: ...as entradas de audio compuesto Izquierda L y Derecha R para conectar las salidas de audio de su Decodificador de Televisión Digital Panasonic DTV STB Seleccione el modo de salida para formato 480i del DTV STV El televisor solo puede recibir señales en formato 480i Entradas para Televisión Digital en la parte posterior del Decodificador de Televisión Digital DTV STB DIGITAL TV OUTPUT PR PB Y MAIN V...

Page 48: ... de función de DBS y DVD REW PLAY FF PAUSE STOP REC TV VCR VCR DBS CH Botones de función Componente Presione el teclado numérico para seleccionar cualquier canal 7 4 1 2 5 8 0 9 6 3 R TUNE Presione para regresar al canal previamente visto o modo de video MENU Presione para accesar el menú de DTV DBS o DVD PROG Presione para delimitar entre los canales mayores y menores Instalación de Pilas en el C...

Page 49: ...ol Navegación Derecha VOL LEFT Vol Cable Vol Navegación Izquierda Televísión Vol Navegación Izguierda ACTION Action Menu DBS RECALL Desplegar Información Televísión Desplegar Información Info De Programa Despliegue En Pantalla Despliegue En Pantalla EXIT Salida DBS GUIDE Guia DBS 1 Digito 1 Digito 1 Digito 1 2 Digito 2 Digito 2 Digito 2 3 Digito 3 Digito 3 Digito 3 4 Digito 4 Digito 4 Digito 4 5 D...

Page 50: ... segundos Presione el botón de la función apropiada del componente en el Control Remoto Presione el botón VOL para ubicarse en el siguiente código Presione el botón VOL para regresar al código anterior Presione el botón del Control Remoto para probar el componente Si éste procedimiento ha sido exitoso el componente se encenderá Nota Repita los pasos anteriores hasta que el código del componente se...

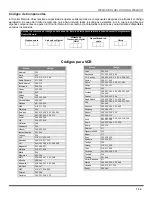
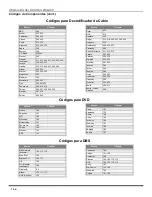
Page 51: ... GE 324 333 345 Goldstar 306 Gradiente 334 Hitachi 300 323 345 Instant Replay 323 324 Jensen 339 JVC 310 311 334 339 Kenwood 306 310 311 339 LXI 300 305 306 307 308 309 Magnavox 323 324 331 Marantz 310 311 339 Marta 306 Memorex 309 324 MGA 338 340 341 347 348 Minolta 300 345 Mitsubishi 338 340 341 347 348 Multitech 304 347 NEC 310 311 334 339 Olympic 323 324 Optimus 306 321 328 335 Marca Código Or...

Page 52: ... Echostar 105 115 116 Echo Star 105 Express VU 105 115 G E 106 G I General Instrument 108 Gradiente 114 Hitachi 103 111 112 HNS Hughes 103 Marca Código Puser 232 RCA 215 Realistic 232 Regal 212 218 240 241 242 245 Regency 234 Rembrandt 205 232 237 Samsung 205 Scientific Atlanta 211 212 213 Slmark 201 205 Sprucer 205 210 Stargate 205 232 Teleview 201 205 Texscan 244 Tocom 235 Toshiba 204 Unika 225 ...

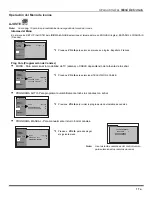
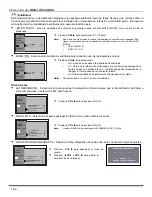
Page 53: ...cono seleccionado Presione para seleccionar la característica Presione MODO VIVID COLOR TINTE BRILLO CONTRASTE NITIDEZ NORMAL NO u I I I I I IMAGEN AJ IMAGEN OTROS AJ u MODO VIVID COLOR TINTE BRILLO CONTRASTE NITIDEZ NORMAL NO u I I I I I IMAGEN AJ IMAGEN OTROS AJ u para ajustar o activar la característica BRILLO 32 I Presione repetidamente para salir de los menús Imágen normal EXIT EXIT ...
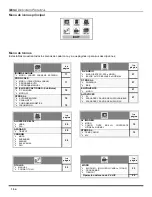
Page 54: ... Ir a página AJUSTE DE RELOJ HORA DIA 20 APAGADO TIEMPO 20 CRONOM MODO ENCENDER APAGAR ELIJA CANAL FIJO 20 Ir a página TITULOS MANUAL PONGA TITULO 22 Ir a página AJ AUDIO MODO ESTERO SPA o MONO BAJOS ALTOS BALANCE o NORMAL 21 OTROS AJ SONIDO IA BBE 21 ENVOLVENTE MODO 21 ALTAVOCES SI APAGADAS Y SALIDA DE AUDIO VARIABLE APAGADAS Y SALIDA DE AUDIO FIJA 21 Ir a página AJ IMAGEN MODO COLOR TINTE BRILLO...

Page 55: ...o borrar canales Presione VOL para seleccionar menus en Inglés Español ó Francés IDIOMA LANGUE PROG CNLS OTROS AJ CC MODO ESPAÑOL u AJUSTE Presione VOL para seleccionar TELEVISION ó CABLE AJUSTE IDIOMA LANGUE PROG CNLS OTROS AJ CC MODO PROGRAMA AUTO PROGRAMA MANUAL u u u CABLE Presione VOL para iniciar la programación automática de canales AJUSTE IDIOMA LANGUE PROG CNLS OTROS AJ CC MODO PROGRAMA A...

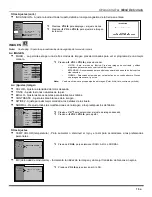
Page 56: ...ado para la modalidad de subtítulos cuando se usa el botón MUTE MUDO CC EN MUDO C1 MODO CC NO AJUSTE IDIOMA LANGUE PROG CNLS OTROS AJ CC MODO CC NO CC EN MUDO NO CC Presione VOL para seleccionar NO Cuando no se desea la modalidad de subtítulos C1 Para que la información relacionada con el video sea desplegada en hasta 4 líneas en pantalla a la vez No bloquea partes relevantes de la imagen El texto...

Page 57: ... LANGUE PROG CNLS OTROS AJ CC AUTOENCENDIDO NO CANAL INFO SI CORR GEOMAGNETICA u INCLINACION u Presione VOL para desplegar el ajuste menús Presione VOL ó VOL para ajustar de Imagen inclinacion INCLINACION 0 t AJUSTE u PRESIONE ACTION PARA SALIR l Presione VOL ó VOL para seleccionar VIVIDO Este el modo de fábrica Crea una imagen de contraste y nitidez mejorados para verse en un cuarto bien iluminad...

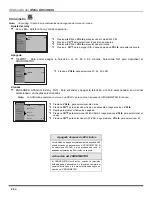
Page 58: ...ancela Activación del CRONOMETRO El CRONOMETRO está activo cuando la televisión está apagada o encendida La televisión cambiará al canal seleccionado a la hora seleccionada según se ajustó en el CRONOMETRO RELOJ CRONOMETRO HORA APAGADO CRONOM AM DIA _ _ _ Presione VOL ó VOL para seleccionar horas AM ó PM Presione CH para seleccionar la posición de minutos Presione VOL ó VOL para seleccionar minuto...

Page 59: ...enta o disminuye los sonidos bajos ALTOS Aumenta o disminuye los sonidos altos BALANCE Enfatiza el volumen del altavoz derecho izquierdo NORMAL Reajusta BAJOS ALTOS y BALANCE a los niveles prefijados de fábrica AJ AUDIO AUDIO OTROS AJ ENVOLVENTE ALTAVOCES u ESTEREO SPA MONO MODO BAJOS ALTOS BALANCE NORMAL NO Presione VOL para seleccionar SI ó NO OTROS AJ AUDIO AJ AUDIO ENVOLVENTE ALTAVOCES SONIDO ...

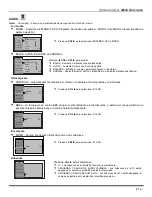
Page 60: ... CURSOR q VIDEO 1 VIDEO 2 VIDEO 3 VCR BRINCAR Presione VOL para desplegar el siguiente menú Presione CH ó CH para mover cursor Presione VOL ó VOL para seleccionar la etiqueta de entrada predefinida moda ver tabla inferior Nota La información en pantalla mostrará Componente ó Video 1 dependiendo de que fuente este conectada Tabla de Títulos Etiqueta Cuando usar VCR Seleccione cuando tiene conectada...

Page 61: ...TODOS está activado y se selecciona alguna de las entradas de video o canales bloqueados el mensaje BLOQUEADO aparecerá en la esquina superior derecha de la pantalla de la televisión Presione VOL para desplegar el menú de Bloqueo MODO BLOQUEO BLOQUEO PROGRAMAS PROGRAMAS DE EEUU NO TIEMPO ACTIVADO INGRESAR CLAVE NO Presione dos veces Presione CH para seleccionar cuánto tiempo Presione VOL para sele...

Page 62: ...ódigo fácil de recordar y escríbalo en un lugar seguro Presione CH para seleccionar PROGRAMAS Presione VOL ó VOL para seleccionar PROGRAMAS DE EEUU Presione CH para seleccionar ACTIVADO Presione VOL ó VOL para mostrar el menú de PROGRAMAS DE EEUU MODO BLOQUEO BLOQUEO PROGRAMAS PROGRAMAS DE EEUU NO TIEMPO ACTIVADO INGRESAR CLAVE NO Presione VOL para seleccionar PROGRAMAS DE EEUU NO ó SI Presione CH...

Page 63: ...n incluir ligera violencia física o cómica o puede asustar a niños menores de 7 años TV G Audiencia General Contiene poca o nada de violencia nada de lenguaje fuerte y poco o nada de diálogo o situaciones con contenido sexual TV PG Guía de los padres sugerida El programa puede contener lenguaje obsceno infrecuente violencia limitada diálogos o situaciones sexualmente sugestivas TV 14 Advertencia a...

Page 64: ...resione CH para realzar PROGRAMAS Presione VOL ó VOL para seleccionar PELICULAS DE EEUU Presione CH para realzar ACTIVADO Presione VOL ó VOL para mostrar el menú de PELICULAS DE EEUU MODO BLOQUEO BLOQUEO PROGRAMAS PELICULAS DE EEUU NO TIEMPO ACTIVADO INGRESAR CLAVE NO Presione VOL para seleccionar NO CLASIFICADOS SI o NO Nota Algunas veces las películas no son clasificadas por una variedad de razo...

Page 65: ... su código de cuatro dígitos Use un código fácil de recordar y escríbalo en un lugar seguro Presione CH para realzar PROGRAMAS Presione VOL ó VOL para seleccionar INGLES DE CANADA Presione CH para realzar ACTIVADO Presione VOL ó VOL para mostrar el menú de INGLES DE CANADA MODO BLOQUEO BLOQUEO PROGRAMAS INGLES DE CANADA NO TIEMPO ACTIVADO INGRESAR CLAVE NO Presione VOL para seleccionar INGLES DE C...

Page 66: ...uatro dígitos Use un código fácil de recordar y escríbalo en un lugar seguro Presione CH para realzar PROGRAMAS Presione VOL ó VOL para seleccionar FRANCES DE CANADA Presione CH para realzar ACTIVADO Presione VOL ó VOL para mostrar el menú de FRANCES DE CANADA MODO BLOQUEO BLOQUEO PROGRAMAS FRANCES DE CANADA NO TIEMPO ACTIVADO INGRESAR CLAVE NO Presione VOL para seleccionar FRANCES DE CANADA SI o ...

Page 67: ...ALTAVOCES SI Cambie el Canal Sonido Ruidoso Sin Imagen Con Motas Ajuste apropiadamente la modalidad de TV o del Cable Revise los Cables de la Antena Sin Sonido Sin Imagen Revise que el Cable de Corriente este Enchufado a una toma de Corriente Activa Ajuste los Controles de Brillo y Audio Cambie el Canal Revise las Conexiones del Cable Programe el Control Remoto otra vez Revise la Operación de la S...

Page 68: ... IDIOMA LANGUE 5 Idiomas del Menú 17 Imagen 19 Inclinación 5 19 Información Importante 4 Inglés de Canada 27 Instalación 3 Instalación de Pilas en el Control Remoto 10 J Juego 23 M Manual 22 Mensaje de Bloqueo 24 Menú de auto Programación 5 Menú de Iconos 16 Menú de íconos Principal 16 Modo CC 18 Modos De Default Para El Control Remoto 12 Mono 21 N Navegación del menú de íconos 15 Nitidez 19 Norma...

Page 69: ...NOTAS 31 ...

Page 70: ...32 NOTAS ...

Page 71: ...NOTAS 33 ...

Page 72: ... Corporation of America One Panasonic Way Secaucus New Jersey 07094 www panasonic com Panasonic Sales Company Division of Matsushita Electric of Puerto Rico Inc PSC Ave 65 de Infantería Km 9 5 San Gabriel Industrial Park Carolina Puerto Rico 00985 Tel 787 750 4300 Fax 787 768 2910 ...

Reviews: