background image

33

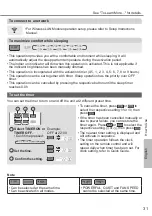
To

 Learn More... / Cleaning the 

Air Conditioner

Cleaning the Air Conditioner

Cleaning has to be carried out at regular 

intervals to ensure the unit is at optimal 

performance. A dirty unit may cause 

malfunction and you may retrieve “H 99” 

error code. Consult an authorised dealer.

• Before cleaning, switch off the power 

supply and unplug the unit.

• Do not touch the aluminium 

fi

 n as the sharp 

parts may cause injury.

• Do not use benzine, thinner or scouring 

powder.

• Use soap (  pH 7) or neutral household 

detergent only.

• Do not use water hotter than 40 °C / 104 °F.

Indoor unit

nanoe

TM

-G Generator

Once every 2 weeks

• Clean with dry cotton bud.

• Do not touch during operation.

Air 

fi

 lters

Once every 2 weeks

• Wash/rinse  the 

fi

 lters gently 

with water to avoid damaging 

the surface.

• Dry  the 

fi

 lters thoroughly under a shade, 

away from 

fi

 re or direct sunlight.

• Replace any damaged 

fi

 lters.

Remove air 

fi

 lter

Attach air 

fi

 lter

Remove from the unit

Insert into the unit

Indoor unit

Wipe the unit gently with a soft 

and dry cloth.

The coils and fans should be 

cleaned periodically by an 

authorized dealer.

Outdoor unit

Clean the debris that surround 

the unit.

Clear any blockage from the 

drain pipe. 

Front panel

Wash gently and dry.

How to remove front panel

Raise over 

horizontal 

level

1

Pull upward

2

Horizontal

Close it securely

AUTO

OFF/ON

nanoe-G

2


Match and push in

1


Hold 

horizontally

3


Close down

4

 Press both ends and center of the front 

panel

AUTO

OFF/ON

nanoe-G

Aluminium 

fi

 n

Front panel

Air 

fi

 lters

nanoe

TM

-G Generator

English

Summary of Contents for CS-WPU9XKH-8

Page 1: ...n l nh Operating Instructions Air Conditioner 20 37 Before operating the unit please read these operating instructions thoroughly and keep them for future reference Before installation the installer s...

Page 2: ...PE N 2 3 1 1 K o n p y l ng c a i u khi n 2 L p pin AAA ho c R03 3 y n p A i u ch nh ng h 1 Nh n sau nh n c i t th i gian Nh n n t trong kho ng 5 gi y hi n th th i gian theo d ng 12 gi am pm ho c 24...

Page 3: ...kh c so v i m y th c Nh s n xu t c th thay i m kh ng b o tr c C m n b n l a ch n M y i u h a kh ng kh Panasonic B C c t nh n ng c b n 2 Nh n MODE ch n ch mong mu n DRY AUTO COOL 1 Nh n OFF ON OFF ON...

Page 4: ...n ng ch u tr ch nhi m v an to n cho h Kh ng n n tr em ngh ch ch i v i m y Vui l ng li n h v i i l y quy n ho c chuy n gia v sinh c c b ph n b n trong s a ch a l p t th o v l p l i m y L p t v x l kh n...

Page 5: ...ng i u khi n t xa Th o pin kh i i u khi n t xa n u kh ng s d ng trong th i gian d i Pin m i c ng lo i ph i c l p ng c c nh ch d n Ngu n c p i n Kh ng k o d y ngu n ra kh i c m tr nh b gi t i n Ngu n...

Page 6: ...c n b c k n u h b ng k p d y bu c b o qu n R32 gi ng nh b o qu n R410A Vi c v n h nh b o d ng s a ch a v n p l i m i ch t l m l nh ph i c ti n h nh b i c c nh n vi n c o t o v ch ng nh n v ph i c gi...

Page 7: ...x l theo ng quy nh 2 B o tr 2 1 Nh n vi n b o tr H th ng c ki m tra th ng xuy n gi m s t v s a ch a b i nh n vi n b o h nh c o t o v ch ng nh n c thu b i ng i s d ng hay m t t ch c c tr ch nhi m C n...

Page 8: ...g gi ph i m b o ph n t n m i ch t l m l nh c th i ra m t c ch an to n v t t h n l n n th i ra ngo i kh ng kh 2 7 Ki m tra thi t b l m l nh Khi ph i thay i c c thi t b i n ph i s d ng c c thi t b m i p...

Page 9: ...m n c ph i ch u p l c ph c b rung c c c m p s c hay ch u c c t c ng kh c c a m i tr ng hay kh ng Vi c ki m tra c ng c n t nh n nh h ng c a th i gian s d ng c a thi t b hay s rung li n t c t c c ngu n...

Page 10: ...ch h p theo h ng d n m b o r ng h th ng l m l nh c ti p t tr c khi n p m i ch t l m l nh cho h th ng D n nh n l n h th ng khi qu tr nh n p li u ho n t t n u ch a c l m C n ph i h t s c c n tr ng kh n...

Page 11: ...qu tr nh n p m i ch t cho to n h th ng M i b nh ch a c s d ng ph i c quy nh r cho c c m i ch t c thu h i v ph i c d n nh n c n th n cho m i ch t c ngh a l c c b nh ch a c bi t thu h i m i ch t B nh c...

Page 12: ...m i FAN SPEED QUIET chuy n gi a ch POWERFUL ECO POWERFUL ECO H ng nghi ng qua l i 7KL W O S FK WKRiW AIR CONDITIONER ON OFF SET TIMER CANCEL OFF ON AIR SWING TEMP OFF ON MODE SLEEP FAN SPEED QUIET POW...

Page 13: ...i b t hay t t m y 2 th i gian l p s n kh c nhau Ghi ch SLEEP POWERFUL ECO FAN SPEED QUIET POWERFUL ECO C th c ch n c ng l c C th c k ch ho t m i ch Ch POWERFUL QUIET hay FAN SPEED kh ng th c ch n c ng...

Page 14: ...c c nh v tr gi a Khi t nhi t c nh o gi ngang s t ng di chuy n l n xu ng ch COOL DRY L M L NH H T M C nh o gi ngang s t ng di chuy n l n xu ng i u khi n ch t kh i ng Khi i n c kh i ph c sau khi m t i n...

Page 15: ...trong khi m y ang ho t ng L i l c kh 2 tu n m t l n R a tr ng l i l c nh nh ng v i n c tr nh l m h b m t l i l c Ph i kh l i l c trong b ng r m tr nh xa l a ho c ph i tr c ti p d i n ng Thay l i l c k...

Page 16: ...b ng nh a S b c m u t y thu c v o v t li u c s d ng trong c c linh ki n b ng nh a Qu tr nh n y s di n ra nhanh h n khi ti p x c v i nhi t nh s ng m t tr i tia c c t m ho c c c y u t m i tr ng B i c th...

Page 17: ...c i u khi n t xa b m t ho c c l i x y ra tr n bi t th m chi ti t Sau 15 ph t ho t ng n u ch nh l ch nhi t gi a c a gi v o v c a gi ra nh d i y c ngh a l m y ho t ng b nh th ng COOL L M L NH 8 C 14 4 F...

Page 18: ...1 C m bi n h b i c v n H 32 C m bi n nhi t d n trao i nhi t s 2 c a kh i ngo i b t th ng H 33 Kh i trong kh i ngo i m t k t n i v i nhau H 34 C m bi n nhi t b l m m t kh i ngo i b t th ng H 35 N c ng...

Page 19: ...ng nhau K hi u n y c th d ng k t h p v i m t k hi u h a h c Trong tr ng h p n y n tu n th c c quy nh c li n quan v h a ch t B O NG Bi u t ng n y cho bi t thi t b d ng m i ch t l m l nh c th g y ch y...

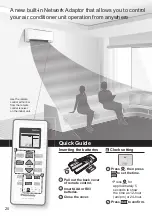
Page 20: ...1 1 Pull out the back cover of remote control 2 Insert AAA or R03 batteries 3 Close the cover A Clock setting 1 Press then press to set the time Press for approximately 5 seconds to show the time as...

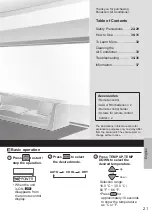
Page 21: ...s only and may differ from the actual unit They are subject to change without notice B Basic operation 2 Press MODE to select the desired mode DRY AUTO COOL 1 Press OFF ON OFF ON to start stop the ope...

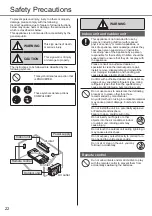
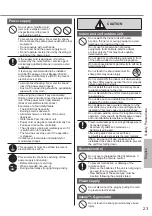
Page 22: ...e supervised to ensure that they do not play with the appliance Please consult an authorised dealer or specialist to clean the internal parts repair install remove disassemble and reinstall the unit I...

Page 23: ...long period of time New batteries of the same type must be inserted following the polarity stated Power supply Do not disconnect the plug by pulling the cord to prevent electric shock nanoe G generat...

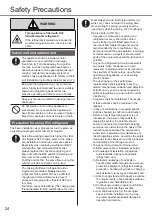
Page 24: ...al the opening by pinching taping etc Handling of R32 is similar to R410A Operation maintenance repairing and refrigerant recovery should be carried out by trained and certified personnel in the use o...

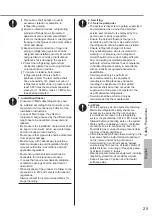
Page 25: ...the precautions in 12 and comply with national regulations Always contact to local municipal offices for proper handling 2 Servicing 2 1 Service personnel The system is inspected regularly supervised...

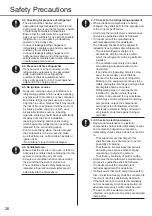
Page 26: ...ternally into the atmosphere 2 7 Checks to the refrigerating equipment Where electrical components are being changed they shall be fit for the purpose and to the correct specification At all times the...

Page 27: ...the atmosphere from a leak 5 Cabling Check that cabling will not be subject to wear corrosion excessive pressure vibration sharp edges or any other adverse environmental effects The check shall also...

Page 28: ...minimize the amount of refrigerant contained in them Cylinders shall be kept in an appropriate position according to the instructions Ensure that the refrigerating system is earthed prior to charging...

Page 29: ...employed Ensure that the correct number of cylinders for holding the total system charge are available All cylinders to be used are designated for the recovered refrigerant and labelled for that refri...

Page 30: ...s operation is automatically stop after 4 hours ECO To reduce power consumption for better energy saving without sacrificing comfort FAN SPEED QUIET To switch between POWERFUL ECO POWERFUL ECO POWER T...

Page 31: ...llows the clock setting on the remote control and will repeat daily when timer has been set For clock setting refer to Quick Guide You can set the timer to turn on and off the unit at 2 different pres...

Page 32: ...zontal flap is fixed at middle position setting Once the temperature is achieved the horizontal flap swings up down automatically In COOL DRY mode The horizontal flap swings up down automatically Auto...

Page 33: ...Air filters Once every 2 weeks Wash rinse the filters gently with water to avoid damaging the surface Dry the filters thoroughly under a shade away from fire or direct sunlight Replace any damaged fi...

Page 34: ...steam Discoloration of some plastic parts Discoloration is subjected to the types of materials used in plastic parts It is accelerated when exposed to heat sun light UV light or environmental factors...

Page 35: ...g or a malfunction has occurred above After 15 minutes of operation it is normal to have the following temperature difference between the air inlet and outlet vents COOL 8 C 14 4 F The units will be n...

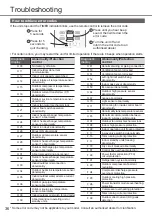
Page 36: ...heat sink temperature sensor abnormality H 35 Indoor outdoor water adverse current abnormality H 36 Outdoor gas pipe temperature sensor abnormality H 37 Outdoor liquid pipe temperature sensor abnorma...

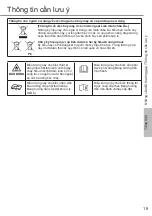
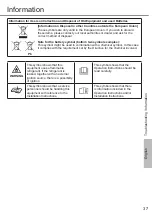
Page 37: ...ght be used in combination with a chemical symbol In this case it complies with the requirement set by the Directive for the chemical involved WARNING This symbol shows that this equipment uses a flam...

Page 38: ...Memo...

Page 39: ...Memo...

Page 40: ...Printed in Malaysia ACXF55 29810 FZ0421 0 Panasonic Corporation 1006 Kadoma Kadoma City Osaka Japan Website http www panasonic com Panasonic Corporation 2021...

Reviews: