background image

- 17 -

Function Settings

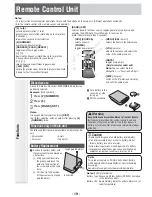
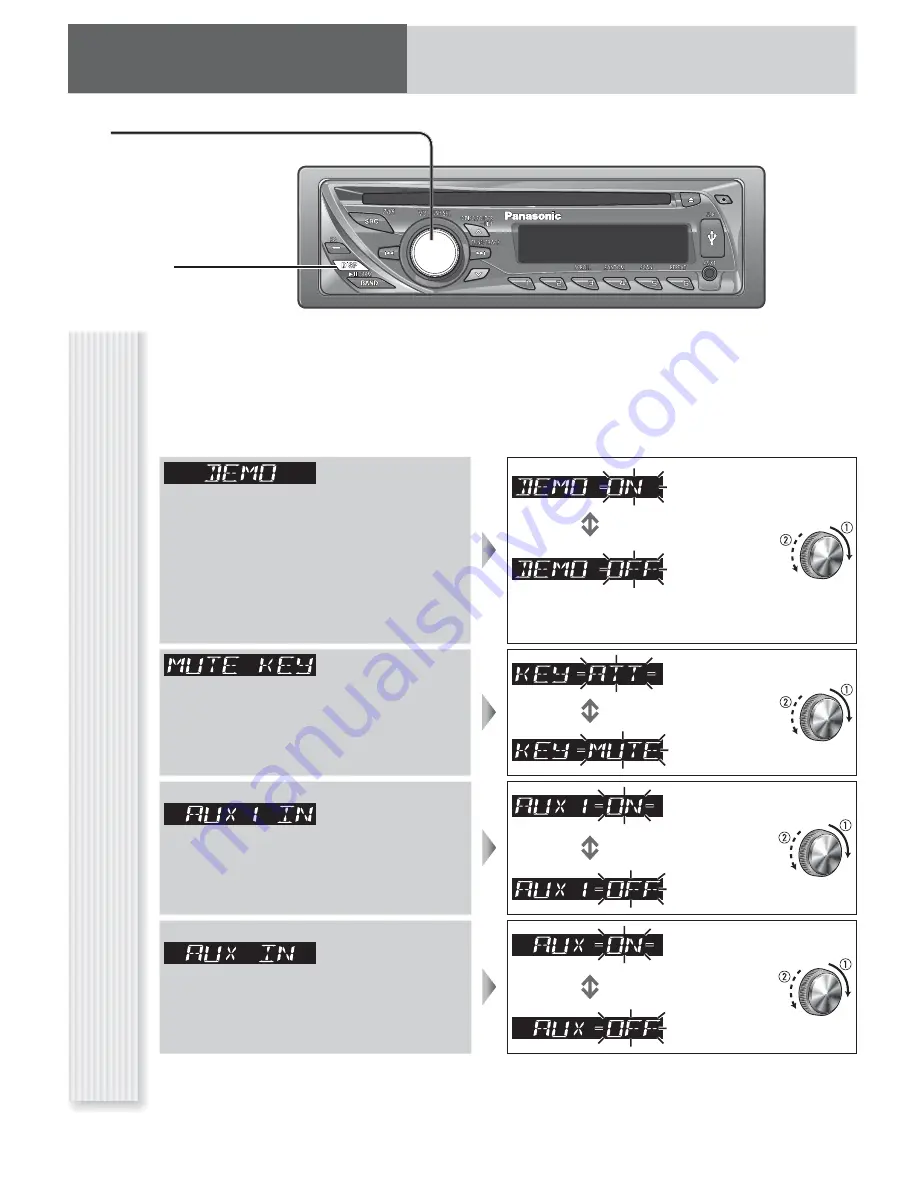
Function Menu

1

Hold down 

[VOL] (PUSH SEL)

 for 2 sec. or more to open the function menu.

Note:

 If no operation takes place for more than 5 seconds in function setting, the display returns to the regular mode. 

2

Press

[VOL] (PUSH SEL)

 to select a mode to 

be adjusted.

3

Turn 

[VOL]

 clockwise or counterclockwise to 

adjust. 

[VOL]

selects a value in the function menu.

(PUSH SEL)

 (Push to select)

selects items in the function menu.

[DISP]

 (Display)

exits from the function menu.

Demonstration

: On (Default)

\CQ-RX400U\  \CQ-RX200U\ 

You can set up the monitor to display or hide the 
demonstration screen.

Note:

 Button operation with either the main unit or 

remote control allows users to cancel the demonstration 
screen for 20 seconds and enable the selected operation 
even in the demo-on mode. 

: Off

Mute/Attenuation

: Volume down 

by 10 steps

You can select mute or attenuation.

: Volume off 

(Default)

\CQ-RX400U\  \CQ-RX200U\

AUX1 Skip

: On (Skip 

disabled.) (Default)

If AUX1 is not used, the AUX1 mode is skipped when 
selecting the source. 

: Off (Skip 

enabled.)

\CQ-RX100U\  \CQ-RX100L\ 

AUX Skip

: On (Skip 

disabled.) (Default)

If AUX is not used, the AUX mode is skipped when 
selecting the source. 

: Off (Skip 

enabled.)

Notes:

• To return to the regular mode, press 

[DISP]

.

\CQ-RX400U\  \CQ-RX200U\

• The sequence and contents of setting items may depend on the conditions of devices to be connected. For further information, 

refer to the 

System Upgrade Guidebook

 or the instruction manuals for the devices to be connected. 

Summary of Contents for CQRX400U - AUTO RADIO/CD/MP3 DECK

Page 1: ...on without prior notice due to improvements Mounting Collar and Trim Plate are mounted on the main unit at shipment CQ RX200U CQ RX100U Request for use of the Removable Face Plate Case To avoid troubl...

Page 2: ...he unit is out of order no power no sound or in an abnormal state has foreign objects in it is exposed to water is smoking or smells turn it off immediately and consult your dealer RThe remote control...

Page 3: ...ace Adaptor CA PANSC1U cannot be used with this unit Bluetooth Using the optional Bluetooth Unit CY BT200U and a Bluetooth device enables hands free telephony and Bluetooth Audio listening with this u...

Page 4: ...d prepaid adequately insured and preferably in the original carton Include details of the defect claimed and proof of date of original purchase For hearing or speech impaired TTY users TTY 1 877 833 8...

Page 5: ...Factory Servicenter or other authorized service centers or damage that is attributable to acts of God THERE ARE NO EXPRESS WARRANTIES EXCEPT AS LISTED UNDER LIMITED WARRANTY COVERAGE THE WARRANTOR IS...

Page 6: ...ame speci ed rating 15 A Using substitutes or fuses with higher ratings or connecting the unit directly without a fuse could cause re or damage to the unit If the replaced fuse fails contact your near...

Page 7: ...ull Speed Maximum Supply Current 500 mA Front AUX input Input impedance 10 kj Allowable external input 2 0 V Connector 3 5 mm Stereo mini pin Dimensions W x H x D 178 x 50 x 160 mm 7 x 1 15 16 x 6 5 1...

Page 8: ...installation is not stable the unit may fall down while driving and this can lead to an accident or injury RInstallation Angle The product should be installed in a horizontal position with the front...

Page 9: ...llel with the unit Observe the disc may be scratched or marked in the process When inserting a disc do not put one disc on another Failure to observe this may cause the discs to be jammed Do not leave...

Page 10: ...because playing time is not displayed properly and sound may be skipped The playback sound quality differs depending on the encoding circumstances For details refer to the instructions of your own enc...

Page 11: ...AAC les or the songs may not play in the intended order or some songs may not play at all When storing MP3 data WMA data or AAC data on the same disc use different folders for each data Do not record...

Page 12: ...the number of folders irrespective of the presence or absence of an MP3 WMA AAC le If the selected folder does not contain any MP3 WMA AAC les the nearest MP3 WMA AAC les in the order of playback will...

Page 13: ...k Display at Power Off Press DISP to change the display Display off Clock display Default Note Battery Information Battery Type Panasonic lithium battery CR2025 Included in the remote control Battery...

Page 14: ...e volume level to low enough before the AUX connection is completed Failure to observe this the loud noise may come out and damage your speakers and your hearing Volume Adjustment Setting Range 0 to 4...

Page 15: ...Station Preset Frequency Adjustment TUNE Lower TUNE Higher Note Hold down for 0 5 sec or more and release for station search Preset Station Selection Press the corresponding preset button from 1 to 6...

Page 16: ...er Front enhanced Rear enhanced Notes The volume can also be adjusted directly using VOL on the main unit General For further information on SQ Sound Quality settings refer to Sound Control Do not act...

Page 17: ...e main unit or remote control allows users to cancel the demonstration screen for 20 seconds and enable the selected operation even in the demo on mode Off Mute Attenuation Volume down by 10 steps You...

Page 18: ...To return an adjusted SQ to the default setting Press SQ and select the SQ which is to be returned to the default setting Only for main unit Hold down BAND for 2 sec or more Notes You cannot save any...

Page 19: ...e fast forward BAND SET selects a band in the tuner source toggles pause play in player source executes the APM Auto Preset Memory in tuner source Hold it down for more than 2 seconds MENU SEL Select...

Page 20: ...connecting Bluetooth Unit OR When an expansion module is connected The devices connected to the ports 1 to 4 are activated in sequence after shifting to AUX2 device connected to the AUX terminal of th...

Page 21: ...tion on the display skip to the previous next folder 4 RANDOM 5 SCAN 6 REPEAT toggles on off each play mode 3 SCROLL scrolls the information on display Play Pause toggles pause play in the player sour...

Page 22: ...re than 2 seconds Hold down again to cancel Scan Play The rst 10 seconds of each songs tracks les is played in sequence Press 5 SCAN Press again to cancel Folder Scan Play MP3 WMA AAC From the next fo...

Page 23: ...until the dew disappears before turning on the unit Noise Make sure that grounding is established properly No sound from left right front or rear speaker Adjust the balance and fader Verify the wiring...

Page 24: ...24 Memorandum...

Reviews: