background image

23

English

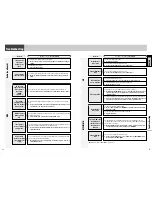
Radio Data System (RDS) in FM Broadcasting

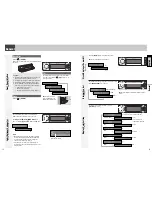
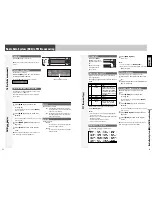
PTY ON/OFF

Holding down 

[DISP]

(PTY) 

for 2 sec. or more

toggles PTY mode on and
off.

Note: 

This operation is

not adjustable by the
remote control.

Program Search by PTY

Programs can be searched for by use of PTY that has
been originally preset.

Press 

[

}

]

or 

[

{

]

to select PTY in the PTY

mode.

Another station in the same PTY is searched for by
pressing 

[BAND] (SET)

.

Notes:

¡

Direct selection can be executed with 

[1]

to 

[6] 

but-

tons on remote control.

¡

When there is no corresponding program type station,
“NONE” is displayed.

¡

A desired PTY appears for 5 seconds.

¡

Preset contents are changeable.

Detailed PTY Selection

1

Press 

[

]

]

or 

[

[

]

to select PTY.

2

Press 

[BAND] (SET)

.

Search starts.

Notes:

¡

To stop searching, press 

[BAND] (SET)

.

¡

When there is no corresponding program type station,

“NONE” is displayed.

PTY Preset Change

Original PTY presets can be changed as you like.

1

Select a PTY that you would like to pre-

set.

2

Follow the procedure of ordinary preset-

ting. (

a

Page 19)

PTY LANG (language selection)

Note:

PTY language is selectable only when PTY

appears.

1

Press 

[MENU]

to open the menu. 

(

a

page 16)

For using the remote control, hold down 

[MENU]

for 2 sec. or more.

2

Press 

[MENU]

to select a mode to be

adjusted.

The selection/adjustment screen appears 1 sec. after
mode selection.

3

Press 

[BAND] (SET)

to adjust the set-

ting value.

4

Press 

[DISP]

to return to the regular

mode.

Note:

If no operation takes place for more than 10 sec-

onds, the display returns to Regular Mode.

Program Type

Contents

1

NEWS

NEWS

2

SPEECH

AFFAIRS, INFO, EDUCATE,
DRAMA, CULTURE, SCIENCE,
VARIED, WEATHER, FINANCE,
CHILDREN, SOCIAL, RELIGION,
PHONE IN, TRAVEL, LEISURE,
DOCUMENT

3

SPORT

SPORT

4

POP M

POP M

5

CLASSICS

CLASSICS

6

MUSIC

ROCK M, EASY M, LIGHT M,
OTHER M, JAZZ, COUNTRY,
NATION M, OLDIES, FOLK M

SPEECH

/

MUSIC

/

NEWS

/

AFFAIRS

/

INFO

/

SPORT

/

EDUCATE 

/

DRAMA 

/

CULTURE

/

SCIENCE

/

VARIED 

/

POP M

/

ROCK M

/

EASY M

/

LIGHT M 

/

CLASSICS

/

OTHER M

/

WEATHER

/

FINANCE

/

CHILDREN

/

SOCIAL 

/

RELIGION

/

PHONE IN

/

TRAVEL

/

LEISURE

/

JAZZ

/

COUNTRY

/

NATION M 

/

OLDIES

/

FOLK M

/

DOCUMENT

CQ-C7300N

BAND

PTY (Program T

ype)

22

Radio Data System (RDS) in FM Broadcasting

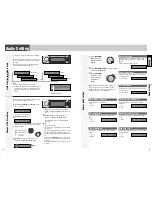
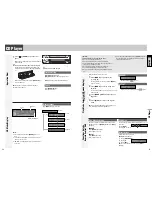
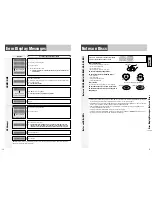
TA ON/OFF

Pressing 

[TA]

toggles TA on and off.

Note:

This operation is not adjustable by the remote

control.

TA Volume Adjustment

The TA volume is adjustable.

Hold down 

[SEL]

for 2 sec. or more while

receiving an FM broadcast.

The current FM volume becomes the TA volume.

Traffic Information Only (TA Mute)

For listening to only traffic information, activate TA and
set the volume to 0 in FM mode.

Once traffic information starts, the volume changes to
the TA volume.

CQ-C7300N

BAND

lights when 

TA

is activated.

1

Press 

[MENU]

to open the menu. 

(

a

page 16)

For using the remote control, hold down 

[MENU]

for 2 sec. or more.

2

Press 

[MENU]

to select a mode to be

adjusted.

The selection/adjustment screen appears 1 sec. after
mode selection.

3

Press 

[BAND] (SET)

to adjust the set-

ting value.

4

Press 

[DISP]

to return to the regular

mode.

Note:

If no operation takes place for more than 10 sec-

onds, the display returns to Regular Mode.

AF SEL

Adjusting the AF sensitivity

AF 1: Switching immediately after the receiving

sensitivity becomes low (for a suburban area
with a fine view) (Default)

AF 2: No switching even after the receiving sensi-

tivity temporarily becomes low (for an area
with a obstructed view)

REGION

Setting the AF range

REG OFF:

The frequency is changed also for programs
outside the region. (Default)

REG ON:

The frequency is changed only for programs
within the region.

TA

 (T

raffic Announcement)

FM Menu display

AF/REGION

Summary of Contents for CQ-C7300N

Page 1: ...eitung vor der Verwendung dieses Produktes aufmerksam durch und bewahren Sie sie danach für spätere Nachschlagzwecke sorgfältig auf Prière de lire ces instructions attentivement avant d utiliser le produit et garder ce manuel pour l utilisation ultérieure Leest u deze instructie alstublieft zorgvuldig door voor u dit product in gebruik neemt en bewaar deze handleiding voor later gebruik Läs igenom...

Page 2: ...h your listening music type For SQ7 you can also make fine adjustments for SQ preset ting P2 P6 according to your taste Genuine subwoofer system achieved thanks to HPF High Pass Filter and LPF Low Pass Filter a Page 15 MP3 WMA playable a Page 26 Features Contents CQ C7300N MP3 WMA CD Player Receiver with CD Changer Control Panasonic welcomes you to their constantly growing family of electronic pro...

Page 3: ...zardous radiation is emitted with safety protection Do not take apart this unit or attempt to make any changes yourself This unit is a very intricate device that uses a laser pickup to retrieve information from the surface of compact discs The laser is carefully shielded so that its rays remain inside the cabinet Therefore never try to disassemble the player or alter any of its parts since you may...

Page 4: ...cement AF Alternative Frequency Number text indicator Refer to the explanation for each source Radio etc Level mater Indicates the fluctuation of the volume level Spectrum analyzer Indicates the volume level for each frequency Disc slot VOLUME PUSH SEL Select P SET Preset DISC FOLDER DISP Display PTY Program Type TUNE TRACK FILE COLOR Release TILT OPEN SOURCE POWER MUTE SBC SW Super Bass Control S...

Page 5: ... NO CT appears on the dis play When a broadcast of FM Radio Data System is received the clock is put right automatically by the Clock Time service a Page 20 1 Select the radio AM mode a Page 18 2 Press and hold DISP Display for more than 2 seconds 3 Press or to adjust the hour Forward Back Press DISP Display to confirm the adjustment 4 Press or to adjust the minute Forward Back Press DISP Display ...

Page 6: ...since this may result in poor electrical contacts If dirt or other foreign substances get on the con tacts wipe them off with clean and dry cloth To avoid damaging the front panel do not push it down or place objects on it while it is open Notes The volume level can be set independently for each source For radio one volume setting for AM MW LW one volume setting for all FMs The volume is not adjus...

Page 7: ...hen a disc is already loaded the disc will automatically be ejected Close Press OPEN Tilt The display angle changes among 4 levels as follows every time you hold down TILT for 1 sec or more and release Note The last selected angle is maintained even after turning off the power CQ C7300N BAND Front Panel Motion OPEN CLOSE TILT Cautions To avoid damaging the front panel do not push it down or place ...

Page 8: ...touch of button in accordance with your listening music type For SQ7 you can also make fine adjustments for SQ presetting P2 P6 according to your taste lights when activated Notes Each SQ level is changeable a see below Settings of SQ bass treble and volume are influenced one another If the influence mentioned above causes distortion to the audio signal readjust bass treble or volume CQ C7300N BAN...

Page 9: ...ped Caution Be sure to select OFF when your car has no ACC position in the ignition switch Failure to do this could cause the battery to go dead Function Setting Menu 16 PATTERN MUTE KEY EXT MUTE SECURITY ACC SET Settings and playing varia tions of each source Function setting a Next page Radio FM AF SEL Adjusting the AF sensi tivity a Page 22 REGION Setting the AF range a Page 22 FM MONO Noise re...

Page 10: ...r mode selection 3 Press BAND SET to adjust the set ting value 4 Press DISP to return to the regular mode Note If no operation takes place for more than 10 sec onds the display returns to Regular Mode FM MONO Monaural Noise reduction when the receiving sensitivity becomes low Receiving in stereo Default Receiving in mono and reducing the noise level lights FM LOCAL AM LOCAL Setting when searching ...

Page 11: ...tically tuned in to When executing APM only RDS stations are selected When calling up a preset station a best receiving sta tion is selected automatically BSR Best Stations Research Notes The AF sensitivity can be adjusted a Page 22 The AF available range can be adjusted a Page 22 TA Traffic Announcement The following functions are available when the TA mode is active a Page 22 A TP station is aut...

Page 12: ...ENT 3 SPORT SPORT 4 POP M POP M 5 CLASSICS CLASSICS 6 MUSIC ROCK M EASY M LIGHT M OTHER M JAZZ COUNTRY NATION M OLDIES FOLK M SPEECH MUSIC NEWS AFFAIRS INFO SPORT EDUCATE DRAMA CULTURE SCIENCE VARIED POP M ROCK M EASY M LIGHT M CLASSICS OTHER M WEATHER FINANCE CHILDREN SOCIAL RELIGION PHONE IN TRAVEL LEISURE JAZZ COUNTRY NATION M OLDIES FOLK M DOCUMENT CQ C7300N BAND PTY Program Type 22 Radio Data...

Page 13: ...o be adjusted The selection adjustment screen appears 1 sec after mode selection 3 Press BAND SET to adjust the set ting value 4 Press DISP to return to the regular mode Note If no operation takes place for more than 10 sec onds the display returns to Regular Mode RANDOM Random playback lights REPEAT Playing the current track repeatedly lights Play Mode Selection CD menu display RANDOM REPEAT Func...

Page 14: ...wn SCAN for 2 sec or more Hold down again to cancel Direct Access A file in the current folder can be directly selected Example file number 5 1 Press NUMBER 2 Press 5 3 Press SET Notes For folder selection enter a number after pressing NUMBER twice To suspend direct selection press DISP Display Play Mode Selection MP3 WMA Menu display RANDOM REPEAT Functions Only by Remote Control Unit 26 MP3 WMA ...

Page 15: ...dows Media Audio Ver 2 8 9 16 22 05 24 kHz Yes 8 k 160 kbps MPEG 2 audio layer 3 MP3 32 44 1 48 kHz Yes 32 k 320 kbps MPEG 1 audio layer 3 MP3 Sampling frequency VBR Bit rate Compression method Recording MP3 WMA files on a CD media Notes on MP3 WMA continued 28 MP3 WMA Player What is MP3 WMA MP3 MPEG Audio Layer 3 and WMA Windows MediaTM Audio are the compression formats of digital audio The forme...

Page 16: ...k by playing first 10 sec of each track SCAN All tracks Press SCAN Press again to cancel DISC SCAN 1st file in each disc Hold down SCAN for 2 sec or more Hold down again to cancel Direct Access A disc can be directly selected Example disc number 5 1 Press NUMBER 2 Press 5 3 Press SET Note To suspend direct selection press DISP Display Play Mode Selection CD changer Menu display RANDOM REPEAT Funct...

Page 17: ...be serviced only by qualified personnel Cautions Do not use the unit in an irregular condition for example without sound or with smoke or foul smell which can cause ignition or electric shock Immediately stop using the unit and call the store where you purchased it Never try to repair the unit by yourself because it is dangerous to do so Problem Possible cause a Possible solution No power to the u...

Page 18: ...n the disc a Remove the foreign material or use a flawless disc For MP3 WMA refer to the description about MP3 WMA Note Refer to Notes on MP3 WMA a Page 28 CD MP3 WMA Troubleshooting 34 Troubleshooting Problem Possible cause a Possible solution The number of auto preset stations is less than 6 The number of receivable stations is less than 6 a Move to an area where receivable stations number is ma...

Page 19: ... of the disc Do not scratch on the disc Do not bend the disc When not in use keep disc in the case Do not use irregularly shaped discs Do not leave discs in the following places Direct sunlight Near car heaters Dirty dusty and damp areas Seats and dashboards Disc cleaning Use a dry soft cloth to wipe from the centre outward Do not attach any seals or labels to your discs Do not write on the disc l...

Page 20: ...quency Range 153 279 kHz Usable Sensitivity 32 dB µV S N 20 dB Sales and Support Information Customer Care Centre For UK customers 08705 357357 For Republic of Ireland customers 01 289 8333 Visit our website for product information E mail customer care panasonic co uk Direct Sales at Panasonic UK Order accessory and consumable items for your product with ease and confidence by phoning our Customer...

Page 21: ...hole q Schrauben Sie die Schraube in das Hauptgerät w Sichern Sie die Rückseite des Hauptgerätes e Lassen Sie die rechten und linken Federn in den Löchern einschnappen q Visser le boulon dans l appareil principal w Fixer l arrière de l appareil principal e Bouteroller les ressorts droit et gauche dans chaque trou q Schroef de bout in het hoofdtoestel w Zet de achterkant van het hoofdtoestel vast e...

Page 22: ...eer de keuzeschakelaar deel uitmaakt van uw systeem System Upgrade Example Connecting with a CD changer Beispiel für die Systemerweiterung Anschluss an einen CD Wechsler Exemple de mise à niveau de système Raccordement à un changeur de disque CD Voorbeeld uitbreiding systeem aansluiten van een CD wisselaar Do not use a 3 wire type speaker system having a common earth lead Verwenden Sie niemals Lau...

Reviews: