HD-SD Format Converter Printed Circuit Board AJ-UDC3700P
Installation
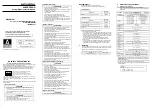
VEP83543 (420P SUB PCB)
1
Turn off the power of the main unit (AJ-HD3700 or AJ-HD3700H), then remove the top panel
and disengage the S PCB clamp.
2
Take out the S4 PCB.
3
Attach the 420P SUB PCB to the S4 PCB. At this stage, mate the P100 connector on the 420P
SUB PCB properly with the P7 connector on the S4 PCB. (Refer to Figs. 5 and 6.)
4
Secure the 420P SUB PCB to the S4 PCB using the screws provided for this purpose.
5
Return the S4 PCB, to which the 420P SUB PCB is now attached, to its original slot.
6
Engage the S PCB clamp which was disengaged in step 1.
7
Attach the top panel which was removed in step 1.
S4 PCB
420P SUB PCB
Before installation
After installation
Fig. 5
Fig. 6
P7 connector
<Note>
The clamp which is
mounted on the inside
of the unit’s front panel
and the clamp which is
mounted on the top
panel are designed to
prevent
the
circuit
boards from popping
out of position. Bear in
mind that the screws
must be used in all the
locations on the clamps
to
keep
the
circuit
boards in place.
Fig. 4