– 8 –
Controls and their functions
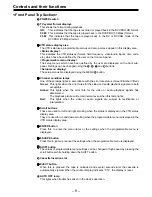
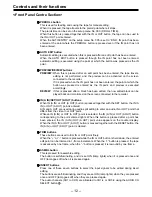
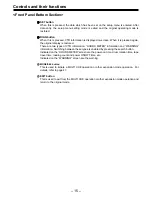
<Front Panel Top Section>
1
POWER switch
2
TV system/format displays
This shows the format during playback.
HD:
This indicates that the tape is recorded or played back in the DVCPRO HD format.
50 M: This indicates that the tape is played back in the DVCPRO (50 Mbps) format.
25 M: This indicates that the tape is played back in the DV or DVCAM mode of the
DVCPRO (25 Mbps) format.
3
3
3
3
3
VTR status display area
The VTR’s statuses, programmable menus and setup menus appear in this display area.
<Status display>
This indicates the VTR statuses (format, field frequency, video/audio inputs, time code,
etc.) which have been defined by the user on the front sub-panel.
<Programmable menu display>
The setup menus which have been defined by the user are displayed on the front sub-
panel. Settings can be changed using the
5
,
6
,
7
and
8
buttons.
<Setup menu display>
The setup menus are displayed using the MENU
d
button.
4
4
4
4
4
Channel condition lamps
One of these lamps lights in accordance with the error rate status. (Green
→
Amber
→
Red)
Green: This lights when the error rates for the video and audio playback signals are both
acceptable.
Amber: This lights when the error rate for the video or audio playback signals has
deteriorated.
The playback picture will remain normal even when this lamp lights.
Red:
This lights when the video or audio signals are subject to rectification or
interpolation.
5
5
5
5
5
Scroll buttons
These are used for left and right scrolling when the status is displayed in the VTR status
display area.
They are used for up and down scrolling when the programmable menu is displayed in the
VTR status display area.
6
6
6
6
6
ENTER button
Press this to enter the menu items or the settings when the programmable menu is
displayed.
7
7
7
7
7
ESCAPE button
Press this to ignore or cancel the settings when the programmable menu is displayed.
8
8
8
8
8
SHIFT button
The values of programmable menu settings can be changed at high speed by pressing the
scroll buttons while holding down the SHIFT button.
9
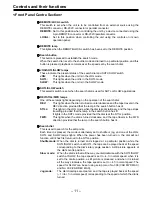
Cassette insertion slot
:
:
:
:
:
EJECT button
When this is pressed, the tape is unloaded and several seconds later the cassette is
automatically ejected. When the counter display indicates “CTL”, the display is reset.
;
AUTO OFF lamp
This lights when trouble has arisen in the deck’s operation.


