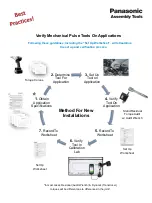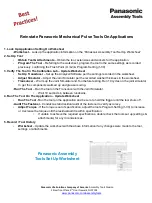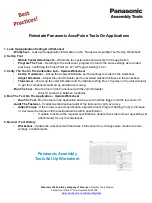
1. Look Up Application Setting On Worksheet
•
Worksheet
– Look up the application information on the “Panasonic Assembly Tool Set Up Worksheet”.
2. Set Up Tool
•
Obtain Tool & Attachments
– Obtain the tool, extensions and sockets for the application.
•
Program The Tool
– Referring to the worksheet, program the tool to the same settings as recorded
previously confirming the Flush Point (L1/L2) & Program Setting (1-30)
3. Verify The Tool In The Calibration Lab
– Update Worksheet
•
Set Up Transducer
– Set up the Analyzer/Software per the settings recorded in the worksheet.
•
Adjust Simulator
– Adjust the Joint Simulator per the recorded washer thickness in the worksheet.
•
Transducer
– Warm up the Joint Simulator and Tool before testing. Run 10 cycles on the joint simulator
to get the components warmed up and grease moving.
•
Run The Tool
– Run the tool on the Transducer with the Joint Simulator.
•
Wait 10 seconds in between rundowns.
4. Run The Tool On The Application
– Update Worksheet
•
Run The Tool
- Run the tool on the application and be sure to hold the trigger until the tool shuts off.
•
Audit The Fastener
- Conduct a static/residual audit of the fastener to verify accuracy.
•
Adjust Torque
- If the torque is out of
specification, adjust the tool’s Program Setting (1-30) to increase
or decrease the torque until the residual audit is within specification.
•
If unable to achieve the required specifications, double check the tools set up (settings &
attachments) for any inconsistences.
5. Record / Tool History
•
Worksheet
– Update the worksheet with the above information if any changes were made to the tool,
settings or attachments.
Panasonic Assembly
Tools Set Up Worksheet
Reinstate Panasonic Mechanical Pulse Tools On Applications
Panasonic Life Solutions Company of America
Assembly Tools Division
2 Riverfront Plaza 5
th
Floor Newark, NJ 07102
Summary of Contents for AccuPulse EYFLA7
Page 1: ......
Page 9: ...EYFLA4 EYFLA5 EYFLA6 EYFMA1 EYFNA1 EYFPA1 Mechanical Pulse Tools ...
Page 14: ... Tool set to L1 ...
Page 15: ... Tool set to L1 ...
Page 16: ...EYFLA7 EYFLA8 EYFLA9 EYFMA2 AccuPulse ...
Page 24: ...EYFGA1 EYFGA2 EYFGA3 EYFGB1 EYFGB2 EYFGB3 Clutch Tools ...


