background image

I

12x

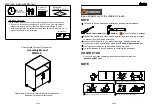
STEP 8  

The panel 

 installation

I

I

I

I

I

I

I

I

I

I

I

I

The panel 

plays a great

role in the stability of the

whole cabinet.

If panel 

 is not in the state

indicated by "Picture 1"

after ordering, please

remove the back panel and

adjust it before ordering

panel 

, otherwise it will

affect the alignment of the

panel and the smoothness

of the drawer opening.

K

4x

J

12x

E

4x

The accessories E are

installed on the inside

E

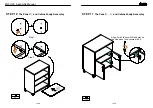
STEP 9


The accessories "K" installation

MWJG-5  Assembly Manual

Home&Garden

13/18

14/18

J

Summary of Contents for MWJG-4

Page 1: ...e product please contact us at pananaus 163 com NOTE 1 Safe carriage multi people are needed 2 Handle with care protective layer is required 3 In case of any doubts contact Panana Home Garden You need to have a crosshead screwdriver and hammer beforehand Both not included in package hammer MWJG 5 Assembly Manual Number of packages 60 MIN Maintenance skills Tools needed 2 1 2 M 2 REQUIRED ASSEMBLY ...

Page 2: ...represent the matching accessories and are packed in a separate package In order to facilitate installation the panel has pre drilled positioning holes for the accessories When installing only need to match the mounting holes of the accessories with the pre drilled holes on the panel and lock them with the matching screws For details see the relevant installation instructions Cam Lock Nuts C2 C1 C...

Page 3: ...IONS Use Accessory A B D Crosshead Screwdriver D RIGHT TURN UNTIL TIGHT B or C RIGHT TURN UNTIL TIGHT Crosshead Screwdriver ENSURE THERE IS NO GAP BETWEEN THE PANELS D Horizontal panel Vertical panel B or C A Horizontal panel Vertical panel The relationship of A B or C D during installation B for cabinet body C mini for drawer B Step1 Step2 Step2 Assembly Instructions STEP 1 Panel Installation A A...

Page 4: ... After STEP 2 Panel Installation 52 48 Front Behind Top Bottom D D A A A A A A A A D D D D A D 2x A 4x D 2x STEP 3 Panel Installation 51 48 Front Behind Left Right D D D D D D 4x D D D 4x D D 48 31 Front Left MWJG 5 Assembly Manual Home Garden 07 18 08 18 ...

Page 5: ... TIGHT Step2 B Top Front Right carpet 09 carpet F 4x C 2x E 12x G 1x G Step 1 Step 2 STEP 4 Panel Installation C1 C1 C2 C2 C1 E E E E E E E E F F F E E E E E E Pay attention to the installation direction of the lock Pay attention to the installation direction L 1x L1 L2 L3 L1 L1 L1 L1 L2 MWJG 5 Assembly Manual Home Garden 09 18 10 18 E E E E F F L3 C1 C1 L1 L1 L1 L1 C2 L2 ...

Page 6: ...he door step 1 Press down Insert into the pre drilled hole Lock the door step 2 Rotate the key to pop out the lock cylinder Open the door step 1 Press down Open the door Turn the key to retract the lock core out and How to lock and open the door MWJG 5 Assembly Manual Home Garden 11 18 12 18 Picture 1 If there is an error in the hole here it can be corrected by adjusting the door hinge or the matc...

Page 7: ...state indicated by Picture 1 after ordering please remove the back panel and adjust it before ordering panel otherwise it will affect the alignment of the panel and the smoothness of the drawer opening K 4x J 12x E 4x The accessories E are installed on the inside E STEP 9 The accessories K installation MWJG 5 Assembly Manual Home Garden 13 18 14 18 J ...

Page 8: ...STEP 11 The Panel and Cabinet body Assembly E F Align F with the pre drilled holes on the side panel and secure with E E 16x E E E E STEP 10 The Panel and Cabinet body Assembly MWJG 5 Assembly Manual Home Garden 15 18 16 18 ...

Page 9: ...WARNING NOTE IMPORTANT Tipping can injure young children Door hinge adjustment method and principle IMPORTANT PRECAUTIONS MWJG 5 Assembly Manual Home Garden 17 18 18 18 Picture 2 ...

Reviews: