


Chapter 7.
114
TransPort™ PT878GC User’s Manual
7.1.8
Changing Communications Parameters
On occasion, you might need to change the parameters by which the PT878GC communicates with a PC over the
wireless infrared interface. To check or change these parameters:
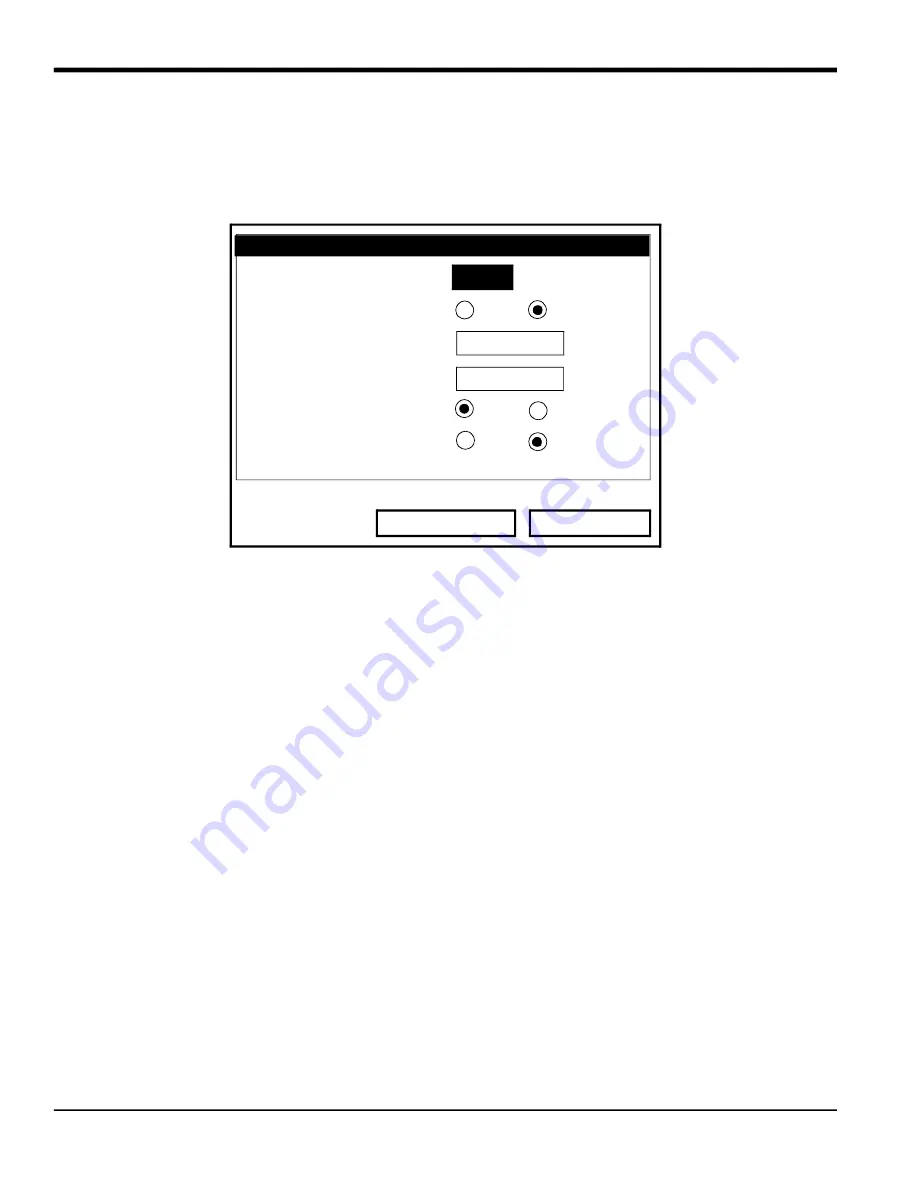
1.
From the Meter menu, scroll to the Communications entry and press
[ENTER]
. The Communications window
appears similar to Figure 108 below.
Figure 108: The Communications Window
2.
The first prompt asks for the node identification number, which can be any number from 1 to 240.
IMPORTANT:
Do NOT change the node ID unless instructed by Panametrics Sensing.
a.
Press
[ENTER]
to open the text box.
b.
Use the numeric keys to enter the node ID.
c.
Press
[ENTER]
to confirm the entry.
3.
The next prompt asks you to select the communications interface from two options: IrDA (Infrared Data
Association) and the IR232 virtual interface. You must use IrDA when using an IR printer or transfer application
such as QuickBeam. Use the [
] and [
] keys to scroll to the desired selection, and press
[ENTER]
.
Note:
For more information on loading software updates via the infrared interface, see Chapter 9,
Servicing the
PT878GC
.
If you have selected IrDA, you have completed entering data in this window. However, if you have selected IR232, the
PT878GC asks for four more parameters.
IMPORTANT:
Using IR232 requires the following parameters:
•
Baud Rate -- 9600
•
Parity -- None
•
Stop Bits -- 1
•
Data Bits -- 8
4.
The program now asks for the baud rate. The default rate is 9,600 bps.
a.
Press
[ENTER]
to open the drop-down menu.
b.
Use the [
] or [
] arrow keys to scroll to the desired rate, from 300 to 115.2K bps.
c.
Press
[ENTER]
to confirm the entry.
5.
The next prompt asks for the parity from five options: None, Mark, Space, Even or Odd. The default parity is None.
Communications
Node ID
2
Comm Interface
IrDA
IR 232
Baud Rate 9600
bps
Parity
None
Stop Bits
Data Bits
1
2
7
8
Cancel
OK
Summary of Contents for PT878GC
Page 2: ......
Page 4: ...ii no content intended for this page...
Page 10: ...Contents viii TransPort PT878GC User s Manual...
Page 16: ...Chapter 2 6 TransPort PT878GC User s Manual Figure 3 Connection Locations...
Page 50: ...Chapter 3 40 TransPort PT878GC User s Manual...
Page 98: ...Chapter 5 88 TransPort PT878GC User s Manual...
Page 148: ...Chapter 8 138 TransPort PT878GC User s Manual...
Page 152: ...Chapter 9 142 TransPort PT878GC User s Manual Figure 131 Printout of a Typical Drive Report...
Page 190: ...Chapter 10 180 TransPort PT878GC User s Manual...
Page 196: ...Chapter 11 186 TransPort PT878GC User s Manual...
Page 198: ...Appendix A 188 TransPort PT878GC User s Manual...
Page 199: ...Appendix A TransPort PT878GC User s Manual 189 Figure 163 The Site Menu...
Page 201: ...Appendix A TransPort PT878GC User s Manual 191 Figure 165 The Program Menu Pipe Option...
Page 204: ...Appendix A TransPort PT878GC User s Manual 194 Figure 168 The Meter Menu...
Page 205: ...Appendix A TransPort PT878GC User s Manual 195 Figure 1 Logging Mneu...
Page 212: ...Appendix D 202 TransPort PT878GC User s Manual...
Page 218: ...Index 208 TransPort PT878GC User s Manual...
Page 220: ...2 Doc Tittle Manual Type...
Page 222: ...Warranty 4 TransPort PT878GC User s Manual no content intended for this page...
Page 223: ......


