


O N I N I T I A L P O W E R - U P
D i s p l a y w i l l i n d i c a t e r e v l e v e l o f s o f t w a r e a n d P a l s t a r
c o p y r i g h t i n f o r m a t i o n .
SCREEN DISPLAY ON POWER-UP
Page 12
Page 3
HOW-TO UPDATE SOFTWARE
PRESS
TO SELECT
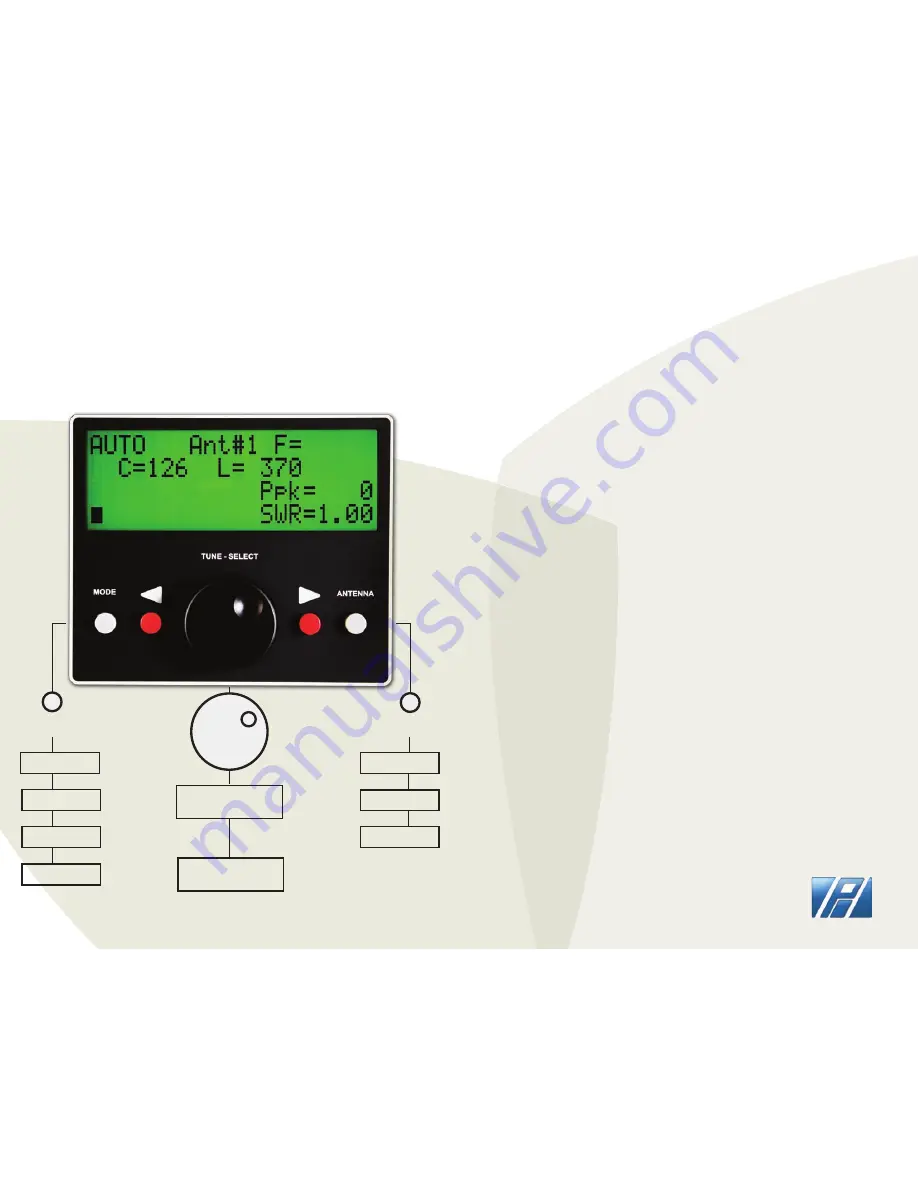
C AND L
TO SELECT
SETUP ITEM
D O W N LO A D I N G H F - AU TO F I R M WA R E
l
CREATE a folder on your computer’s hard drive (but not desktop)
l
NAME the folder HF_AUTOUPGRADE
l
DOWNLOAD the Firmware file (Zip format) from the Palstar website -
http://www.palstar.com/en/hf-auto/ - it is near the bottom of the page .
The link to the file is named “HF-AUTO Firmware 1.x”
l
SAVE the file to the folder you created in Step 1
l
OPEN the folder by right-clicking on the Zip file and select “Extract All” -
follow the steps in the Extraction wizard
l
TURN-OFF the HF-AUTO
l
CONNECT the RS-232 cable to the rear panel
l
CONNECT the other end of the RS-232 cable to Com 1 or your computer
l
TURN-ON the HF-AUTO
l
SET Switch at rear of the HF-AUTO to “PROGRAM”
l
Note: LED (PROGRAM MODE) on Front Panel is illuminated
l
DOUBLE-CLICK “LOAD_HF_9600” from your HF_AUTOUPGRADE folder that
you created in Step 2
l
DOS Window appears - wait until DOS Window closes (approx. 1 min)
l
TURN “PROGRAM” Switch to “NORMAL”
l
REMOVE the RS-232 cable
l
TURN HF-AUTO OFF and then ON again
l
LOOK at HF-AUTO display to see new REV level at top-right corner when
you first turn it on
l
COMPLETE - you have now completed the update of the firmware
NOTE:
I N S TA L L I N G T H E F I R M WA R E U P G R A D E
ANT #1
ANT #2
ANT #3
AUTO
MANUAL
BYPASS
SETUP
The HF-AUTO ships with a DB9 serial cable.
You can order a USB to DB9 serial cable
from Palstar for use with computers with no
DB9 serial port to update the firmware.
MODE
TUNE KNOB
PRESS
PRESS
ANTENNA
PALSTAR