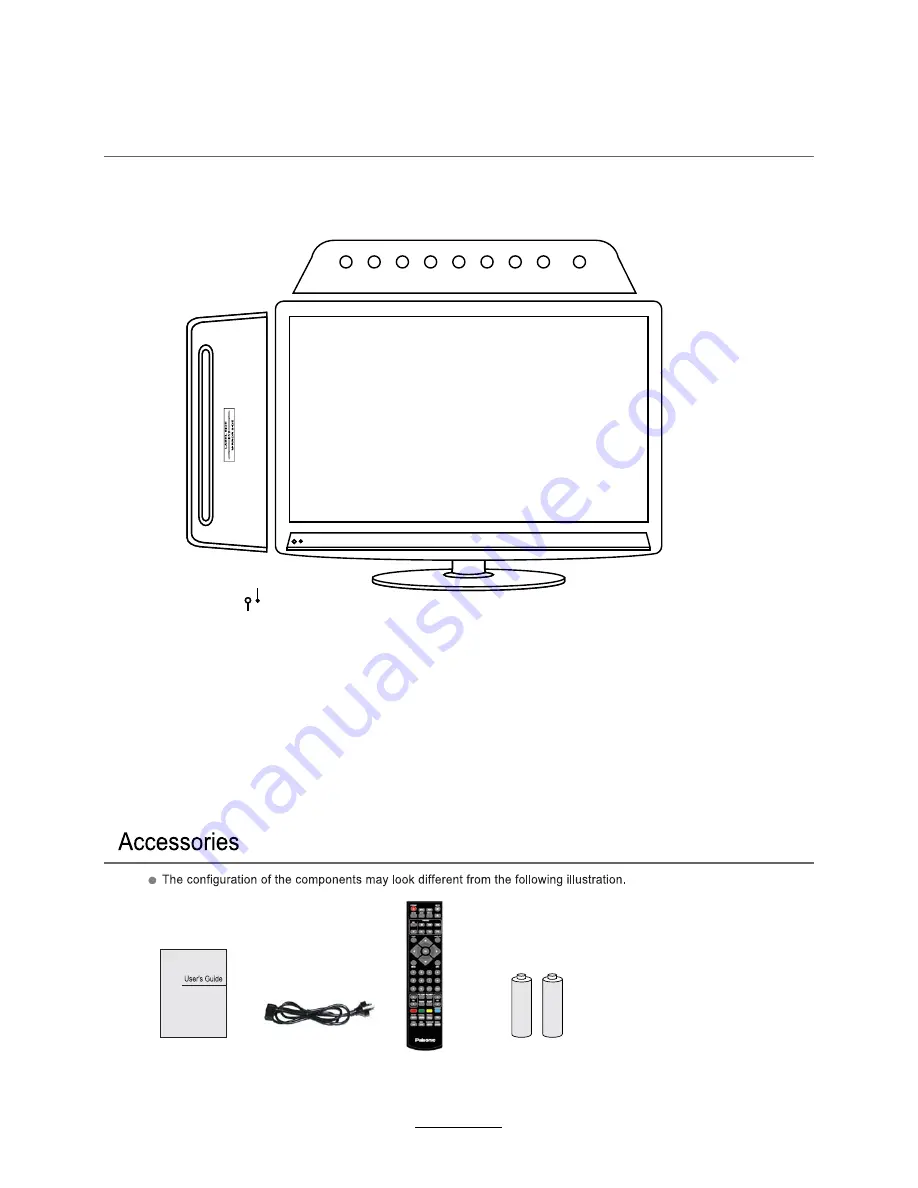
Palsonic TFTV6042FHD Instruction Manual Download Page 9

User’s Guide

Remote Control

Mains cable

Batteries (2xAAA)

Overview

Front View

MENU:

Display/exit the OSD menu.

CH+/-:

 Scan through channels.

VOL+/-:

Adjust the volume.

INPUT:
PLAY:

Play / Pause the disc playing

EJECT:

Eject the disc.

 Display the input source menu.

POWER:

Turn on/standby the TV set.

Remote Control Sensor
(keep clear)

LED Indicator

MENU

 CH

CH

VOL

VOL

TV

AV

PLAY

EJECT

POWER

Please insert a 12cm disc 
according to the silk

 6

Summary of Contents for TFTV6042FHD

Page 1: ...TFTV6042FHD INSTRUCTION MANUAL 60cm 23 6 LCD TV WITH DVD DVB T...

Page 2: ......

Page 3: ...te control 8 9 Basic Operation 10 1 CHANNEL Menu 11 12 2 PICTURE Menu 13 4 TIMER Menu 15 5 OPTION Menu 16 6 LOCK Menu 17 3 SOUND Menu 14 Contents OSD Menu Recording Operation Recording Operation 21 23...

Page 4: ...Power Supply 1...

Page 5: ...Installation 2...

Page 6: ...Use and Maintenance 3...

Page 7: ...Important Safety Instructions 4...

Page 8: ...Important Safety Instructions 5...

Page 9: ...H Scan through channels VOL Adjust the volume INPUT PLAY Play Pause the disc playing EJECT Eject the disc Display the input source menu POWER Turn on standby the TV set Remote Control Sensor keep clea...

Page 10: ...C PC IN Connect it to the audio output terminal of PC YPbPr Connect them to the YPbPr video output terminal of DVD Coax out Digital coaxial output Audio L R in Connect them to the audio output termina...

Page 11: ...show the Electronic Program Guide during no menu state only in DTV mode REP Repeat playing the title or chapter Load eject DVD disc CURSOR KEYS OK Allows you to navigate the on screen menus and adjust...

Page 12: ...eginning and end of it GOTO Play your favorite title chapter track SLOW Play DVD programs at slow speed CH Scan through channels VOL Adjust the volume PICTURE Select the picture mode NICAM A2 TV Nicam...

Page 13: ...e Before you select the input source make sure the connections are made correctly Basic OSD Menu operation Press MENU button to display the OSD menu as below Use button to select the main menu and pre...

Page 14: ...DTV channel and press OK button to start searching ATV Manual Tuning Press OK button to enter the ATV Manual Tuning menu Storage To Select a position for storing the program System Select a TV system...

Page 15: ...W again to confirm the change Press menu to exit and it will automatically save the current set Skip Select a channel and press the BLUE button to label the channel as long as the channel has a skip l...

Page 16: ...crisp edges in the picture decrease it for soft edges Tint Controls the tint NTSC mode only Color Temperature Choose from Medium Cool User and Warm Red Controls the red colour of the picture Green Co...

Page 17: ...ode is set to User Controls the relative intensity of lower pitched sounds Balance To adjust the balance of the left and right sound track or turn off the volume of the left and right sound track Auto...

Page 18: ...ll be turned off automatically you could also set the frequency On Time Press OK button to enter the submenu you could set the time when the TV set will be turned on automatically you could also set t...

Page 19: ...mode Allows you to select first and second subtitle language OSD Duration Allows you to setup the time of the menu display on the screen among 5s 10s 15s 20s 25s 30s 35s 40s Country Display the curren...

Page 20: ...en changed you must enter the newest code New Enter the new password Confirm Enter the new password again Block Program Lock the channel you have to enter the code to view the channel Use and buttons...

Page 21: ...ect the kind of the files in the device you want to program from PHOTO MUSIC MOVIE and TEXT Press button to select the device and press OK button to enter 1 Press the TV AV button on the remote contro...

Page 22: ...mode press again to exit Play the photo Play the music Multimedia Operation Multimedia Operation Press button to select the option on the table and press OK button to change Repeat Select the repeat...

Page 23: ...s button to cancel Step Step the programs by OK button press button to cancel Goto Time Program the movie form the time you set Zoom out in Zoom out in the movie screen Aspect Ratio Select the aspect...

Page 24: ...RED button Delete the program you select Recording Operation Recording Operation 2 Recording Timer TITLE Display the name of the recording program MODE Select the record mode Start Time Set the start...

Page 25: ...he remote control 4 PVR File System Setup the PVR File system before you start recording Select Disk Select the device for the Record files Check PVR File System USB Disk Display the USB state Format...

Page 26: ...mode c Press PLAY button to play the program you are recording from the beginning 5 Record Start PAUSE Press to enter the timeshift mode When you press REC button the screen will display the recording...

Page 27: ...a track to play 4 Press OK or Play to start when highlighted 5 Return to Menu when Playing When playing a DVD disc press the Menu button to return to the ROOT menu When playing a SVCD or VCD and PBC...

Page 28: ...disc press Next on the remote or the right side of the player 3 To skip backward to the beginning of the preceding title chapter track on a disc press Prev on the remote or the right side of the playe...

Page 29: ...ial number of playing subtitle the amount of optional subtitles or Off Press the button for the third time the display menu fades out 4 Loading and playing VCD Press Display button once to show the fi...

Page 30: ...th subtitles you can use the Subtitle feature to view the subtitles on screen By default subtitles are off The info banner will display Subtitle Off 4 To display subtitles press the Subtitle button ag...

Page 31: ...uttons will turn off the setup menu while the choices that have been changed will be saved Menu specification 1 SYSTEM SETUP The system setup options are illustrated below TV SYSTEM According to the C...

Page 32: ...If the disc you are playing has the language you require you may select this 3 AUDIO SETUP 4 DIGITAL SETUP The video setup options are illustrated below DYNAMIC RANGE Use the button to move the scrol...

Page 33: ...ompressed data that needs proper handling 1 Hold the disc with fingers by outer edge and or the center spindle hole Do not touch the discs surface 2 Do not bend or press the disc 3 Do not expose the d...

Page 34: ...een size Stripes appear on the screen Stop using wireless telephones hair driers and electric drills and it shakes The screen does not move Press the PAUSE button Check if the Pause button is pressed...

Page 35: ...Size LCD Panel Max Resolution Input Connector Output Connector VIDEO YPbPr VGA AUDIO L R PC AUDIO HDMI RF HEADPHONE COAX Main Voltage Power 23 6 TF T LCD 1920x 1080 1 1 1 1 1 1 1 1 1 1 100 240V 50 60...

Page 36: ......

Reviews: