background image

OSD Menu

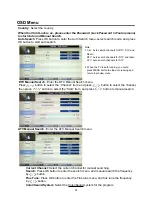
Country

: Select the country.

Auto Search

: Press OK button to enter the Auto Search menu, select search mode, and press

DTV Manual Search

: Enter the DTV Manual Search menu.

Press            button to select the “Channel” item, and press            button to select the channel,
then press             button to select the “Start” item, and press            button to manual search. 

OK button to start auto search.

ATV Manual Search

: Enter the ATV Manual Search menu.

Fine Tune: 

Press OK button to enter the Fine tune menu, and fine tune the frequency

Current Channel: 

Select the current channel for manual searching.

Search:

Press OK button to enter the search menu, and manual search the frequency

Color/Sound System

: Select the Color/Sound system for the program.

by           button.

by           button.

Note:

1. ALL: Auto search channels for DTV, ATV and

   Radio.

   DTV: Auto search channels for DTV and radio.

   ATV: Auto search channels for ATV.

2. When the TV is auto tunning, you could

   press MENU button to stop auto tunning and

   return to preview menu.

When the Child Lock is on, please enter the Password (Lock Password in Feature menu) 
to start Auto and Manual Search.

7

585500

 14

Summary of Contents for TFTV4225FL

Page 1: ...Offering Australians quality since 1958 www palsonic com au TFTV4225FL INSTRUCTION MANUAL 107cm 42 D LED TV WITH DVB T 6 200mm 200mm...

Page 2: ......

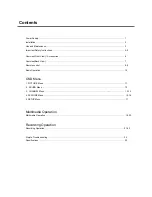
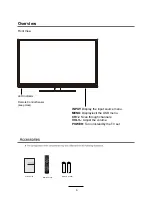
Page 3: ...ew Front View Accessories 6 Remote control 8 9 Basic Operation 10 1 PICTURE Menu 11 2 SOUND Menu 12 4 FEATURE Menu 15 16 5 SETUP Menu 17 3 CHANNEL Menu 13 14 Contents OSD Menu Recording Operation Reco...

Page 4: ...Power Supply 1...

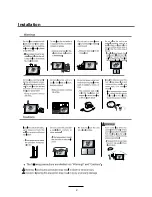
Page 5: ...Installation 2...

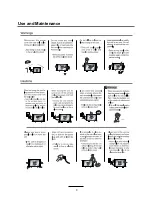
Page 6: ...Use and Maintenance 3...

Page 7: ...Important Safety Instructions 4...

Page 8: ...Important Safety Instructions 5...

Page 9: ...t the OSD menu CH Scan through channels VOL Adjust the volume INPUT Display the input source menu POWER Turn on standby the TV set User s Guide Remote Control A A A x 2 s e i r e t t a B Remote Contro...

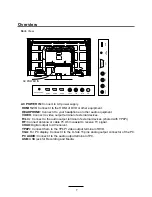
Page 10: ...tput terminal of PC VGA For PC display Connect it to the D Sub 15 pins analog output connector of the PC COAX Digital output to AV receiver HEADPHONE Connect it to your headphone or other audio equipm...

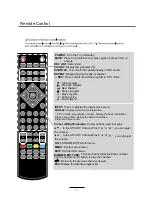
Page 11: ...annel directely Press number Cursor left right up down Cursor buttons used in menus OK CONFIRM BUTTON for menu In the ATV DTV Channel Press or you can ajust the channel In the ATV DTV Channel Press or...

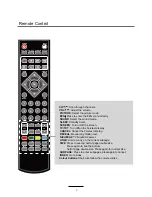
Page 12: ...den text HOLD Hold or carry on the current subpage SIZE Press to see top half of page double size Press again to see the bottom half of page double size Press again for normal size SUBPAGE Press to en...

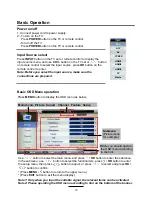
Page 13: ...ke sure the connections are prepared Basic OSD Menu operation Main menu Picture Sound Channel Feature Setup Submenu Picture menu for example Hint you should operate Press MENU button to display the OS...

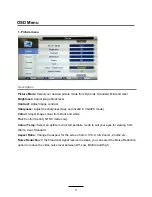
Page 14: ...mode Colour Adjust image colour from black and white Colour Temp Select an optimum color temperature mode to suit your eyes for viewing from Warm Cool Standard Noise Reduction If the broadcast signal...

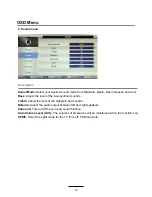
Page 15: ...of the lower pitched sounds Treble Adjust the level of the higherpitched sounds Balance Adjust the audio output between left and right speakers Auto Volume Level AVL The volumes of all sources will b...

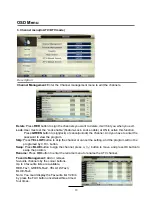
Page 16: ...ill hint you when you exit Press Skip YELLOW button to skip the channel or cancel the setting and the program will not be programed by CH button Press Swap Rename BLUE button to sign the channel press...

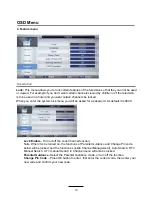
Page 17: ...nter the Fine tune menu and fine tune the frequency Current Channel Select the current channel for manual searching Search Press OK button to enter the search menu and manual search the frequency Colo...

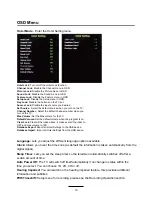
Page 18: ...you will be asked for a password As default it is 0000 Lock Enable Turn on off the Lock Channel function Parental Guidance Select the Parental Guidance mode or turn off the function Note When it is b...

Page 19: ...you select You can choose 1H 2H 4H or off Hotel Lock Turn on off the Hotel Lock function Channel Lock Disable the Channel menu in OSD Picture Lock Disable the Picture menu in OSD Sound Lock Disable t...

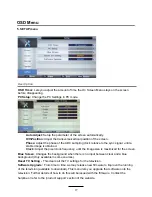
Page 20: ...vailable to download This menu lets you upgrade that software onto the television Further details of how to do this will be issued with the firmware Contact the helpline or refer to the product suppor...

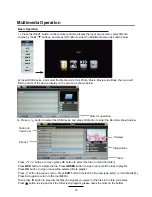
Page 21: ...the input source menu select Media source by the buttons and press OK button to enter the Multimedia menu as shown below Then press button to program the files be signed you select or the files in the...

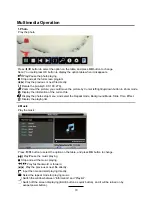
Page 22: ...icture you could move the picture by Cursor left right up down button in Zoom mode Display the information of the current file Display the photo setup menu and select the Repeat mode Background Music...

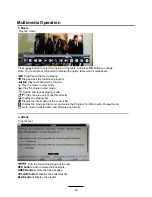
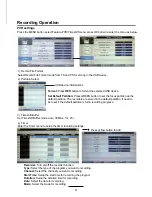
Page 23: ...Set the A B repeat playing mode AB Goto mode Input the time and start playing directly Display the information of the current file Display the movie setup menu and setup the Program Subtitle Audio Rep...

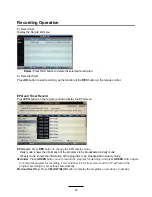
Page 24: ...efault partition It need to be reset if the default partition is full in recording progress 2 Partition Select Recording Operation Set Timeshift Buffer mode auto 30Mins 1hr 2hr 3 Timeshift Buffer Ente...

Page 25: ...to change the EPG display mode Daily mode shows the information of the programs to be broadcasted in daily mode Weekly mode shows the information of the programs to be broadcasted in weekly mode Remin...

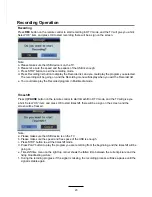
Page 26: ...g there will be a sign on the screen Press PAUSE button on the remote control to start timeshift in DTV mode and the TV will give you Note a Please make sure the USB device is on the TV b Please make...

Page 27: ...Check the aerial connections Check that the channel is tuned in properly Adjust the picture settings brightness colour sharpness contrast hue Make sure that the TV is not located close to electrical a...

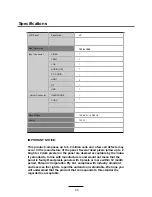
Page 28: ...e panel is faulty Dead pixels panels with 6 pixels or more within 12 month period Palsonic Corporation Pty Ltd complies with industry standard and reserves the right to repairthe unitand non refundabl...

Page 29: ......

Page 30: ......

Page 31: ......

Page 32: ...Palsonic Customer Service Telephone Australia 1300 657 888 Palsonic C ABN 34 000 474 108 1 Joynton Avenue Waterloo NSW 2017 Australia Telephone 02 9313 7111 Facsimile 02 9697 0655 www palsonic com au...

Reviews: