Palsonic TFTV1720D User Manual Download Page 3

Important Safety Instructions

2

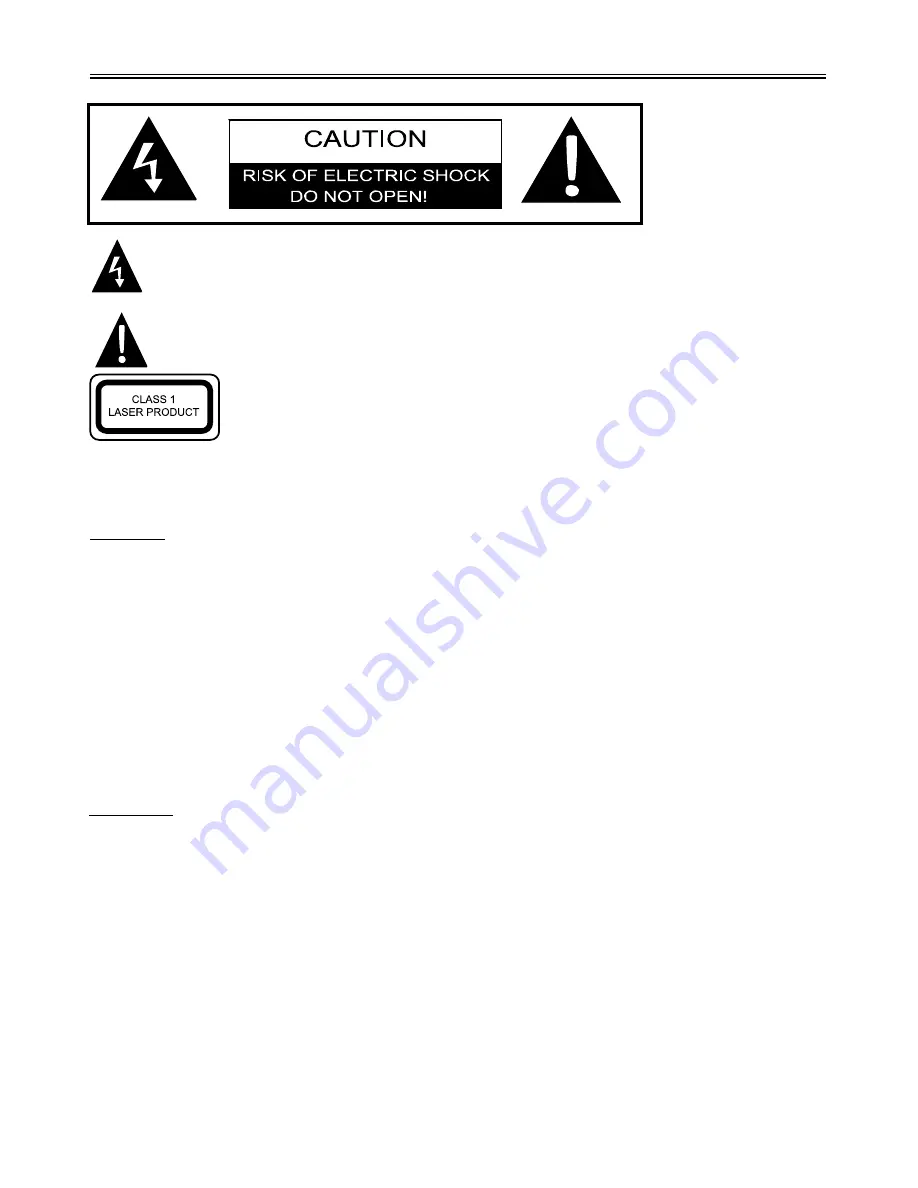
The lightning flash with arrowhead symbol, within an equilateral triangle, is intended
to alert the user to the presence of uninsulated “Dangerous Voltage” within the product’s
enclosure that may be of sufficient magnitude to constitute a risk of electric shock to persons.

The exclamation point within an equilateral triangle is intended to alert the user to
the presence of important operating and maintenance (servicing) instructions in the
literature accompanying the appliance.

CAUTION:

 USE OF ANY CONTROLS, ADJUSTMENTS, OR PROCEDURES OTHER THAN

THOSE SPECIFIED HEREIN MAY RESULT IN HAZARDOUS RADIATION EXPOSURE.

CAUTION

1.

2.

3.

4.

The product contains a low-power laser device. In order to ensure the safety of the laser device,

do not remove any cover and attempt to repair the unit. If any service is needed, please contact

the distributor or its authorised service centre.

To reduce the risk of electric shock, do not remove the cover (or back). No user-serviceable

parts inside. Refer servicing to qualified service personnel. Unplug the product from the wall

outlet before servicing or when it is unused for a long period of time.

The manufacturer should not hold responsibility for the damage caused by any substitutions

and modifications of the product without authorisation from the manufacturer or authorised unit.

Danger of explosion if battery is incorrectly replaced. Replace only with the same

or equivalent type.

WARNING

The apparatus shall not be exposed to dripping or splashing and that no objects filled with liquids,
such as vases, shall be placed on the apparatus.

CAUTION: Laser radiation when open. Do note stare into
beam.

Summary of Contents for TFTV1720D

Page 1: ...LCD TV COMBO TFTV1720D USER S MANUAL...

Page 2: ...te Control System Connections Connecting to AV Signal Source Connecting to Personal Computer Connecting to TV Signal Input Connecting to Power Adapter Connecting to Headphone TV Function AV Function C...

Page 3: ...afety of the laser device do not remove any cover and attempt to repair the unit If any service is needed please contact the distributor or its authorised service centre To reduce the risk of electric...

Page 4: ...t where they exit from the apparatus Only use attachments accessories specified by the manufacturer Use only with the cart stand tripod bracket or table specified by the manufacturer or sold with the...

Page 5: ...arly shows the data Stereo Amplifier Built in 2 x 3w speakers and BBE sound processor provide high quality sound Teletext Function Support Teletext function and provide more operations Advanced Playin...

Page 6: ...yback of CD R or CD RW discs created on a computer requires proper formatting and finalisation of the disc for audio playback Some computers and or software programs may not be capable of creating com...

Page 7: ...creen Present high resolution pictures 2 Power Indicator In normal playback status it turns green while in standby turns red 3 Remote sensor Used as the remote sensor window for the remote control 4 S...

Page 8: ...4 VOL button Press to decrease or increase the volume The same function as direction button when in LCD menu set up 5 PLAY button Press to start playback under DVD mode 6 Stop Press to stop playback t...

Page 9: ...al computer 4 S Video Input Jack Connection for S Video input 5 L R Audio Input Jacks Connection for external audio input under S VIDEO or AUX mode 6 Video Input Jack Connection for external video inp...

Page 10: ...vance to the next channel or to go back to the preceding channel Use the buttons to select items in the setup menu 10 OK button Press to confirm the selection Press to exit from the LCD setup menu 11...

Page 11: ...o scan channels under TV mode 28 VOL Press to increase or decrease the speaker volume level 29 Pause Step Press to pause the playback or start step frame by frame playback Press the PLAY button to res...

Page 12: ...Insert the battery into the receptacle and insert the receptacle into the remote Under normal use the battery will last for six months Take out battery when the remote is not in use for a long time Us...

Page 13: ...rce And also connect the unit and the external AV signal source with S video output Connections should be made as follows Ensure that you observe the colour coding when connecting audio and video cabl...

Page 14: ...the unit and the computer via the VGA jack And also use an audio cable to connect the Audio In jack on the rear panel of the unit and the audio output jack of the computer See the below figure After...

Page 15: ...V Signal Input Plug the TV signal cable to the jack marked with ANT INPUT on the rear panel of the unit Then you can enjoy TV programs TV Signal Input After connecting press the SOURCE button on the r...

Page 16: ...ter one end of which is connected to the DC 12V IN jack on the rear panel another to wall outlet with AC100 240V See to the picture below Connecting To a Headphone Plug the headphone to the jack on th...

Page 17: ...ss the LCD SETUP button three times repeatedly on the remote control to access the TV setup menu and select correct colour and sound system In this menu use the buttons to select items you want to set...

Page 18: ...et the colour and sound mode into your local radio station mode in the general setup menu Press the LCD SETUP button twice repeatedly on the remote control to enter tuning setup menu and OSD display a...

Page 19: ...ching automatically Press the button to move cursor to Search item Press the button to search the TV program in higher or lower frequency until the unit searches the desired program Press the buttons...

Page 20: ...ure Parameter setup Press the LCD SETUP button once on remote control to enter picture setup menu and OSD display as below PICTURE BRIGHT CONTRAST SATURATION HUE SHARPNESS 055 050 070 050 000 Use the...

Page 21: ...ou can adjust display zone contrast suitable to your environment condition Auto select to automatically adjust the display zone horizontally vertically and picture quality Phase You can adjust the pic...

Page 22: ...taken automatically into the tray Loading will be highlighted on the screen and playback will begin Warning Do not play poor quality discs that may damage the player s lens DVD Playback Menu Normally...

Page 23: ...m various camera positions This lets you enjoy the same scene from different perspectives In this case you ll usually find a marking on the DVD sleeve When playing a DVD containing various camera angl...

Page 24: ...n direction button to select the contents Many discs have other contents besides pictures For Picture CD disc it will display the pictures automatically During playback press the or button to select p...

Page 25: ...cific time Press the GOTO button to display a menu and uses the direction buttons to select Time Title or Chapter Use the number buttons to input the time hour minute and second and the player will pl...

Page 26: ...ram and then press the OK button to start programming playback Select the Clear All to clear all input Press the PROG button again to exit During playback press the STOP button to stop programming pla...

Page 27: ...n on the r c Correctly put the disc into the disc tray 5 6 Playback starts automatically usually DVD discs now shows a menu to choose from You can control this menu with the direction buttons Mark the...

Page 28: ...Press the OK button to enter The screen will display as the following Language OSD Menu Subtitle Audio Disc Menu Close Caption Video English Off English English Off Rating English Francais Espanol It...

Page 29: ...rm selection and return TV Display The program s screen format is fixed by the DVD Please note that this format might not necessarily match your TV s screen format Normal PS PAN SCAN Choose this mode...

Page 30: ...default password is 3308 You can use the 3308 or the new password you input to enter the Rating level selecting mode Rating DVD s that are equipped with the child lock function are rated according to...

Page 31: ...tness Contrast You can adjust display zone contrast suitable to your environment condition Auto select to automatically adjust the display zone horizontally vertically and picture quality Phase You ca...

Page 32: ...are correct If it is not access the setup menu and select the correct system Cannot continue to play and play a section repeatedly Make sure it is not in A B repeat status Press A B button to cancel...

Page 33: ...0W Dimension without speakers 485mm x 333mm x 350mm Weight About 7 35 Kg DESIGN AND SPECIFICATIONS ARE SUBJECT TO CHANGE WITHOUT NOTICE Manufactured under license from Dolby Laboratories Dolby and the...

Page 34: ...PALSONIC CORPORATION PTY LTD 1 JOYNTON AVENUE WATERLOO NSW 2017 AUSTRALIA TEL 02 9313 7111 FAX 02 9313 7555 www palsonic com au PALSONIC CUSTOMER SERVICE TELEPHONE AUSTRALIA 1300 657 888...

Reviews: