background image

1.3 Press the       or       button to enter into the sub-menu of  

Presetting the channels

There are two ways to preset channels: to preset
channels automatically and to preset channels manually.
Below we will describe how to preset the channels
by making use of the menu.

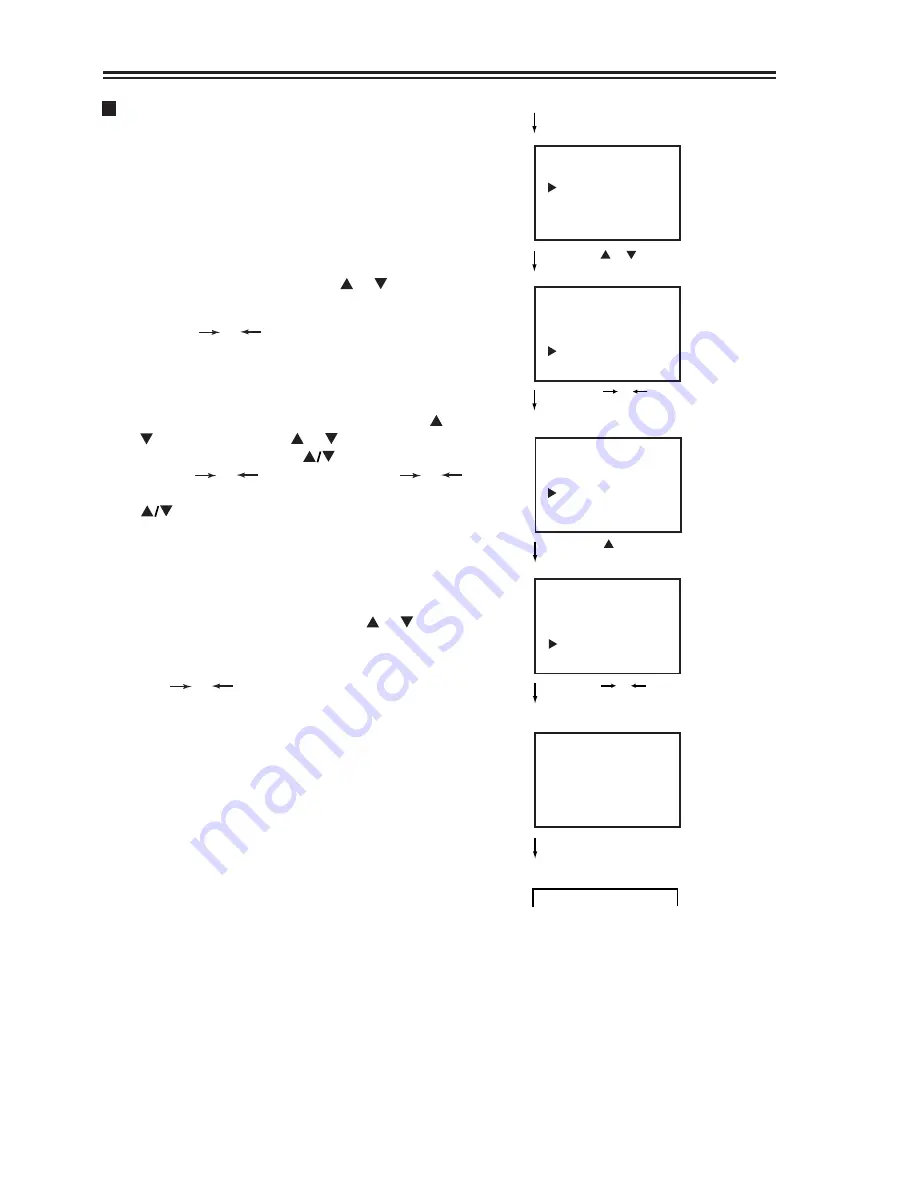
1. To enter into menu

1.1 Press the 

MENU

 button to enter into the main

menu.

1.2 Press menu item select button     or     to select

The MENU button refers to the 

MENU

 button on

the remote controller or on the TV set, the     or
    button refers to the     or     button on the
remote controller or CH         on the TV
set, the       or       button refers to the       or
button on the remote controller or the VOL
         button on the TV set.

Press the menu item select button     or     to select

AUTO SEARCH

 (the caption on the screen

is red).

Press      or       button, the TV begins to search TV
channels automatically. All active channels will be
preset and stored into the memoriser automatically.
After presetting, the TV will return to the first
channel program.

Before auto - search begins, you had better press

"SYS"

 button to set the current sound system to

B/G and the colour system to "AUTO".

Press the MENU button to
display the main menu

AUTO SEARCH

12     VHFH

After presetting is finished
it returns  to the first
channel

1

MENU

7

Press the    or    button
to select SEARCH

MENU

SEARCH

Press the      or     button
to display the sub-menu
of SEARCH

SEARCH

MANUAL SEARCH

AUTO SEARCH

Press the     button to
select AUTO SEARCH

Press the     or     button
it begins searching
automatically

2. AUTO SEARCH

SEARCH

.

SEARCH.

Note:

2.1

2.2

Note:

lllllllllllll

llllllllllllllllllllll

Summary of Contents for 8040PFST

Page 1: ...1 FAX 02 9313 7555 www palsonic com au PALSONIC CUSTOMER SERVICE TELEPHONE AUSTRALIA 1300 657 888 80CM CORDLESS REMOTE COLOUR TELEVISION MODEL 8040PFST OWNER S MANUAL Type Tested Electrical Safety AS...

Page 2: ...ete separation of brightness and colour signals To reduce colour interface blurry and dotted interruptions To make the picture clearer 3 Digital Luminance Transient Improver LTI Adopts the digital del...

Page 3: ...manual in an easily accessible location for future reference Contents Main features Notes for operation Installation and appearance Antenna connection Battery installation Appearance The remote contro...

Page 4: ...set to rain or excessive moisture to prevent tire disaster or electric shock Avoid using the set in very warm or damp places Never use it in a bathroom There exists High Voltage in this TV set Do not...

Page 5: ...htning strike Battery Installation 1 Remove the back battery cover 2 Insert two size AAA batteries according to the polarity indication inside the remote controller 3 Effective range of the remote con...

Page 6: ...oller Antenna input MONITOR output terminals VIDEO AUDIO L MONO R 1 Video 1 input terminals S VIDEO VIDEO AUDIO L MONO R 2 Video 2 input terminals S VIDEO VIDEO AUDIO L MONO R POWER SWITCH 3 Video 3 i...

Page 7: ...The Remote Controller 5...

Page 8: ...switch the set to standby mode the indicator turns to red Special indication Last Mode Memory after turning off the power the last TV mode picture and sound setting mode and preset channels all are m...

Page 9: ...m select button or to select AUTO SEARCH the caption on the screen is red Press or button the TV begins to search TV channels automatically All active channels will be preset and stored into the memor...

Page 10: ...he button to search channels from current channel to higher channel Push the button to search channels from current channel to lower channel When a channel is located the searching stops this channel...

Page 11: ...r two CATV channel s sound and picture are not standard you can correct by the use of Manual Fine Tuning Repeat steps 3 1 to 3 3 to select the channels you want to manually fine tune Push the or butto...

Page 12: ...ect the right sound system The sound system will change in the sequence on the right Now you can watch the broadcasting TV program at the preset channel You can select your desired TV program by one o...

Page 13: ...you experience loud noise in digital sound channel because of the weak signal please press the button to set the sound mode to FM MONO or FORCE FM thus to select FM sound channel In FORCE FM mode the...

Page 14: ...he program you can select BBK item to shut off the blue background We suggest you turn BKK on in ordinary circumstances STANDARD Press the MENU button to display the main menu Press the or button to d...

Page 15: ...r decrease right side sound on off weaker stronger stronger decrease left side sound on off stronger Standard mode 50 50 0 Off 50 SOUND MEMORY BASS 50 TREBLE 50 Press the or button to select adjustmen...

Page 16: ...urn off surround sound select SURROUND OFF 4 Adjusting the volume and muting the sound You can press the VOL button to adjust the volume and you can press the button to mute the sound Press the button...

Page 17: ...et time Press the MENU button to enter into the main menu press the or button to select TIMER and press the or button to enter into the sub menu of TIMER 1 2 ON TIME With the ON timer the TV will auto...

Page 18: ...EEP To make use of SLEEP function press the SLP button every time the letters displaying on the screen will change in the sequence of OFF 120 min 110min 10min OFF At the preset time the TV will automa...

Page 19: ...ipment to be connected as well 1 To Connect to AV input You can video equipments such as a VTR and video camera to this TV and enjoy the high quality picture and sound If your video equipment has an S...

Page 20: ...display COLOR AUTO If not press the or button until normal colour appears Note on the S VIDEO terminal The S VIDEO input terminal has priority over the AV1 AV2 VIDEO terminals on the rear and the AV3...

Page 21: ...neon lamps etc Possible interferences of electronic interference from another TV set a computer electronics game machine a broadcast station etc This may be caused by reflections from nearby mountain...

Page 22: ...stem Sound system Sound output Accessories Note Design and specifications are subject to change without notice IGR 2 Carrier B G 5 5 5 74 13W 13W one remote controller AC 240V 50Hz 200W 926 W x 678 5...

Page 23: ...PALSONIC CORPORATION PTY LTD 1 JOYNTON AVENUE WATERLOO NSW 2017 AUSTRALIA TEL 02 9313 7111 FAX 02 9313 7555 www palsonic com au PALSONIC CUSTOMER SERVICE TELEPHONE AUSTRALIA 1300 657 888 604 Z34183 00...

Reviews: