

IMPORTANT
Please read these instructions carefully before you start to assemble this greenhouse.
Keep these instructions in a safe place for future reference.
» Customer Service
For assistance with assembly or for replacement parts – please log onto our website
or call our service line (number is on the title page).
Additional information can be found at our website: www.palramapplications.com
» Safety Advice
•
It is of utmost importance to assemble all of the parts according to the directions.
Do not skip any step.
•
We strongly recommend using work gloves during assembly.
•
Always wear shoes and safety goggles when working with extruded aluminium.
•
If using a step ladder or power tools ensure that you follow the manufacturer’s safety advice.
•
Do not touch overhead power cables with the aluminium profiles.
•
Do not attempt to assemble the greenhouse in windy or wet conditions.
•
Dispose of all plastic bags. Keep them out of reach of small children.
•
Keep children away from the assembly area.
•
Do not lean against or push the greenhouse during construction.
•
Do not position your greenhouse in an area exposed to excessive wind.
•
Do not attempt to assemble this greenhouse if you are tired, have taken drugs or
alcohol or if you are prone to dizzy spells.
•
Hot items such as recently used grills, blowtorches etc. must not be stored in the
greenhouse. Ensure there are no hidden pipes or cables in the ground before
inserting the pegs.
•
This product is designed to be used as a greenhouse only.
» Care & Maintenance
When your greenhouse needs to be cleaned, use a mild detergent solution and rinse with cold clean
water. DO NOT use acetone, abrasive cleaners or other special detergents to clean the clear panels. It is
recommended to check periodically that roof panels caps (plastic part 329 & profile 981) are set in place.
» Tools & Equipment
•
Work gloves
•
Rubber mallet
•
Phillips head screwdriver
•
Adjustable Spanner / Wrench
•
Leveler
•
Tape measure
EN
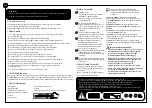
•
Screws 411 and nuts 412 are used throughout the assembly process.
•
Screws 411 are to be assembled from the outside and nuts 412 from the inside of the greenhouse.
•
If not specified otherwise, do not fasten screws and nuts (411 & 412) more than
2-3 turns only. Do not tighten them until completion of the panels’ assembly.
These 2 icons indicate if screws’ tightening is required or not.
•
However, in some steps, temporary tightening of a few screws may be needed to prevent a
profile from falling.
During assembly you will encounter the
information icon, please refer to the relevant
assembly step for additional comments and
assistance.
Step 3: Part 8362 is the greenhouse threshold.
Fixing it determines the front side of the greenhouse.
Parts 8254 & 8255 should be assembled as indicated in
diagrams a & b.
Step 24: Part 7180 is used for assembly assistance.
Step 32: Dismantle Part 7180 and re-implemant in
Step 33.
Step 39: After installing the gutter, it is mandatory to
remove Part 7180 and discard.
Step 55: Decide on the window’s location before
assembly. Windows can be installed at either one of the
four (4) indicated options.
Step 69: In case the window is not closed properly,
please release the screws, adjust the profile and tighten
the screw.
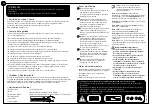
Important Recommendations
•
Firmly connect the greenhouse to a level position
immediately after completion of the assembly.
•
In order to anchor the greenhouse use the
designated manufacturer anchoring kit.
•
Anchoring the greenhouse can also be done by
drilling the base profiles and fastening it to the
ground using ground screws or spikes
(screws and spikes are not supplied).
•
Tighten all screws once assembly is completed.
•
Please note: Anchoring this product to the ground
is essential to its stability and rigidity.
It is required to complete this stage in order for
your warranty to be valid.
»
Before Assembly
Selecting a site:
- The greenhouse must be positioned
and fixed on a flat level surface.
- Choose a sunny position away from
overhanging trees.
We strongly recommend this
greenhouse being secured directly to a
solid concrete foundation. When doing
that use the pre drilled holes in the
metal base.
This is a multi-part assembly best
achieved by two people. Allow at least a
half a day for the assembly process.
Take all components & parts out of the
packages. Sort the parts and check
against the contents parts list.
Parts should be laid out close at hand.
Keep all small parts (screws etc.) in a
bowl so they do not get lost.
Please note multi-sided profiles are used
in this greenhouse. As a result some
holes in the profiles are not used during
assembly.
Please review entire instructions before
starting. Carry out the assembly steps in
exact order.
•
Silicone spray / Lubricant
•
Ladder
•
T001 - Special tool for Screws 411 and nuts 412
» Notes During Assembly
•
You may use Silicon lubricant spray in
order to help you slide the panels into
the profiles.
•
Do not spray the Polycarbonate panels.
•
Use a rubber mallet if necessary.
16.02_RF_V5


