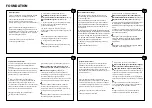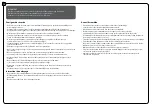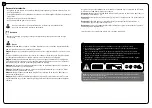
Site Preparation!
•
Base or foundation must be flattened, leveled
and prepped prior to installing the product!
•
The product must be built on a solid level
surface in order to perform properly. We
recommend using concrete or wood deck as base.
*
We recommend checking for restrictions or
covenants for building this product in your area.
In addition we advise you to check if you need to
sumbit any forms or if any permits are required
prior to building the product.
•
Clear the surface of loose empediments
•
Level the ground surface
*
See below 2 recommended options
A Solid Base (Concrete / Concrete Wall /
Pressure Treated Wood / Wood Deck)
(drawing)
B Ground Surface (grass / soil)
(drawing)
•
In order to allow easy access during assembly,
make sure you clear the surface around the
product’s assembly site.
•
Make sure you have at least 5 cm (2 in.)
between the product’s base and the edge of your
foundation.
A
Secure the product to the solid base of your
choosing using suitable screws and plugs or
masonry anchors. (Not supplied)
B
Secure the product to the ground surface using
suitable pegs. (Not supplied)
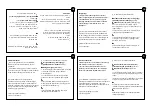
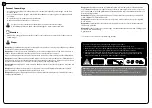
Baustellenvorbereitung!
•
Der Boden oder das Fundament müssen vor
der Montage des Produkt planiert, nivelliert und
vorbereitet werden!
•
Der Produkt muss auf einem festen, ebenen
Untergrund errichtet werden, um seine Funktion
einwandfrei leisten zu können. Wir empfehlen die
Verwendung von Beton oder eines Holzdecks als
Untergrund.
*
Wir empfehlen die Prüfung auf Einschränkungen
oder Verpflichtungen an Ihrem Wohnort hinsichtlich
dem Erbau dies Produkt. Darüber hinaus empfehlen
wir Ihnen, vor dem Bau des Produkt zu prüfen, ob
Sie irgendwelche Formulare ausfüllen müssen oder
ob Genehmigungen erforderlich sind.
•
Entfernen Sie die jegliche Hindernisse von der
Oberfläche.
•
Bodenoberfläche nivellieren
*
Siehe unten zwei empfohlene Optionen
A
Massiver Untergrund (Beton / Betonwand /
Druckbehandeltes Holz / Holzdeck)
(Zeichnung)
B
Bodenoberfläche (Gras / Erde)
(Zeichnung)
•
Um einen leichten Zugang während der Montage
zu ermöglichen, ist darauf zu achten, dass die
Oberfläche um den Montageort des Produkt herum
frei ist.
•
Stellen Sie sicher, dass Sie mindestens 5 cm (2
in.) zwischen dem Schuppenboden und dem Rand
Ihres Fundaments haben.
A
Befestigen Sie das Produkt mit geeigneten
Schrauben und Dübeln, oder Mauerwerksdübeln
an einem festen Untergrund Ihrer Wahl. (nicht
mitgeliefert)
B
Befestigen Sie das Produkt mit geeigneten Dübeln
am Boden. (nicht mitgeliefert)
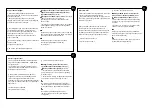
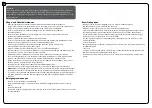
¡Preparación del Sitio!
•
¡La base o cimentación debe estar aplanada,
nivelada y lista antes de instalar el producto!
•
El producto debe construirse sobre una superficie
sólida y nivelada para funcionar correctamente.
Recomendamos usar una plataforma de concreto o
madera como base.
*
Recomendamos verificar restricciones u
ordenanzas para la construcción de esbo producto
en su área. Además, le aconsejamos que verifique
si necesita enviar algún formulario o si se requieren
permisos antes de construir el producto.
•
Despeje la superficie de obstáculos sueltos
•
Nivele la superficie del suelo
*
Abajo, vea 2 opciones recomendadas
A
Base Sólida (Hormigón / Panel de Hormigón /
Madera Prensada / Deck de Madera)
(dibujo)
B
Superficie del suelo (césped / tierra) (dibujo)
•
Para permitir un fácil acceso durante el montaje,
asegúrese de despejar la superficie alrededor del
sitio de montaje del producto.
•
Asegúrese de tener al menos 5 cm (2 pulgadas)
entre la base del producto y el borde de su cimiento.
A
Asegure el producto a una base sólida de su
elección, utilizando tornillos y tacos adecuados o
anclajes de mampostería. (No incluido)
B
Asegure el producto a la superficie del suelo,
utilizando estacas adecuadas. (No incluido)
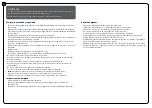
La préparation du terrain !
•
La base ou la fondation doivent être aplaties,
nivelées et préparées avant l’installation du
produit !
•
Le produit doit être construit sur une surface de
niveau solide afin de fonctionner correctement.
Nous recommandons l’utilisation de béton ou le
plancher en bois comme fondation.
*
Nous recommandons la vérification des
restrictions ou les accords de construction de
cette produits dans votre région. Nous vous
recommandons de vérifier si vous avez besoin de
soumettre des formulaires ou si des permis sont
requis avant la construction du produit.
•
Dégagez la terrain des obstacles libres
•
Niveler la surface du terrain
*
Voir deux options recommandées ci-dessous
A
Base Solide (béton / mur en béton / bois
traité sous pression / terrasse en bois)
(dessin)
B
Surface au Sol (gazon / sol)
(dessin)
•
Afin de permettre un accès facile pendant
l’assemblage, assurez-vous de dégager la surface
autour du site de montage du produit.
•
Assurez-vous d’avoir au moins 5 cm (2 po) entre
la base du produit et le bord de votre fondation.
A
Fixez le produit à la dalle de béton à l’aide de
vis et de chevilles appropriées ou d’ancres de
maçonnerie. (Les vis et les chevilles ou les ancres
de maçonnerie ne sont pas fournis)
B
Fixez le produit à la surface du sol en utilisant des
chevilles appropriés. (Non fourni)
FOUNDATION
EN
FR
DE
ES
Summary of Contents for Snap & Grow 8x8
Page 19: ...HE...
Page 24: ...245cm 961 2 365 cm 1433 4...
Page 26: ...a 2 a a a a a a a a a a 245cm 961 2 365 cm 1433 4 924 x 10 c c x 1 c c 0 1 2 3 4...
Page 28: ...1 b a 4 X2 848 849 b a a a b 849 849 848 848 849 848 848 x 2 849 x 2 847 U P U P U P UP a...
Page 30: ...a 813 847 b 813 6 b a a a 813 813 813 813 b b b 813 x 4 854 854 854 854 x 2...
Page 31: ...1 2 b a a a a a 836 x 4 836 836 836 836 836 836 836 7...
Page 34: ...b 10 a 95 95 95 95 Carton Spacer...
Page 36: ...a b 566 x 4 a a b b b a b 1 2 a 566 566 566 566 566 566 566 843 12...
Page 37: ...1 2 837 x 1 566 x 2 a b 1 2 a a b 837 837 566 566 837 a b 817 824 13 14...
Page 39: ...a a 562 562 559 559 560 560 b b b 559 x 2 560 x 2 562 x 2 16 b a b c...
Page 40: ...2 2 a a a a b 22 2 1 b 842 x 1 843 x 1 22 x 5 843 842 837 843 1 2 22 a 843 842 17...
Page 41: ...b b b b 850 Click 850 850 850 850 b b 850 x 4 561 x 2 a a 850 561 561 850 561 a 18...
Page 43: ...22 b a 1 2 1 2 22 22 809 558 99 99 22 x 4 99 x 1 99 x 1 20 558...
Page 44: ...X2 b a b 809 563 x 1 X1 a b 563 563 563 563 563 21...
Page 45: ...566 566 566 566 566 a b 566 x 15 x 7 566 a a b a a a a a b b b b 22...
Page 46: ...b a 23 23 23 2 3 a a a a a a b b b b b 23...
Page 47: ...b Click a 815 815 814 814 815 x 2 814 x 4 814 814 x 2 830 830 830 24...
Page 49: ...Click a1 833 833 851 a2 851 x 1 852 x 2 833 x 4 852 833 833 852 a a a a 26...
Page 50: ...a b a b a b 422 x 16 465 x 16 464 x 8 a b x4 465 x4 464 x2 422 x2 464 x2 a b 840 839 27 7mm...
Page 52: ...462 462 x4 a b 466 x2 411 x2 a b a b x2 466 x 8 411 x 8 462 x 4 9cm 31 2 7 5cm 215 16 29...
Page 53: ...a b 463 x4 463 x 4 a b a b a b a b 30...
Page 54: ...300 300 101 101 101 101 a a 300 x 2 101 x 2 a 300 b 300 31...
Page 55: ...a 466 411 256 a 461 x 4 256 x 4 66 x 8 411 x 4 b b a a a b b 32 b 256 466 461 x4...
Page 59: ...10mm 36 b 466 x 2 461 x 2 x 2 x 2 a 466 461 466 461...
Page 60: ...466 x 2 461 x 2 x 2 x 2 10mm c b a 466 461 37 466 461 466 461...
Page 62: ...850 461 x 8 466 x 8 39 a a 98B x 2 a b x2 466 x4 461 x4 98B 98B...
Page 63: ...Version9 2_6 2018...


