

Page 2 of 2
ION 1200-C5G-WW Quick Start Guide (Continued)
Power on the Device
1
Connect the power cable to the device.
2
Plug the device power cable into an AC power outlet. When the device is powered on, the power
indicator turns green.
Connect the Device to the Controller
1
Connect the ION device port 1 or port 2 to a DHCP-enabled network that has access to the
internet, such as an Internet Service Provider (ISP) cable modem.
2
If you do not wish to connect via DHCP-enabled network, access the console and set a static IP
on port 1 or port 2.
Refer to Configure Static IP Using a Console at:
https://docs.paloaltonetworks.com/prisma/prisma-sd-wan/prisma-sd-wan-ion-cli-
reference/access-the-ion-cli-commands/assign-a-static-ip-address-using-the-console.
html.
Where To Go Next
To learn more about the device, refer to the ION 1200 Hardware Reference Guide:
https://docs.paloaltonetworks.com/hardware /ion-1200-hardware-reference
.
To learn how to configure the device, refer to the Prisma SD-WAN Administrator's Guide:
https://docs.paloaltonetworks.com/prisma/prisma-sd-wan/prisma-sd-wan-admin
.
Contact PaloAlto Networks Support to get help.
Customer Support at
https://www.paloaltonetworks.com/company/contact-support
.
For Technical Support: US: 866 898 9087 | International: +1 408 738 7799
docs.paloaltonetworks.com
| © 2022 | Palo Alto Networks, Inc. | Part Number: 810-000318-00D
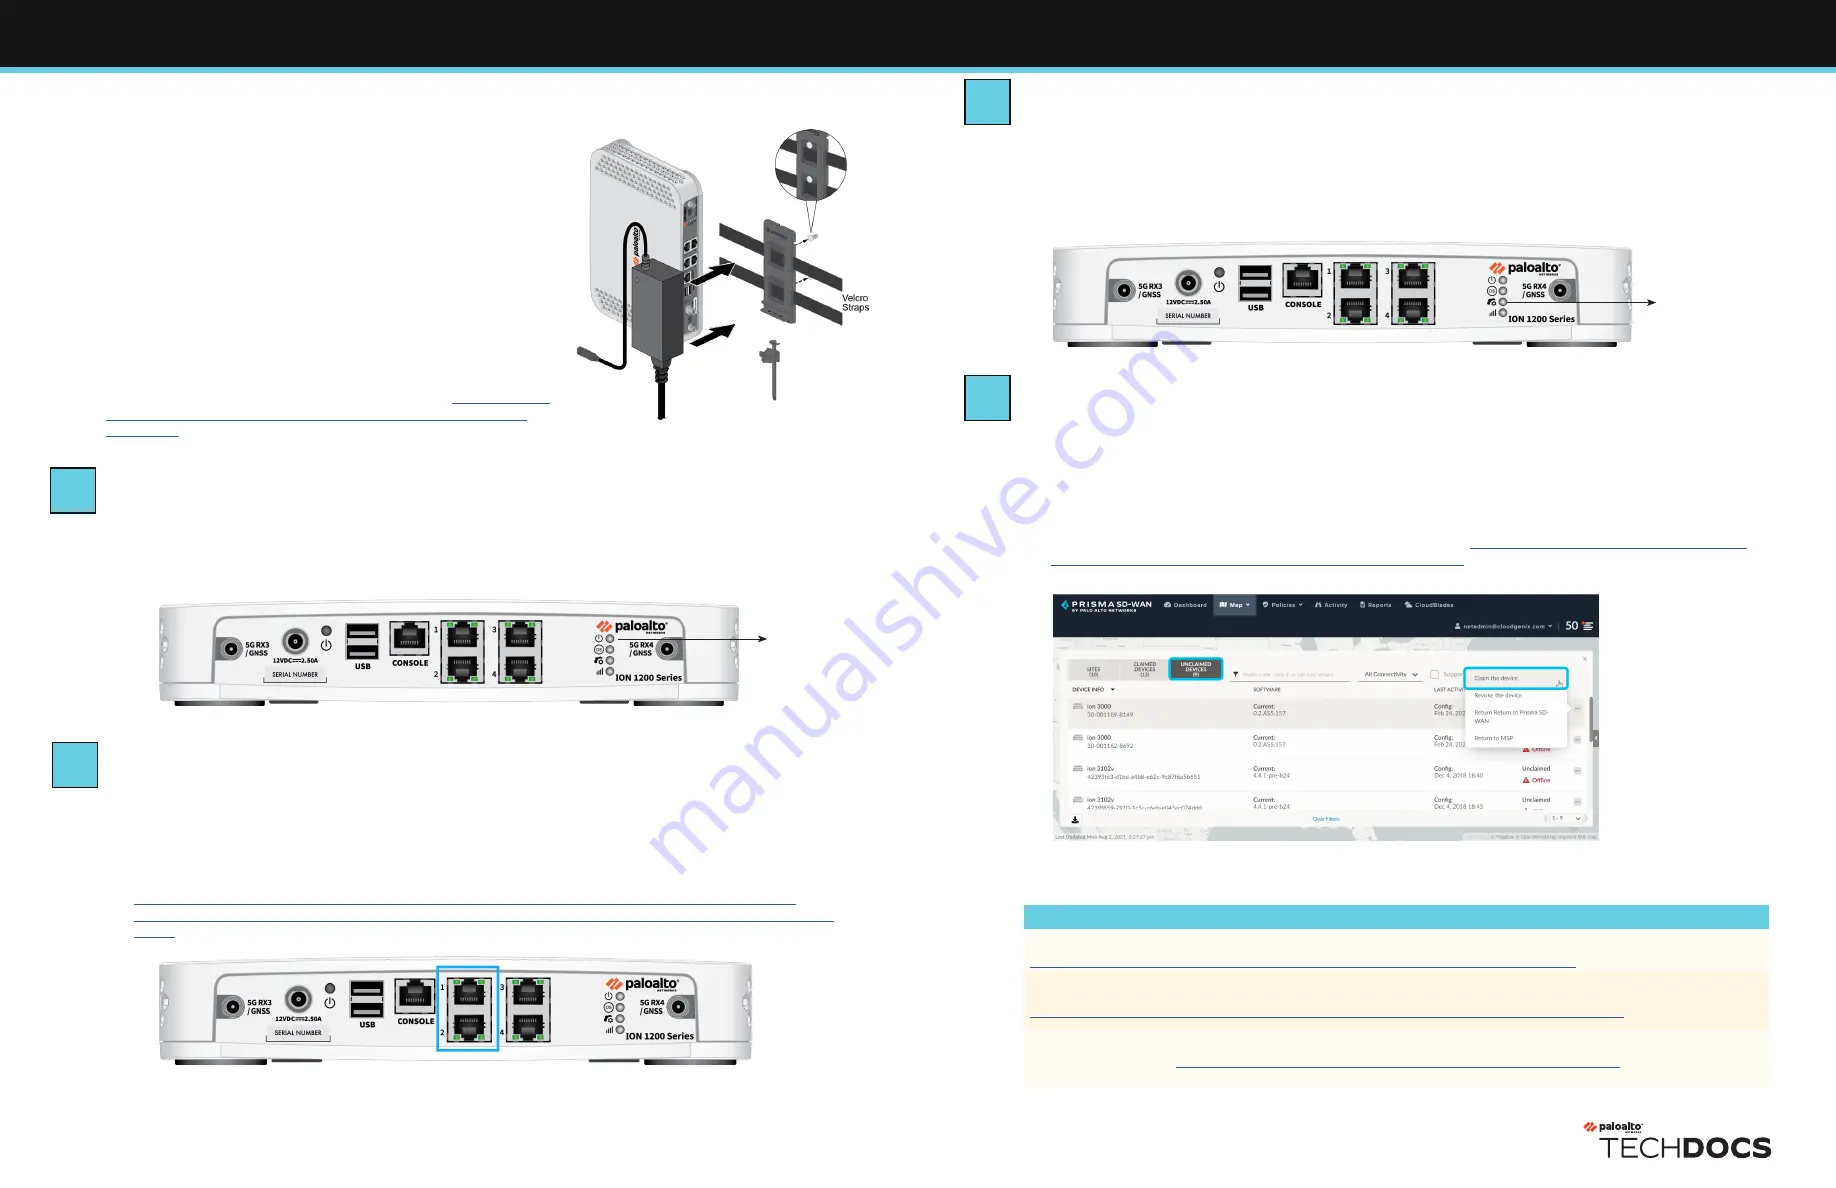
Connect to the Portal
1
Log in to the Prisma SD-WAN portal using the provided login credentials.
2
Navigate to
Map > Unclaimed Devices
to verify that your ION device is listed as
Online
under
Unclaimed Devices
.
3
Select the device and click the option
Claim the device.
4
Assign the device to a site and configure it.
Refer to the Prisma SD-WAN Administrator's Guide at
https://docs.paloaltonetworks.com/
prisma/prisma-sd-wan/prisma-sd-wan-admin.html
.
◼
If any screw location is located over wood, use a .75”
wood screw instead of a drywall anchor and screw.
3
Align the four holes on the bottom of the device with
the four screws on the wall and hang the device on the
screws.
4
Install the power adapter in the power adapter wall-
mount bracket using the Velcro strap (Figure 6) and cable
tie. Make sure to align the cable tie with the notches in
the bracket to prevent the power cord from falling out.
5
Mount the power adapter wall-mount bracket next to the
device using wood or drywall screws as appropriate.
Power LED
Figure 7 - Power LED
Figure 8 - DHCP-enabled ports
Figure 9 - Controller connectivity LED
Figure 10 - Prisma SD-WAN portal
Figure 6 - Power adapter in the wall mount bracket
Controller Connectivity LED
Install the device in a rack
When installing in a rack, ensure there is nothing placed
above the device.
Refer to the ION 1200 Hardware Reference at
https://docs.
paloaltonetworks.com/hardware/ion-1200-hardware-
reference
to learn to install the device in a rack.
Verify Device Connection to the Controller
◼
Upon successful connection, the controller connectivity LED on the ION device turns green.
◼
The ION device is now connected to the Controller and displays on the portal under
Unclaimed Devices
.
5
6
7
8


