Palm Xplore G18 User Manual Download Page 64

Managing Applications

Setting preferences for applications

G18 User Manual

53


To set preferences for an application: 

1.

Open an application. For instructions, see “Selecting applications” in 
this chapter.

2.

Tap the Menu icon. 

3.

From the Options menu, select Preferences.

4.

Enter the desired preference settings; then tap OK.

Assigning applications to buttons

Buttons preferences let you assign different applications to the buttons on 
the front panel of the pda phone. For example, if you find that you seldom 
use the To Do List and often use Mail, you can assign the To Do List button 
to start the Mail application.

You can also change whether the full-screen pen stroke activates the 
Graffiti

®

2 Help application or one of your pda phone controls using 

Buttons preferences.

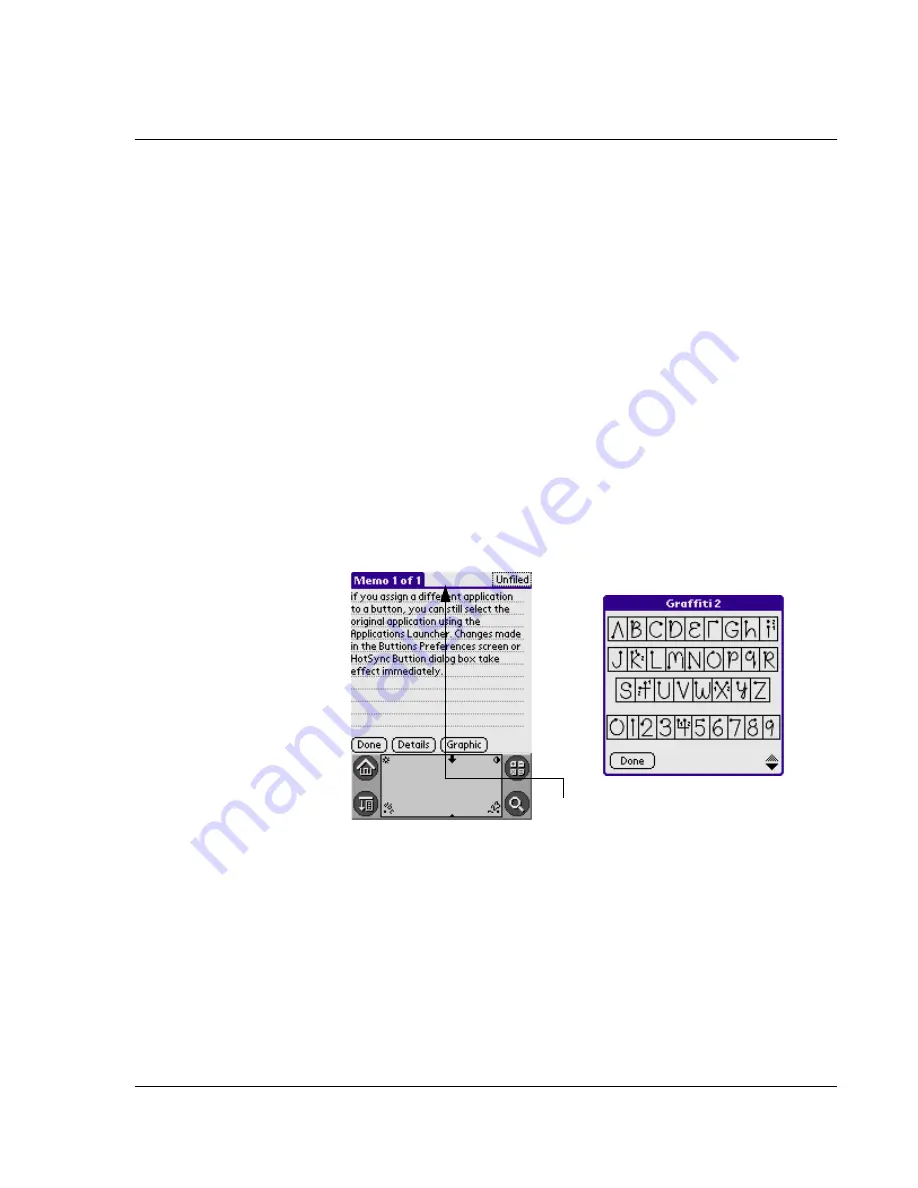
If you assign a different application to a button, you can still select the 
original application using the Applications Launcher. Changes made in the 
Buttons Preferences screen or HotSync Buttons dialog box take effect 
immediately. 

To change the Buttons preferences:

1.

Enter the Application Start.

2.

Select All or System from the pick list in the upper right corner.

use the pen pull to the top of the screen 

Summary of Contents for Xplore G18

Page 1: ...Xplore G18 User Manual ...

Page 2: ...red trademarks of PalmSource Inc a subsidiary of Palm Inc Palm Desktop the HotSync logo and Palm Powered are trademarks of PalmSource Inc a subsidiary of Palm Inc THE CHINESE HANDWRITING RECOGNITION SYSTEM IS AUTHORIZED BY HANWANG TECHNOLOGY CO LTD The manufacturer reserves the right to change the specifications without notice ...

Page 3: ... System requirements for Windows 6 G18 components 7 Locating front panel controls 7 Locating back panel components 10 Desktop Charger 11 Tapping versus clicking 12 Starting pda phone and calibrating screen 13 Adjusting the brightness of your screen 14 Adjusting the contrast of your screen 14 To open applications 15 Using the pda phone interface 16 Using menus and menu commands 19 Displaying tips 2...

Page 4: ...ng Graffiti 2 ShortCuts 31 Importing data 33 4 Performing Common Tasks 35 Creating records 35 Editing records 36 Selecting Text 36 Using the Edit menu 36 Deleting records 37 Purging records 38 Categorizing records 39 Finding records 42 Finding Address Book records 42 Using the Find option 43 Using Phone Lookup 44 Sorting records 44 Making records private 45 Attaching notes 47 Choosing fonts 47 Get...

Page 5: ...63 Call Setting 64 Call Time 66 Call Records 66 Speed Dial 67 Phone Security Setting 68 Phone ringing Setting 71 Quick Switch 73 Testing the Phone Connection 74 Using the SMS Short Message 77 Function list 77 To open the SMS 77 SMS setting 78 Writing SMS Sending SMS 79 Receiving SMS 80 Replying SMS Forwarding SMS 80 Using the jMMS 83 Function list 83 To open the jMMS application 83 Settings 86 Bro...

Page 6: ...ing Net 104 Favorites 105 History 106 Statistics 106 Using the STK SIM Tool Kit 107 7 Working with Studio Applications 108 Using the Camera 109 To open the Camera application 109 To set the preferences of a photograph 109 Taking photos 110 Browsing Photos 110 Using the MelodyManager 111 To open the MelodyMgr application 111 The source of Melody 111 To listen or delete a melody 111 Using the Photo ...

Page 7: ...application 130 Using the Calculator 138 To open the Calculator application 138 Using the Calculator buttons 138 Displaying recent calculations 139 Using the Date Book 140 Use the Date Book to 140 To open the Date Book application 140 Scheduling events 140 Scheduling untimed events 144 Adding Address Book information to an event 147 Setting the alarm 148 Changing the Date Book view 150 Changing th...

Page 8: ...ons 178 Playing the Bejeweled 179 To start the game 179 Bejeweled Easy Mode 179 Bejeweled Timed Mode 180 Winning the game 182 Bejeweled Hidden Features 182 Playing the Big Money 184 To start the game 184 Game Rules 185 Winning the game 185 Big Money Hidden Features 186 Insaniquarium LowRes 187 To start the game 187 How To Play 187 Game Modes 188 Other Options 189 Insaniquarium Hidden Features 189 ...

Page 9: ...earching for a string 203 Using the SD Manager 205 Function list 205 To open the SD Manager application 205 11 Working with System Applications 212 Customizing your pda phone 213 To open the Preferences application 213 To personalize your pda phone 213 To set the date time and time zone 214 To format the date time and numbers 216 To set the auto off delay time 217 To set the sounds and volumes 218...

Page 10: ...HotSync application settings 240 IR HotSync operations 242 Preparing your computer for infrared communication 242 Configuring HotSync Manager for infrared communication 244 Performing an IR HotSync operation 244 Returning to using the HotSync cable for HotSync operations 245 Conducting a HotSync operation via the modem 245 Preparing your computer 246 Preparing your pda phone 247 Selecting conduits...

Page 11: ...indicator 257 14 Using an Expansion Card 258 Displaying contents of G18 258 Launching an application on the G18 259 Displaying G18 application information 260 Copying a G18 application to your handheld or desktop 261 Beaming applications on the G18 263 ...

Page 12: ...that come with it This guide shows you how to Identify all the parts of your PDA phone View and enter data Use your PDA phone with your computer Personalize your PDA phone with your own preference settings After you become familiar with the basic functionality of your G18 PDA phone you can use the rest of this guide as a reference for less common tasks for maintaining your G18 PDA phone and also a...

Page 13: ... the passenger seat or where it can break loose in a collision or sudden stop Phone operating Remember to follow any special regulations in force in any area and always switch off your phone whenever it is forbidden to use it or when it may cause interference or danger When connecting read the Owner s Guide for detailed safety instructions Do not connect it to incompatible products Electronic devi...

Page 14: ...ion of any radio transmitting equipment including wireless phones may interfere with the functionality of inadequately protected medical devices Consult a physician or the manufacturer of the medical device to determine if they are adequately shielded from external RF signal or if you have any question Switch off your phone in health care facilities when any regulation posted in these areas instru...

Page 15: ...OFF and do not remove the battery when in any area with potentially explosive environment and obey all signs and instructions Sparks from your battery in such areas could cause an explosion or fire resulting in injury or even death Areas with a potentially explosive environment are often but not always clearly marked They include fueling areas such as gasoline stations lower deck of boats fuel or ...

Page 16: ...ur phone OFF before boarding a plane To avoid interfering with the aircraft instrument do not use the phone on the plane Persons who disregard the regulations could have their wireless device being confiscated or being charged in court OR both ...

Page 17: ...easily be able to do the following Enter all your schedule details in the Date Book and view them by the day week or month and even set an alarm to remind you of an important event Keep all your contact names addresses phone numbers and other details in the Address Book so you can find them as soon as you need them Add your tasks to the To Do List prioritize them so you don t overlook them and ass...

Page 18: ...t the screen for the screen brightness display according to the lighting conditions or temperature of the environment where you use your organizer For more information see Adjusting the brightness of your screen later in this chapter Contrast control button Displays the onscreen contrast control You can adjust the screen for the clearest screen display according to the lighting conditions or tempe...

Page 19: ... G18 User Manual 8 Sub Menu Icon Escape Key Call Key Left Key Down Key Up Key Enter Key Right Key End Call Key Camera Key Increase Calling Vol ume Key Decrease Calling Vol ume Key Power Button Camera Brightness Control Button Contrast Control Button ...

Page 20: ...a of the pda phone screen Press the lower half of the scroll button to scroll down and view information below the viewing area Press the upper half to view information above the viewing area Application buttons Activates the individual pda phone applications that correspond to the icons marked on the buttons Date Book Address Book To Do List and Memo Pad See Assigning applications to buttons in Ch...

Page 21: ...nts that can be slid in and out of either side channel To use the stylus remove it from the side channel and hold it as you would have a pen or pencil Reset button Under normal use you should not have to use the reset button See Resetting your pda phone for information on when and how to use the reset button Reset Button Side channel earphone hole Serial Port ...

Page 22: ...ync technology Desktop Charger Compatible with Travel Charger Compact and convenient solution to charging your phone battery and spare battery For further instructions please refer to the following 1 Installing phone battery Press the release grip of the back cover on the Desktop Charger to remove it Insert the phone battery and push it slightly until it clicks 2 Charging the battery Place the bat...

Page 23: ... For further information on care and maintenance of the accessories please refer to the user manual in CD ROM To maximize the performance of the phone and not void the warranty always purchase the accessories that are specially designed for use with the phone Customer Service can not be held liable for any damage due to use with non authorized accessories Tapping versus clicking Just as you use a ...

Page 24: ...ions in dialog boxes Open the onscreen keyboards Just as you drag the mouse to select text or move objects on your computer you can drag the stylus to select text In addition you can use the stylus to drag the slider of any scroll bar Starting pda phone and calibrating screen The first time you start the G18 pda phone setup instructions appear onscreen These instructions include a calibration scre...

Page 25: ...e following Drag the slider to adjust the brightness Tap to the right or left of the slider to adjust the brightness in small increments Press or press and hold the PageUp or PageDown buttons to adjust the brightness in small or large increments respectively Adjusting the contrast of your screen You can adjust the contrast of your screen to make it easy to see in a variety of lighting conditions T...

Page 26: ...pen the four main applications Date Book Address Book To Do List and Memo Pad with the application buttons on the front panel of your pda phone TIP When you press a application button on the front panel of your device the selected application immediately appears even if the device was turned off In addition to providing a way for you to open applications the Applications Launcher displays the curr...

Page 27: ...pda phone includes the following interface elements A menu bar containing a set of menu commands specific to the application Not all applications have a menu bar A command bar that lets you tap icons or write a ShortCut stroke to initiate a command instead of tapping a command in the menu bar The icons displayed in the Command bar vary within each application Command buttons that initiate a comman...

Page 28: ...or must be in an input field for this option to work A 123 dot in the input area that displays the numeric keyboard when tapped note that the cursor must be in an input field for this option to work Check boxes that indicate the state of the corresponding option A check mark in a check box indicates that the option is active If a check box is empty tapping it inserts a check mark If a check box is...

Page 29: ...croll through pages tap the slider arrow at either end to move one line at a time To scroll to the previous page tap the scroll bar just above the slider to scroll to the next page tap the scroll bar just below the slider You can also scroll to the previous and next pages by pressing the upper and lower portions of the scroll button on the front panel of the pda phone Previous nextarrows that disp...

Page 30: ...he Edit menu Most menu commands have an equivalent Graffiti 2 command stroke which is similar to keyboard shortcuts used to execute commands on computers To use Graffiti 2 menu commands menus must be closed To display a menu bar and choose a command 1 Do one of the following Open an application such as the Date Book then tap the Menu icon Select the desired command from the menu Tap the inverted t...

Page 31: ...nds to draw the ShortCut letter you ll have to redraw the Graffiti 2 command stroke to redisplay the Command toolbar Displaying tips Many of the dialog boxes that appear on your pda phone contain a Tips icon in the upper right corner Tips anticipate questions you may have and provide shortcuts for using the dialog box or other useful information To display a tip 1 Tap the Tips icon the lowercase i...

Page 32: ...rk with your G18 pda phone applications on your computer Palm Desktop duplicates the Date Book Address Book To Do List and Memo Pad applications on your pda phone so that you can view enter and modify any data stored on your pda phone Back up the data stored on your pda phone with HotSync technology and synchronize the data on your Palm Desktop Synchronization is a one step procedure that ensures ...

Page 33: ...esktop disks are write protected and then make backup copies of them When you have finished use the copies to install the software and store the original disks in a safe place Refer to your computer s manual or operating system documentation for information on locking or copying diskettes Do not copy the Palm Desktop files to your computer s hard disk You must use the installer to place the files ...

Page 34: ...anytime you need to enter text or numbers on your pda phone To use the onscreen keyboard 1 Open any application such as the Address Book 2 Tap any record or tap New 3 Choose one of the following to display the alphabetic or numeric keyboard Tap abc on the front panel of your pda phone to display the alphabetic keyboard Tap 123 on the front panel of your pda phone to display the numeric keyboard TI...

Page 35: ... Graffiti 2 characters With only a few minutes of practice you ll find it easy to enter accurate text and numbers using Graffiti 2 writing strokes The Graffiti 2 demo shows how to use the handwriting software The first time you turn on your pda phone or perform a hard reset the Welcome application will automatically guide you through the setup process When you complete setup you will be invited to...

Page 36: ...roke Lookup screen of the demo use the pick list to view a wide variety of characters that you can make As you tap a character you will see an animation of the strokes used to form that character General Guidelines for Graffiti 2 Writing Follow these guidelines to learn and use Graffiti 2 writing strokes successfully To achieve 100 accuracy practice drawing characters exactly as they appear in the...

Page 37: ...e drawn Otherwise the temporary stroke is recorded The text input area is divided into two parts one for writing lowercase letters and one for writing numbers The small marks at the top and bottom of the text input area define the division line To have your pda phone recognize letters and numbers you must begin letter strokes on the left side and number strokes on the right side of the text input ...

Page 38: ... for the next character you want to write Graffiti 2 tips When using Graffiti 2 writing keep the following tips in mind For greater accuracy draw letters with large strokes strokes that nearly fill the text input area are easily interpreted To delete characters set the insertion point to the right of the character you want to delete and draw the Backspace stroke a line from right to left in the te...

Page 39: ...omma punctuation marks can be written on either side of the text input area the letter or number side Other common punctuation marks can be written on one side of the text input area according to the chart below in general the more frequently used punctuation is on the left side Note that the punctuation characters can also be entered anywhere on the text input area if you first use the shift char...

Page 40: ...of the input area as shown in the illustration below Symbols and other special characters can be written using the Shift command When you make a vertical stroke from the bottom to the top in the text input area the Shift indicator arrow appears in the lower right corner of the screen While this arrow is visible you can make the punctuation shift characters shown in the illustration below Once the ...

Page 41: ...e uppercase accented characters write the letter across the division mark just as you would do with an ordinary letter Using the Graffiti 2 tuner The Graffiti 2 tuner provides alternate strokes for making the T P Y and characters For example you may want to write the letter T by using strokes similar to a space and an L But if this technique is difficult to control you can turn off this option To ...

Page 42: ...r commonly used words or phrases ShortCuts are similar to the Glossary or Autotext features of some word processors Graffiti 2 writing comes with several predefined ShortCuts You can also create your own for any words letters or numbers You can create ShortCuts with up to 45 characters using the ShortCut preferences For example you could create a ShortCut for your name or for the header of a memo ...

Page 43: ... ShortCut stroke followed by the ShortCut character or characters When you draw the ShortCut stroke the ShortCut symbol appears at the insertion point To create a ShortCut 1 Tap the Applications icon 2 Select All or System from the pick list in the upper right corner 3 Select Prefs from the menu 4 Tap ShortCuts in the pick list in the upper right corner 5 Tap New 6 In the ShortCut Name line of the...

Page 44: ...then tap OK To delete a ShortCut 1 In the ShortCut Preferences screen tap the ShortCut you want to delete 2 Tap Delete then tap Yes Importing data If you have data stored in computer applications such as spreadsheets and databases or if you want to import data from another device you can transfer the data to your G18 pda phone without having to key it in manually Save the data in one of the file f...

Page 45: ...in a field with category names do the following a Select All in the Category box b Make sure that the same categories that appear in the imported file also exist in the application If the categories do not exist create them now otherwise the records will be imported into the Unfiled category 4 Choose File Import then select the file you want to import and click Open 5 To import data into the corre...

Page 46: ...edure to create a new record in Date Book Address Book To Do List Memo Pad and Expense To create a record 1 Select the application in which you want to create a record 2 Tap New For the Date Book only select start and end times for your appointment and tap OK 3 Enter text for the record NOTE The pda phone automatically capitalizes the first letter of each field except numeric and e mail fields 4 A...

Page 47: ...owing techniques Double tap on a word in a field to select the word Triple tap on any word on a line to select the entire line To select a segment character in the character you can tap the top or trail of character you want to select then pull to the trail or top of the segment you want to select So you can select several character one time Using the Edit menu The Edit menu is available from any ...

Page 48: ...erses the last action taken Cut removes a selection from its current location to memory You can then paste the text into another area of the current application or into a different application Copy copies a selection and moves it to memory You can paste the selection into another area of the current application or into a different application Paste inserts a selection from memory into an area you ...

Page 49: ... In the text input area drag a diagonal line from the lower left to upper right to display the Command toolbar then tap the Delete icon or draw a Graffiti 2 D in the text area A confirmation dialog box appears 3 To archive a copy of the deleted file on your PC select the Save Archive option If you choose the archive option the record is transferred to the archive file on your PC the next time you ...

Page 50: ...rchive Copy on PC to save a copy of purged records in an archive file on your desktop Selecting this option transfers purged records to an archive file the next time you perform a HotSync operation Tap OK For the Expense application tap a category and tap Purge Tap Yes to confirm the deletion and then tap Done Categorizing records You can categorize records in the Address Book To Do List Memo Pad ...

Page 51: ...ategory of records 1 Open one of the following applications the Address Book the To Do List or the Memo Pad or the Expense application 2 Tap the pick list in the upper right corner of the screen then tap the category you want to display TIP Pressing the Address Book To Do List or Memo Pad button on your pda phone toggles through the categories assigned to the application respectively To add or edi...

Page 52: ...ories 2 Select any of the following options To create a new category tap New and enter a new name in the text input area Tap OK To rename a category tap it in the list to select it Tap Rename enter a new name in the text input area and Tap OK To delete a category tap it in the list to select it Tap Delete 3 Tap OK To rename a category 1 Tap the pick list in the upper right corner of the screen the...

Page 53: ...mo Pad you can use Phone Lookup to display the Address List screen and add the information from this list to a record In the Address Book you can use the Look Up option to enter the first letter of a name to scroll immediately to that name In your EMailer application you can use Lookup to access information in your Address Book Finding Address Book records You can look up Address Book records usin...

Page 54: ...text dog appears in the Address Book and the Date Book the Find option displays both occurrences in the Find dialog box To use the Find option 1 Tap the Find icon 2 Enter the text you want to find then tap OK Note that the Find option is not case sensitive searching for davidson also finds Davidson TIP Select text in an application before tapping Find to automatically place the text in the Find di...

Page 55: ...the top of the screen then tap Options and tap Phone Lookup In the text input area drag a diagonal line from the lower left to upper right to display the Command toolbar In the text area write an L the ShortCut for the Phone Lookup command 3 Select a record or write the first few letters of the name you want to add Tap Add to add the information to the record NOTE You can also search based on the ...

Page 56: ...nt then tap OK to sort the list To sort the Memo List manually Tap and drag a memo to a new location in the list TIP To display the list of your memos on your computer as you arranged them manually on your pda phone open Memo Pad in Palm Desktop click List By and select Order on Handheld Making records private In all the basic applications except the Expense and Mail application you can make indiv...

Page 57: ... following Tap the Menu icon tap the Security Set or Security in the Options menu Tap the inverted tab at the top of the screen then tap Security Set or Security in the Options menu Bring up the Command Bar and tap the padlock icon To bring up the Command Bar drag your pen diagonally across the text input area from lower left to upper right 2 In the Change Security dialog box in the Current Privac...

Page 58: ...then tap OK 3 If you have assigned a password you must enter the password before the hidden records are displayed 4 Enter your password and then tap Show Attaching notes You can attach notes to records in all the basic applications except the Memo Pad A note can be up to several thousand characters long To attach a note to a record 1 Display the entry to which you want to add a note 2 In Address B...

Page 59: ... inverted tab at the top of the screen then tap Font in the Options menu In the text input area drag a diagonal line from the lower left to upper right to display the Command toolbar In the text area write an F the ShortCut for the Font command 3 Tap the font style you want then tap OK Small font Large font Bold font Tap here for small font Tap here for large font Tap here for bold font ...

Page 60: ... About box The About box displays the name and version number of the application To display the About box 1 Tap the Menu icon from any location 2 In the Options menu tap About 3 The text following the About command differs based on your location For example if you re in the Date Book the command is About Date Book if you are in the Address Book the command is About Address Book ...

Page 61: ...s Launcher Tap the Applications icon Selecting applications Your G18 pda phone is equipped with a variety of applications All the applications installed on your pda phone appear in the Applications Launcher In addition to providing a way for you to open applications the Applications Launcher displays the current time battery level and application category To open an application Choose from the fol...

Page 62: ...icon on the front panel of your device 2 Tap the Menu icon 3 From the App menu tap Category 4 Choose from the following options To choose a category for an application tap the pick list next to each application To create a new category for an application tap Edit Categories from the application s pick list Tap New enter the category name and then tap OK to add the category Tap OK 5 Tap Done To dis...

Page 63: ...ons Launcher To display the last selected category of applications 1 Tap the Applications icon then tap the Menu icon 2 From the Options menu tap Preferences 3 In the Preferences dialog box tap Remember Last Category 4 Tap OK Each time you return to the Applications Launcher the last category of applications you selected is displayed NOTE If you do not select the Remember Last Category option all ...

Page 64: ... that you seldom use the To Do List and often use Mail you can assign the To Do List button to start the Mail application You can also change whether the full screen pen stroke activates the Graffiti 2 Help application or one of your pda phone controls using Buttons preferences If you assign a different application to a button you can still select the original application using the Applications La...

Page 65: ... the Prefs icon 2 In the pick list in the upper right corner tap Buttons 3 In the Buttons Preferences screen tap HotSync 4 Tap the pick list next to the button you want to assign 5 Tap the application you want to assign to each button The default setting for each button is the HotSync setting which means the HotSync cable perform their normal HotSync functions To change what the full screen pen st...

Page 66: ... phone Beam Data beams the current record to another PDA connected organizer 7 Tap OK Installing add on applications In addition to the applications that came with your pda phone you can install applications called add on applications using the Install Tool during a HotSync operation A variety of third party applications are available for your device such as games and other software from the inter...

Page 67: ...start a new game or set preferences for the game To install add on applications on your pda phone 1 From your computer desktop copy or download the applications you want to install into the add on folder in your Palm Desktop directory 2 If the application is compressed for example as a zip file decompress the application into the add on folder before continuing 3 Double click the Palm Desktop icon...

Page 68: ...en click Add 5 In the file list of the Add on folder select the application that you want to install on your pda phone then click Open The file appears in the Palm Install Tool dialog box 6 If decide not to install an application select it in the list of files in the Palm Install Tool dialog box and click Remove The application is removed from the dialog box list but not from your computer 7 Click...

Page 69: ...annot remove the built in applications that reside in the ROM portion of your device including the Date Book Address Book To Do List Memo Pad Expense Calculator and Mail applications To remove an add on application 1 Tap the Applications icon then tap the Menu icon 2 Tap Delete 3 In the Delete dialog box tap the application you want to remove 4 Tap Delete 5 Tap Yes 6 Tap Done Removing Palm Desktop...

Page 70: ...sktop G18 User Manual 59 2 Open the Add Remove Programs icon 3 On the Install Uninstall tab select Palm Desktop then click Add Remove NOTE You must retain the HotSync Manager from the CD for installation to synchronize data with another PIM ...

Page 71: ...Working with Communication Applications G18 User Manual 60 6 Working with Communication Applications Your G18 includes the following communication applications Phone SMS jMMS EMailer WAP Browser STK ...

Page 72: ... can be activated by 1 Tap the Applications icon 2 Select Communication from the pick list in the upper right corner then tap the Phone icon icon added TIP Alternatively you can press the Call key to activate the telephone function Making a call 1 Tap Numeric keyboard 0 9 and to key in telephone numbers ...

Page 73: ...ll key to dial the numbers 3 After the call is connected Tap New button to pause the calling to call another number Tap Hold button to hold the call Tap Mute button to mute the call Tap DTMF button to input DTMF Press the End Call Key to end the call ...

Page 74: ...a call you will see the incoming call number onscreen TIP Alternatively the user can press the Call key to accept the call while pressing the End Call Key enables you to reject the call Touch the Reject button to reject the call Touch the Accept button to answer the call ...

Page 75: ...p the Menu icon 2 Choose Call Call Setting a Call Waiting Tap New button to go to Ap plications Launcher and press the CALL key to return Tap Hold button to hold the call Tap Mute button to mute the call Tap DTMF button to input DTMF Press the End Call Key to end the call Back Save ...

Page 76: ...c Region Code Setting d Auto redial On to enable Off to disable Network Determined by GSM network Display Choose to display the Call line ID Hide Choose to hide the Call line ID Only code Add a region code only and code Add a letter before region code ...

Page 77: ...Tap Save button to save the setting then Tap Left Arrow icon to exit Call Time 1 Tap the Menu icon 2 Choose Call Call Time Call Records 1 Tap the Menu icon On to enable Off to disable auto redial function Tap back button to exit Tap Delete button to reset timer ...

Page 78: ...y Speed Dial 1 Tap the Menu icon 2 Choose Call Speed dial Tap Delete to delete the de tail of the call record figure needed Tap Save to save the phone number in the call record fig ure needed Tap SMS to send the short message to the selected number Tap Edit to edit the phone number figure added Tap Delete to delete the detail of the record figure added ...

Page 79: ...you must contact your service provider and obtain the SIM PIN Unblocking Key PUK code from your service provider If you unsuccessfully enter the PUK code ten times the SIM card is permanently blocked and must be replaced If this happens all data will be lost You have to purchase a new SIM card Tap the Menu icon on front panel of your pda phone Choose Change password PIN code PIN2 code Barring code...

Page 80: ...Manual 69 b Setting Enable PIN Code Tap On from the pick list to enable the PIN Code If the PIN Code has not been set a dialog box will appear and ask you to set the PIN Code Tap PIN Tap PIN2 Tap Barring code Input the PIN Code ...

Page 81: ...oice Call Barring Four types of setting are available for Outgoing item Three types of setting are available for incoming item Fix Dialing Deactivated for disable call barring function All for All calls Int l for International call Int l for x Home for International calls except home call Deactivated means that accepting all incoming calls All means that blocking all incoming calls Roaming means t...

Page 82: ... the Fix Dialing section 3 Tap the Save button to save the setting 4 Tap left arrow to exit Phone ringing Setting a Ringing set Tap the Profile you can find the following pre defined profiles On for enable Off for disable Tap to reset all the fields to de fault setting Back ...

Page 83: ...ert d Melody NOTE You can pick up one of your favourite melody For the usage of Melody see Using the MelodyManager in Chapter 7 for details You can edit each profile as you like by changing any other section in this page You can choose the Alert style when call the in coming message You can specify the mel ody for your phone de fault None for silence ...

Page 84: ... button to enter Address application you can pick up the phone number from the address book For the usage of Address please refer to Chapter 8 Using the Address Book for details Tap Call record button to view the call record history list Reference to the part of Call Recodr in this chapter Tap on the volume bar to specify the volume of the melody for your phone ...

Page 85: ... cancel to quit without selecting Tap Return to quit to main view Testing the Phone Connection For the first time to use the telephone function you may need to check and test the phone connection 1 Tap the Applications icon 2 Select System from the pick list in the upper right corner 3 Tap the Prefs icon then select Phone from the pick list in the upper right corner 4 For Connection select Default...

Page 86: ...ection test 6 Wait for a while there will appear a dialog box to show wether it s ok or anything fails 7 If the test is ok you could try to launch the Phone application to call someone 8 If the test fails you might need to check whether the SIM or the other things go wrong Tap Phone ...

Page 87: ...lect On in the Call divert option then tap to save your setting C calls A Switch the call with B or C by us ing Call Devert function A calls D to enter the conference call Invite B and C to the confrence call Interuppt the conference call and talk to only one person Tap to restart the conference call A calls C after connected ...

Page 88: ...end them in groups Short messages can be sorted by date or by name Each short message can contain 70 Chinese characters or Chinese and English characters mixture However it can contain 160 pure English characters To open the SMS 1 Tap the Applications icon 2 Select Communication from the pick list in the upper right corner 3 Tap the SMS icon Tap SMS icon to enter the inbox interface ...

Page 89: ...age Warn Over You will get a warning when the SMS package is over the limitation Expires Set a period of time for which the message can be retained in the message center before you send it out Message Center Before sending any short message you must input the short message service center number which you can get from your service provider Of course it can be recognized once the SIM card was insert...

Page 90: ...d to switch to keyboard entry Now you can input number and the content of message Once finished tap Done button on keyboard and return to the message edited interface 3 Tap the different icons to conduct respective functions for example tap Send icon to send the message After being tapped a dialog box will appear to ask for confirmation of deletion Create an SMS Make a call Tap to show the list ha...

Page 91: ...automatically show a dialog box it will appear a envelop icon You can easily view its content The short message may be stored in Inbox or SIM according to the preferred storage setting Replying SMS Forwarding SMS 1 In the list view select proper records in the relative box Enter Address Book to select phone number Send SMS whatever success or not you will get a return message Save to draft box Ret...

Page 92: ...ns Delete the short message Delete the short mssage to dustbin Select any of the message you want to delete Tap the DELETE button then appears a dialog box answer the addresser forward the current SMS return to the previous direction After being tapped a dialog box will appear to ask for confirmation of deletion after delet ing it will be placed in the dustbin ...

Page 93: ...e message tap the Delete All button then the all message in the directory will be deleted tap the Cancel button then canel the operation Delete forever Tap the MENU icon then a pick list will appear In the list select the Empty Trash then delete all the message saved in the dustbin tap Empty Trash ...

Page 94: ...e New Send Delete Draft Compositor To open the jMMS application 1 Tap the Applications icon 2 Select Communication from the pick list in the upper right corner 3 Tap the jMMS icon and enter the inbox interface Doodles Tap to enter MMS application New Delete Sorting Move ...

Page 95: ...compose interface and enter the picture interface 3 Tap the icon at the bottom of picture interface then you can Dooles Setting the color 1 Enter the dooles interface then tap Menu icon pop up menu appears 2 Select Pict Color to enter color selection interface 3 Select your favorite color and tap OK or tap Cancel Setting the thickness of line Tap Color ...

Page 96: ...n in the upper right corner to pop a list 2 Select a drawing tool for example select 3 Tap icon or icon in toolbar select Pict Clear to erase everything Thin Thick Select object rectangle Color picker Draw a line Draw a oval Draw a rectangle Draw a solid oval Draw a solid rectangle Paintbrush Text Eraser Undo Save ...

Page 97: ...ldown menu and then select Tools Profiles Tap Edit icon to edit the MMSC URL Notice Please edit the content on the line after the keyboard appeared in order to avoid missing something input the address of the local MMS service center such as mmsc conternet com Tap Clear Tap Profiles to enter the profiles interface Edit button ...

Page 98: ... necessary Tap OK to save the settings or tap Cancel to cancel the settings Configuration Tap icon to pop up a menu and select View Configuration According to what you need you can set Manual Automatic or Custom when downloading the MMS Locate the cursor in the input column tap abc on the tab let to start up the let ter Keyboard edit the content Tap Done to exit edit Tap Configuration pop up list ...

Page 99: ...n tap Cancel to quit without changing anything Browse In Inbox screen tap any message Tap View in the pick list to browse the message Restrict the message s size Set the message s class Tap View Reply Reply all Send to others Property Properties Frame Tap OK to exit ...

Page 100: ...rface to enter new MMS editing interface you can write message and send it with pictures and music Input area you can use stylus or keyboard to input words or numbers Tap the Insert Picture icon on the toolbar to enter the picture library or dooles yourself and then select a picture to attach Save the image inside the message Save the tune inside the message Display the number of new MMS Input the...

Page 101: ...e current MMS you have finished and then enter the interface of sending Select a picture create a picture Edit a picture Delete a picture Edit picture property Page up down button Select the tune Play the tune Properties of the tune Stop playing Delete the tune Import receiptor from the Address Book Import CC receiptor from the Address Book Import BCC receiptor from the Address Book ...

Page 102: ...to Draft Edit MMS properties after taping Tap New icon on the toolbar to add new SMS Tap Delete icon on the toolbar to delete the current SMS Tap preview icon on the toolbar to preview the eidted short message Deleting 1 Delete a single message a Enter Inbox and select a MMS b Select Delete from the pulldown menu to delete the selected MMS Tap OK to save the properties setting tap Cancel to cancel...

Page 103: ...e outbox s interface the MMS you have not finished or you are ready to send will be saved to the draft Sorting Tap Sort icon on the inbox s interface the MMS will be sorted according to the status type of MMS sender subject size or effective date to be viewed conveniently Tap Yes to delete the se lected SMS Tap Yes to confirm Tap No to cancel ...

Page 104: ... and send the e mail To browse the e mail To edit the e mail To delete the e mail To reply the e mail To search To open the EMailer application 1 Tap the Applications icon 2 Select Communication from the pick list in the upper right corner 3 Tap the EMailer icon Receive button New button ...

Page 105: ...t panel of your PDA phone pop up the menu model showing as the following 1 Choose Options Preferences to set whether to give the confirmation whether deleting the dialog box or signing your name 2 Tap Options Accounts Setting to set your account s information Tap checkbox to show confirmation before deletion Input signature OK button Cancel button ...

Page 106: ...e EMailer G18 User Manual 95 OK Cancel Done Detail Delete You can select an e mail account from the poplist or just input directly Input username Tap here Set your e mail account Set SMTP server Set POP3 server ...

Page 107: ...chronization Tap the Option icon in the function menu to enter the show option dailog to set the way to arrange list there are three ways Date Sender and Subject And you can also set the character code there are three choices Auto GB2312 and Big5 Lookup button OK button Select character code Select sorting method ...

Page 108: ...nd send an e mail 1 Tap the New button at the bottom of the main screen to enter the editing interface 2 After inputting respective information on To Cc Bcc Subject Content tap a icon as following Save the mail to outbox and return to the previous interface Cancel the current operation and return to the previous interface Show the message details See Pic Select Deleted box Set e mail priority send...

Page 109: ...ecords by choosing the folder in the pick list in the upper right corner in the main screen Select an e mail to browse the content and tap the scroll bar to view all the content Tap two icons in the upper right corner to change the list pattern Tap the Previous or Next button in the lower right corner to view the previous or next e mail Sent mails Tap to change list mode the Previous Next button D...

Page 110: ...terfaces 1 In the browse interface of the relevent folder and select the e mail you want to delete 2 Enter the browse interface of the e mail content and tap the Delete button at the screen bottom 3 Tap Yes to confirm your deletion or tap No to cancel your deletion 4 In the browse interface of the relevent folder tap the funtion menu icon at left bottom of the keyboard and then pop up the menu mod...

Page 111: ...select the Reply Reply all or transmit in the Reply option 3 You can input the content you want and then send this e mail To search 1 On the interface of creating an e mail tap the Receiver 2 Input contents in input field and you can search for the e mail See the end Picture of Pic Reply button ...

Page 112: ...ore the wireless arena WAP Browser To open the WAP Browser application 1 Tap the Applications icon 2 Select Communitcation from the pick list in the upper right corner 3 Tap the WAP Browser icon Getting To Know The WAP Browser Setting To View the current settings tap the Menu icon on the front panel of your PDA phone select Tools Settings ...

Page 113: ... default the Jataayu WAP 1 0 Gateway is selected Check the Browse Offline box for offline browsing To disable offline browsing uncheck the Browse Offline box By default the Browse Offline option is disabled Check Load home page on startup to load your home page on starting the application By default the Load home page on startup is disabled Click Apply to enable the connection settings Click Cance...

Page 114: ...rd are not required Click Done to save the settings or Cancel to exit Cache Browsed pages can be cached for future viewing Fetching pages from the cache loads the page faster Enabling Cache To access the cache screen select the Settings option from the Tools menu and click on Cache Cookie in the popup list on the top right hand corner of the screen To enable cache check Enabled in the Cache group ...

Page 115: ...t Set Options from the Tools menu and click on Cache Cookie in the popup list on the bottom right hand corner of the screen Click Ok to save your settings By default the Cookie is enabled and the Cookie size is 50 KB Clearing Cookies To clear the cookie information click on Cache Cookie in the popup list on the bottom right hand corner of the screen Click the Clear button in the Cookie group Surfi...

Page 116: ...k on Go Favorites from the menu The favorites under various categories are displayed Select a favorite URL and click Go to open that site To delete a favorite select it and click Delete To add a new URL to favorite list click Go Edit Favorites The current URL is shown which can be edited Give a name for the favorite Enter the category and click Add To add a category click New Category Give the nam...

Page 117: ...t provided To visit a site from history just select that site and click Go To delete the history entries click Clear Statistics Statistics To view the statistical information for a connection click View Statistics Select the connection from the popup list Information of the pages viewed object fetched number of bytes sent and received and the average page size for the selected connection are displ...

Page 118: ...Using the STK SIM Tool Kit G18 User Manual 107 Using the STK SIM Tool Kit It depends on each STK SIM card Before using this function you need to order a STK SIM card from your service provider ...

Page 119: ...Working with Studio Applications G18 User Manual 108 7 Working with Studio Applications Your G18 includes the following studio applications Camera Melody Manager Photo Album Photo Editor ...

Page 120: ...t the preferences of a photograph 1 Tap the Menu icon on the front panel of your PDA phone 2 Choose Options Preferences Splash The default time is 1 second You can change it by tapping left or right arrow Timer The Camera will take a photo every several seconds 5 10 15 20 25 30 seconds can be chosen Chatter New sound of shutter downloaded will be shown in the list automatically Effect Normal black...

Page 121: ... or shrink the picture Five modes of White balance sunny cloudy bulb daylight lamp auto focusing Zoom in Zoom out Three modes of taking photos Normal model tap the button after setting Postpone model tap the button after setting Speedup model tap the button after setting Browsing Photos Browsing the photos by pressing the Left Right key on the front panel of your PDA phone NOTE The photos taken ar...

Page 122: ...ication 1 Tap the Applications icon 2 Select Studio from the pick list in the upper right corner 3 Tap the MelodyMgr icon The source of Melody 1 Melodie inside the system 2 The melodie downloaded by users in multiple ways such as mms synchronization software etc To listen or delete a melody Select the melody in side the system tap this button a warning box would pop up ...

Page 123: ...Stop Tap the button to stop playing the melody Delete a The melody downloaded by users tap this button to remove the chosen melody from the system b The melody inside the system if you tap this button a warning box will pop up and tell you that the Melody saved in Rom can t be deleted NOTE After you confirm the selection of a melody the melody will take effect when a phone comes in ...

Page 124: ...from being stored into the photo album there is a default directory for example DCIM to store pictures in SD Card for more information about SD Card usage please go for SD Manager You can import pictures from SD Card or export them to SD Card or you can move copy the photos to My Photos of Photo Album from DCIM Function list To create album To delete album To play album To delete photo To browse p...

Page 125: ...not long ago and those separate pictures can be downloaded from users PC These pictures can be moved to other albums MMS Pictures the pictures in MMS will be placed in the folder My Notes to save the pictures in Photo Editor NOTE In searching inerface when deleting the albums only the records in them will be deleted their name will still remain 3 To create album Tap New a dialog box of creating ne...

Page 126: ...tap the Play button to start playing the pictures in the album according to the preset mode You can use the Left Right key on the front panel of your PDA phone to enlarge reduce pictures You can also use the up or down hard button to browse the previous or next picture If you tap the screen again and go back to the previous view 6 To delete photos Tap the icon to show details tap to enter the albu...

Page 127: ...ing To browse photos 1 In pictures list interface tap any picture to enter the picture browsing view 2 Tap Done to exit browsing 3 Functions of Buttons Tap icon to enter Photo Details Tap icon to delete Tap icon to zoom in Tap icon to zoom out NOTE If a picture is larger than the display area of the screen you can browse different parts of the picture by dragging the picture with your stylus ...

Page 128: ...re To add a seal To hide toolbar To open the Photo Editor application 1 Tap the Applications icon 2 Select Studio from the pick list in the upper right corner 3 Tap the Photo Editor icon To create a picture 1 Tap the Menu icon on the front panel of your PDA phone 2 Choose File New to create a new picture Tap the icon to enter the Photo Editor ...

Page 129: ... list will be shown 3 Tap the pick list in the upper right corner you can choose any picture you like 4 Tap you can browse pictures To save pictures 1 Tap the Menu icon on the front panel of your PDA phone 2 Choose File Save to save pictures Select the listed size to create a new picture List the photo categories Quit to picture Editing interface Browse the pictures ...

Page 130: ...can add a frame for any picture you like Rotate 1 Tap the Up and Down icon in the toolbar 2 Tap the Rotate list box in the toolbar 3 Tap an item in it e g Rotate 270 To adjust size 1 Tap the Resize icon in the Toolbar 2 Input the length height and width then tap OK Select Rotate 270 Tap here ...

Page 131: ...n or Zoom out to change the picture e g Zoom out To move picture 1 Tap the Up and Down icon in the Toolbar 2 Tap the Move icon in the Toolbar then you can move pictures To add figure 1 Tap the Up and Down icon in the Toolbar 2 Tap the list box in the Toolbar 3 Tap an item in it for example Select the icon Select Zoom in Select the icon ...

Page 132: ...own icon in the Toolbar 2 Tap the certain button in the Toolbar then you can select an area 3 Tap the Menu icon on the front panel of your PDA phone 4 Choose Edit Cut or Edit Copy 5 Then choose Edit Paste Selected to paste the content cut or copied To change the effect 1 Tap the Menu icon on the front panel of your PDA phone 2 Choose Effect Grey or Effect Antigue Thin Thick Select your favorite co...

Page 133: ...o enter the small stamp interface tap Done button to return Small stamp will be added when you tap any small stamp 2 Tap the big stamp to enter the big stamp interface Big stamp will be added when you tap any big stamp 3 Tap the small stamp to enter the small stamp interface tap Done to return To hide toolbar 1 Tap the Menu icon on the front panel of your PDA phone 2 Choose Tool Hide Bar 3 The Too...

Page 134: ...h Main Applications G18 User Manual 123 8 Working with Main Applications Your G18 includes the following basic main applications Address Book Clock Calculator Date Book GSL Launcher Memo Pad Short Hand To Do List ...

Page 135: ...Browsing the details of records Address in SIM Card To make a call To open the Address Book application 1 Tap Applications icon 2 Select Main from the pick list in the upper right corner 3 Tap the Address icon Display the address list NOTE If you want to know about the pigeonhole function please refer to Edit Categories ...

Page 136: ...st letter of the name then the screen will display the relative contacts 2 New Edit the record Tap New button on the screen to add a new record Done Tap this button to return to personal information screen Details Tap this button to show a dialog box In the dialog box you can set the current record delete or add notes to current record ...

Page 137: ...n to close this dialog box without saving the changes Delete Tap this button to prompt whether to delete the selected entry Tap OK to delete all the information tap Cancel to cancel deletion Note Tap this button to attach a note to current entry Note Editing interface Done Finish editing and return to previous interface Delete Delete current note Details Show in list Category Private ...

Page 138: ...rectly 3 Birthday Setting In editing interface tap Not Set beside icon to pop up a Birthday Setting dialog box you can tap Not Set to set the Birthday and Birthday Notify Clear Clear the setting Done Save the setting 4 Browsing the details of records In the phonetic index screen tap family name to open all the contacts Tap the telephone number next to the name to browse phone number list of the cu...

Page 139: ...l 128 Tap icon to launch Address in SIM Card To create a new contact a Tap the New button b Input Name and Phone number c Tap OK to save the contact or tap Cancel to quit without changing anything To edit the contact a Tap the Edit button ...

Page 140: ...hange the Name or Phone number c Tap OK to save or tap Cancel to quit without changing anything To find the contact refer to Step 1 6 To make a call No matter in name mode or list mode tap the Call key to call the phone number of the selected entry ...

Page 141: ...eft corner 3 Tap the Clock icon Clock Select Clock from the pick list in the upper right corner Clock You can set the time of two defferent time zone can also set two different time zones one of the local another of the world In graphics or in digits it shows current date time and week You can enter perferences by tapping the clock on the screen or by tapping either the date or time Clock Set Time...

Page 142: ...to set date and time Details are as follows To set Date a Tap the Set Date box b Tap the arrow to choose current year c Tap the current month d Tap the current date To set Time a Tap the Set Time box tap to select current date tap to select curren tmonth tap the arrow to choose current year ...

Page 143: ... Tap AM or PM to change the display style e Tap OK To set Time Zone a Tap the Set Time Zone box b Select your time zone from the list TIP You can set the current time zone while on your trip which will reset the date and time without affecting the date and time of the items in the notebook c Tap OK To set Daylight Saving You can select On or Off from the pick list ...

Page 144: ...ates hour minut second Tap the menu icon to pop up the pick list Tap Option Setting Select a melody in the Melody Manager application you can tap Play to listen the music Tap the upward downward arrows to set your desired time Tap the Start button to begin counting If the time is out display the alarm dilog and play the music Click 1 Click 1 Tap to select the Melody ...

Page 145: ...0 Stopwatch Select StopWatch from the pick list in the upper right corner The default value is 00 00 00 main fuctions are as follows Tap the Start button to begin counting Tap the Pause button to pause counting Tap the Reset button to set the time to the default value 00 00 00 Alarm Select Alarm from the pick list in the upper right corner ...

Page 146: ...lickering to remind your time is up until you turn it off Tap None to enter the alarm setting interface There is a check box tap it to show the further settings Repeat None no repeat Daily repeat everyday Weekly If it is selected there will be more options to let you decide on which day you want to repeat the alarm tap None to set the alarm ...

Page 147: ...efer to the relevant part in Clock End On Determines when the repeating alarm will end No End Date no end date Choose Date specify a date when the repeat will end Comment Tap the blank area next to the comment then a flickering icon will appear and you can add comments here Alarm Detail Alert mode ...

Page 148: ...can select one from them can also set the option s order can also the same number or different number You can set alert time and frequency here If anything special happens you can set Special Send Sercvice to send the message to you You are supposeed to send messages as SMS EMS MMS or EMAIL ...

Page 149: ...ming a series of chain calculations To open the Calculator application Tap the Calculator icon next to the text input area Using the Calculator buttons The Calculator includes several buttons to help you perform calculations The CE button clears the last number you entered Use this button can clear a mistake number while entering during a calculation This button enables you to re enter the number ...

Page 150: ... button has no effect on the current calculation or series of calculations it merely places the value into memory until it is recalled The MR button recalls the stored value from memory and inserts it in the current calculation The MC button clears any value that is stored in the Calculator memory Displaying recent calculations The Recent Calculations command lets you review the last series of cal...

Page 151: ...rent ways by Day Week Month or Agenda view Set an alarm to sound minutes hours or days before a scheduled appointment Attach notes to events to describe or clarify Date Book entries Rearrange or delete events from your schedule To open the Date Book application Press the Date Book button on your pda phone to open the Date Book to view today s schedules The date is displayed at the top right of the...

Page 152: ...of a day preset by the user Scheduling timed events You can schedule timed events for the current date or for future dates To schedule a timed event for the current date 1 Press the Date Book button on your pda phone to open the Date Book to today s schedule The current date and a list of times for a normal business day are displayed in Day view 2 With the current day selected tap the line next to...

Page 153: ... set the Start Time Tap End Time then tap the time columns to set the End Time Tap All Day if the event lasts all day The default hours of a standard business day are set by the user and may be changed using the Preferences command in the Date Book application See the section Changing the displayed Start and End Times in this chapter later 6 Tap OK Tap the time to display the Set Time dialog box S...

Page 154: ... Go To at the bottom of the screen to open the Go to Date dialog box Select a date by tapping a year month and day in the calendar TIP In the Go to Date dialog box you can also tap the Previous week or Next week scroll arrows to move to another week in your PDA 2 After locating the desired date follow the steps for scheduling an event for the current day Previous week Next week Select the date in ...

Page 155: ...e a new untimed event by making sure no event is selected and then writing letters in the text input area When you start writing the untimed event appears at the top of the screen 4 Enter a description of the event 5 Tap a blank area on the screen to deselect the untimed event NOTE If you create a timed event and later want to make it an untimed event tap directly on the event time on the Date Boo...

Page 156: ...he time next to the event Typically a continuous event is an untimed event 2 Tap Details 3 Tap the Repeat box to open the Change Repeat dialog box 4 Tap Day Week Month or Year to set how often the event repeats For a continuous event tap Day 5 Enter a number that corresponds to how often you want the event to repeat on the Every line 6 For example if you select Month and enter the number 2 the eve...

Page 157: ...o select Delete Event from the Record menu This opens the Repeating Event screen 4 Select one of the following options Tap OK to delete a single occurrence of this event Tap Cancel to go back to the previous box The Save archive copy on PC option will store deleted record in an archive file on your Desktop at the next HotSync operation Some record will be hidden but not deleted until then The even...

Page 158: ...u change other repeat settings for example time alarm private of a repeating event and apply the change to all occurrences your pda phone creates a new event The start date of this new event is the day on which the setting is changed Past occurrences prior to the day of the change are not changed If you apply a change to a single occurrence of a repeating event e g time that occurrence no longer s...

Page 159: ... days before midnight of the day on which the untimed event begins For example you set a 5 minute alarm for an untimed event that occurs on February 4 The reminder message will appear at 11 55 p m on the night of February 3 The reminder remains onscreen until you turn on your pda phone and tap OK to turn off the reminder To set an alarm for an event 1 Tap the event to which you want to assign an a...

Page 160: ...When the alarm dialog box appears tap Snooze to delay the alarm for a preset five minute period Each time you tap Snooze the alarm is dismissed for an additional 5 minute period Setting alarm options You can set the alarm to go off automatically for each new event using preferences You can also set a tone for the alarm and the number of times the alarm sounds Tap here to select unit of time Enter ...

Page 161: ...ng options Tap Alarm Preset to set an alarm for each new event automatically The silent alarm for untimed events is defined by minutes days or hours before midnight of the date of the event Tap the Alarm Sound pick list and then tap an option to set the tone of the alarm Options include Alarm Alert Bird Concert Phone Sci fi and Wake Up Tap Remind Me to define how many times the alarm sounds once o...

Page 162: ...iew Week view displays a calendar of your events for an entire week This view lets you quickly review your appointments and available time slots In addition the graphical display helps you spot overlaps and conflicts in your schedule To display the Week view 1 Tap the Week view icon or press the Date Book button until the Week view appears 2 Tap the left and right navigation controls to move forwa...

Page 163: ...ed for a new event Tap any day or date that appears at the top of the Week view to move directly to that day without selecting an event The Week view displays the time span defined by the Start Time and End Time in the Date Book Preferences settings If you have an event before or after this time span a bar appears at the top or bottom of that day s column Use the onscreen scroll arrows to scroll t...

Page 164: ...ars and in the Day view as overlapping brackets to the left of the conflicting times Working in Month view The Month View screen shows which days have scheduled events Dots and lines in the Month view indicate events repeating events and untimed events You can control the dots and lines that appear in the Month View See TO changing the Date Book display of events for more information Event conflic...

Page 165: ...op button to display the previous month the bottom button to display the next month Working in Agenda view The Agenda view lets you view appointments untimed events and To Do List items in a single screen Although it is primarily a viewing option you can also use the Agenda view to check off completed To Do List items To go to a Day View of any event on the Agenda view screen simply tap the desire...

Page 166: ...hange the category of To Do items shown Tap on the pick list and select the new category See the chapter on Using the To Do List for more information on To Do items Changing the Date Book display In Day or Month view you can change which events appear in the Date Book In Day view you can display time bars that highlight event conflicts To change the Date Book display of events 1 In Day view or Mon...

Page 167: ...references used for new entries Preferences include display starting time display ending time and alarm characteristics See the section Setting alarm options earlier in this chapter for more information on alarm preferences To change the start and end time in the Date Book 1 In the Date Book tap the Menu icon 2 Tap Option and then tap Preferences The Start and End Time are used by the various Date...

Page 168: ...Using the Date Book G18 User Manual 157 time slots you select do not fit on one screen you can tap the scroll arrows to scroll up and down 4 Tap OK ...

Page 169: ...Delete Unhide Hide category Change the icon mode Delete application Check information To open the GSL Launcher application 1 Tap Applications icon 2 Select Main from the pick list in the upper right corner 3 Tap the GSL Launcher icon Setting Tap the Menu icon in the bottom left corner of your PDA phone after entering GSL Launcher interface ...

Page 170: ...n two different categories and set categoties which need hiding or unhiding To Hide Unhide Categories You can hide or unhide categories in GSL Launcher interface 1 Tap the Menu icon in the bottom left corner of your PDA phone 2 Choose Options Hide Folder or Options Unhide Folder 3 The categories which are in the screen will display or hide onscreen select a photo from Album to set as the backgroun...

Page 171: ... more operation details To view Categories and Modules You can view each category s modules and their contents in GSL launcher setting interface 1 Tap the left or right arrow on the left or right side of the screen to see more categories and to cycle through these categories 2 Tap any category on the top of the screen 3 You can see the modules in the corresponding category 4 In a category you can ...

Page 172: ... You can choose different icon mode in the main interface 1 Tap the Menu icon in the bottom left corner of your PDA phone 2 Choose App Big Icon or App Small Icon 3 The icon on the screen will become bigger or smaller accordingly To delete applications You can delete applications in the main interface of GSL Launcher 1 Tap the Menu icon in the bottom left corner of your PDA phone tap to see more ca...

Page 173: ...to confirm deletion or Cancel to cancel deletion To view Information You can see each module s version and size in the main interface of GSL Launcher 1 Tap the Menu icon in the bottom left corner your PDA phone 2 Choose App Info 3 In the Info dialog box tap the Version the Size or the Records button to see the corresponding content and you can also tap the scroll bar on the right side to see more ...

Page 174: ...d drop memos into popular computer applications like Microsoft Word when you synchronize using Palm PDA and HotSync technology Assign memos to categories so that you can organize and view them in logical groups Write down phone numbers and other types of information Later you can copy and paste this information into other applications To open the Memo Pad application 1 Tap the Applications icon 2 ...

Page 175: ...ion If you want to know about the detailed guide please look over Finding address book recorders of the Find recorder of the Performing Common Tasks in the chapter 4 To create a new memo 1 Tap the Memo Pad icon on the front panel of your Palm PDA to display the Memo List 2 Tap the New button TIP You can also create a new memo by beginning to write in the text input area in the Memo List screen The...

Page 176: ...ter you set the size of photo you can select one from the photo library or create a new one b Use tools in the toolbar to edit the photo c After editing tap the Menu icon select File Back 5 Tap the Done button You can categorize memos and sort them by categories Tap Graphic Tap Back to return to the previous interface ...

Page 177: ...p the text of the memo 2 Browse or edit the text in the memo 3 Tap the Done button To change the order in which memos appear in the Memo List 1 In the Memo List tap the Menu icon on the front panel of your PDA phone 2 Choose Options Preferences and select one of the following options Tap Manual to sort new memos in the sequence in which you create them Tap Alphabetical to sort new and existing mem...

Page 178: ...Using the Memo Pad G18 User Manual 167 3 Tap OK choose the sort mode from the pick list ...

Page 179: ...Hand application 1 Tap the Applications icon 2 Select Main from the pick list in the upper right corner 3 Tap the ShortHand icon Adding ShortHand entries 1 Tap the New button or enter the edit interface tap menu icon pop up the list select the New ShortHand in the recorder 2 Tap the icon at the bottom to change the color of font tap any one to en ter the editing in terface ...

Page 180: ...record Editing ShortHand entries 1 Tap any record to enter editing screen 2 You can edit title content and color of the record until you feel satisfied Deleting ShortHand entries 1 Tap any record to enter editing screen 2 Tap the Menu icon on the front panel of your PDA phone 3 Choose Record Delete ShortHand then a prompt dialogue box appear 4 Tap OK to confirm the deletion and tap Cancel just to ...

Page 181: ...r Manual 170 Changing the speed of inputting 1 First of all get in editing screen 2 Tap the Menu icon on the front panel of your PDA phone 3 Choose Options Slow Normal Faster or Fastest to change the speed of writing with stylus ...

Page 182: ...s to categories so that you can organize and view them in logical groups Sort your To Do List items either by the due date priority level or by the category Attach notes to individual To Do List items for a description or clarification of the task To open the To Do List application 1 Tap Applications icon 2 Select Main from the pick list in the upper right corner 3 Tap the To Do List icon Creating...

Page 183: ...o List according to their importance or urgency Items appear by priority and due date at the top of the To Do List by default with 1 the highest priority Changing an item s priority may move its position in the list New To Do List items automatically have a priority of 1 If you select another item first before creating a new item the item you create appears beneath the selected item with the same ...

Page 184: ...item 1 In the To Do List tap show Tap Show Completed Items If you clear this setting your To Do items disappear from the list when you complete check them NOTE Items that no longer appear on the list because Show Completed Items is turned off have not been deleted They are still in the memory of your PDA You must purge completed items to remove them from memory 4 Tap the check box on the left side...

Page 185: ...ue date of a To Do List item 1 In the To Do List tap the item you want to change 2 Tap the Details button 3 In the To Do Item Details dialog box tap No Date to open the Due Date pick list 4 Selecdt the date that you want to assign to the current item 5 Select Private check box to hide this item when Security is turned on 6 Tap the Note button enter To Do List editing interface NOTE After editting ...

Page 186: ...k list Select Priority Due Date to sort items by priority first and then due date Select Due Date Priority to reverse that order Select Category Priority to sort items by category first and then priority Select Priority Category to reverse that order 3 Tap OK Displaying completed and due items You can make the To Do List display completed items and their completion dates as well as due items and t...

Page 187: ...t due do not appear in the list until their due date Select Record Completion Date check box to replace the due date with the actual date when you complete check the item If you do not assign a due date to an item the completion date still records when you complete the item Select Show Due Dates check box to display the due dates for items in the To Do List and to display an exclamation mark next ...

Page 188: ...Using the To Do List G18 User Manual 177 About To Do List Show the version information of the To Do List ...

Page 189: ...Enjoy with Game Applications G18 User Manual 178 9 Enjoy with Game Applications Your G18 includes the following game applications Bejeweled Big Money Insaniquarium Megabowling Zap 2000 ...

Page 190: ... the pick list in the upper right corner 3 Tap the Bejeweled icon EASY Easy game TIMED Timed mode INSTRUCTIONS The instructions about Bejeweled Bejeweled Easy Mode Tap the INSTRUCTIONS button to get a quick briefing about what to do then tap the screen to return to the main menu Tap to enter the Bejeweled inter face Tap EASY ...

Page 191: ...oss the screen it can take away some random gems and allow you to start getting even more matches If you can t find a match after around 10 seconds one of the gems will twinkle and that means it can be moved somewhere to make a matching line You can call up the hint yourself see below If you run out of possible moves the game will be over and the art of keeping playing is to try to move the gems t...

Page 192: ... out it means the game is over Every time you get a line you get a little more time added Fill it completely and you will get the bonus wave as before but your time is reset to the normal starting value If you run out of possible moves in this mode the all gems will be removed and you ll get a whole new set some of which may even start with matches To play in this mode well you have to be able to ...

Page 193: ...om This can make you very fast Type a graffiti h during the game to get a hint a twinkle on a moveable gem Doing this in Timed mode will cost you 5 seconds Type a graffiti c to cycle the Clock on then the Battery meter and then both off Type a graffiti r to display how many possible moves there are left on the board Type a graffiti W if you have a colour machine to send the shimmer wave across the...

Page 194: ...little faster in order to help to save batteries energy You can also toggle Economy mode on or off with by typing a graffiti e You can press scroll up or scroll down at any time to pause the game and quickly access the buttons to change the sound volume or abandon one game Graffiti a abandons or ends the current game but it doesn t warn you first Graffiti g brings up the standard game settings opt...

Page 195: ...r the normal game interface hard game Tap to enter the hard game interface Start a game and you will see several rows of coins different colors on color machines different patterns on grey scale machines Look for a group where three or more of the same type of coins are touching each other Tap on one of those coins and the whole group will pop out of sight and you ll get some points and the meter ...

Page 196: ... progress to the next level you must collect enough money bags which drop from the top of the screen when the meter on the left reaches the top You can then collect them by removing the coin directly under the money bag 4 Sometimes as you play currency symbols the may fall from the top of the screen Remove the coin under one of these and all of the coins of that color or symbol on the screen will ...

Page 197: ...p on the status display area to pause the game at any time You can also press the scoll up or down key to pause the game You can choose to change the display level and the battery level from within the Game Settings menu Enter the top Tap anywhere in this part to pause the game Select the sound setting mode S l i e n t Q u i e t Loud ...

Page 198: ...de to push them to the right and vice versa Tap them on the top to push them down and vice versa With practice you can steer aliens away from your fish Watch out some aliens later in the game must be killed in a different way As your fish grow buttons will become available on the button bar near the top of the screen Tap them to buy fish or upgrades See the in game instructions for a detailed desc...

Page 199: ...rmation bar at the top of the screen You can export your high scores from Time Trial mode to the Astraware web high score table by selecting the menu option Export high scores Time Trial mode is a lot harder than the early levels of Quest mode so it is best to play a few levels in Quest mode before you attempt Time Trial mode Challenge mode Challenge mode is the hardest game mode in Insaniquarium ...

Page 200: ...n to Menu option is only available on the drop down menu of the title screen Instructions If you ever get stuck you can read the in game instructions by selecting Instructions from the title screen or the Options drop down menu It contains a detailed and illustrated guide to all the pets fish aliens and buttons that you will need to know about Insaniquarium Hidden Features Hidden pet There is a hi...

Page 201: ...nse Game scoring It may seem to many of us that scoring a tenpin bowling game is about as difficult as the hang gliding backwards but never fear Below is a guide to how to score a game of tenpin bowling including the meaning of the symbols used By the way a 300 the highest score possible is achieved by bowling twelve strikes in a row in one game From the information below you can work out how a 30...

Page 202: ... two balls of the tenth frame the bowler receives one extra ball 6 There is a maximum of three balls in the tenth frame so the score in the tenth frame is simple and added to the score from the ninth Note that scoresheets can come in a variety of display formats but they all mean the same thing Scoresheet Samples Scoresheet one of the standard formats with triangles and squares to indicate spares ...

Page 203: ...g this mode Abandon game starting a new game the current game is lost Hi Score review and game results control Options game parameters setting Register Registration of the MegaBowling application About Information about the MegaBowling application devel opers Throw type game mode selection This version offers you 2 modes available Stroke complete feeling of a realistic game Arcade arcade variant d...

Page 204: ...devices and try again 4 After the 1st player detects the rival s device the Waiting for reply message appears This means the second player considered in the game as 2nd player can connect It must be mentioned that you can simultaneously initiate the beginning of the game on both devices however it is not recommended 5 The second player presses the Start new game button After the first player s dev...

Page 205: ...s table represents top 9 results for every mode When Best scores is selected the best results are represented simultaneously for every mode Sound volume sound effects volume change Show pen stroke errors system notification delivery when the trajectory is incorrect Show difficulty notification when changing Easy Normal Hard levels in Option section the length of trajectory that you set with the st...

Page 206: ...old the stylus at any part of the screen or instead of stylus you can use any key of your device Whether the ball achieves the target precisely or not it depends on the stylus hold time or on the device key hold time respective ly This mode imitates complete feeling of presence in the hall effect This mode control is quite easy Touch with your stylus in the beginning of the path and draw the ball ...

Page 207: ...imun is 6 ships Zap 2000 has a facility to allow you to save your position at key points throughout the game You can use Save game only at the end of each mission After you kill a boss you will see a Save icon while the Summary is shown Tap it and your score lives and power ups will be saved at the start of the following mission You can use the Game menu to use Resume game and continue from where ...

Page 208: ...azards Your ship is equipped with weapons which will be upgraded throughout your mission and powerful thrusters to move you around the screen Maneuver to the left and right with the controls on the left of you Palm and use the buttons on the right to either thrust or shoot You can change which way round the buttons work by changing the GAME PREFERENCES menu option SHIELDS For when the action gets ...

Page 209: ...ast annihilates all enemies and their shots Activate with the UP button When you absolutely positively have to blow away everything in the sector accept no substitute BOSSES At the end of each mission is a crazed boss intent on your destruction Destroy it before it destroys you Each boss has different ways of attacking and each has its own weaknesses CHEATS Finding the game too hard Visit the Astr...

Page 210: ...Working with Utility Applications G18 User Manual 199 10 Working with Utility Applications Your G18 includes the following utility main applications E C Dict SD Manager ...

Page 211: ...ict application 1 Tap the Applications icon 2 Select Utilities from the pick list in the upper right corner 3 Tap the E C Dict icon To inquire Word 1 Tap the keyboard icon at top right corner to show a soft keyboard 2 Input the first character of the word you want to inquire The word list will show the first word whose initial character is the one inputed if you input the second character the list...

Page 212: ...n t be found in the word browsing mode a dialog box will ask you if you want to use the nearest words inquiry or spell check inquiry Nearest Word inquire the word which is nearest to the word user has inputted Spell check do some mendations to the word inputted and then inquire If the word can not be revised a dialog box will prompt user No word found Cancel return to the current interface To get ...

Page 213: ...re the singular or plurality of the current word Antonym inquire the antonym of the current word Synonym inquire the synonym of the current word Examples give examples of how to use the word Transformation of style inquire the changing of style of the current word conform font inquire the conform font of the current word Homophone inquire the homophone of the current word Adj transformation inquir...

Page 214: ...Tap V Inflection to browse the syntax of the current word For example V Inflection of wad Sim pres wad Pres P wadding Sim past wadded Past P wadded 3 Tap Done to return to the word browsing interface Searching for a string In the browsing interface of each word if you choose a character string a search button will display on the bottom right return to the word browsing interface ...

Page 215: ...he application will translate the string using the proper Dictionary if the string is in English E C Dict will be used If the string can t be identified the dialog box will prompt user No word found tap OK button to return to the current interface Return to previous interface ...

Page 216: ...n the PDA or SD Card by using SD Manager Function list Browsing Copying Moving Deleting Creating folders Renaming To open the SD Manager application 1 Tap the Applications icon 2 Select Utilities from the pick list in the upper right corner 3 Tap the SD Manager icon NOTE SD Manager will search for all applications when starting it will take you a few seconds show the free space tap here ...

Page 217: ...d Size make the applications sort by size Type make the applications sort by type Creator make the applications sort by the creator 2 Tap Up over the list bar to browse the content of the upper directory Copying You can copy the applications from your PDA phone to SD Card or copy the applications from SD Card to your PDA phone 1 Choose applications in the Manager interface Click palm PDA Applicati...

Page 218: ...lications from SD Card to PDA phone 1 Select applications in the Manager interface You can select all applications by tapping the Select All button Select nothing by tapping the Clear All button 2 Tap the Move button a dialog box will ask you if you are sure to move the file 3 Tap OK a dialog box will appear to show you the status of moving if the same application exists a dialog box will ask you ...

Page 219: ...button a dialog box will ask you if you are sure to delete the file 3 Tap OK a dialog box will appear to show you the status of deleting 4 Tap Cancel to cancel NOTE If the selected file is a system file such as Currency a dialog box will warn you can not delete files Creating folders You can create the folder in SD Card 1 Select SD Card from the pick list in the upper right corner can not create f...

Page 220: ...5 Tap OK to confirm 6 Tap Cancel to Cancel Renaming You can rename files in SD Card 1 Select SD Card from the pick list in the upper right corner can not create folder in your PDA phone 2 Select the application which you want to rename 3 Tap the Menu icon on the front panel of your device Tap the menu name input the folder name ...

Page 221: ...nly the following directions are allowed in the SDManager Palm Launcher Palm Book Palm Program Dcim Audio 2 When the files are copy to SD card from the PDA the files will be saved under the path shown above the prc will be added as the extended name automatically 3 When the files are copy to the PDA from the SD card if the format of the files are recognized by the PDA the operation will be Tap the...

Page 222: ... shown in green it is said that the file can be imported to the PDA as the chord music other files are shown in gray and they are not imported to the PDA phone The files are imported to the PDA phone or not base the color that the files are shown in actually it base the inner format of the files 7 When the card is inserted or pulled out the interface is different After the card is inserted if a ge...

Page 223: ...Working with System Applications G18 User Manual 212 11 Working with System Applications Your G18 includes the following utility system applications Preference Security Card Info Flash Backup Manager ...

Page 224: ...ceive any data beamed to it To open the Preferences application You set preferences to customize your device To enter the Preferences screen 1 Tap the Applications icon 2 Select All or System from the pick list in the upper right corner of the screen 3 Tap the Prefs icon To personalize your pda phone Owner preferences let you record a name company name phone number or any other information you wan...

Page 225: ...Preferences screen 1 Display the Owner Preferences screen 2 Tap Unlock The Unlock Message dialog box appears 3 Enter your current password the one you entered in the Security application then tap OK 4 Edit the Owner Preferences text as desired To set the date time and time zone The General Preferences screen lets you set the date time and time zone for your device To set the date 1 Tap the Applica...

Page 226: ... then tap an arrow to change the number 5 If available tap AM or PM 6 Tap OK to set the new time and return to the Date Time screen NOTE To display time based on a 24 hour clock change the time format See To the date time and numbers later in this chapter To set the time zone 1 Tap the Applications icon then tap the Prefs icon 2 From the pick list in the upper right corner tap Date Time 3 On the P...

Page 227: ...me and numbers The Formats Preferences screen lets you choose a default country for your device and also lets you set defaults for times dates and number formats When selecting a country and time date and number formats keep the following in mind When you select a country the time date and number formats as well as the week s starting day are adjusted For example in Germany time often is expressed...

Page 228: ...is setting controls the Day Week Month and Agenda views in Date Book and all other aspects of your pda phone that display a calendar 6 Tap the Numbers pick list and select formats for the decimal point and thousands separator To set the auto off delay time You can set when your pda phone automatically shuts off Your pda phone automatically turns off the power and backlight after a period of inacti...

Page 229: ... tap the Prefs icon 2 In the pick list in the upper right corner tap General 3 To set sounds and volumes tap the System Alarm or Game Sound pick list and select the sound level Off Low Medium or High Turning off the System Sound also turns off the chime tones used during HotSync operations NOTE The Game Sound setting typically works only with newer games that are programmed to respond to it To set...

Page 230: ...ge enter the current setting again you will see the interface below when you choose English Enable Chinese OS enable Chinese Operation System General Options tap this button to pop General Options dialog box Keyboard Option tap this button to pop Keyboard setting dialog box ...

Page 231: ...ns icon then tap the Prefs icon 2 In the pick list in the upper right corner tap Adv Setting After choosing one color tap Apply and you can see the shorthand icon s color has been changed To set PowerOn 1 Tap the Applications icon then tap the Prefs icon 2 In the pick list in the upper right corner tap PowerOn ...

Page 232: ...e In the pick list in the upper right corner tap GSM GPRS and after the interface refreshing tap Profile in the list now you can enter the phone setting SMS EMS In the pick list in the upper right corner tap GSM GPRS after interface refreshing tap SMS EMS in the list now you enter the Setting of SMS EMS tap here to enter the welcome message ...

Page 233: ...the list now you enter the Setting of Email jMMS In the pick list in the upper right corner tap GSM GPRS after interface refreshing tap jMMS in the list now you enter the Profile of jMMS WAP Browser In the pick list in the upper right corner tap GSM GPRS after interface refreshing tap WAP Browser in the list now you enter the Profile of WAP Browser ...

Page 234: ...ur pda phone so that a password must be entered before you can use the device again Hide records that you have defined as private with or without a password Without a password private records are hidden until you set the Security application to display them with a password you must enter the password to view the private entries Masking and hiding records You can mask or hide private records When y...

Page 235: ...ress Book records marked as private are not included in the display of names Note that you can mask or hide records without assigning a password or you can assign a password if you want records to remain masked or hidden until a password is entered Assigning and editing passwords You can assign a password to protect your private records and to lock your pda phone Once you define a password you can...

Page 236: ...enter the password when you turn on your device to gain access to the information on it If you forget the password you must perform a hard reset to resume using your pda phone Performing a hard reset deletes all the records in your pda phone however you can restore all synchronized data at the next HotSync operation See Performing a hard reset in Appendix A for more information To lock your pda ph...

Page 237: ...ll entries and files marked as Private IMPORTANT If you synchronize with your computer before deleting a forgotten password your pda phone restores private entries the next time you perform a HotSync operation but does not restore the forgotten password To delete a forgotten password 1 From the Applications Launcher tap the Security icon 2 From the Security dialog box tap Forgotten Password 3 A me...

Page 238: ...fo application 1 Tap the CardInfo icon on the Applications menu The G18 information is displayed 2 To rename the G18 tap on the Card Info tab in the upper left corner of the screen 3 Select Rename Card and enter the new name in the Rename Card dialog box 4 Tap the Rename box 5 To reformat the G18 tap Card Info select Format Card and tap OK in the Format Card dialog box ...

Page 239: ... G18 will destroy its data 6 To display help for Card Info tap Card Info in the upper left corner of the screen 7 Select Help from the menu and scroll through the tips that are not displayed 8 To display About Card Info tap Card Info and tap About Card Info ...

Page 240: ... data created by users including those generated by applications e g the events created by NoteBook photos received messeges and e mails data generated by the Palm Desktop synchronization application and data generated by other devices All of them are stored in RAM so the data will be lost in 3 minutes after power off 3 In order to prevent the loss of data as a result of power off there are two wa...

Page 241: ...e execution of these applications can be stored in Flash 3 When user use both methods to backup and if data in Palm Desktop is newer than those in Flash then user can restore the data via the Flash Backup Manager After creating some data there will be confusion between data stored in Palm Desktop and in flash when user synchronize data with the Palm Desktop application again So it is strongly reco...

Page 242: ...ecific time you want to backup NOTE After selecting this check box a dialog box will pop up noting The setting will be effective only when you quit this application Backup via Flash Backup Manager After entering the Flash Backup Manager interface select Backup from the pick list in the upper right corner a Tap PIM Databases button then the Choose PIM Database dialog box appears You can select the ...

Page 243: ...You can select the database you want to backup Finally tap the Backup button then the setting is finished Restore via Flash Backup Manager After entering the Flash Backup Manager interface select Restore from the pick list in the upper right corner OK affirm the database selected Cancel cancel the datebase selected select all select all the datebase clear all not to select any datebase OK affirm t...

Page 244: ...n DBs button then the Choose Comm Database dialog box appears You can select the communication database you want to restore c Tap Other Databases button then the Select Other Databases dialog box appears You can select the database you want to restore OK affirm the database selected Cancel cancel the datebase selected OK affirm the database selected Cancel cancel the datebase selected ...

Page 245: ... User Manual 234 Finally tap the Restore button then you restore the databases select all selec all the datebase clear all not to select any datebase OK affirm the datebase you selected Cancel cancel the datebase you selected ...

Page 246: ... you make on your pda phone or Palm Desktop appear in both places after a HotSync operation HotSync technology synchronizes only the needed portions of files thus reducing synchronization time You can synchronize your data by connecting your pda phone directly to your computer with the serial port HotSync cable You can also perform HotSync operations using the IR port on your organizer This chapte...

Page 247: ...1 Introduction to the G18pda phone for instructions To perform a local HotSync operation 1 Connect your PDA phone to computer s serial port through the HotSync cable 2 If the HotSync Manager is not running start it On the Windows desktop click Start and then choose Programs Navigate to the Palm Desktop program group and choose HotSync Manager Alternatively you can start the Palm Desktop which auto...

Page 248: ...e pda phones with specific information such as a company phone list before distributing them to their actual users For more information on the File Link option see Using File Link later in this chapter The User Profile feature is designed only for the first time HotSync operation before you assign a User ID to a particular pda phone To create a user profile 1 Open Palm Desktop 2 From the Tools men...

Page 249: ...k Profiles 4 Select the profile that you want to load on the pda phone and click OK 5 Click Yes to transfer all the profile data to the pda phone The next time you perform a HotSync operation Palm Desktop prompts you to assign a user name to the pda phone Selecting HotSync setup options You can choose when you want HotSync Manager to run To set the HotSync options 1 Click the HotSync Manager icon ...

Page 250: ...en you open Palm Desktop Manual monitors requests only when you select HotSync Manager from the Start menu If you re not sure which option to use keep the default setting Always Available 4 Click the Local tab to display the settings for the connection between your computer and the pda phone cradle 5 If needed choose another Serial Port to identify the port that Palm Desktop uses to communicate wi...

Page 251: ...s For each application you can define a set of options that determines how records are handled during synchronization These options are called a conduit By default a HotSync operation synchronizes all files between the pda phone and Palm Desktop In general you should leave the settings to synchronize all files The only reason you might want to change these settings is to overwrite data on either y...

Page 252: ... Select an application in the Conduit list Click Change 5 Click the direction in which you want to write data or click Do Nothing to skip data transfer for an application 6 Choose how long the setting will remain in effect To have the setting affect only the next HotSync operation deselect Set As Default Thereafter the HotSync Actions restore their default settings ...

Page 253: ...tantly you can use the IR port to perform HotSync operations You don t need a HotSync cable to do this This is very useful if you travel with an infrared enabled laptop You simply enable infrared communication on your laptop and pda phone and follow the steps in Performing an IR HotSync operation later in this section Preparing your computer for infrared communication Before you can perform a HotS...

Page 254: ...ared driver is already installed successfully check the ports used by your computer for infrared communication To check the ports used for infrared communication 1 In the Windows taskbar click Start choose Settings and then choose Control Panel 2 Double click Infrared 3 Click the Options tab 4 Select Enable infrared communication The COM port displayed in the drop down box is the port where your i...

Page 255: ...e Infrared Monitor 6 Click OK The HotSync Manager is now communicating with the simulated port defined for infrared communication NOTE You cannot use your HotSync cable again until you reconfigure the HotSync Manager to communicate with the port defined for HotSync cable synchronization Performing an IR HotSync operation After you complete the steps to prepare for an IR HotSync operation it is eas...

Page 256: ...phone set to perform IR HotSync operations and still use the HotSync cable This is useful if you perform HotSync operations with both your desktop computer and a laptop that you travel with When you travel you don t have to carry a cable When you are in the office just connect your organizer with the HotSync cable Conducting a HotSync operation via the modem You can use a modem to synchronize your...

Page 257: ...nc operation 1 Confirm that the computer modem is connected and turned on and that no communications applications such as fax or telephony software are running on a COM port NOTE Make sure that the computer is disconnected from all online services such as America Online AOL and CompuServe to avoid conflicts with the COM port 2 Start HotSync Manager if not running and from the HotSync Manager menu ...

Page 258: ...c Setup String to identify the setup string for your particular modem Not all modems require a setup string Refer to your modem manual and enter the setup string if recommended by the manufacturer 4 Click OK Preparing your pda phone In addition to preparing your computer you must perform a few steps to prepare your pda phone for a modem HotSync operation To prepare your pda phone for a modem HotSy...

Page 259: ...n during the modem HotSync operation 7 If you want to use a calling card to place the call select the check box and enter the calling card number 8 Tap OK 9 Tap the Menu icon 10 Tap Options and then tap Modem Setup 11 Enter the settings Selecting conduits for a modem HotSync operation You can define which files applications or both on your pda phone synchronize during a modem HotSync operation to ...

Page 260: ... boxes to deselect the files and applications that you do not want to synchronize during a modem HotSync operation The default setting is to synchronize all files 6 Tap OK Performing a HotSync operation via a modem After you prepare your computer and your pda phone and select your Conduit Setup options you are ready to perform a modem HotSync operation To perform a modem HotSync operation 1 Tap th...

Page 261: ...equires the following Your computer has TCP IP support installed Both your company s network system and its remote access server support TCP IP Your System Administrator has this information You have a remote access account If you don t have an account consult your System Administrator Everything you need to connect to your company s dial in server network modem is included with Palm Desktop and p...

Page 262: ... that a check mark appears next to your user name If no check mark appears select the check box next to your user name 5 Click OK 6 Place your pda phone in the cradle and perform a HotSync operation The HotSync operation records network information about your computer on your pda phone With this information your pda phone can locate your computer when you perform a HotSync operation over the netwo...

Page 263: ...o Pad information into your pda phone from a separate external file such as a company phone list HotSync Manager stores the data in a separate category on your Palm Desktop and your pda phone You can set the File Link feature to check for changes to the external file when you perform a HotSync operation With File Link you can import data stored in any of the following file formats Comma delimited ...

Page 264: ...iew them from a single list where you can selectively dismiss or follow up on each event Applications will signal for your attention at two different levels insistent and subtle Each will be discussed in detail below Insistent alarms Insistent applications open a Reminders dialog screen and may play a sound or vibrate depending on your hardware configuration Alarms continue until you snooze or dis...

Page 265: ... in the upper left corner of the screen For more information see Understanding the blinking alarm indicator below Go To Switches to the application that created the alarm and shows the record that caused the alarm although you may have to navigate within the application There is no further notification Setting alarm volume You control most alarm volumes globally in the General panel of the Prefs m...

Page 266: ...arm to sound before the event The alarm song or sound effect for example Bird or Concerto How many times the alarm repeats before giving up The pause between each time the alarm sounds Using the Reminders list screen The Reminders dialog screen changes to a list of items that require your attention under two insistent alarm conditions When a second application attempts to get your attention and th...

Page 267: ... go directly to the Reminders list screen without waiting by tapping on the blinking alarm indicator For more detail see Understanding the blinking alarm indicator below Done If the Reminders list appeared because of more than one insistent alarm tapping Done closes the Reminders list screen although the events will remain in the application that created them The Reminders list screen will not app...

Page 268: ...reen in the menu bar of applications that allow it under the following conditions While viewing a Reminders dialog screen you tap the Done or the Snooze button A subtle alarm is present The indicator appears in three different states Off The indicator is not shown at all when the list is empty Blinking two states When the list is not empty but there are no new items then the star indicator will bl...

Page 269: ...of G18 When an expansion card is inserted all applications listed in the card s launcher directory is automatically added to a new Launcher category This category is assigned the name of the expansion card volume for example the name My Card is used throughout this section To display the contents of your G18 1 Tap the Applications icon on the front panel of your G18 2 Tap the All pick list in the ...

Page 270: ...ay page To display the applications tap the arrow The G18 applications are displayed Launching an application on the G18 To launch an application on your G18 1 Press the Applications icon on the front panel of your G18 2 Tap the All pick list in the upper right corner of the screen 3 Tap the G18 on the menu 4 The G18 applications are displayed on the Applications menu 5 Tap the application that yo...

Page 271: ...ormation To display information about an application on your G18 1 Press the Applications icon on the front panel of your G18 2 Tap the All pick list in the upper right corner of the screen 3 Tap My Card at the bottom of the menu 4 The G18 applications are displayed on the Applications screen 5 Tap in the upper left corner of the screen to bring up the App menu 6 Tap Info 7 In the Device pick list...

Page 272: ...n you tap More you access the CardInfo application described in the Using CardInfo section Copying a G18 application to your handheld or desktop To copy an application on your G18 to your handheld or to your desktop 1 Press the Applications Launcher menu on the front panel of your pda phone 2 Tap the All pick list in the upper right corner of the screen ...

Page 273: ...een 5 Tap in the upper left corner of the screen to bring up the App menu 6 Tap Copy 7 Select the source and the destination using the From and the Copy To pick lists 8 Select the application and then tap Copy The application is copied to the selected destination TIP Some applications and databases are copy protected and cannot be beamed These are listed with a lock icon next to them ...

Page 274: ...er left corner of the screen to bring up the App menu 6 Tap Beam 7 Select My Card from the Beam From pick list 8 Select the application you want to beam then tap Done The application is beamed to the other handheld TIP Some applications and databases are copy protected and cannot be beamed These are listed with a lock icon next to them Deleting Applications on the G18 To delete an application on y...

Page 275: ...r left corner of the screen to bring up the App menu 6 Tap delete 7 Select My Card from the Delete From pick list 8 Highlight the application you want to delete then tap Done The application is deleted Applications that are loaded in ROM for example Memo Pad cannot be deleted and are not listed ...

Page 276: ......

Reviews: