


©
2005 Verizon Wireless
9
Setting up HotSync for Use with Wireless Sync
Wireless Sync can be configured as a replacement for the PIM and email components of
HotSync, which is included with your Treo 600. More specifically, the following types of data
can be synchronized with both HotSync and Wireless Sync: Calendar, Contacts, Tasks,
Inbox and Notes.
The individual user should insure the proper settings are configured in HotSync to avoid
duplicating data on their device or desktop PIM application during a sync at the PC. The
settings required in HotSync will depend on which Email Source was selected in the Wireless
Sync account setup. Instructions for
Corporate
email users are included on this page. Go to
the next page if you have configured Wireless Sync to use
Internet
email only.
Corporate email Users
Users synchronizing with a Corporate email source will receive updates to all PIM and email
data using Wireless Sync. In this case, these data sections should not be selected in the
HotSync configuration at the user desktop.
Follow these steps to verify your HotSync settings and insure proper synchronization when
you cradle/cable your device to the PC.
27. Open the HotSync configuration on the PC by
right-clicking on the
icon in the task tray and
selecting the
Custom…
option.
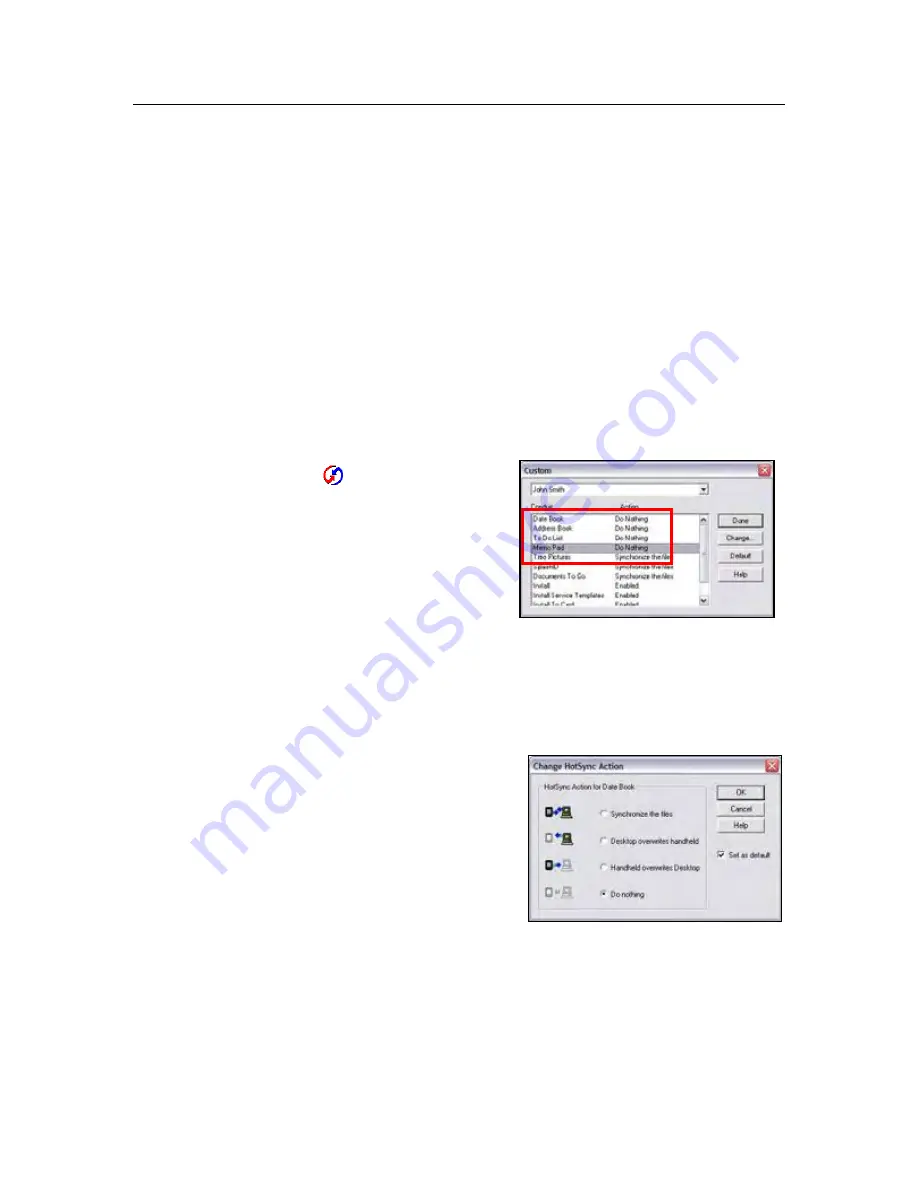
28. Select the
device User Name
from the drop list
at the top of the dialog box that matches your
device.
29. Verify that the Date Book, Address Book, To Do
List and Memo Pad
Conduit
values are set to
Do Nothing
NOTES
:
The conduits may have an alternate naming convention if you have installed a
third-party tool for synchronizing this data to a desktop application. For example,
it may say “Outlook Calendar” instead of “Date Book”. In ay case, make sure the
Action
is set to
Do Nothing.
If the
Action
is set to “Synchronize the
Files”, perform the following action for
each
Conduit
.
Double-click on the conduit
name to get the
Change
HotSync Action
dialog.
Select the
Do Nothing
and
Set
as default
options
Click
OK
to save.
Repeat for each
Conduit
setting.